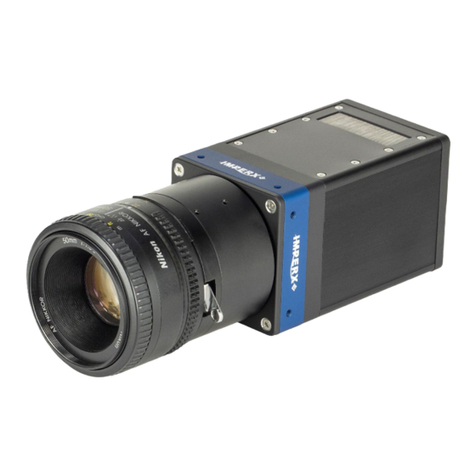
MiFleet +Vision C6D-M Manual

C6D-M Hardware Installation Guide
For more information, please visit our website www.MiFleet.us/support

02
Install Guide
NOTE: We highly suggest that you have a professional camera installer preform these
steps to insure accuracy with device installation. Furthermore, to insure vehicle health
upon completion of installation.
1. Please read the tool list section carefully and bring your own tools before installation.
2. Please read the packing list section carefully and check when unpacking.
3. Observe the vehicle environment before installation.
Follow the principle below:
A. Installation location does not aect the driver’s vision.
B. The location of forward facing camera must be installed within the working
range of the wiper.
C. The location of driver facing camera should not aect the rear view mirror.
4. The appropriate installation location should be selected according to the vehicle
environment. This document is for reference only.
5. The appropriate powering method should be selected according to the vehicle
environment. This document is for reference only.
6. If there is a problem with the installation of a special vehicle, please contact your local
installer for additional assistance.
Product Introduction
MiFleet + Vision is a cost-eective device developed for vehicle video surveillance and
remote video surveillance.
Its characteristics are as follows:
• Two Cameras: the forward facing camera (external facing) and the driver facing
camera (internal facing).
• With 3G/4G capability & WiFi you will always be connected
• Prerecord video for review later
• SD card video storage up to 256GB
• Real-time Live Stream Video
• High Level of security
MiFleet + Vision has an industrial design with aluminum casing for durability and weight
that can be used consistently for up to 5 years. It has the ability to see both inside and
outside of the vehicle at all times. The internal facing camera is 720P that has infrared
and recording functions while the external facing camera at 1080P and can clearly
capture events taking place outside of the vehicle.
It is light weight, convenient, and with the proper installation can t easily behind the
rear view mirror for full visibility of the vehicle’s cab. With MiFleet + Vision’s small size it
will never obstruct your drivers view so they can always keep their eyes on the road.
For more information, please visit our website www.MiFleet.us/support

Box Contents:
The box should contain these items
List of contents
Picture Name Application Total
Parts
Forward facing camera
with bracket Camera faces exterior trac 1 pcs
Driver facing camera Camera faces interior of vehicle,
generally pointed at driver 1 pcs
4G Antenna
(Only available for
LTE device)
Communication antenna to amplify
signal and GPS function 2 pcs
External GPS Module Used for obtaining GPS location of
vehicle at all times 1 pcs
10 PIN Power Cable Power input cable with PB alarm input 1 pcs
9 PIN Serial Cable IO alarm input, RS232 serial port 1 pcs
Wrench Used to open or close SIM door 1 pcs
Mounting Bracket To mount the exterior facing camera
to the windshield for easy installation 1 pcs
Screws Used for xing mounting bracket and
exterior facing camera 4 pcs
03For more information, please visit our website www.MiFleet.us/support

Additional tools for install:
Before install, you need to prepare the following accessories and
tools to assist in an easier professional install.
04
List of contents
Picture Tool Name Application
Phillips Screwdriver Remove the screw of the safety cover and x the ignition
signal cable
Seesaw For removing vehicle panels such as A-pillars
Zip Ties Used for stopping thread
Dry Cloth Used to clean the mounting spots
Smart Phone or Tablet Used to install software for video preview and conguration
Marker Used for external facing installation
Wire Strippers For shearing and stripping cables
(for vehicles without OBDII port)
Electrical Tape Used for dressing exposed wire ends
USB Flash Drive Used for upgrade and storage of les
For more information, please visit our website www.MiFleet.us/support

05
Device Diagram:
Install Steps
1. Open the panel and insert the SIM card and SD card into slots shown below:
2. After loading the SIM and SD card, close the panel and tighten the screws clockwise.
3. Then select the camera mounting location
NOTE: Forward facing camera is recommended to be mounted on the right back rear view mirror. The driver facing
camera can be mounted on both sides of the rear view mirror. The mounting place for 4G antenna and GPS antenna are
shown on page 6. Adjust camera as the rear view mirror bracket may block the view of exterior facing camera. Driver facing
camera is a wide angle camera so the camera does not need to face the driver. Rear view mirrors and sun visors should not
be aected after installation of the driver facing camera.
For more information, please visit our website www.MiFleet.us/support

06
4. Connect the power in / IO cable, GPS antenna, and IPC to the camera unit as shown below.
We suggest using the
locations that are
pointed out in this picture for
mounting, however
if you prefer or your vehicle
can not accommodate
this setup you can move
the camera, antennas,
& GPS module to
another location.
NOTE: Using “power out/RS232” is not necessary only if panic button, OBD reader or other accessories are included.
4G Antennas
GPS
Module
Internal Facing
Camera
External Facing
Camera
For more information, please visit our website www.MiFleet.us/support

07
5. Extend the power cable from the A-pillar down to the fuse box or power supply as follows.
6. Locate the power, ground, and ACC cables
after running wires down to fuse box.
7. Connect ACC, power, and ground cables
to the corresponding port or cables in the fuse
box. ACC will be tied to an ignition source.
8. Fix the mounting bracket to the external facing
camera with one screw on both sides.
NOTE: You can adjust the camera lens angle with the screw
shown below (below images). You can adjust the whole mounting
position by adjusting the screw space in image on the left.
For more information, please visit our website www.MiFleet.us/support

08
9. Properly clean the mounting location on the
interior of the vehicle with cloth to make sure
the glass is clean and dry.
10. Adjust the angle of bracket to make sure the
forward facing unit is vertical (sky to ground
then lock the bracket in position with the
screws on each side.
11. Remove the 3M adhesive tape from the
bracket, place it in the desired mounting
location, rmly press and hold the camera for
1 minute to adhere tape.
NOTE: Picture below shows how the external facing camera should be mounted. If surface is not cleaned properly before
mounting, device will have issues sticking and you may experience device falling from glass.
For more information, please visit our website www.MiFleet.us/support

Install Steps 4G Antenna (LTE ONLY)
1. Plug the 4G dual antenna cable extension into the roof panel.
2. Paste the 4G antennas on both sides of cables and close to the roof.
3. Make sure the two antennas are separated by at least 5 cm, as shown below.
09
4. Take the GPS antenna out of the lower end of the A-pillar and paste it horizontally on the
center console.
5. Arrange the redundant cables and hide them in the A-pillar. The installation diagram is as
shown below:
A. Hide all cables under headliner
B. Restore panels such as A-pillar panels and fuse boxes
C. Wipe the work surface and turn vehicle on to connect
For more information, please visit our website www.MiFleet.us/support

10
Trouble shooting
LED indicator
There is only one LED status indicator on the MiFleet + Vision base. The working status of device
can be reected by the lighting.
• No light on device means the device is not powered on.
• Steady red light means the device is powered on and booting up or in sleep mode.
• Red light ashing once per second means the device is in the process of booting up or
completed but containing module fault. Module fault includes no GPS, no WiFi, no SD card,
and / or video loss.
• Steady green light means device is working normally.
Can’t search for MiFleet + Vision device on EasyCheck?
1. Check the LED indicator on the device. If it is o, that means the device is not powered on. If it
is steady red, that indicates the device is starting up.
2. If the LED on the device is a steady green light, check if the device has been on for more than
2 minutes. If it is more than 2 minutes, you need to power o and restart the device, then log
in to the app within 2 minutes after rebooting.
3. If the LED indicator on the device ashes red constantly, within 2 minutes of booting, and also
conrm that the GPS, memory , camera and communication modules are present, the WiFi
module does not exist.
Mobile phone network dials but wont connect to server?
1. Check if the server address is correct.
2. Check signal strength of the mobile phone network is greater than 2.
WiFi network cannot connect to the server?
1. Check if EasyCheck has been completely logged out (EasyCheck login interface does not
prompt that this device is connected)
2. Check if the time to exit EasyCheck has exceeded 2 minutes. You must exit EasyCheck for 2
minutes before switching to Client mode to connect to the server.
For more information, please visit our website www.MiFleet.us/support

11
Channel 2 preview display keeps missing video?
1. Check if the local IP address of the network setup interface is 192.168.1.99, and if not, modify it.
2. IPC setting interface, manually search IPC, check whether IPC can be searched. If IPC can be
searched, the IP address of this IPC is 192.168.1.100, if not, modify it.
There is no video record mark on App?
1. Check whether the operation and maintenance interface memory status is empty or unformatted.
2. IF EMPTY: check if the SD card has been inserted. If the SD card is inserted, check to see if the SD
card is in normal condition and inserted correctly with contact.
3. IF NOT FORMATTED: manually format the memory card. The SD card and capacity information will
be displayed after successful formatting.
4. Check whether the main stream recording parameter of the recording setting interface is enabled.
If it is not turned on, it should be turned on manually.
For more information, please visit our website www.MiFleet.us/support
Table of contents
