Mila EasyChef Steam XL User manual
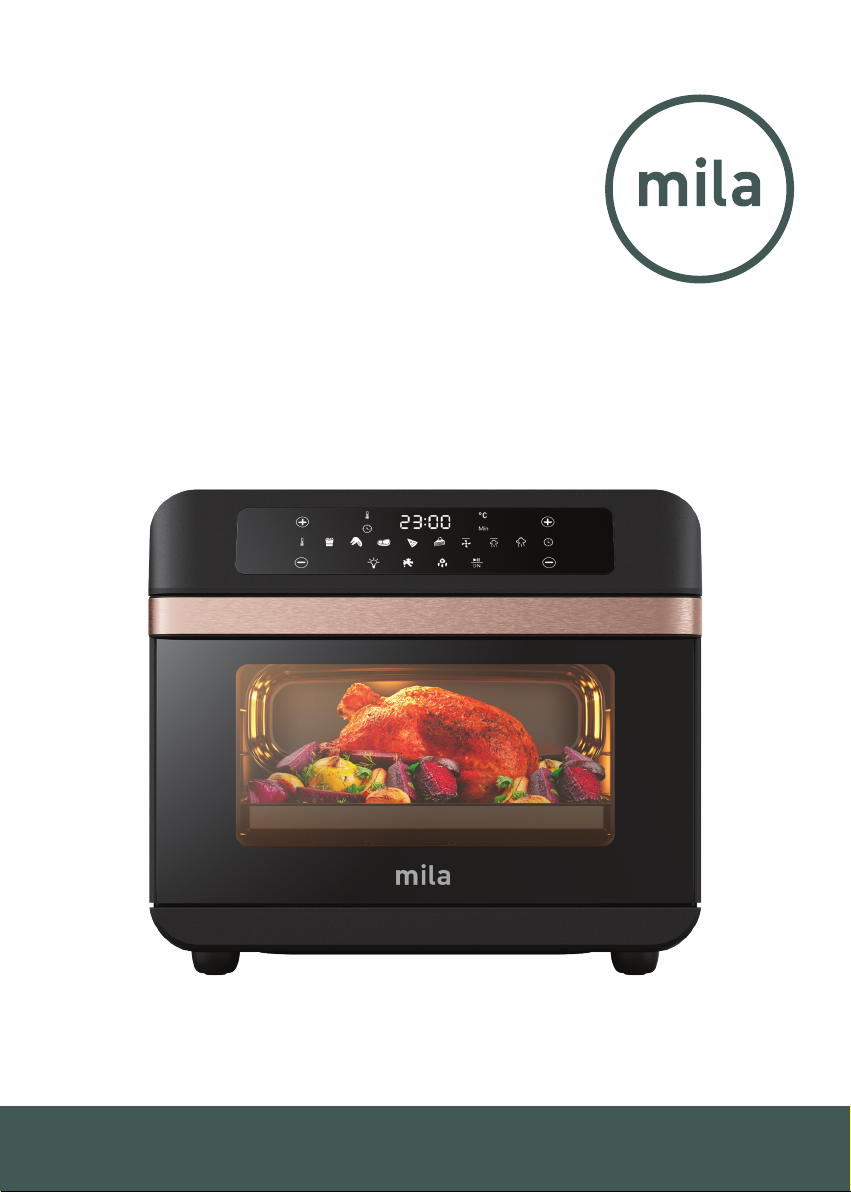
EasyChef Steam XL
USER MANUAL
24L Steam air fryer Cooking
and Touch Control
MLA-500AF

2

3
CONTENTS
1. GETTING TO KNOW YOUR EASYCHEF STEAM XL..................................... 5
2. IMPORTANT SAFEGUARDS....................................................................... 6
3. BEFORE USING FOR THE FIRST TIME ........................................................ 8
4. TOUCHSCREEN CONTROL ....................................................................... 9
5. EASYCHEF STEAM XL QUICK START GUIDE: ...........................................10
6. AIR FRY MODE.........................................................................................10
7. STEAM & AIR FRY COMBO MODE ............................................................ 11
8. FULL STEAM MODE................................................................................. 11
9. STEAM + FUNCTION ...............................................................................12
10. PRESET COOKING MODES ...................................................................... 12
11. COOKING TIPS & INSTRUCTIONS............................................................13
12. TEMPERATURE & TIME SETTING OPTIONAL..........................................14
13. START/PAUSE OPERATION ...................................................................... 15
14. FILL WATER TANK REMINDER ................................................................. 15
15. INTERIOR LIGHT...................................................................................... 15
16. SELF CLEANING FUNCTION ....................................................................16
17. A NOTE ON AIR FRYING PREPACKAGED FROZEN FOODS.......................16
18. AIR FRYING CHART ................................................................................. 17
19. EASYCHEF STEAM XL MAINTENANCE ....................................................18
20. CARE & CLEANING INSTRUCTIONS.........................................................18
21. STORING INSTRUCTIONS........................................................................18
22. TROUBLESHOOTING ...............................................................................18
23. ERROR CODES AND THEIR MEANINGS....................................................19
24. SPECIFICATIONS.................................................................................... 20
25. WARRANTY TERMS & CONDITIONS ....................................................... 20
26. INDEMNITY............................................................................................. 21
27. WARRANTY & DISCLAIMER ..................................................................... 21
28. LIMITATIONS & LIABILITY........................................................................22

4
5
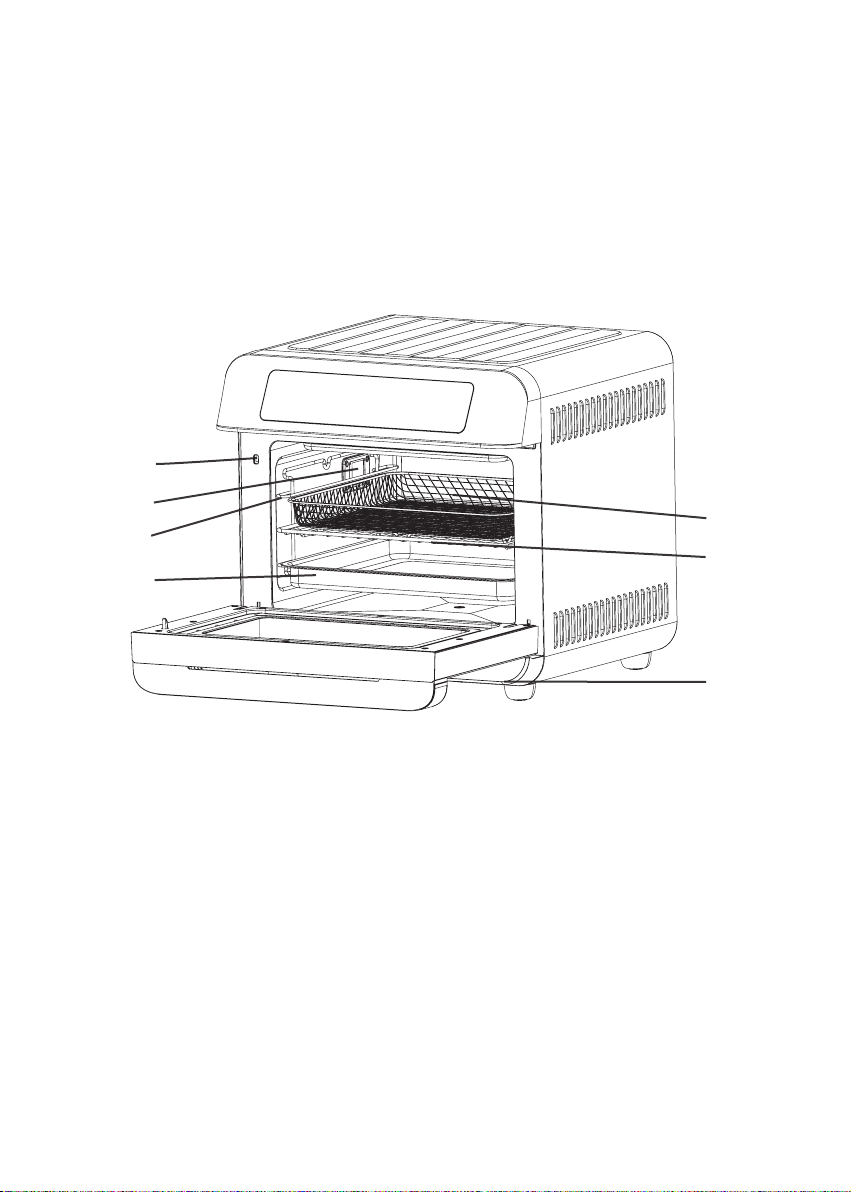
1. GETTING TO KNOW YOUR EASYCHEF STEAM XL
1. Whats in the box:
*Product may vary slightly from illustration
• EasyChef Steam XL
• User Manual
• Grill Pan / Drip Tray x1
• Grill Rack x1
• Mesh Tray x1
Door Switch
Lamp
Rack
Drip Tray/
Grill Pan
Mesh Tray
Grill Rack
Water Tank

6
2. IMPORTANT SAFEGUARDS
When using electrical appliances with various functions, please observe the following
safety precautions to ensure you don’t damage the unit or cause personal injury:
MAKE SURE THERE IS WATER IN THE TANK BEFORE YOU USE THE STEAM
FUNCTION. THE TANK IS LOCATED UNDER THE UNIT.
MAKE SURE YOU CHANGE THE WATER IN THE TANK AFTER USE TO AVOID
CONTAMINATION AND STALE ODOURS.
1. DO NOT
touch hot surfaces. Use handles, oven mitts or potholders.
2. To protect against electric shock DO NOT immerse the cord, plugs, or appliance in
water or other liquid.
3. All users of this appliance should read and understand this instruction manual before
operating or cleaning this appliance.
4. Unplug the appliance from the power outlet when not in use and before cleaning.
5. Allow to cool before putting on or taking o parts, and before cleaning the appliance.
6. DO NOT operate the appliance if it has malfunctioned or has been damaged,
including the power cord or plug. If the power cord is damaged, it must be replaced
by the manufacturer, its service agent or qualied technician in order to avoid a
hazard.
7. The use of accessory attachments not recommended by the appliance manufacturer
may cause injuries and void the product warranty.
8. DO NOT use outdoors.
9. DO NOT let the cord hang over the edge of tables or counters, or touch hot surfaces.
10. DO NOT place on or near a hot gas or electric burner, or in a heated oven.
11. DO NOT move the appliance while containing hot oil or other hot liquids.
12. DO NOT use the appliance for other than intended use.
13. This appliance is not intended for use by persons (including children) with reduced
physical, sensory or mental capabilities, or lack of experience and knowledge, unless
they are being supervised or given instruction concerning use of the appliances by the
person responsible for their safety.
14. Children should be supervised to ensure that they DO NOT play with the appliance.
15. Close supervision is necessary when your appliance is being used near children or
infants.
16. This appliance is intended for household use only, it is not warranted for use in a
commercial or business application.
1 7. The unit will not operate unless the unit door is fully closed.
18. After hot air frying, extreme caution must be used when handling the hot frying tray,
removeable airow tray, and cooked foods.

7
19.
DO NOT
use on acrylic or stone surfaces. The heat may cause cracks or surface
damage. Do not place directly in front of glass splashbacks. Leave a minimum of
10cm from the rear of the unit.
20. This appliance generates heat and escaping steam during use. Proper precautions
must be taken to prevent the risk of burns, res, or other injury to persons or
damage to property. Keep your face and hands away from heat or steam outlets.
21. This appliance will become hot during operation and retain heat after turning OFF.
22. Always use oven mitts when handling hot materials and allow metal parts to cool
before cleaning.
23. DO NOT
place anything on top of the appliance while it is operating or while it
is hot.
24. The cord to this appliance should be plugged into a 220- 240V AC electrical outlet
only.
25. If this appliance begins to malfunction during use, if safe, remove the food and the
tray from the cavity of the unit. Then remove the plug from the wall outlet. DO NOT
use or attempt to repair the malfunctioning appliance.
26. DO NOT leave this appliance unattended during use.
27. Keep the cord out of reach of children and infants to avoid the risk of electric shock
and choking.
28. DO NOT obstruct the air outlet or air inlets on the back and sides of the unit with
any objects. Avoid escaping steam from the air outlet during air frying.
29. Keep the appliance at least 15 cm away from walls or other objects during operation.
30. After air frying, make sure to place the cooking tray on a at, heat-resistant surface.
31. Make sure the door is closed to use the air fryer function. Open the door to move
or turn over the food.
32.
Hot oil can collect at the base of the tray. To avoid risk of burns or personal injury,
or to avoid oil from contaminating air fried foods, always remove the tray before
emptying.
33. Over-lling the cooking cavity may damage the air fryer unit and could result in
serious personal injury.Please use your judgment and keep within the specied
capacity as specied on the box.
34. NEVER move the unit while in use.
35. DO NOT clean with metal scouring pads. Pieces can break o the pad and touch
electrical parts, creating a risk of electric shock.
36. The EasyChef Steam XL should not be used to boil water or to deep fry food.
3 7. During rst use, the EasyChef Steam XL may emit a slight odor. This is normal and
will not aect the avor or air convection frying.

8
3. BEFORE USING FOR THE FIRST TIME
1. Remove all packing material and labels from the inside and outside of the
EasyChef Steam XL. Check that there is no packaging underneath and around the
trays.
2. Before you use the unit for the rst time, ll the water tank with water and insert
the water tank into the slot, which is under the unit.
NOTE: Before using the appliance for the FIRST TIME, we recommend you to run the
self-cleaning mode to clean the steam generator system thoroughly. This will
take roughly 60 minutes to complete. DO NOT place food in the unit until it
has completed. Please refer to section 16: Self Cleaning in this manual.
3. After the self-cleaning function has nished, switch o the oven. Once it has
cooled down, wipe down the oven cavity. Your EasyChef Steam XL is now ready to
use.
4. DO NOT IMMERSE THE EASYCHEF STEAM XL BODY IN WATER. Wipe the
EasyChef Steam XL body with a damp cloth. Dry all parts thoroughly.
NOTE: During rst use, the EasyChef Steam XL may emit a slight odour. This is
normal and will not aect avour or air frying.
CAUTION HOT SURFACES:
• This appliance operates at high temperatures. Do not touch external
surfaces of the appliance as they can be hot. Do not touch inside the
appliance while it is in operation.
• During operation, hot steam is released through the hot air outlets.
Please keep your hands and face away from the steam and air outlets.
Grill Pan
Grill Rack
Mesh Tray

9
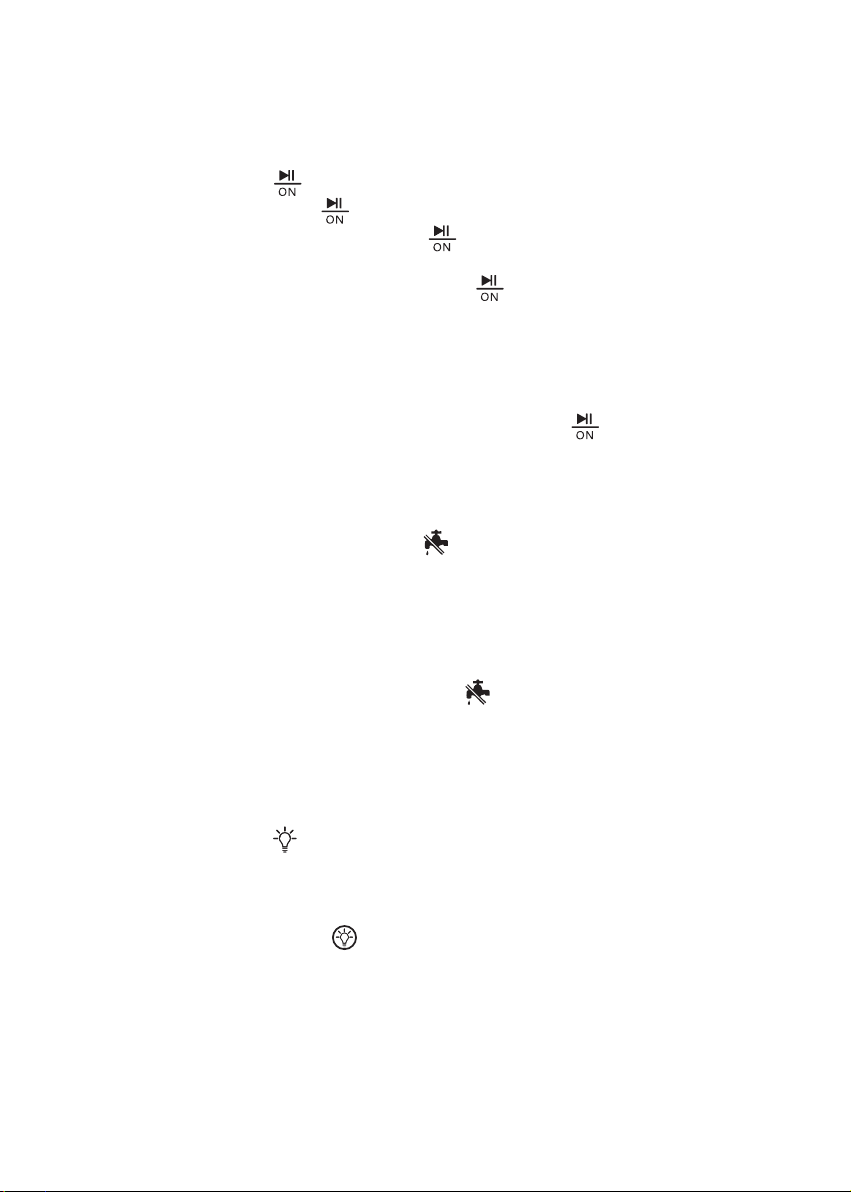
4. TOUCHSCREEN CONTROL
BASIC SETTINGS
TEMPERATURE CONTROL TIME CONTROL
ON/OFF/START/PAUSE BUTTON
AIR FRYER PRESETS
FRIES CHICKEN
MEAT PIZZA
BAKE
COOKING MODES & VISIBLE ALERTS
STEAM & AIR FRY COMBO MODE AIR FRY MODE
STEAM+
(Add steam manually during
operation)
FULL STEAM MODE
LIGHT ON/OFF INSUFFICIENT WATER
(Indicator to ll the water tank)

10
5. EASYCHEF STEAM XL QUICK START GUIDE:
Please follow the below steps to get cooking quickly, although results may vary.
We recommend reading this manual throughly.
1. Plug in the EasyChef Steam XL. The buttons will turn on and o and the unit will
make a tone, then the red power button will stay lit, indicating the unit is ready.
2. Press the red button. It will turn green MENU MODE once pressed.
3. Please press your chosen cooking preset.
4. To begin Air Frying, touch the button. (The icons on the control panel will
stay lit, while the other cooking presets and buttons will turn o. The will stop
blinking at this point).
5. Press the ON/OFF/START/PAUSE button to pause and long press to go into
standby mode.
6. AIR FRY MODE
The Air Fryer cooks food that may have otherwise been deep fried, giving you the
crunch without much oil. Things like frozen chicken bites, frozen fries and even air
fried salmon work well.
The AIR FRY function combines intense heat and maximised airow to cook foods
crispy and brown.
HOW TO USE AIR FRY MODE:
1. Arrange food evenly on one of the included trays. For best results, place food in a
single layer and leave space between pieces.
2. Insert the tray into the top rack position.
3. Close the oven door.
4. Touch the ON/OFF/START/PAUSE button, it will turn to blinking .
5. Touch the AIR FRY icon, it will start ashing.
6. The AIR FRY temperature and time settings can be adjusted before and during
the AIR FRY cycle.
7. The AIR FRY temperature and time is displayed alternatively on the screen. Press
the +and TEMP icons to adjust the AIR FRY temperature.
8. Touch the ON/OFF/START/PAUSE icon to activate the AIR FRY function.
The AIR FRY icon will remain illuminated, and the timer will automatically
begin to count down.
NOTE: It is advised that you use the Grill Pan/Drip Tray underneath the air fry tray to
catch the oil drippings. Discard excess oil in between the batches.

11
7. STEAM & AIR FRY COMBO MODE
The Steam & Air Fry Combo Mode works rst to heat food. When the temperature
reaches 200°C, the steamer will automatically turn on. The air fryer and the steamer
will work alternatively to provide continuous circulation of hot air and steam. This
keeps food tender and juicy on the inside while still golden and crispy on the outside.
In this mode, the unit will generate steam that will enter into the oven cavity to cook
the food. Steaming food helps preserve its natural avours and nutritional value.
HOW TO USE:
1. Fill the water tank to the maximum level with water only.
2. Make sure the water tank’s cap is secure and locked.
3. Re-attach the water tank on the underside of the unit.
4. Place the food on a tray and into the EasyChef Steam XL.
5. Touch the ON/OFF/START/PAUSE button, it will start blinking.
6. Select AIR FRYERSTEAM icon on the touchscreen panel to start the Air Fry &
Steam process.
7. The default cooking time is 30 minutes. Adjust the desired cooking time by
pressing the +or on the TIME buttons.
8. When you hear the timer sound, cooking has nished.
9. Check if the food is ready. If the food is not ready yet, put it back in the EasyChef
Steam XL and set the timer for a few extra minutes.
8. FULL STEAM MODE
The Full Steam Mode is best used to cook sh, vegetables and dumplings.
In this mode, the unit will generate steam that will enter into the oven cavity to cook
food. Steaming food helps preserve its natural avours and nutritional value.
HOW TO USE:
1. Fill the water tank to the maximum level with water only, before use.
2. Make sure the water tank’s cap is secure and locked.
3. Re-attach the water tank on the underside of the unit.
4. Place the food on a tray and into the EasyChef Steam XL.
5. Touch the ON/OFF/START/PAUSE button, it will start blinking.
6. Select STEAM icon on the touchscreen panel to start the Steam process.
7. The default cooking time is 30 minutes. Adjust the desired cooking time by
pressing +or on the TIME buttons.
8. When you hear the timer sound, the cooking has nished.

12
9. Check if the food is ready. If the food is not ready yet, put it back in the EasyChef
Steam XL and set the timer for a few extra minutes.
NOTE: To cook steamed vegetables, you can directly select the cooking program.
The temperature and cooking time will be automatically set up. When is
ashing, it indicates that water is missing in the tank. Rell the water tank with
water. We recommend using puried water.
9. STEAM + FUNCTION
The Steam + function is used to add steam manually during operation of the Air Fry
Mode and the 5 presets. It can not be used in the Full Steam Mode or the Steam and
Air Fry Combo Mode.
HOW TO USE:
While cooking, press the STEAM + button. It will emit steam for 1 minute and then
revert back to standard air frying. To add more steam, press the STEAM + button
again.
10. PRESET COOKING MODES
PRESET
FUNCTIONS
TIME (Min) TEMP (°C)
ADDITIONAL
HUMIDIFICATION
FUNCTION
Default Range Default Range
FRIES 20min 1-60min 230°C100-230°COptional
CHICKEN
25min 1-60min 200°C100-230°COptional
MEAT 25min 1-60min 175°C100-230°COptional
PIZZA 15min 1-60min 180°C100-230°COptional
BAKE 30min 1-60min 160°C100-230°COptional
AIR FRY MODE 30min 1-60min 200°C40-230°COptional
STEAM & AIR FRY
COMBO MODE 30min 1-60min 150°C100-230°CNon-Optional
FULL STEAM
MODE 30min 1-60min 100°CNon-
Adjustable Non-Optional

13
11. COOKING TIPS & INSTRUCTIONS
1. The EasyChef Steam XL door needs to be fully closed to cook properly, but the
unit will continue to cook even if left slightly ajar. This is not a design feature, and
is an unsafe way to cook. We encourage you to close the unit door during use to
ensure cooking quality and to protect your safety.
2. Please refer to the Air Frying Chart and/or follow the package directions for the
suggested cooking TIME, TEMP and cooking modes. All preset and cooking
modes are pre-programmed with a default time and temperature. You can
customise the TIME and TEMP settings by following 12. Temperature and Time
Settings (Optional), in this manual.
3. If you want to use the steam function, ll the water tank before use. This will
ensure there is enough water in the reserve for the steam generator to operate
normally.
TIP: Use distilled water/soft drinking water instead of mineral water to help
prevent the generation of scale within your EasyChef Steam XL.
4. Once you have chosen the preset you desire, press the START/PAUSE button
once. The button will begin to ash, and the default time & temperature will be
displayed on the digital screen. This indicates that the preset function has been
selected.
5. Always use oven mitts when handling the EasyChef Steam XL.
6. Hot oil can pool at the base of the drawer. To avoid risk of burns or personal injury
and to avoid oil from contaminating air fried foods, always ensure you remove the
cooking tray before you empty it.
7. Allow cooked food to rest for 5 to 10 minutes. Remove the tray from the machine
and place on a at, heat resistant surface.
8. Always pat food dry before cooking to encourage browning and avoid excess
smoke.
9. For crispier results, air fry small batches of freshly crumbed food. Create more
surface area by cutting food into smaller pieces. Bathe pieces of meat in egg and
milk and then press bread crumbs onto the meat.
10. Arrange crumbed food in the frying tray so that it is not touching to allow air ow
on all surfaces.
11. Spray oils work best because oil is distributed evenly and less oil is needed.
Canola, olive, avocado, coconut, grapeseed, peanut, or vegetable oil all work well.
12. Unplug the EasyChef Steam XL when not in use.
13. By default the viewing light is on. To turn o, press the button.

14
14. You can adjust the cooking temperature and time by pressing their respective
+and buttons. Pressing the TIME buttons adjust the cooking time in 1 minute
increments. Pressing TEMPERATURE buttons adjust the cooking temperature in
5°C increments.
15. When in dehydrate mode, the time adjustment will be in hourly increments.
16. While cooking, you can look in the viewing window at any time to see the
progress, however if you need to pause the EasyChef Steam XL press the
button. The button will ash until cooking resumes. Press the button
again to resume cooking.
1 7. When paused, it is normal that the fan will keep running for 20 seconds.
18. If the door is not closed within 5 minutes, the unit will turn o.
19. When cooking time is complete, the unit will beep once and the display will show
“END”. The fan will continue to run for 20 seconds to cool down and return to
standby mode.
NOTE: If you want to stop cooking, please hold down the power button for 3
seconds.
12. TEMPERATURE & TIME SETTING OPTIONAL
Once the preset or cooking mode is selected, the default temperature and time
setting will be shown on the digital display screen. You can adjust the temperature by
pressing the temperature settings buttons +and to decrease or increase.
To adjust the time, simply press the +and on the right side to decrease or increase
the cooking time.
NOTE:
• Adjustable temperature range: 40-200°C.
• Short press the temperature setting buttons to increase/decrease the
temperature by 5°C each time. Press and hold the temperature setting
buttons (for 3 seconds) to increase/decrease the temperature rapidly by
5°C.
• Adjustable time range: 1-60mins.
• Short press the time setting buttons to increase/decrease the time by 1
minute each time. Press and hold the time setting buttons (for 3 seconds) to
increase/decrease the time by 5 minutes each time.
CAUTION: The temperature setting is NOT adjustable when in FULL STEAM MODE.
15
13. START/PAUSE OPERATION
• When the preset or cooking mode is selected, the default time and
temperature will ash.
• Press the button to start cooking.
• Short press the button to pause the cooking.
• When cooking is paused, the button, and the cooking mode/preset
button will ash, and the timer will also stop counting.
• To resume cooking, short press the button again.
• The buttons will stop ashing and the digital screen will continue timing.
NOTE:
• If you open the door during the cooking time it will automatically pause the
operation. To resume, close the oven door to continue cooking.
• To completely stop cooking, press and hold the button for 3 seconds.
MAINTENANCE NOTES
14. FILL WATER TANK REMINDER
• The INSUFFICIENT WATER button will ash when the water level is
low and needs relling.
• It will ash for 30 seconds, a buzzer will ring and the ERROR CODE E5 will
appear.
• Take out the water tank from the underside of the unit, ll it with tap water
and then re-insert it.
• Press the INSUFFICIENT WATER button to continue cooking.
• DO NOT ll the wastewater box, it may cause water to leak out
during operation.
15. INTERIOR LIGHT
• The light can be turned on or o during cooking by pressing the LIGHT
ON/OFF button. It will automatically turn OFF after 30 seconds.
• The interior light will automatically turn ON when you open the oven door,
and turn OFF when you close the door.
• To manually turn OFF the light when the oven door is open, press the
LIGHT ON/OFF button.

16
16. SELF CLEANING FUNCTION
The self-cleaning function is designed to clean any built-up scale inside of the steam
generator. The entire process takes 60 minutes and it will clean in 3 stages:
DESCALER CLEANING | WATER CLEANING | DRYING
While you can use the self-cleaning method as often as you like, it is best to use
the self-cleaning function before you use the unit for the rst time, and after which
“CLER” is shown on the digital display screen. This will display after 80 hours of use
since the last clean was undertaken.
Follow the below to use the self-cleaning mode function.
1. Take out the water tank from the bottom of the unit.
2. Fill the water tank with clean water or descaler as specied on the container. We
strongly advise using a food-grade descaler such as citric acid powder to clean.
3. Insert the water tank back into the unit and turn ON. If you are using the oven for
the rst time, you can use just clean water for the rst self-clean.
4. Press and hold the STEAM+ button for 5 seconds to start the self-cleaning
function, working its way through STAGES 13:
• STAGE 1: DESCALER CLEANING. During this stage, the digital display
screen will show “CL:01”. The START/PAUSE button will begin to ash and
the screen will show “CL:02” as it goes into the next phase.
• To nish this section of cleaning, you will need to empty and rell the water
tank within 5 minutes after the 1st stage (Descaler Cleaning) has completed.
• Once this stage has completed a buzzer will sound. You will notice “CL:02”
displayed on the digital screen. After you have relled the water, press the
START/PAUSE button to start the 2nd and 3rd stages. If you miss this step -
the self-cleaning function mode will cancel and you will need to restart again.
• Once the setup is complete for STAGE 2, press the ashing START/PAUSE
button to initiate the clean. It will automatically cycle through to STAGE 2 and
STAGE 3.
• At the conclusion of STAGE 3, the buzzer will sound and the digital display
screen will show END.
1 7. A NOTE ON AIR FRYING PREPACKAGED FROZEN FOODS
1. Where microwave ovens often produce hot, mushy results and toaster ovens can
be slow to cook, air frying delivers fast, crispy results.
2. As a rule (depending on the food and amount to be cooked), the suggested cook
TIMES may have to be reduced slightly. Always check food halfway through
cooking time to determine nal cook TIME and TEMP.
3. Always check cooking progress after TIME has expired.
17
18. AIR FRYING CHART
Times are estimated and based on average sizes and weights. Always use a meat
thermometer to ensure that meat, poultry and sh are cooked thoroughly before
serving.
• Frying smaller batches will result in shorter cooking times and higher food
quality. Adjust air frying temperatures and times as necessary to suit your taste.
• Unless food is pre-packaged and pre-oiled, for browned and crispy results,
all foods should be lightly oiled before air frying.
DISH COOKING MODE TEMP TIME
Steamed Corn Full Steam Mode 100°C 30 min
Steamed Bread Full Steam Mode 100°C 15 min
Steamed Egg Full Steam Mode 100°C 12 min
Steamed Fish Full Steam Mode 100°C 15 min
Steamed Pork Ribs Full Steam Mode 100°C 20 min
Steamed Sweet Potato Full Steam Mode 100°C 30 min
Steamed Shrimp Full Steam Mode 100°C 8 min
Pizza Steam and Air Fry Combo Mode 180°C 10 min
Roasted Pork Ribs Steam and Air Fry Combo Mode 200°C 20 min
Grilled Chicken Steam and Air Fry Combo Mode 200°C 40 min
NORMAL OCCURANCES TO BE MINDFUL OF:
SITUATIONS CAUSE
Water is expelled from the
steam outlet
This is normal. When the water tank is full, a small
amount of water will be released from the steam
outlet.
Water is expelled through the vent
on the back of the oven.
After cooking, the pressure of the oven cavity is
high. If the oven door is closed immediately, a small
amount of water will be emitted from the vent.
It is recommended to wait about 60 seconds after
opening the oven door before closing it.
Steam condenses on the oven door.
When cooking, a small amount of steam will be
generated on the inside of the oven. This in turn
may condense on the oven door. After you have
nished cooking, wipe the door and the glass with a
dry cloth.
The fan continues running after cooking
Once you have nished cooking, due to the high
temperature in the oven, the fan will continue to run
in order to help with heat dissipation.

18
19. EASYCHEF STEAM XL MAINTENANCE
This appliance requires little maintenance. It contains no user-serviceable parts. Any
servicing requiring disassembly other than cleaning must be performed by a qualied
appliance repair technician.
20.CARE & CLEANING INSTRUCTIONS
WARNING: Allow the EasyChef Steam XL to cool fully before cleaning.
1. Unplug the EasyChef Steam XL. Remove frying tray. Make sure the internal trays
and accessories are cooled before cleaning.
2. Wash the trays in hot soapy water. Do not use metal kitchen utensils or abrasive
cleansers or cleaning products.
3. The frying tray and removeable airow tray are dishwasher-safe. For best results,
place them both on the rack of your dishwasher to clean.
4. Wipe the EasyChef Steam XL body with a soft, non-abrasive damp cloth to clean.
5. The transparent window is glass and should only be cleaned when cool and the
unit is o. It should only be cleaned by a warm cloth.
21. STORING INSTRUCTIONS
1. Make sure the EasyChef Steam XL is unplugged and all of its parts are clean and
dry before storing.
2. NEVER store the EasyChef Steam XL while it is hot or wet.
3. Store the EasyChef Steam XL in its box or in a clean, dry place.
22.TROUBLESHOOTING
PROBLEM POSSIBLE CAUSE SOLUTION
The Steam Oven
doesn’t work
• The power plug is not
connected properly.
• The door may not be
closed correctly.
• The household circuit
breaker has switched o
or tripped.
• The watertank is not put
back in correctly or is
empty.
• Plug the cord into the wall outlet.
To begin, press the button.
Food is not
cooked
• The frying tray is
overloaded.
• Cook smaller batches of food.
• Shake food 2 OR 3 TIMES during
cooking.
• Increase TEMPERATURE.
• Increase AIR FRY TIME.

19
Food is not fried
evenly
• The frying tray is
overloaded.
• Air fry smaller batches of food.
• Apply a light even coat of spray oil to
food before frying.
• Shake foods 2 OR 3 TIMES during the
cooking process.
Frying tray won’t
slide into the
EasyChef Steam
XL body properly
• The frying tray is
overloaded. • Air fry smaller batches of food.
White smoke is
expelled from the
EasyChef Steam
XL
• The EasyChef Steam XL is
overloaded with oil.
• The frying tray and drawer
have not been cleaned.
• When frying oily foods, such as bacon,
you may need to clean out the frying tray
more often.
• Clean the frying tray after each use.
Fresh potato
fries are not fried
evenly
• The frying tray is
overloaded.
• Soak, rinse and fully dry potatoes
before frying.
• Use fresh, rm potatoes.
Fries are not
crispy
• Raw fries have too much
water.
• Use a clean kitchen towel to wrap and
dry cut potato fries thoroughly before
adding oil.
• Cut potato fries into smaller slices.
• Shake and spray potato fries frequently.
23.ERROR CODES AND THEIR MEANINGS
Please check the table below for error codes, explanations and solutions.
ERROR WHY SOLUTION
E1 Open circuit of the air fryer sensor.
Turn OFF the power, open the oven door
and wait for 8-10 minutes, then restart.
E-2 The air fryer sensor has short
circuited.
E-3 The air fryer sensor is overheated.
Please contact Customer Service for help.
E-4 Power board error.
E-5 Open circuit of the steam generator
sensor.
E-6 Short circuit of the steam generator
sensor.

20
24.SPECIFICATIONS
25.WARRANTY TERMS & CONDITIONS
Our goods come with guarantees that cannot be excluded under the Australian
Consumer Law. You are entitled to a replacement or refund for a major failure and
for compensation for any other reasonably foreseeable loss or damage. You are also
entitled to have the goods repaired or replaced if the goods fail to be of acceptable
quality and the failure does not amount to a major failure.
This warranty is provided in addition to your rights under the Australian Consumer
Law. Directed Electronics Australia Pty Ltd (Directed Electronics) warrants that this
product is free from defects in material and workmanship for a period of 12 months
from the date of purchase or for the period stated on the packaging. This warranty is
only valid where you have used the product in accordance with any recommendations
or instructions provided by Directed Electronics.
This warranty excludes defects resulting from alterations of the product, accident,
misuse, abuse or neglect. In order to claim the warranty, you must return the product
to the retailer from which it was purchased or if that retailer is part of a National
network, a store within that chain, along with satisfactory proof of purchase. The
retailer will then return the goods to Directed Electronics.
Directed Electronics will repair, replace or refurbish the product at its discretion. The
retailer will contact you when the product is ready for collection. All costs involved
in claiming this warranty, including the cost of the retailer sending the product to
Directed Electronics, will be borne by you.
Email: info@milahome.com.au
Phone: +61 3 8331 4800
Product Name EasyChef Steam XL
Model Number MLA-500AF
Rated Voltage 220-240V
Rated Frequency 50 / 60Hz
Rated Power Steam 985W / Air Fryer 1650W
Dimensions 40 × 43.5 × 39 cm
Net Weight 13.2kg
Capacity 24 litres
Water Tank Capacity 1200mL
This manual suits for next models
1
Table of contents
Other Mila Fryer manuals

Popular Fryer manuals by other brands

Falcon
Falcon EFS 200 Installation and operating instructions

Avalon Bay
Avalon Bay AB-Airfryer100 Product guide

Ninja
Ninja AF080 owner's guide

CONTINENTAL EDISON
CONTINENTAL EDISON CERFRSH24002CB manual

Smeg
Smeg SFR30 Instructions and suggestions for use, installation and maintenance

Tower Hobbies
Tower Hobbies T17024 Safety and instruction manual


