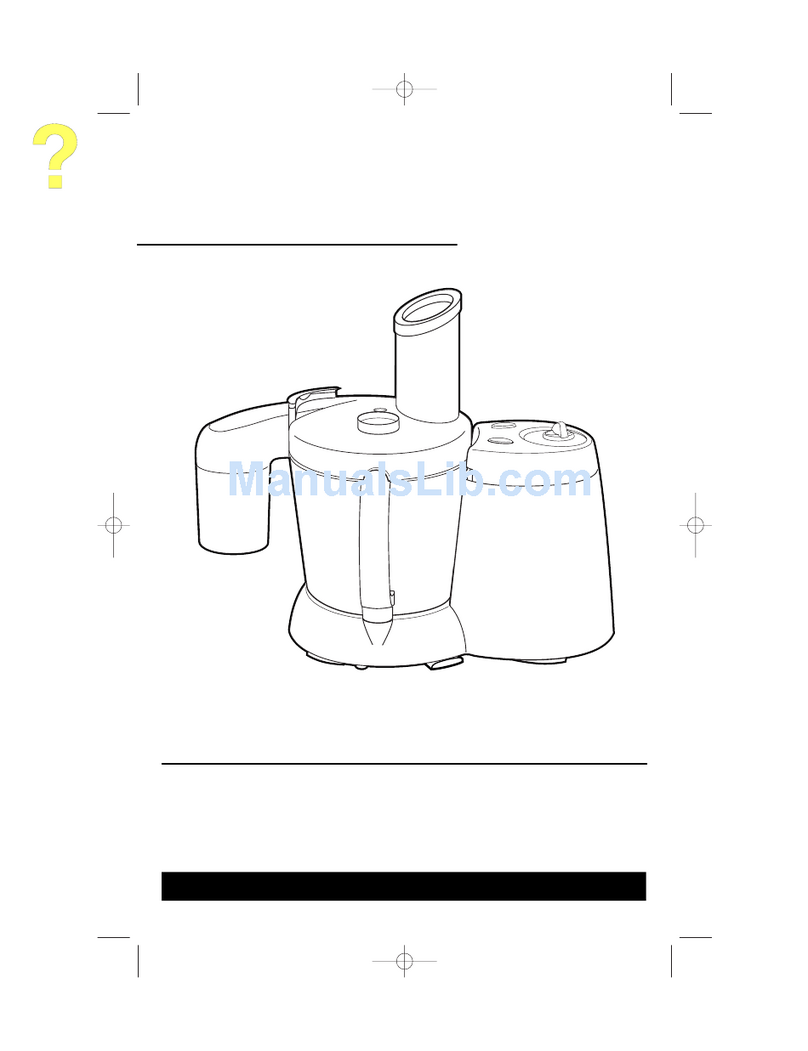
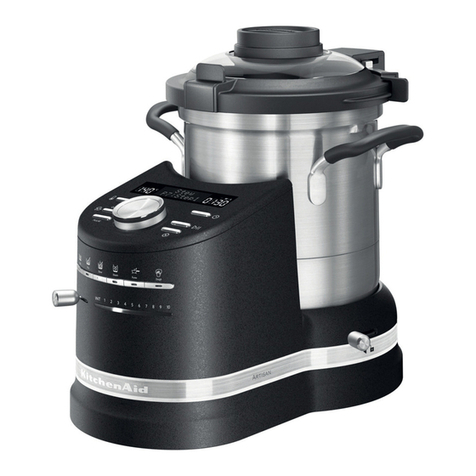
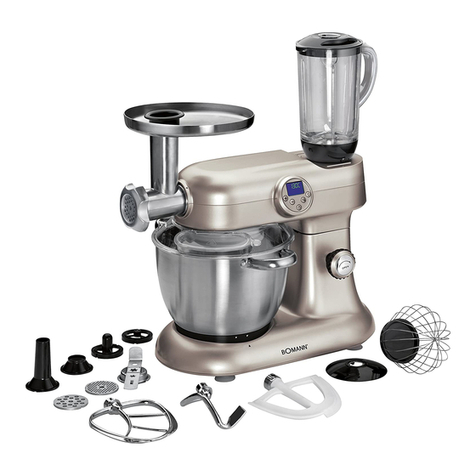
Milenta Ultimo Plus FP14201A User manual

Instructions Manual 1
Food Processor Ultimo Plus FP14201A
Instructions Manual

2 Instructions Manual
Safety instructions
• Before using this appliance, read the user
instructions carefully.
• Keep these instructions, warranty card, purchase
receipt and, if possible, the box, together with
inner packaging.
• This appliance is only for domestic use, and not
for commercial use.
• This appliance is not intended for use by
persons (including children) with reduced
physical, sensory or mental capabilities, or lack
of experience and knowledge, unless they have
been given supervision or instruction concerning
use of the appliance by a person responsible for
their safety.
• Always disconnect the appliance from the supply
if it is left unattended and before assembling,
disassembling or cleaning.
• Do not allow children to use the appliance
without supervision.
• Inspect the power cable and appliance regularly.
If any defect is found, do not operate.
• Do not attempt to repair the unit yourself, it must
be repaired by qualified technicians to avoid any
hazard.
• If the supply cord is damaged, it must be
replaced by the manufacturer, its service agent
or a qualified person in order to avoid a hazard.
• Keep appliance and cable away from direct
radiant heat from the sun, from damp, from
sharp edges and other dangers
• Never use your appliance without paying
attention! Always unplug the unit when not in
use, even for a moment.
• Never use any accessories or parts from other
manufacturers.
• Do not use outdoors.
• Never immerse the unit in water or any other
liquids, or come into contact with them. Do not
use it with wet hands.
• If the appliance should become wet or damp,
remove plug from mains socket immediately. Do
not put your hands in the water!
• Use this appliance only for its intended purpose.
• Never touch the rotating tools while still in
motion; always wait for them to stop.
• Never use this appliance to mix or stir anything
other than foods.
• The blades and discs are very sharp, handle with
care.
Always hold the knife blade shaft and do not touch
the cutting edge when handling and cleaning.
• Always remove the knife blade before pouring
contents from the bowl.
• Keep hands and utensils out of the processor
bowl and blender jug whilst connected to the
power supply.
• Switch off and unplug:
* before fitting or removing parts
* after use
* before cleaning
• Never use your fingers to push food down the
feed tube. Always use the pusher supplied.
• Before removing the processor bowl, blender or
miller from the power unit:
* switch off;
* wait until the attachment / blades have
completely stopped;
* Be careful not to unscrew the blender jug or
miller from the blade unit.
• Allow hot liquids to cool before blending in the
blender - if you haven’t fitted the lid securely and
it comes off, you could get splashed.
• Do not use the safety lock to operate the
processor, such as turning off the appliance by
removing the bowl or lid. Always use the on/off
speed control.
• This machine will be damaged and may cause
injury if the interlock mechanism is subjected to
excessive force.
• Don’t let children play with this machine.
• Never use a damaged machine. Get it checked
or repaired: see ‘service’.
• Don’t let excess cord hang over the edge of a
table or worktop or touch hot surfaces.
• Do NOT operate without cover and pusher.
• Do NOT remove cover until blade stops turning.
Thank you for choosing products
Thank you for choosing products
Before plugging in
Make sure your electricity supply is the same as the one shown on the underside of your appliance.
Before using for the first time
1. Remove all packaging including the plastic blade covers from the knife blade. Take care the blades are very
sharp. These covers should be discarded as they are to protect the blade during manufacture and transit only.
2. Wash the parts see ‘cleaning’
3. Store excess power cord under the appliance.

Instructions Manual 3
Parts description
1. Main unit
2. Processor bowl
3. Processor drive shaft
4. Processor bowl lid
5. Feed tube
6. Pusher
7. Safety interlock
8. Cord storage
9. Pulse control
10. Speed control
11. Measuring cup
12. Lid
13. Blender jug
14. Sealing ring
15. Blade assembly unit
16. Juice cone
17. Juice sieve
18. Juice tank with drain
19. Juicer drive shaft
20. Miller cup
21. Sealing ring
22. Miller blade unit
23. Stainless steel julienne
disk (not included)
24. Coarse Stainless steel
slicing/shredding disk
25. Fine Stainless steel
slicing/shredding disk
26. Plastic assist blade
27. Plastic dough blade
28. Stainless steel blade
29. Egg beating disk
30. Spatula
31. Food Tray (not included)

4 Instructions Manual
Built-in safety lock
This function ensures that user can only switch the appliance on when the accessories have been
placed on the unit in correct position. When the accessories have been fixed properly, the unit can
only be switched on. (i.e. Built-in safety lock function is disabled at this moment)
Use the appliance
To use your food processor
1.Fit the processor bowl onto the main unit and
place the handle towards the back.
2. Place the processor drive shaft onto the
motor drive shaft.
3. Then fit the suitable disk or blade onto the
processor drive shaft.
Caution: Always fit the bowl and attachment onto
the appliance before adding ingredients.
4. Fit the lid and turn clockwise until it locks -
ensuring the top of the drive shaft locates into
the centre of the lid.
5. Turn the processor bowl clockwise until it
locks.
Caution: Do not use the lid to operate the processor,
always use the on/off speed control. The processor
won’t work if the bowl and lid are fitted incorrectly.
Use the pulse control for short bursts. The
pulse will operate for as long as the lever is
held down.
6. Switch on and select a speed.
7. Reverse the above procedure to remove the
lid, attachments and bowl.
Attention: To remove the lid from the processor
bowl, the processor bowl must be unlocked
from main unit first.
Caution: Always switch off before removing the lid.
Important
Your processor is not suitable for crushing or
grinding coffee beans, or converting granulated
sugar to caster sugar.
1
5
2
3
4

Instructions Manual 5
Choosing a speed for all functions
Tool / attachment Function Speed
Egg beating disc Egg whites 1
Egg & sugar for sponges 1
Cream (1L) 1
Plastic dough blade Yeast dough 2
Discs - slicing / julienne /
shredding Solid food such as carrots, potatoes 2
Softer food such as cucumbers, tomatoes
(400g) 1
Citrus juicer Press citrus fruits 1
Blender Liquid eg. milkshakes, soups, sauces and
mayonnaise 2
Miller All processing 2
Hints
1. Please mix 500g flour with 250g water as maximum quantity for our appliance. Do not re-
mix the formed yeasted dough or leave ingredients stay long in the bowl as it may overload
the processor.
2. To ensure long product-life, do not operate the machine for more than 1 minute when
kneading dough. Please wait for at least 2-3 minutes before operating the processor again.

6 Instructions Manual
Using the attachments
See chart above for speed of each attachment.
Blades / Discs placement
Plastic dough blade /
Stainless steel blade
Stainless steel blade is the most versatile of all the attachments. The length of the processing time
will determine the texture achieved. For coarser textures use the pulse control.
Hints
Plastic dough blade
• Place the dry ingredients in the bowl and add the liquid via the feed tube whilst the appliance
is running.
• Process until a smooth elastic ball of dough is formed, this will take 45 - 60 sec.
• Re-knead by hand only. Re-kneading in the bowl is not recommended as it may cause the
processor to become unstable.
Warning: Please do not use the plastic dough blade with plastic assist
blade together. The appliance will be overloaded and may be damaged.
Assist plastic blade
Coarse slicing /
shredding disc
Julienne Disc
Stainless
steel blade
Fine slicing /
shredding disc
Egg beating
disc
Stainless steel blade
• Cut food such as meat, bread, vegetables into cubes approximately 2cm before processing.
• When making pastry, cut the frozen fat into 2cm cubes first.
• Take care not to over-process.
• Plastic assist blade can be used together with stainless steel blade to provide better performance.

Instructions Manual 7
Egg beating disc
Use for light mixtures only e.g. egg whites, cream, condensed milk and for whisking eggs and sugar
for fatless sponges. Heavier mixtures such as fat and flour will damage it.
Reversible stainless steel slicing / shredding discs – coarse / fine
Use the slicing side for cheese, carrots, potatoes, cabbage, cucumber, beetroot and onions.
For coarse slicing (Part 21)
For coarse shredding (Part 21)
Hints
• Best results are obtained when the eggs are at room temperature.
• Ensure the bowl and whisks are clean and free from grease before whisking.
Face upward
Face upward
For fine slicing (Part 22)
For fine shredding (Part 22)
Face upward
Face upward
Use the shredding side for cheese, carrots, potatoes and foods of a similar texture.

8 Instructions Manual
Hints
• Usefreshingredients
• Whenusingthediscs,placeingredientshorizontally.
• Whenslicing:Rawfoodplacedatslopeinfeedtubeprovideslargercrosssectionarea
processedfood.
Neverputyourngersinthefeedtube.
Stainless steel Julienne disc
Usetocut:potatoesforJuliennestyleFrenchfries;rmingredientsforsalads,garnishes,casseroles
andstirfries(e.g.carrot,cucumber).
For Julienne(Part20)
Faceupward
Safety
• Neverremovetheliduntilthecuttingdischascompletelystopped.
• Handlethecuttingdiscswithcare-theyareextremelysharp

Instructions Manual 9
To use your blender
1.Assure the sealing ring is placed properly onto the blade assembly
unit.
2. Screw the blade unit into the jug.
3. Put the measuring cup in the lid, then turn.
4. Lock the lid onto the jug
5. Place the jug onto the main unit and turn to lock.
6. Select the speed by turning the control knob or press the Quick-
select button.
Hints
• When making mayonnaise, put all the ingredients, except the
oil into the blender. Then with the machine running, pour the oil
into the measuring cup and let it run through.
• Thick mixtures, e.g. pates and dips, may need scraping
down. If it’s difficult to process, add more liquid.
• When crushing ice, add 15ml (1tbsp) water to 6 ice cubes.
Use the pulse control.
Important
• Allowhotliquidstocoolbeforeblending–ifyouhaven’tttedthe
lidsecurelyanditcomesoff,youcouldgetsplashed.
• To ensure the long life of your blender, never run it continuously
for longer than 3 minutes. Switch off as soon as you’ve got the
right consistency.
• Don’t process spices - they may damage the plastic.
• The machine won’t work if the blender is fitted incorrectly.
• Don’t use the blender as a storage container. Keep it empty
before and after use.
• Never blend more than 1.5 liters - less for frothy liquids like
milkshakes.
1
2
5
4
3

10 Instructions Manual
To use your juicer
This juicer is designed for making citrus juice (e.g. oranges, lemons, grapefruits…etc).
Important
Use low speed for juicing.
1. Place the juicer drive shaft and the juice
tank onto the main unit
2. Turn the juice tank clockwise to lock into the unit.
3.Place the juicer cone at
the centre of the tank and
connect with the juicer
drive shaft.

Instructions Manual 11
4. Cut the fruit in half.
5. Position the half fruit on the juicer cone. Press the fruit down lightly and select the first speed, the
motor will automatically begin the juicing process.
6. Juice Tank with Drain, lift drain up when squeezing juicer, press down the drain let juice drain
out until up to desired capacity then lift up drain to prevent dripping and spilling of juice. (Refer to
Fig.1-HOLD, Fig.2-DRAIN). Place a suitable glass under the drain before it is pushed downwards
to release the juice.
Fig.2Fig.1
Hint
• The juicer won’t work if the tank is fitted incorrectly.
To use your miller
The miller is designed for milling solid ingredients such
as coffee beans, seeds.
1. Place the food in the miller cup (maximum in 1/2 of
miller cup)
2. Fit the sealing ring onto the miller blade unit
3. Place the miller blade unit onto the miller cup. Fix it
by turning the blade unit in counter-clockwise direction.
4. Turn the assembled miller upside down and place it
on the motor unit. Fix the miller by turning it in clockwise
direction.
5. Select the highest speed by turning the control knob
or press the Quick-select button.

12 Instructions Manual
Safety
• Do NOT place the miller blade unit on the main unit before installing into the miller cup.
• Avoid touching the sharp blades.
• Never touch the rotating tools while still in motion; always wait for them to stop.
Important
Do not operate the appliance longer than 1 minute every time. Switch off as soon as you’ve got
the right consistency.
The main unit won’t work if the miller is fitted incorrectly.Only use the miller for dry food
Cleaning
Always clean the removable parts immediately after use.
Note: Be careful when cleaning the parts. Avoid touching the sharp blades!
1. Disconnect the power from main supply.
2. Disassemble all removable parts before cleaning.
3. Clean all removable parts in dishwasher or in lukewarm water with cleanser.
4. Use dry cloth to clean the main body. Ensure that the interlock area is clear of food debris.
5. Store excess cord in the storage area at the bottom of the appliance.
Technical Data
Model: FP14201A
Main Supply: 220-240V~50/60Hz
Power: 1000W
Insulation class: II

Instructions Manual 13
Robot Culinaire Ultimo Plus FP14201A
Mode D’emploi

14 Mode D’emploi
Consignes De Securite
• Avant d’utiliser cet appareil, lisez attentivement
les instructions d’utilisation.
• Garder ces instructions, certificat de garantie,
facture d’achat et, si possible, la boîte, ainsi que
les emballages intérieurs.
• Cet appareil est uniquement pour un usage
domestique, et non pour un usage commercial.
• Cet appareil n’est pas destiné à être utilisé par des
personnes (y compris les enfants) aux capacités
physiques, sensorielles ou mentales limitées, ou
qui manquent d’expérience et de connaissances,
à moins qu’ils ne soient surveillées par une
personne responsable de leur sécurité.
• Toujours débrancher l’appareil de l’alimentation
si elle est laissée sans surveillance et avant le
montage, le démontage ou le nettoyage.
• Ne pas laisser les enfants utiliser l’appareil sans
surveillance.
• Inspectez le câble d’alimentation et appareil
régulièrement. Si un défaut est constaté, ne faites
pas fonctioner l’appareil.
• Ne pas tenter de réparer l’appareil vous-même, il
doit être réparé par des techniciens qualifiés afin
d’éviter tout risque.
• Si le cordon d’alimentation est endommagé, il
doit être remplacé par le fabricant, son agent de
service ou une personne qualifiée afin d’éviter un
danger.
• Placer l’appareil et le câble loin de la chaleur
rayonnante directe du soleil, de l’humidité, des
bords tranchants et d’autres dangers.
• Ne jamais utiliser votre appareil sans y prêter
attention! Toujours débrancher l’appareil lorsqu’il
n’est pas utilisé.
• Ne jamais utiliser des accessoires ou des pièces
provenant d’autres fabricants.
• Ne plongez jamais l’appareil dans l’eau ou autres
liquides, ni le laisser entrer en contact avec eux.
Ne l’utilisez pas avec des mains mouillées.
• Si l’appareil devient mouillé ou humide, retirez
la fiche de prise de courant immédiatement. Ne
mettez pas vos mains dans l’eau!
• Utilisez cet appareil uniquement pour son usage
prévu.
• Ne touchez jamais les outils rotatifs en
mouvement, attendez qu’ils s’arrettent.
• Ne jamais utiliser cet appareil pour mélanger ou
remuer autre chose que des aliments.
• Les lames et lamelles sont très tranchantes,
manipuler avec soin.
Toujours tenir l’arbre de la lame et ne pas toucher
la pointe lors de la manipulation et le nettoyage.
• Toujours retirer la lame avant de verser le contenu
du bol.
• Gardez les mains loin des lames du bol du robot
quand le robot est connecté à l’alimentation.
• Éteignez et débranchez:
* Avant de monter ou de retirer des pièces
* Après utilisation
* Avant le nettoyage
• Ne pas utiliser vos doigts pour pousser la
nourriture dans le tube d’alimentation. Toujours
utiliser le poussoir fourni.
• Avant de retirer le bol du robot ou le mélangeur de
la base moteur:
* Éteignez;
* Attendez que la pièce jointe / lames sont
complètement arrêtés;
* Veillez à ne pas dévisser le bol mixeur ou
meunier de l’unité de la lame.
• Permettre aux liquides chauds de se refroidir
avant de mélanger dans le mélangeur - si vous
n’avez pas monté le couvercle en toute sécurité et
qu’il se détache, vous pourriez être éclaboussé.
• Ne pas utiliser le verrou de sécurité pour faire
fonctionner le processeur, en retirant le bol ou
le couvercle pour éteindre l’appareil. Toujours
utilisez l’interrupteur on / off.
Cette machine sera endommagée et peut causer
des blessures si le mécanisme de verrouillage est
soumis à une force excessive.
• Ne pas laisser les enfants jouer avec cette
machine.
• Ne jamais utiliser une machine endommagée.
Faites-le vérifier ou réparer: voir «service».
• Ne pas laisser le cordon dépasser du bord d’une
table ou plan de travail ou toucher des surfaces
chaudes.
• Ne pas utiliser sans couvercle ou sans poussoir.
• Ne pas retirer le couvercle jusqu’à ce que la lame
s’arrête de tourner.
*Merci d’avoir choisi la qualité
Avant de brancher
Assurez-vous que votre alimentation électrique est la même que celle indiquée sur la face inférieure de
votre appareil.
Avant d’utiliser pour la première fois
1. Retirez tous les emballages, y compris les couvercles en plastique et le protege couteau. Prenez soin, les
lames sont très tranchantes.
2. Lavez les pièces et les accessoires voir «nettoyage»
3. Rangez le cordon sous l’appareil

Mode D’emploi 15
Caracterisques et Composants
1. Bloc moteur
2. Bol principal
3. Axe d’entrainement du bol
principal
4. Couvercle du bol principal
5. Cheminée de remplissage
6. Poussoir d’aliment
7. Système de verrouillage de
sécurité
8. Rangement cordon
d’alimentation
9. Touche « Turbo »
10. Bouton marche/arrêt et
de sélection de la vitesse +
fonction « Pulse »
11. Bouchon doseur
12. Couvercle du blender
13. Blender
14. Joint d’étanchéité du
blender
15. Bloc lames du blender
16. Grand et petit cône
17. Filtre
18. Réservoir à jus avec bec
verseur
19. Axe d’entrainement du
réservoir à jus
20. Couvercle de l’accessoire
Moulin.
21. Joint d’étanchéité du
moulin
22. Bloc lames du moulin
23. Julienne disque (non
inclus)
24. Disque pour lamelles
épaisses/râpeuse (épais)
25. Disque pour lamelles
fines/râpeuse (fin)
26. Mélangeur supérieur
(diamètre moyen)
27. Mélangeur inférieur (gros
diamètre)
28. Lame couteau pour le bol
mélangeur et son cache-
lames en plastique
29. Disque émulsionneur
30. Spatule ouvre-bouteille
31. Plateau de la cheminée
de remplissage (non inclus)

16 Mode D’emploi
Verrouillage de sécurité intégré
Cette fonction garantit que l’utilisateur ne peut allumer l’appareil que lorsque les accessoires ont été
montées sur l’unité dans la bonne position. Lorsque les accessoires ont été fixés correctement,l’unité
peut être allumé. (i.e. verrouillage de sécurité intégré est désactivé en ce moment)
Utilisation
Utilisation du Robot
1. Installez le bol du robot sur l’unité principale
et placez la poignée vers l’arrière.
2. Placer l’arbre d’entraînement processeur sur
l’arbre d’entraînement à moteur.
3. Installez ensuite le disque approprié ou la
lame sur l’arbre d’entraînement du processeur.
attention: Fixez toujours le bol et fixation sur
l’appareil avant d’ajouter les ingrédients.
4. Posez le couvercle et tournez dans le sens
horaire jusqu’à ce qu’il se verrouille – assurez
que le haut de l’axe d’entrainement se trouve
au centre du couvercle.
5. Tournez le bol du robot dans le sens horaire
jusqu’à ce qu’il se verrouille.
attention: Ne pas utiliser le couvercle pour faire
fonctionner le robot, toujours utiliser l’interrupteur
on / off . Le robot ne fonctionnera pas si le bol et
le couvercle sont installés de manière incorrecte.
Utilisez la commande “pulse” pour de courtes
durées. Le “pulse” fonctionne tant que le levier
est maintenu enfoncé.
6. Mettez en marche et sélectionnez une
vitesse.
7. Inversez la procédure ci-dessus pour arreter
et retirer le couvercle, les pièces jointes et le bol.
Attention: Pour retirer le couvercle du bol du
robot, le bol doit être déverrouillé de l’unité
principal en premier.
Attention: toujours éteindre avant de retirer le
couvercle.
Important
Votre robot n’est pas conçu pour concasser ou
moudre des grains de café, ou la conversion du
sucre cristallisé en sucre en poudre.
1
5
2
3
4

Mode D’emploi 17
Les differentes vitesses adaptees a chaque fonction
Accessoire Fonction Vitesse
Disque émulsionneur Blancs d’oeufs 1
Oeufs et sucre 1
Crème (1L) 1
Lame à pétrir en plastique pâte à levure 2
Disques - tranchage /
rapage
Des aliments solides tels que des carotte,
pommes de terre. 2
Aliments plus doux tels que les concombres,
tomates (400g) 1
Presse-agrumes Presser du jus 1
Blender Melange liquide par exemple milk shakes, les
soups et les sauces. 2
Moulin Moudre le café, les graines, epices 2
Conseils pratiques
1. Vous etes priés de mélanger au plus 500g de farine avec 250ml d’eau, ceci étant la quantité
maximale pour votre appareil. Ne mélangez pas à nouveau la pâte deja levée. Ne laissez pas
les ingrédients longtemps dans le bol, ceci peut surcharger l’appareil.
2. Pour assurer la long vie de l’appareil, n’utilisez pas l’appareil pour plus de 1 minute continue
pour pétrir la pâte. Priere d’attendre au moins 2-3 minutes avant de faire fonctionner le robot
à nouveau.

18 Mode D’emploi
Utilisation des pièces jointes
Voir tableau ci-dessus pour la vitesse de chaque pièce jointe.
Installation des lames / disques
Lame à pétrir en plastique /
Lame en acier inoxydable
La lame en acier inoxydable est l’outil le plus polyvalent de tous les accessoires. Le temps de
preparation determinera la texture des aliments obtenues. Pour une texture plus grosse, veuillez
utiliser la commande “pulse”.
Conseils pratiques
Lame à pétrir en plastique
• Placez les ingrédients secs dans le bol et ajouter le liquide par l’intermédiaire du tube
d’alimentation pendant que l’appareil est en marche.
• Operez le robot jusqu’à ce qu’une boule lisse élastique de pâte est formée, cela peut prendre
entre 45 et 60 secondes.
• Re-pétrir à la main seulement. Re-pétrir dans le bol n’est pas recommandée car ca peut amener
le robot à devenir instable.
Avertissement:il ne faut pas utiliser la lame pâte plastique avec la lame d’assistance
plastique ensemble. L’appareil sera surchargé et peut-être endommagé.
Lame en plastique
Disque Epais
éminceur / râpe
Julienne Disc
Lame en acier
inoxydable
Disque Fin éminceur / râpe
Lame à pétrir
en plastique
Disque emulsioneur
Lame en acier inoxydable
• Coupez les aliments comme la viande, le pain, les légumes en cubes d’environ 2cm avant de
traiter.
• Pour la preparation de la pâtisserie, couper tous les ingredients en cubes de 2cm.
• Prenez soin de ne pas trop hacher.
• La lame d’assistance en plastique peut être utilisé conjointement avec la lame en acier inoxydable
pour offrir une meilleure performance.

Mode D’emploi 19
Disque emulsioneur
Utilisez pour les mélanges légers uniquement ex: blancs d’œufs, la crème, le lait condensé et pour
fouetter les œufs et le sucre pour les gateaux Savoyard. Des mélanges plus lourds tels que la graisse
et la farine pourra l’endommager.
Disque réversible acier inoxydable tranchage /rapage – epais / fin
Utilisez la fonctions rape pour les fromages, carottes, pommes de terre, choux, concombres,
betteraves et oignons.
Pour tranche epais (partie 21)
Pour râper epais (partie 21)
Conseils pratiques
• Les meilleurs résultats sont obtenus lorsque les œufs sont à température ambiante.
• Assurer le bol et les fouets sont propres avant toute utilization.
Face à la hausse Face à la hausse
Face à la hausse Face à la hausse
Pour trancher fin (partie 22)
Pour râper fin (partie 22)
Utilisez la râpe pour les fromages, carottes, pommes de terre et aliments de texture similaire.

20 Mode D’emploi
Conseils pratiques
• Utilisezdesingrédientsfrais
• Lorsquevousutilisezlesdisques,introduisezlesingrédientshorizontalement.
• PourRaper:Lesalimentscrusmisàlapentedansletubed’alimentationfournissentune
surfaceplusgrandeetdemeilleursresultats.
Nemettezjamaisvosdoigtsdansletubed’alimentation.
Disque Julienne en acier inoxydable (non-inclus)
Utilisez-lepourcouper:lespommesdeterrepourfritesJulienne;ingrédientsfermespoursalades,
garnitures,ragoûtsetsautés(parexemple,carottes,concombre).
Pour Julienne (partie20)
Consignes de sécurité
• Neretirezjamaislecouverclejusqu’àcequeledisquedecoupeestcomplètementarrêté.
• Manipulezlesdisquesdecoupeavecprécaution-ilssontextrêmementtranchants
Faceàlahausse
Table of contents
Languages:
