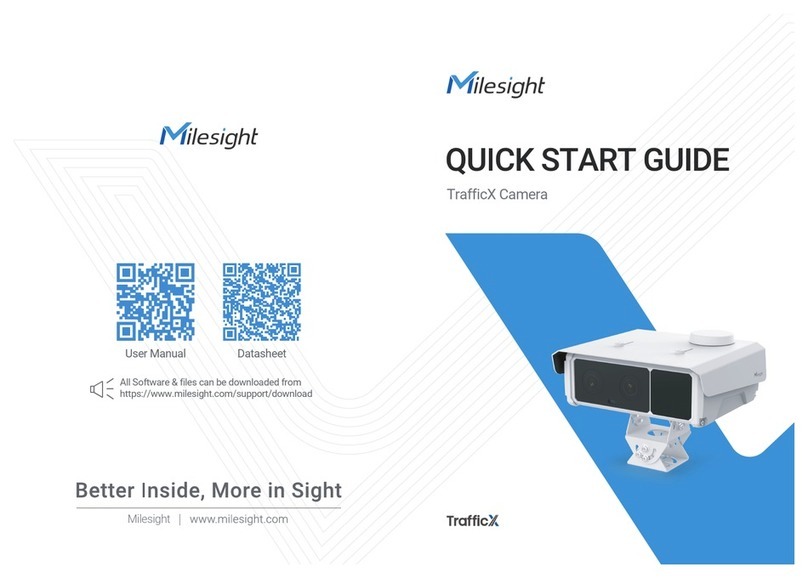
Milesight TS2866-X4TPC User manual

blank
Intelligent Traffic Camera
Intelligent Traffic Camera User Manual
User Manual
Version: V1.0
Date: 2022-11-23

Chapter 1. Introduction........................................................................................................5
1.1 Copyright Statement.................................................................................................5
1.2 Safety Instruction......................................................................................................5
1.3 Revision History........................................................................................................6
Chapter 2. Entrance and Exit Management.......................................................................7
2.1 Product Description...................................................................................................7
2.1.1 Product Overview........................................................................................... 7
2.1.2 Related Product..............................................................................................7
2.1.3 Hardware Overview........................................................................................7
2.1.4 Related Documents........................................................................................9
2.2 Configuration Flow....................................................................................................9
2.3 Network Connection................................................................................................11
Setting the Camera over the LAN.........................................................................11
Dynamic IP Connection.........................................................................................11
2.4 Accessing the Network Camera.............................................................................12
Assigning an IP Address....................................................................................... 12
Accessing from the Web Browser.........................................................................19
Accessing from Milesight Back-end Software........................................................20
2.5 Live View................................................................................................................ 22
Live Video.............................................................................................................. 22
LPR Mode..............................................................................................................26
2.5 Playback..................................................................................................................29
Playback.................................................................................................................29
2.6 Settings................................................................................................................... 33
2.6.1 Media............................................................................................................ 33
2.6.2 Network.........................................................................................................55
2.6.3 Storage..........................................................................................................75
2.6.4 Event.............................................................................................................82
2.6.5 LPR...............................................................................................................90
2.6.6 System........................................................................................................121
Chapter 3. Road Traffic Management............................................................................ 135
3.1 Product Description...............................................................................................135

Contents
3.1.1 Product Overview....................................................................................... 135
3.1.2 Related Product..........................................................................................135
3.1.3 Hardware Overview.................................................................................... 136
3.1.4 Related Documents.................................................................................... 139
3.2 Configuration Flow................................................................................................139
3.3 Network Connection..............................................................................................141
Setting the Camera over the LAN.......................................................................141
Dynamic IP Connection.......................................................................................141
3.4 Accessing the Network Camera...........................................................................142
Assigning an IP Address..................................................................................... 142
Accessing from the Web Browser....................................................................... 149
Accessing from Milesight Back-end Software......................................................150
3.5 Live View...............................................................................................................152
Live Video............................................................................................................ 152
PTZ Mode............................................................................................................ 156
LPR Mode............................................................................................................163
3.6 Playback................................................................................................................167
Playback...............................................................................................................167
3.7 Settings................................................................................................................. 171
3.7.1 Media.......................................................................................................... 171
3.7.2 Network.......................................................................................................193
3.7.3 Storage........................................................................................................213
3.7.4 Event...........................................................................................................220
3.7.5 LPR.............................................................................................................240
3.7.6 System........................................................................................................285
Chapter 4. Parking Management.................................................................................... 299
4.1 Product Description...............................................................................................299
4.1.1 Product Overview....................................................................................... 299
4.1.2 Related Product..........................................................................................299
4.1.3 Hardware Overview.................................................................................... 299
4.1.4 Benefits of the Camera...............................................................................300
4.1.5 Installation Guide........................................................................................301

Contents
4.1.6 Related Documents.................................................................................... 304
4.2 Configuration Flow................................................................................................305
4.3 Network Connection..............................................................................................306
Setting the Camera over the LAN.......................................................................306
Dynamic IP Connection.......................................................................................307
4.4 Accessing the Network Camera...........................................................................307
Assigning an IP Address..................................................................................... 307
Accessing from the Web Browser....................................................................... 314
4.5 Live View...............................................................................................................315
Live Video............................................................................................................ 315
4.6 Playback................................................................................................................318
Playback...............................................................................................................318
4.7 Settings................................................................................................................. 321
4.7.1 Media.......................................................................................................... 321
4.7.2 Network.......................................................................................................341
4.7.3 Storage........................................................................................................361
4.7.4 Event...........................................................................................................368
4.7.5 System........................................................................................................386
Chapter 5. Services..........................................................................................................399

Chapter 1. Introduction
Thank you for purchasing our product. If there is any question or request, please do not
hesitate to contact your dealer.
This manual may contain several technically incorrect places or printing errors, and the
content is subject to change without notice. The updates will be added into the new version
of this manual. We will readily improve or update the products or procedures described in
the manual.
This Manual explains how to use and manage Milesight Intelligent Traffic cameras.
Milesight innovatively combines video surveillance with AI, ANPR, 3D Radar and other
cutting-edge technologies to perfectly meet the demands of road traffic management,
entrance & exit management and indoor & outdoor management. So the Milesight
Intelligent Traffic camera consists of three series, including Entrance & Exit Management,
Road Traffic Management, Parking Management. Please read this manual carefully before
operation and retain it for future reference.
You can also click on the following hyperlinks to quickly jump to the corresponding series
introduction.
1. Entrance & Exit Management (page 7)
2. Road Traffic Management (page 135)
3. Parking Management (page 299)
1.1 Copyright Statement
This manual may not be reproduced in any form or by any means to create any derivative
such as translation, transformation, or adaptation without the prior written permission of
Xiamen Milesight IoT Co., Ltd (Hereinafter referred to as Milesight).
reserves the right to change this manual and the specifications without prior
notice. The latest specifications and user documentation for all Milesight products are
available on our official website http://www.milesight.com
1.2 Safety Instruction
These instructions are intended to ensure that user can use the product correctly to
avoid danger or property loss. The precaution measures are divided into “Warnings” and
“Cautions”

Intelligent Traffic Camera User Manual | 1 - Introduction | 6
Warnings: Serious injury or death may be caused if any of these warnings is neglected.
•This installation must be conducted by a qualified service person and should strictly
comply with the electrical safety regulations of the local region
•To avoid risk of fire and electric shock, do keep the product away from rain and
moisture before installed.
•Do not touch components such as heat sinks, power regulators, and processors, which
may be hot
•Source with DC/AC 12V or PoE
•Please make sure the plug is firmly inserted into the power socket
•When the product is installed on a wall or ceiling, the device should be firmly fixed
•If the product does not work properly, please contact your dealer. Never attempt to
disassemble the camera by yourself
Cautions: Injury or equipment damage may be caused if any of these cautions are
neglected.
•Make sure that the power supply voltage is correct before using the camera
•Do not store or install the device in extremely hot or cold temperatures, dusty or damp
locations, and do not expose it to high electromagnetic radiation
•Only use components and parts recommended by manufacturer
•Do not drop the camera or subject it to physical shock
•To prevent heat accumulation, do not block air circulation around the camera
•Laser beams may damage image sensors. The surface of image sensors should not be
exposed to where a laser beam equipment is used
•Use a blower to remove dust from the lens cover
•Use a soft, dry cloth to clean the surface of the camera. Stubborn stains can be
removed using a soft cloth dampened with a small quantity of detergent solution, then
wipe dry
•Do not use volatile solvents such as alcohol, benzene or thinners as they may damage
the surface finishes
•Save the package to ensure availability of shipping containers for future transportation
1.3 Revision History
Table 1.
Version Revision Content Release Date
V1.0 First release November 2022

Chapter 2. Entrance and Exit Management
2.1 Product Description
2.1.1 Product Overview
Milesight Entrance & Exit Management Camera combines video surveillance with AI,
ANPR and other cutting-edge technologies to help traffic management systems intelligently
monitor and manage traffic behavior at entrances and exits. Based on real-time data,
valuable insights are obtained to optimize the traffic flow at the entrance and exit, reduce
the risk of accidents, and deal with emergencies more efficiently. It can be widely used in
the security gate system, which can significantly improve management efficiency and make
traffic more intelligent, safer and smoother.
2.1.2 Related Product
Table 2.
Product Name
Entrance & Exit AI LPR Bullet Camera
Entrance & Exit Supplement Light
AI LPR Pro Bullet Plus Camera
Entrance & Exit AI LPR Pro Dome Camera
2.1.3 Hardware Overview
•Entrance & Exit AI LPR Bullet Camera

Intelligent Traffic Camera User Manual | 2 - Entrance and Exit Management | 8
•Entrance & Exit Supplement Light AI LPR Pro Bullet Plus Camera
•Entrance & Exit AI LPR Pro Dome Camera

Intelligent Traffic Camera User Manual | 2 - Entrance and Exit Management | 9
2.1.4 Related Documents
Table 3.
Document Type Link
Entrance&Exit Management Camera
Datasheet https://www.milesight.com/static/file/en/download/datasheet/ipc/traffic/Milesight-
Entrance-and-Exit-Management-Datasheet-en.pdf
Quick Start Guide https://www.milesight.com/static/file/en/download/user-manual/ipc/Milesight-
Network-Camera-Quick-Start-Guide.pdf
2.2 Configuration Flow
The configuration flow of Entrance&Exit Management Camera is shown in the following
figure.

Intelligent Traffic Camera User Manual | 2 - Entrance and Exit Management | 10
More configuration details are shown in the following table.
Table 4. Description of flow
Configuration Description Reference
Network Connection Connect the network camera. You
can set the camera over the LAN or
dynamic IP connection. Setting the Camera over the LAN
(page 11)
Accessing the Network Camera Accessing from IP address, web
browser and Milesight back-end
software are available. Assigning an IP Address (page 12)
Configure Basic Parameters After login the camera, you can
adjust the video/image/audio/network
parameters as needed.
Video (page 33)
Image (page 36)
Configure Advanced Functions Configure LPR-related settings and
other advanced functions. General (page 90)

Intelligent Traffic Camera User Manual | 2 - Entrance and Exit Management | 11
2.3 Network Connection
Setting the Camera over the LAN
Connecting the camera to a switch or a router is the most common connection method. The
camera must be assigned an IP address that is compatible with its LAN.
Connect the Camera to the PC Directly
In this method, only the computer connected to the camera will be able to view the camera.
The camera must be assigned a compatible IP address to the computer. Details are shown
as the following figure.
Connect via a Switch or a Router
Refer to the following figure to set network camera over the LAN via the switch or router.
Dynamic IP Connection
Step1: Connect the network camera to a router;
Step2: On the camera, assign a LAN IP address, the Subnet mask and the Gateway;
Step3: On the router, set port forwarding. E.g. 80, 8000 and 554 ports. The steps for port
forwarding vary depending on different routers. Please look up the router's user manual for
assistance with port forwarding;

Intelligent Traffic Camera User Manual | 2 - Entrance and Exit Management | 12
Step4: Apply a domain name from a domain name provider;
Step5: Configure the DDNS settings in the setting interface of the router;
Step6: Visit the camera via the domain name.
2.4 Accessing the Network Camera
Assigning an IP Address
The Network Camera must be assigned an IP address to be accessible. The default IP
address of Milesight network cameras is 192.168.5.190.
You can also change the IP address of the camera via Smart Tools or browser. Please
connect the camera in the same LAN of your computer.
Assigning an IP Address Using Smart Tools
Smart Tools is a software tool which can automatically detect multiple online Milesight
network cameras in the LAN, set IP addresses, and manage firmware upgrades. It’s
recommended to use when assigning IP addresses for multiple cameras.
Step1: Install Smart Tools (The software could be downloaded from our website);
Step2: Start Smart Tools, click the IPC Tools page, then enter the device information, such
as IP address, MAC address, Status, Port number, Netmask, and Gateway, then all related
Milesight network camera in the same network will be displayed. Details are shown as the
figure below;

Intelligent Traffic Camera User Manual | 2 - Entrance and Exit Management | 13
Step3: Select a camera or multiple cameras according to the MAC addresses;
Select single camera:
Select multiple cameras:

Intelligent Traffic Camera User Manual | 2 - Entrance and Exit Management | 14
Step4: If the selected camera shows "Inactive" in the status bar, click "Activate" to set the
password when using it for the first time. You can also set the security questions when
activating the camera in case that you forget the password (You can reset the password by
answering three security questions correctly). Click ‘Save’ and it will show that the activation
was successful.
Note:
•Password must be 8 to 32 characters long, contain at least one number and one letter.
•You need to upgrade Smart Tools version to V2.4.0.1 or above to activate the camera.

Intelligent Traffic Camera User Manual | 2 - Entrance and Exit Management | 15
Step5: After activation, you can change the IP address or other network values, and then
click “Modify” button.
Step6: By double clicking the selected camera or the browser of interested camera, you
can access the camera via web browser directly. The Internet Explorer window will pop up.

Intelligent Traffic Camera User Manual | 2 - Entrance and Exit Management | 16
More usage of Smart Tools, please refer to the Smart Tools User Manual.
Assign An IP Address via Browser
If the network segment of the computer and that of the camera are different, please follow
the steps to change the IP address:
Step1: Change the IP address of computer to 192.168.5.0 segment, here are two ways as
below:
a. Start-->Control Panel-->Network and Internet Connection-->Network Connection-->Local
Area Connection, and double click it;

Intelligent Traffic Camera User Manual | 2 - Entrance and Exit Management | 17
b. Click “Advanced”, and then click “IP settings”--> “IP address”--> “Add”. In the pop-up
window, enter an IP address that in the same segment with Milesight network camera ( e.g.
192.168.5.61, but please note that this IP address shall not conflict with the IP address on
the existing network);

Intelligent Traffic Camera User Manual | 2 - Entrance and Exit Management | 18
Step2: Start the browser. In the address bar, enter the default IP address of the
camera:http://192.168.5.190;
Step3: You need to set the password first when using it for the first time. And you can also
set three security questions for your device after activation. Then you can log in to the
camera with the user name (admin) and a custom password.
Note:

Intelligent Traffic Camera User Manual | 2 - Entrance and Exit Management | 19
•Password must be 8 to 32 characters long, contain at least one number and one letter.
•You can click the “forget password” in login page to reset the password by answering
three security questions when you forget the password, if you set the security questions
in advance.
Step4: After login, please select “Settings” --> “Network” --> “Basic” --> “TCP/IP”. The
Network Settings page appears (Shown as below Figure);
Step5: Change the IP address or other network values. Then click “Save” button;
Step6: The change of default IP address is completed.
Accessing from the Web Browser
The camera can be used with the most standard operating systems and browsers. And the
camera was upgraded to support Plugin-Free Mode. In Plugin-Free Mode, you can preview
the video on the browser without plugin. Currently Plugin-Free Mode is supported in Firefox
& Google Chrome & Safari & Edge browser for Windows system, MAC system, iOS system
and Android system. Both H.265&H.264 video codec are supported in Plugin-Free Mode for
camera, and it will play the secondary stream by default.
Note:
•For more details about set plugin-free mode of Milesight camera, please refer to https://
milesight.freshdesk.com/a/solutions/articles/69000643388.

Intelligent Traffic Camera User Manual | 2 - Entrance and Exit Management | 20
Accessing from Milesight Back-end Software
Accessing from Milesight NVR (Network Video Recorder)
Milesight NVR Series can work with Milesight network cameras. Based on embedded Linux
operation system, Milesight NVR Series manages and stores HD video data. It owns multi-
disk management systems, front end HD device management system, HD video analysis
system and high-capacity system for video. Also, it adopts the technology of high flow
capacity data network transmitting&transmission, with multi-channel video decoding, to
achieve functions like intelligent management, safe storage, HD decoding, etc.
For detailed information about how to use the Milesight NVR Series, please refer to
Milesight NVR User Manual.
Accessing from Milesight CMS (Center Management System)
Milesight Central Management System (CMS) is a central management system for Milesight
network cameras and Milesight NVR. It is an intelligent surveillance solution for users
to control up to 256 devices, to remote preview and playback more conveniently. With
high-efficient management performance, Milesight CMS software offers users a superior
administration experience in such centralized system. Featured with friendly UI design, the
intelligent video management system CMS allows users of all levels to setup and deploy
solutions as easy as ABC. Moreover, E-map function provides users a smarter way to show
the devices spatial distribution. The software could be downloaded from our website https://
www.milesight.com/.
Table of contents
Other Milesight Digital Camera manuals
