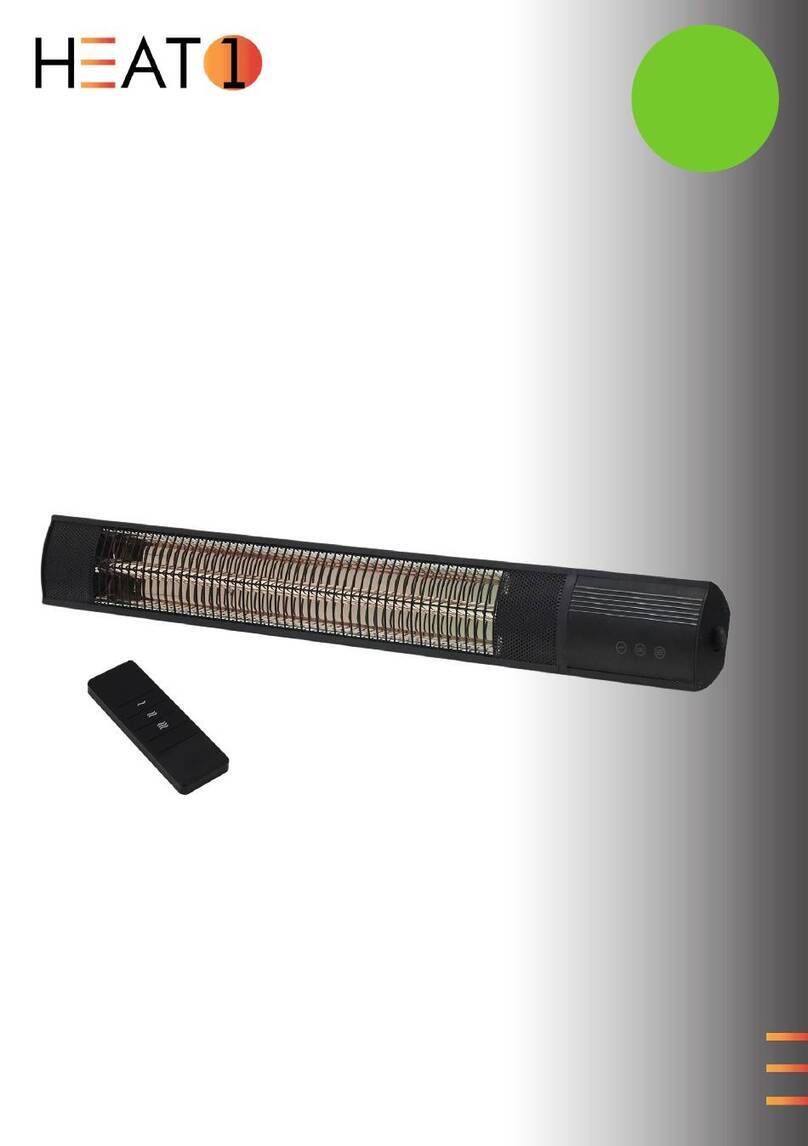
MILL JDB1500CL User manual

OPERATION AND ASSEMBLY MANUAL (EN)
BRUKS- OG MONTERINGSANVISNING (NO)
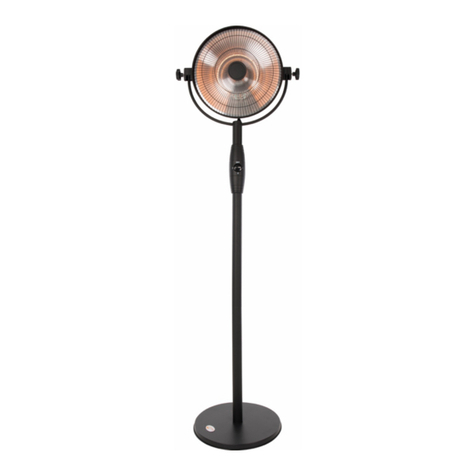
Series: Pendant patio heater
Model: JDB1500CL
Please read the manual carefully and make sure that the patio heater is installed according to the provided instructions. The use
and maintenance of the product must follow the operation manual as well. Failure to carefully observe these instructions may
result in damage to the patio heater and personal injury. If you have any questions about the product assembly or operation,
please contact the product importer.

Thanks for buying Mill
Our company was founded in Norway in 1992 by Cato Bryn, specializing in distribution of oil lled
radiators and other types of heaters. From 1992 to 2009, we have gained signicant knowledge
and expertise of different type of heaters, thus enabling us to sell to almost all the largest retail-
ers in the Nordic countries.
In 2010, Cato’s son, Phillip joined the company. Philip looked at the heating industry with fresh
eyes and wondered why there had been so little change to the appearance of portable heaters in
the last 20 years, especially since interior design in general had changed dramatically over the
years. Philip thought consumers should have more styles to choose from other than the typical
old-fashioned, traditional heaters.
Since heaters are part of so many homes, Philip and Cato decided to use their extensive
knowledge to re-invent new design of heaters. They wanted to create beautiful, modern and
minimalistic heaters, using the most advanced technology, that would complement people’s
homes. They launched the brand “Mill” in 2012.
Mill offers revolutionary, innovative Norwegian designs. We are continuously innovating to com-
plement our line of products to meet consumers’ demand.
Prospering on our success in the Nordics we decided to promote Mill at some of the world’s
largest electronic fairs and home shows - the feedback from retailers and distributors all over
the world were amazing. We are proud to say that consumers in over 25 countries can now keep
warm with style!
EN 2 millnorway.com

Content
Important safety information…………………………………………………………………………..4-6
Specications……………………………………………………………………………………..……………..7
Benets of Carbon heating element…………………………………………………………………7
Description of patio heater………………………………………………………………………………..7
Installation……………………………………………………………………………………………………...….8
Minimum distances……………………………………………………………………………………………8
How to install the patio heater…………………………………………………………………..…..….9
Operation………………………………………………………………………………………………………....10
Troubleshooting..............................................................................................................11
Maintenance……………………………………………………………………………………………………..12
Guarantee and Waste Management...........................................................................12
EN 3 millnorway.com

Important Safety Information
You must obey common safety guidelines when using electrical
products, especially in the presence of children.
WARNING! To avoid electric shock or damage due to
heat, always make sure the plug is pulled out before
the heater is moved or cleaned.
• Read the instructions carefully.
• The product is intended for outdoor use only.
• Make sure the product is connected to the house's regular
mains, as it indicated on the product.
• New products will produce a specic odor when used the
rst time. This will stop after a short time and is completely
harmless.
• Check for any pieces of packing foam or cardboard that may
have fallen into the heating elements of the product. These
pieces must be removed in order to avoid unpleasant odors.
• Prevent the product from overheating – do not cover.
• Always turn off the product and unplug it when not used for
a long time.
• Pay special attention if the product is used in areas where
children, the handicapped or elderly reside.
• The product should not be set up directly beneath an electri-
cal socket outlet.
• The cord must not be laid under any kind of carpet. Make
sure the cord is laid in such a way that nobody can trip on it.
• The product must not be used if either the cord or plug is
damaged. The product must not be used if it has been
dropped on the oor or is damaged in any other way causing
it to malfunction.
• The cord must be repaired by the manufacturer or by an ex-
pert if it has been damaged, to avoid dangerous situations.
EN 4 millnorway.com

• Avoid using extension cords, which may overheat and could
possibly start a re.
• Never cover the air vents on the heater. Avoid potential re
hazards by making sure the air intakes are not blocked or
covered.
• The product should not be installed in close proximity to
ammable materials of any kind because there can always
be a risk of re.
• The product must never be used in rooms where gasoline,
paint or other ammable liquids are stored, such as in a gar-
age.
• The product has an IP rating of IP25.
• Do not touch the heating lamp with bare ngers. If the heat-
ing lamp has been touched in connection with a fault, any
ngerprints have to be wiped off using a soft cloth mois-
tened with denatured alcohol. The ngerprints leave grease
which can burn to the heating lamp. This shortens the ser-
vice life of the heating lamp.
• Make sure that the product is installed in a safe manner and
is mounted securely to the ceiling.
• Never touch an electric heater with wet hands.
• The product becomes hot when it is on. Therefore, be careful
and avoid burning or scorching your skin.
• The product must be switched off, the plug removed and the
product must cool down before it is moved.
• Avoid overloading the mains (the circuit) where the product
is connected. The product may overload the electrical circuit
if other electrical devices are plugged into the same socket
outlet.
EN 5 millnorway.com

• The product cannot be used by children under 8 years of age
and persons with reduced physical or mental abilities or lack
of experience and knowledge unless they have been given
supervision or instruction in the safe use of the product and
understand the hazards involved.
• Children should not play with the product. Cleaning and
maintenance should not be done by unsupervised children.
• Children under the age of 3 should be kept away from the
product, unless they are under constant supervision.
• Children aged 3 to 8 years are only permitted to turn the
product ON/OFF, assuming the product is mounted accord-
ing to the assembly instructions and the children have re-
ceived instruction or supervision in the safe use of the prod-
uct and understand the hazards involved.
• The patio heater must not be placed at a distance of less
than 1 m to furniture, sunblinds or any other ammable mate-
rial
• The heater has to be connected to an electric socket ap-
proved for outdoor use.
EN 6 millnorway.com

KEEP THIS OPERATION MANUAL FOR FUTURE REFERENCE!
NEVER TOUCH THE PRODUCT WITH WET HANDS. NEVER COVER
YOUR PATIO HEATER
THE PRODUCT IS HOT—DO NOT TOUCH
EN 7 millnorway.com
Model Heating
lamp Cable Heating
capasity
Dimensions
(cm) Weight Power (W) IP rating Remote
control
JDB1500C
LCarbon Dark grey,
1,9 m* 5000 hours Ø 40*32 3,1 kg 1500 IP25 Yes
Specications
* Maximum length that is permitted under European Standard
Benets of Carbon heating element
This patio heater has a carbon heating element that provides a gentle and comfortable heat.
The element has a soft and pleasant light compared to traditional patio heaters that tend to
have a prominent red glare.
Description of patio heater
1. Heat emission
2. Indicator light/IR reciever for remote control
3. ON/OFF
4. Adjustment point for wire
5. Adjustable wire
6. Carabiner

Installation
• When unpacking the patio heater, check for missing parts and make sure that it is not
faulty or defective.
• Keep the packaging away from children as it can be dangerous.
• Make sure that the mains voltage matches the rated voltage on the type plate.
• Do not disassemble any of the heater components
• Never pull the power cable in order to move the patio heater.
• Make sure that the ceiling is rm and solid before any drilling or screwing.
• Always use the supplied suspension, wire and carabiner when installing the product to
the ceiling. Inspect it for damages and make sure it is intact.
• The patio heater should be installed so that it hangs at a distance of at least 1,8 m from
the oor and 0,6 m from the ceiling or superstructure (please see the illustration below).
• The patio heater should be placed at a distance of at least 0,8 m from adjacent walls or
any other objects on both sides (please see the illustration below).
• There should always be a safety distance of at least 1,0 m below the heater.
• The heater must be connected to an earthed socket.
• Do not turn on the patio heater before the installation is complete.
EN 8 millnorway.com
Minimum distances

EN 9 millnorway.com
How to install the patio heater:
This product must be mounted to a solid and secure ceiling outdoor. Use the supplied suspen-
sion to mount the patio heater to the ceiling. Install the suspension to the ceiling by using the
supplied screws. Make sure the suspension is securely fastened before you attach the patio
heater by connecting the carabiner to the suspension. Please see illustration below.
Adjust the height of the patio heater with the adjustable wire. To adjust the height; use a screw-
driver to loosen the two screws connected to the wire (adjustment point for wire). When the
screws as loosened you can easily drag the end of the wire to nd your desired height for the
patio heater.
Tip! It may be easier to adjust the height when the patio heater is installed and
hanging from the ceiling.

EN 10 millnorway.com
Operation
To switch the patio heater on:
1. Put the plug into an electric socket
2. Press I on the ON/OFF button at the top of the patio heater to set the heater in standby
mode (green light)
3. Press the button at the back of the patio heater 1 time for 750W (orange light) and 2 times
for maximum effect of 1500W (red light).
Attention! Please be aware that the carbon heating element will take
some time to reach maximum effect.
As long as the heater has been set in standby mode (green light), you can use the wireless re-
mote control to turn the patio heater ON/OFF and adjust the heat by setting the watt power to
2 different levels; 750W (orange light) and 1500W (red light). Point the remote control in the di-
rection of the indicator light on the patio heater when using it. Battery type: 2 pcs AAA, not in-
cluded.
To switch the patio heater off:
1. Press o on the ON/OFF button at the top of the patio heater or press OFF on the remote
control
2. Pull the plug out of the electric socket.
Up arrow Up one heating level
Down arrow Down one heating level
MAX The heater goes directly to the
highest heating level.
On To switch the heater on:
Press ON/OFF button
Off
To switch the heater off:
Press ON/OFF button: the heat-
er will switch to standby mode
(green light).
Battery type 2 x AAA, not included.

EN 11 millnorway.com
Troubleshooting
Before you go through the troubleshooting procedure below, please check the following:
1. Check if there is electricity in the socket.
2. Make sure that the product is in standby mode. In other words, the ON/OFF switch at the
top of the patio heater is in position I and the indicator light is green.
Fault Cause Remedy
The product does not generate
heat and the receiver light does
not respond when a remote con-
trol button is pressed.
The battery has been improperly
inserted in the remote control, at
battery or defective remote con-
trol
Check whether the battery is properly in-
serted and make sure that the battery is not
at. Try to use manual control.
In case the problem persists after the
abovementioned corrections, contact Mill
and request a new remote control
The product does not generate
heat but the receiver light re-
sponds as if the heater is
switched on when pressing differ-
ent heating levels on the remote
control.
Defective heating lamp Please return the product to the dealer.
The product does not generate
heat and the receiver indicator is
not on
Defective product Make sure that you have checked items 1-2
above. If the problem persists, the product
is defective. Return the product to the deal-
er.

Maintenance
The maintenance is simple and does not involve dismantling or moving parts. Make sure that
the power is off and that the heater is cold before wiping the product with a dry cloth.
Do not touch the heating lamp with your hands or with hard objects.
Do not use abrasive or corrosive agents to wash the patio heater.
Guarantee
The guarantee is valid for a period of two years. If a fault occurs during this period, the product
will be repaired or replaced. In order for the guarantee to apply, the product must be used ac-
cording to the instructions described in this operation manual and a receipt must be presented.
In case of a product fault, please contact the store, where you have purchased the product, or
the product importer.
Waste Management
The symbol indicates that this product may not be thrown away along with ordinary house-
hold waste. In order to prevent possible damage to the environment or to human health, the
product must be delivered for refurbishment of electric and electronic equipment. Your local
electricity company or recycling station can manage the environmentally friendly destruction or
refurbishment of such products.
In case of a complaint, please indicate the serial number and enclose the original receipt.
In case of a complaint, questions about the product or spare parts, please contact your dealer
or Mill International AS
Mill International AS
Grini Næringspark 10
1361 Østerås
Tlf: +47 22 13 32 00
facebook.com/millnorway
millnorway.com
EN 12 millnorway.com

Innhold
Viktig sikkerhetsinformasjon...……………………………………………………………………………….....4-6
Spesikasjoner .............................................................................................................................7
Fordeler med karbon varmeelement………………………………………………………………….…………7
Beskrivelse av terrassevarmer……………………………..……………………………………..……………….7
Installasjon.....................................................................................................................................8
Minimumavstander…………………………………………………………………………………………………...….8
Hvordan installere terrassevarmeren…...…………………………………………………………….……....9
Bruk ...............................................................................................................................................10
Feilsøking………............................................................................................................................11
Vedlikehold...……………………………………………………………………………………………………………....12
Garanti og avfallshåndtering………..........................................................................................12
NO 3 millnorway.com

Viktig sikkerhetsinformasjon
Vanlige sikkerhetsregler må alltid følges ved bruk av elektriske
artikler, spesielt når barn er tilstede.
ADVARSEL! For å unngå elektrisk støt eller skader på
grunn av varme, pass alltid på at støpselet er trukket
ut før produktet yttes eller rengjøres.
• Les bruksanvisningen nøye
• Produktet skal kun ment for utendørs bruk
• Sørg for at produktet kobles til husets vanlige strømnett slik
produktets merke viser
• Nye produkter vil avgi en egen lukt når den brukes
• Sjekk at det ikke har falt rester (isopor/papp) fra innpakning-
en ned på varmerøret til produktet. Slike rester må fjernes
for å unngå ubehagelig lukt
• Unngå at produktet blir overopphetet – må ikke tildekkes
• Skru alltid ovnen (Off) og dra ut kontakten når den ikke er I
bruk over lengre tid
• Vær spesielt oppmerksom hvis produktet er i bruk hvor barn,
handikappede eller eldre oppholder seg
• Produktet må ikke monteres opp rett ”under” et elektrisk
kontaktpunkt
• Ledningen må ikke legges under tepper av noe slag. Påse at
den ligger på en slik måte at ingen kan snuble I den
• Produktet må ikke brukes hvis ledningen eller kontakten er
skadet. Den må ikke brukes hvis den har falt i bakken (gulvet)
eller er skadet på annen måte, slik at den ikke fungerer nor-
malt
• Hvis ledningen blir skadet må denne bli reparert av en fag-
person for å unngå farlige situasjoner
• Unngå å bruke skjøteledning, da en slik ledning kan bli
overopphetet og muligens starte en brann
EN 4 millnorway.com

• Dekk aldri til luftinntakene på produktet. Unngå en mulig
brann ved å sørge for at ovnens luftinntak ikke er sperret
eller tildekket. Ovnen brukes I rom med vanlige rette gulv
• Ovnen må ikke monteres rett ved brennbart materiale av noe
slag da det alltid kan være en fare for brann
• Ovnen må ikke brukes I rom hvor det lagres bensin, maling
eller andre let antennelige væsker som for eks. I en garasje
• Produktet har en IP grad på IP25
• Ikke berør varmerøret med bare ngrene. Hvis varmerøret
berøres ved en feil, skal ngeravtrykk vaskes bort med en
myk klut fuktet med rødsprit. Fingeravtrykkene etterlater seg
fett som kan brenne seg fast. Dette forkorter varmerørets le-
vetid
• Kontroller at produktet er montert på en trygg måte, og sitter
godt fast I taket
• Ta aldri på produktet med våte hender.
• Produktet blir varmt når det står på. Vær derfor oppmerksom
slik at du unngår å brenne eller svi huden din
• Produktet må være skrudd av, kontakten tatt ut og ovnen
være kald før det blir yttet på
• Unngå overbelastning på strømnettet (kursen) hvor produk-
tet er tilkoblet. Ta hensyn hvis annen elektrisk apparatur er
koblet til samme strømuttak eller kurs
• Produktet kan ikke benyttes av barn under 8 år og personer
med reduserte fysiske eller psykiske evner eller som mangler
erfaring og kunnskap, om de ikke får tilsyn eller instruksjoner
om bruk av apparatet på en sikker måte og forstår farene
som er involvert.
• Barn skal ikke leke med produktet. Rengjøring og vedlikehold
skal ikke utføres av barn uten tilsyn
• Barn under 3 år skal holdes unna produktet med mindre de
har kontinuerlig tilsyn
NO 5 millnorway.com

• Barn i alderen 3 til 8 år kan kun slå AV/PÅ produktet, forutsatt
at produktet er montert slik monteringsanvisningen viser, og
barna har fått instruksjon eller tilsyn vedrørende bruk av
produktet på en sikker måte og forstår farene som er in-
volvert
• Terrassevarmeren må ikke plasseres I en avstand mindre
enn 1 m fra møbler, markiser eller annet brennbart materiale
• Produktet må være tilkoblet en stikkontakt som er godkjent
for utendørs bruk
NO 6 millnorway.com

TA VARE PÅ DENNE BRUKSANVISNINGEN!
ALDRI BERØR MED VÅTE HENDER - ELLER DEKK TIL DIN TERRASSE-
VARMER
PRODUKTET ER VARMT—IKKE RØR
NO 7 millnorway.com
Modell Varmerør Ledning Varmekapa-
sitet
Dimensjo-
ner
(cm) Vekt Effekt (W) IP-grad Fjern-
kontroll
JDB1500CL Karbon Mørk grå
1,9 m* 5000 hours Ø 40*32 3,1 kg 1500 IP25 Yes
Spesikasjoner
* Maksimum lengde som er tillatt i følge Europeisk standard
Fordeler med karbon varmeelement
Denne terrassevarmeren har et karbon varmeelement som avgir en skånsom og komfortabel
varme. Dette elementet har et dempet og behagelig lys i motsetning til tradisjonelle terrasse-
varmere som ofte har et fremtredende glødende rødt lys.
Beskrivelse av terrassevarmer
1. Varmeutslipp
2. Indikatorlys/IR mottaker for fjernkontroll
3. PÅ/AV
4. Justeringspunkt for vaier
5. Justerbar vaier
6. Karabinkrok
7. Effektvelger; 2 effektnivåer: 750W og 1500W

Installasjon
• Sjekk at terrassevarmeren er komplett, uten opplagte feil eller mangler når du pakker
den ut
• Hold emballasjen vekk fra barn, den kan være farlig
• Kontroller at nettspenningen stemmer overens med merkespenningen på typeskiltet.
• Ikke demonter noen deler av varmeren
• Dra ikke i strømkabelen for å ytte terrassevarmeren
• Vær sikker på at taket er fast og solid før boring eller skruing.
• Bruk alltid medfølgende oppheng, vaier og karabinkrok når du monterer produktet til
taket. Sjekk at det ikke er noe skader på delene.
• Terrassevarmeren bør installeres minst 1,8m fra bakken og 0,6 m fra tak eller overbygg
(vennligst se illustrasjon under).
• Terrassevarmeren bør plasseres minst 0,8 m fra tilstøtende vegger eller andre gjenstan-
der på begge sider (vennligst se illustrasjon under)
• Det bør alltid være minst 1,0 m sikkerhetsavstand under terrassevarmeren.
• Terrassevarmeren må tilkobles jordet kontakt.
• Sett ikke på terrassevarmeren før installasjonen er ferdig.
NO 8 millnorway.com
Minimumavstander

NO 9 millnorway.com
Hvordan installere terrassevarmeren:
Dette produktet må monteres til et solid og sikkert tak/overbygg utendørs. Bruk opphenget som
medfølger produktet for å feste terrassevarmeren til taket. Fest opphenget til taket ved å skru
inn medfølgende skruer. Vær sikker på at opphenget er festet godt før du henger opp terrasse-
varmeren ved hjelp av medfølgende karabinkrok som festes til opphenget. Vennligst se illustra-
sjon nedenfor.
Juster høyden på terrassevarmeren med den justerbare vaieren. For å justere høyden; bruk en
skrutrekker for å løsne de to skruene som er plassert nederst på vaieren (justeringspunkt for
vaier). Når skruene er løst opp kan du enkelt dra i enden av vaieren for å nne din ønskede høyde
for terrassevarmeren.
Tips! Det kan være enklere å justere høyden når terrassevarmeren er installert og
henger fra taket.

NO 10 millnorway.com
Bruk
For å skru på terrassevarmeren:
1. Sett støpselet i en stikkontakt
2. Trykk på I på AV/PÅ knappen på toppen av produktet for å sette produktet i standby mo-
dus (grønt lys)
3. Trykk på knappen på baksiden av produktet 1 gang for 750W (oransje lys) og 2 ganger for
maks effekt på 1500W (rødt lys).
OBS! Vær oppmerksom på at det vil ta litt tid før karbon varmeelemen-
tet oppnår maks effekt
Så lenge terrassevarmeren har blitt satt i standby modus (grønt lys), kan du bruke fjernkontrol-
len for å skru terrassevarmeren PÅ/AV og justere varmen ved å sette watt styrken til 2 ulike ni-
våer; 750W (oransje lys) og 1500W (rødt lys). Hold fjernkontrollen i retning mottakerlyset på ter-
rassevarmeren når den er I bruk. Batteritype: 2 stk. AAA, medfølger ikke.
For å skru av terrassevarmeren:
1. Trykk inn o på AV/PÅ knappen på toppen av produktet eller trykk på OFF på fjernkontrol-
len.
2. Dra støpselet ut av stikkontakten
Pil opp Opp et varmenivå
Pil ned Ned et varmenivå
MAX
Varmeren går direkte til høyeste
varmenivå
Indikatorlyset lyser RØDT
On For å skru på produktet:
Trykk en gang på ON/OFF knap-
Off
For å skru av produktet:
Trykk en gang på ON/OFF knap-
pen: Produktet er nå i standby
modus (grønt lys).
Batteritype 2 x AAA, medfølger ikke.
Table of contents
Languages:
