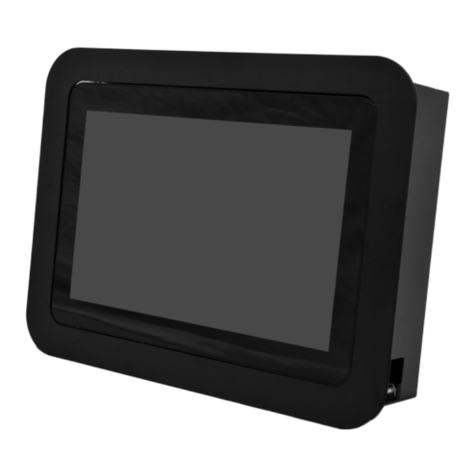
Mimo Monitors Adapt-IQ User manual

Model: MCT-70HPQ, MCT-70HPQ-POE
Please keep this manual for future reference.
TABLE OF CONTENTS
PAGE
DECLARATION……………....…………………..............……………............…....1
PRODUCT INSTRUCTIONS……….......……..............…………………....………………1
POWERING ON THE PRODUCT………...........………………………...….....….……….2
INSERTING THE SD CARD.....………………….................………………………………3
INSERTING USB DEVICES……………..................……………......…………….……….3
HOME SCREEN.......………..…………….....................………….…......................……4
COMBINED SYSTEM BAR…....................................................................................8
USE APPS............................................................................................................…11
LANGUAGE………………......…............................................................……12
DATE & TIME……………….....….......….............................…...................................13
VOLUME………………......….......….............................…...................................14
WI-FI....................………………......….......….............................................19
ETHERNET....................………………......….......….............................................20
VIRTUAL KEYBOARD....................…....……………......…........................................23
SWITCH INPUT METHODS......................………......….......…................................24
SURF ONLINE................………………......….......….................................................29
BROWSE FILES................………………......….......…...............................................30
PLAY MEDIA................………………......….......…...................................................31
RESET TO FACTORY DEFAULT................………....................................................36
Adapt-IQ 7” User’s Manual

Mimo Monitors
Sales: 1-855-YES-MIMO (937-6466)
1
Declaration
Please read the instructions carefully before equipment installation and
using the device.
Do not put the product in high temperature, humid or dusty environment.
Do not drop, crash or break down this product.
Do not power off the device when it’s formatting or upgrading, otherwise it
will cause operation system error.
This product is not waterproof.
Use only approved add-on enhancements.
1. Camera (optional): 2M pixel camera
2. LED Indicator:
Red System is booting.
Green System is working properly.
Light Off Power supply is off.
3. SD Card Slot / Cover: support external SD card
4. Escape Button: return to the previous page
5. Function Keys (Up / Down): select the up/down item
6. Function Keys (Vol+ / Vol-): adjust the system volume
7. Speaker: audio output
8. VESA Mount Holes: for installing the bracket
9. DC In Jack: powered by 12V/2A DC input
10. Ethernet RJ45 Port: support Ethernet connection (10/100Mbps LAN)
11. USB Port: support USB 2.0 high speed 480Mbps
12. Micro-USB Port: support USB 2.0 high speed 480Mbps
13. Power Switch: switch power ON/OFF
14. Add-on module slot: to put optional add-on module
15. Headset + Microphone Jack
16. WIFI: 802.11b/g/n/ac 2.4G
17. Temperature:
:
Operation: 0℃~ 40℃( 32F ~104F)
Storage: -10°C ~ 55°C (14°F ~ 131°F)
Product Instruction

Mimo Monitors
Sales: 1-855-YES-MIMO (937-6466)
1
2
1
2
3
4
5 ‐
6
2
1
2 ‐
3
1 ‐
2 ‐
4
Mechanical Design
1. Wi-Fi Antenna
2. Speakers x 2 (8-ohm, 2W)
3. COM2 (RS-232)
4. COM1 (RS-232)
5. Power Switch
6. VESA mount (75mm x 50mm)
7. L AN
8. Micro USB
9. GPIO
10. Mini HDMI
11. USB Type-A
12. DC Power IN
13. COM1 (RS-232)
14. COM2 (RS-232)
15. Power LED
16. USB Type-A
1
22
3
4
5
6
7 8 9 10 11 12
13 14
15 16

Mimo Monitors
Sales: 1-855-YES-MIMO (937-6466)
::℃ ℃
Power on the Product
Step1 Power on the power adapter that connected to this product.
Step2 Switch the power switch (#13in Product Instruction) on the back of
this product to ON.
Insert SD Card
This product supports external SD card. Please insert your SD card into the
SD Card Slot (#3 in Product Instruction) on the top of this product.
Insert USB Devices
This product supports USB and Micro-USB to deal with your files.
USB
Plug your USB memory into the USB port (#11in Product Instruction) on
the bottom of this product, and then you can do the file operations via the File
Browser. (See the details in Browse Files).
Micro-USB
Connect the Micro-USB port (#12 in Product Instruction) on the bottom of
this product and the USB port on your computer with a Micro-USB-to-USB
cable.
Click the “Turn on USB storage” button in the “USB mass storage” window
that pops up automatically to make the device memory visible in your
computer.
3

Mimo Monitors
Sales: 1-855-YES-MIMO (937-6466)
4
Home Screen
When the system starting completed, you will see the home screen.
In the home screen, you will see some app or widget icons. By long-press of
an icon, you can drag it to where you like.
If you want to remove an icon, sweep the icon up to the top of the screen.
By long-press of any space on a screen, wallpaper selection and widget
icons will occur. You could choose your wallpaper from “Wallpapers”.

Mimo Monitors
Sales: 1-855-YES-MIMO (937-6466)
5
Widgets
Clicking the “widgets”will open the widgets tab.
By long pressing an application, you could create a widget in the home page.

Mimo Monitors
Sales: 1-855-YES-MIMO (937-6466)
6
Combined System Bar
Navigation Buttons
1. Volume-: Decrease the system volume.
2. Back: Return to the previous page.
3. Home: Return to the home screen.
4. Recents: Switch between recently used apps.

Mimo Monitors
Sales: 1-855-YES-MIMO (937-6466)
7
To remove an app from the list, you could long-press the icon to select
“Remove from the list”.
Or swipe the app item up or down to remove it.

Mimo Monitors
Sales: 1-855-YES-MIMO (937-6466)
8
5. Volume+: Increase the system volume.
Status Notifications
The upper-right corner of the home page displays time, Wi-Fi and Ethernet
connection.
Slide down the upper-right of screen to open context menu.

Mimo Monitors
Sales: 1-855-YES-MIMO (937-6466)
9
Brightness
Click “BRIGHTNESS”in context menu. In details, you can see the
brightness tool.
Slide the brightness button to adjust the brightness of the screen.
Use Apps
Click at the right side of home screen to show the applications’page.

Mimo Monitors
Sales: 1-855-YES-MIMO (937-6466)
10
The installed applications will be shown here and you can open an app by
clicking its icon.
To find an app easily, you can create a shortcut of the icon by long-pressing
and drag it to the home screen.
Language
In the App list, click “Settings” to open the system setting app, and
select the option “Language & input”.

Mimo Monitors
Sales: 1-855-YES-MIMO (937-6466)
11
Click the first option “Language”under “Language & input”, and then you
can change the system language according to your preference.
Date & Time
In the App list, click “Settings” to open the system setting app, and
select the option “Date & time”.
If you enabled the option “Automatic date & time”under “Date & time”,

Mimo Monitors
Sales: 1-855-YES-MIMO (937-6466)
12
system date and time will be synchronized automatically with network time
when you connected a Wi-Fi network.
If you want to set the time manually, you need to disable “Automatic date &
time”.
In this option, you can also set time zone, time notation and date format.
Volume
On the system bar, click the Volume- icon to decrease the system
volume, and click the Volume+ icon to increase the system volume.
Or you can press the function keys (#6in Product Instruction) on the top of
the product to adjust the volume.
Wi-Fi
In the App list, click “Settings”to open the system setting app, and
select the option “Wi-Fi”.

Mimo Monitors
Sales: 1-855-YES-MIMO (937-6466)
13
Switch the Wi-Fi button to ON. The product will scan available wireless
networks automatically. Select a network under Wi-Fi networks and input the
password to connect.
Ethernet
In the App list, click “Settings”to open the system setting app, and
select the option “Ethernet”.

Mimo Monitors
Sales: 1-855-YES-MIMO (937-6466)
14
Switch the Ethernet button to ON and plug the Internet cable into the
Ethernet port (#10in Product Instruction). If you are Static IP user, please
set the configurations manually.
Virtual Keyboard
The device provides a virtual keyboard for typing. You can use it as a real
one.
When you click in a text input box, the virtual keyboard will appear at the
bottom of the screen.
To collapse the virtual keyboard, you can click the icon in the system
bar.
Switch Input Methods
Click the second key in the lower left corner of the software disk to switch
languages,pop-up "Choose input method" dialog box.

Mimo Monitors
Sales: 1-855-YES-MIMO (937-6466)
15
If the keyboard icon is invisible, please check whether the installed input
method is selected in the “Language & input”option under the system
setting app.
Surf Online

Mimo Monitors
Sales: 1-855-YES-MIMO (937-6466)
16
In the App list, click “Browser”to open the browser.
When connecting the device to a network, you can visit websites, play online
media or download files via the browser.
In a browser window, enter in a URL in the address bar and click “Go” in the
virtual keyboard to go. You can also click to add new tabs to make
multiple tabs opened simultaneously.
Browse Files
In the App list, click “Explorer”to view local files.

Mimo Monitors
Sales: 1-855-YES-MIMO (937-6466)
17
Click to select one or several files, and click it again when you want to
deselect.
Click to do file operations, such as cut, copy, paste, delete, rename
and send.

Mimo Monitors
Sales: 1-855-YES-MIMO (937-6466)
18
Play Media
With the provided apps, you can play your media files on your storage, such
as pictures, music and videos.
Picture Player:
Support jpg, gif, png, bmp, etc.
Music Player:
Support mp1, mp2, mp3, aac, flac, ape, ogg, wav, wma, etc.
Movie Player:
Support mkv, ts, flv, avi, vob, mpg, dat, asf, rm,mov, 3gp, mp4,wmv, etc.
Reset to Factory Default
Please make sure to back up the important data before resetting the device.
In the App list, click “Settings” to open the system setting app, and
select the option “Backup & reset”.

Mimo Monitors
Sales: 1-855-YES-MIMO (937-6466)
19
Click “Factory data reset”.
Click “Reset tablet”button.
This manual suits for next models
2
Table of contents
Other Mimo Monitors Tablet manuals

Mimo Monitors
Mimo Monitors Adapt-IQ 7" MCT-70QDS User manual

Mimo Monitors
Mimo Monitors Adapt-IQ 7" MCT-70QDS User manual

Mimo Monitors
Mimo Monitors MCT-215HPQ-TMPMD User manual

Mimo Monitors
Mimo Monitors Adapt-IQ 7" MCT-70QDS User manual

Mimo Monitors
Mimo Monitors MWB-10-BSBI User manual

Mimo Monitors
Mimo Monitors Adapt-IQ MCT-70HPQ User manual