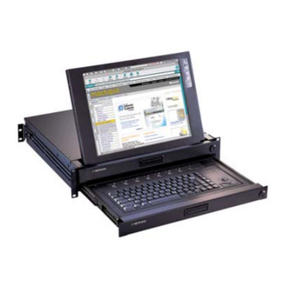
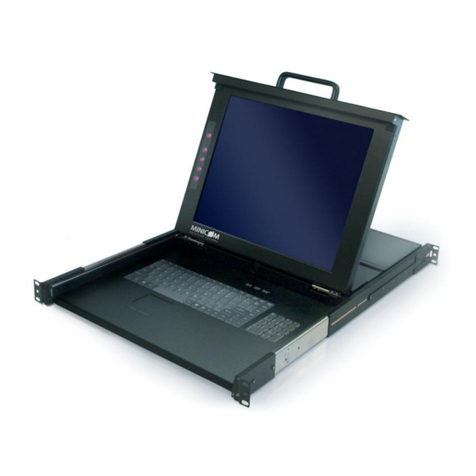
Minicom SMARTRACK 116 IP User manual

www.minicom.com
InternationalHQ
Jerusalem,Israel
Tel:+9722535 9666
minicom@minicom.com
NorthAmericanHQ
Linden,NJ,USA
Tel:+1908486 2100
info.usa@minicom.com
EuropeanHQ
Dbendorf,Switzerland
Tel:+4144823 8000
info.europe@minicom.com
Technicalsupport - support@minicom.com
5UM20182 V1.1 11/08
SmartRack116 IP
UserGuide

SMARTRACK 116IP
1
TableofContents
1. Welcome......................................................................................................................4
SectionI...........................................................................................5
2.Introduction.................................................................................................................5
2.1Keyfeatures........................................................................................................................................5
2.2Compatibility........................................................................................................................................6
3. Systemcomponents....................................................................................................6
4. Hardwarekitcontents.................................................................................................6
5. Pre-installationguidelines...........................................................................................7
5.1Avoidinggeneral rackmountingproblems.........................................................................................8
6. Connectingtoarack...................................................................................................8
6.1Usingthelongerbracket forrackdepthof 905~990mm...............................................................11
6.2Connecting theKVMSwitch116IP.................................................................................................12
7. TheSmartRackSwitchsystemconfiguration...........................................................14
7.1The116switch..................................................................................................................................14
7.1.1Connectortable........................................................................................................................15
7.2Connecting ROCstoservers............................................................................................................15
7.2.1ConnectingaROCPS/2..........................................................................................................15
7.2.2ConnectingaROCUSB...........................................................................................................16
7.3Connecting theCAT5cables............................................................................................................17
7.4Connecting tothenetwork................................................................................................................17
7.5Connecting thepowersupply...........................................................................................................17
8. Terminology..............................................................................................................17
9.Initialsettings-DefaultIPaddress...........................................................................17
9.1StaticIPaddressesforanumberof units........................................................................................18
10.Logging intotheWebinterface...............................................................................20
10.1SSLCertificatenotes......................................................................................................................20
11. Network>Configuration.........................................................................................21
11.1LAN1...............................................................................................................................................21
11.2KVM.net...........................................................................................................................................22
12. Network>SNMPSettings.......................................................................................22
12.1SNMPEventstable.........................................................................................................................23
13. Administration >UserSettings...............................................................................25
13.1Addingauser..................................................................................................................................26
13.2Editingauser..................................................................................................................................26
13.3Deletingauser................................................................................................................................26
13.4Blocking auser................................................................................................................................26
14. Administration >SwitchConfiguration...................................................................27
15. Administration >UserTargets................................................................................27
16. Security>Settings..................................................................................................28
17. Security>SSLCertificate.......................................................................................29
18.Maintenance>FirmwareUpgrade...........................................................................30
19. RestoreFactorySettings.........................................................................................30

USERGUIDE
2
20. Savingchangesand loggingout.............................................................................31
21. Starting aremotesession.......................................................................................31
21.1Taking overabusyremotesession................................................................................................33
21.2TheToolbar.....................................................................................................................................33
21.3Switchingtoadifferentserver........................................................................................................34
21.4Changingtheperformancesettings...............................................................................................34
21.5Adjusting theVideo settings...........................................................................................................35
21.5.1Refresh....................................................................................................................................35
21.5.2Manual Video Adjust...............................................................................................................35
21.5.3AutoVideo Adjust...................................................................................................................36
21.6Powercycle.....................................................................................................................................37
21.7Keyboardkeysequences...............................................................................................................37
21.8Synchronizingmousepointers.......................................................................................................38
21.8.1Aligningthemicepointers......................................................................................................39
21.8.2Calibrating micepointers........................................................................................................39
21.8.3Manual micesynchronization.................................................................................................39
21.9Minicomicon menu features...........................................................................................................41
21.10Fullscreen mode...........................................................................................................................42
21.11Disconnectingtheremotesession...............................................................................................42
22.Troubleshooting -Safemode..................................................................................42
22.1EnteringSafemode........................................................................................................................43
22.2Restoringfactorydefaults...............................................................................................................44
22.3Restoringthedevicefirmware........................................................................................................45
SectionII........................................................................................46
23. Switchingbetweencomputers................................................................................46
23.1Thekeyboardhotkeys.....................................................................................................................46
24.TheOSD...................................................................................................................46
24.1.1NavigatingtheOSD................................................................................................................47
24.1.2Selectingacomputer..............................................................................................................47
24.1.3TheOSDsettings(F2)............................................................................................................47
24.1.4TheGeneral settings..............................................................................................................48
24.1.5F7Defaults..............................................................................................................................50
24.1.6ThePortssettings...................................................................................................................50
24.1.7TheTimesettings...................................................................................................................51
24.1.8Users.......................................................................................................................................52
24.1.9Security...................................................................................................................................53
24.1.10 TheOSDHELPwindow–F1...............................................................................................53
24.1.11 Scanningcomputers–F4.....................................................................................................54
24.1.12 Tuning–F5...........................................................................................................................54
24.1.13 Movingthelabel –F6...........................................................................................................55
24.1.14 DDC –F10............................................................................................................................55
25. UpgradingtheSmartRack116IPfirmware.............................................................56
25.1SystemrequirementsfortheSmartRack116IPUpdatesoftware...............................................56
25.2ConnectingtheSmartRack 116IPsystem....................................................................................56
25.3Installingthesoftware.....................................................................................................................56
25.3.1ConnectingtheRS232Downloadcable................................................................................56
25.4Startingandconfiguring theSmartRack116IPUpdate................................................................57
25.4.1Verifyingtheversion numbers................................................................................................58
25.4.2Obtainingnewfirmware..........................................................................................................59

SMARTRACK 116IP
3
25.4.3Updatingthefirmware............................................................................................................59
25.4.4ManuallyupdatingROCs.......................................................................................................60
25.5Troubleshooting theUpdatesoftware............................................................................................60
25.5.1ResettingthroughtheUpdatesoftware.................................................................................61
25.5.2SettingdefaultvaluesfortheOSD.........................................................................................61
25.5.3Gettingthecurrent status.......................................................................................................61
25.5.4CommunicationErrormessage..............................................................................................61
25.5.5Electricityfailure......................................................................................................................61
26.Technical specifications..........................................................................................63
27. Videoresolution and refreshrates..........................................................................65
28. Safety.......................................................................................................................65
29. Userguidefeedback................................................................................................65
30. WEEEcompliance...................................................................................................65

USERGUIDE
4
1.Welcome
Thank youforbuyingtheSmartRack116 IPsystem. Thissystemisproducedby
MinicomAdvancedSystemsLimited.
ThisdocumentprovidesinstallationandoperationinstructionsforMinicom’s
SmartRack116 IP. Itisintendedforsystemadministratorsand networkmanagers,
and assumesthatreadershavea generalunderstanding ofnetworks, hardwareand
software.
Technicalprecautions
Thisequipmentgeneratesradiofrequencyenergyandifnotinstalledinaccordance
withthemanufacturer’sinstructions,maycauseradiofrequencyinterference.
ThisequipmentcomplieswithPart15,SubpartJoftheFCCrulesforaClassA
computingdevice. ThisequipmentalsocomplieswiththeClass Alimitsforradio
noiseemissionfromdigitalapparatussetoutintheRadioInterferenceRegulation
oftheCanadianDepartmentofCommunications. Theseaboverulesaredesignedto
providereasonableprotectionagainstsuchinterferencewhenoperatingthe
equipmentina commercialenvironment. If operationofthisequipmentina
residentialarea causesradiofrequencyinterference, theuser,and notMinicom
AdvancedSystemsLimited,willberesponsible.
Changesormodificationsmadetothisequipmentnotexpresslyapprovedby
MinicomAdvancedSystemsLimitedcouldvoidtheuser’sauthoritytooperatethe
equipment.
MinicomAdvancedSystemsLimitedassumesnoresponsibilityforany errorsthat
appearinthisdocument. Informationinthisdocumentissubjecttochangewithout
notice.
Nopartofthisdocumentmaybereproducedortransmittedinany formorbyany
means, electronicormechanical, forany purpose, withouttheexpress written
permissionofMinicomAdvancedSystemsLimited.
Trademarks
Alltrademarksand registeredtrademarksarethepropertyoftheirrespective
owners.
©2008CopyrightMinicomAdvancedSystems.Allrightsreserved.

SMARTRACK 116IP
5
SectionI
ThissectionexplainshowtoconfigureandoperatetheSmartRack116 IPsystem
remotelyoverIP.
Section II onpage46, explainshowtooperatetheSmart16 IP switchingsystem
locallythroughtheOnScreenDisplay(OSD).
2.Introduction
TheSmartRack116 IPextendsyourKVM(keyboard,video, and mouse)fromany
computerorserveroverTCP/IPvia LAN, WANorInternetconnection. Nowyou
cancontrol, monitorand manageup to16 remoteserversfromwhereveryouare,
insideoroutsidetheorganization. TheSmartRack116 IP isacost-effective
hardwaresolution, forsecureremoteKVMaccess &controlof16
computers/serversfromtheBIOS level-independentoftheOS. Onelocalanalog
oroneremotedigitalIP usercanaccess and control16 multi-platforms(PS/2,
USB)serversata time.
TheSmartRack116 IPisbasedonMinicom’sinnovativeROCtechnologyin
whicheachcomputer/serverisdirectlyconnectedtotheswitchvia ROCdongles
usingonlystandardCAT5cableata distanceofup to30m/100ftina star
configuration. NoexternalpowerisneededattheremoteROCs.
Occupyingjust1Uofrackspace, it’stheneat, space-saving waytocontrolyour
datarack. Itcomeswithall thehardwareyouneedtomountit, and iseasyto
install.
Youcanaccess and controlup to16 multi-platformcomputersfromoneKVM
(keyboardvideomouse)console.
Toaccess servers, justslideoutthedrawerand flipup itstoptodisplaythelarge,
high resolution17”TFTLCDdisplay.
Thedisplayis(VGA/SVGA/XGA/SXGAcompatible)withfront-panelhigh-
qualitycontrolsand Touchpadforeasyadjustment.
2.1Keyfeatures
BIOSlevelcontrol toanyserver’sbrand and model, regardless oftheserver
conditionandnetworkconnectivity, coveringtheentirespectrumofcrash
scenarios.
Compatible withall majoroperatingsystems. Supportsmanyhardwareand
softwareconfigurationsfortheremoteclientandthetargetservercomputers,as
wellastheKVMswitchinuse.

USERGUIDE
6
Web-basedcontrol- Browsercontroltoa targetserver, fromany locationvia
securedstandardIP connection.
Multi-userviewmode- Allowssimultaneoususerstoviewremotesessions.
Remotecontrolcanbeintuitivelyhandedbetweenuserswithappropriate
permissions.
Security -Supportsthehighestsecuritystandardsforencryption(128 bitSSLand
HTTPS)and authenticationforremoteuserand advancedOSDmanagementwith
multi-layersecurityforlocaluser.
KVM.net - CanbecontrolledbyMinicom’sKVM.netsystemforcentralized
over-IPmanagementofdistributeddata centerlocations.
2.2Compatibility
TheSmartRack116 IPiscompatiblewith:
•PS/2and USBcomputers/servers
•Windows, Linux, UNIXandothermajoroperatingsystems
3.Systemcomponents
TheSmartRack116 IPsystemconsistsof:
•1SmartRack116 IP
•1RS232 Downloadcable(p/n5CB40419)
•ROCS-PS/2,USB
•CAT5cables(1.5mprovided)
4.Hardwarekitcontents
Rail withfrontand rearbracketx2,
forrackdepthof614 ~800 mm.
Rightand leftsidesaredifferent.

SMARTRACK 116IP
7
Longbracketx2. (Forincreasedrack
depthof905 ~990mm)
Shortbracketx2
Bracketattachmentx2
Note! Theshortbracketandbracketattachmentfora rackdepthof504~614 mm
and withouta KVMswitchconnectedtothedrawer.
Flatscrewsx6(forrail mounttoconsolebody)
Screwsx6
BracketAwiththumbscrewx2
Screwsx4
Keysx2.
5.Pre-installationguidelines
•Switchoff all computers
•Placecablesawayfromfluorescentlights,airconditioners, and machinesthat
arelikelytogenerateelectricalnoise
•Ensurethatthemaximumdistancebetweeneachcomputerand theSmartRack
116 IPdoesnotexceed30m/100ft

USERGUIDE
8
5.1Avoidinggeneral rack mountingproblems
Elevatedoperatingambienttemperature
Theoperatingambienttemperatureoftherackenvironmentmaybegreaterthan
theroomambientwheninstallingintoa closedormulti-unitrackassembly. So
install theequipmentinanenvironmentcompatiblewiththemaximumrated
ambienttemperature.
Reducedairflow
Installtheequipmentina rackinsucha waythattheamountofairflowrequired
forsafeoperationisnotcompromised.
Mechanicalloading
Mounttheequipmentintherackinsucha waythatahazardousconditionisnot
achievedduetounevenmechanicalloading.
Circuitoverloading
Whenconnectingtheequipmenttothesupplycircuit, considertheeffectthat
overloadingofcircuitsmighthaveon over-currentprotectionandsupplywiring.
Reliableearthingofrack-mountedequipmentshouldbemaintained. Giveattention
tosupplyconnectionsotherthandirectconnectionstothebranchcircuit(e.g. useof
powerstrips).
6.Connectingtoarack
Note!Forincreasedrackdepthof905 ~990mm,firstchangethebracket, see
section 6.1onpage11.
Note!TheillustrationsbelowshowtheconnectionstoonesideoftheSmartRack
116 IP.Theconnectionsarethesamefortheotherside.
1.Movetherail until twoscrewsappear,seeFigure1.
Figure1Exposing the2screws
2.Loosenslightlythe7screwsasshownbelow.

SMARTRACK 116IP
9
Figure2Loosen7screws
3.Adjusttherearbrackettofityourcabinet, seebelow.
Figure3Adjusting thebracket
4.Installthefrontand rearbracketontothecabinet, seefigurebelow.
Figure4Installing frontand rearbracketon cabinet
5.Tightenthe7screwsasshownbelow.

USERGUIDE
10
Figure5Tightening the7screws
6.Repeatthestepsabovetoconnecttheotherrail totheothersideoftherack.
7.SlidetheSmartRackconsolebetweentherailsasshownbelow.
Figure6Sliding theSmartRackbetweentherails
8.Unlockandpull bothleftand rightrail–lockswitchestogether–seebelow–
and pushtheconsoleall thewayintotherack.
Figure7Rail–lockswitch
9.Connectthreeflatscrewstotherearoftheconsoleon bothsides. Seefigure
below.

SMARTRACK 116IP
11
Figure8Connecting threeflatscrewstotherearoftheconsole
Theconsolenowsitssnuglyintherack, seeFigure9.
Figure9Consoleintherack
6.1Usingthelongerbracketforrack depthof905 ~990mm
Toreplacethebracketwiththelongerbracket:
1.Loosenthe7screwsasshownbelow.
Figure10 Loosening the7screws
Removethesix(different)screwsasshownbelow.

USERGUIDE
12
Figure11 Removing thesixscrews
2.Taketherearbracketout, seebelow.
Figure12 Taking therearbracketout
3.Insertthelongbracketintotherail thenadjustthebrackettofityourcabinet.
Tightenatleast2~3screwsalongthelengthyouneed.SeeFigure13.
Figure13 Inserting and tightening thelong bracket
4.Repeattheabovestepsfortheotherside.
5.Gotosection 6Connecting toa rack.
6.2ConnectingtheKVMSwitch116 IP
1.ConnectthebracketAtothesidesoftheSwitchusingthetwo6mmscrews
providedseefigurebelow.

SMARTRACK 116IP
13
Figure14 Connecting thebracketAto thesidesoftheSwitch
2.SlidetheSwitch116 IP intotherail andintothebackoftheSmartRackconsole
untilyouheara click. Seethefigurebelow.
Figure15 SlideswitchintobackofSmartRack
3.SecuretheSwitch116 IPtotherail byinserting thethumbscrewsthroughthe
bracketand intotherail andtighteningthem, seeFigure16.
Figure16 Tightening thethumbscrews

USERGUIDE
14
7.TheSmartRackSwitchsystemconfiguration
Youconnectserverstothe116IP switchvia ROCs.Figure17 illustratethebasic
configurationofthe116IP system.
12345678
10 11 12 13 14 15 169
MINICOM
I
0
SMARTRACK116IPSWITCH FLASH LAN
SERIAL
Toservers
ROCs
toservers
UseroverIP
Internet/ VPN/ LAN
SMARTRACK116IPSWITCH
CAT5cables
Upto30M/ 100ft
Figure17 SmartRack116IPSwitch systemconfiguration
7.1The116 switch
Power
connector
Serverports
LAN(Ethernet)
connector
Flash
(download)
connector
1 2 3 4 5 6 7 8
10 11 12 13 14 15 169
MINICOM
I0
SMARTRACK116IPSWITCH FLASH LAN
SERIAL
Figure18 116IPSwitchports

SMARTRACK 116IP
15
7.1.1Connectortable
Connector Function
Serial ThisportisforfutureSerialfunctionality
Flash Toupdatefirmwareoftheanaloguepartof the116 IPSwitch
system-OSD,Switch,ROCs.
LAN Connectto10/100MbitEthernet. YellowLedilluminateswhen
connectedtoLAN.GreenLEDilluminateswhenaremotesession
isinprogress
Serverports ConnecttoserversviaROCs
7.2ConnectingROCstoservers
Eachcomputer/serverisdirectlyconnectedtotheSmartRackswitchvia the
appropriateROCusingCAT5cableina starconfiguration. Noexternalpoweris
neededattheremoteROCs.TheROCsdrawtheirpowerfromthecomputer’s
keyboardport(ROCPS/2)orfromtheUSBport(ROCUSB). Thefiguresbelow
illustratetheROCPS/2and ROCUSB.
Tocomputer’s
keyboardport
Tocomputer’s
mouseport
Tocomputer’s
Video card
Figure19 ROCPS/2
Tocomputer’s
USB Port
Tocomputer’s
Video Card
Figure20 ROCUSB
7.2.1Connecting aROCPS/2
Figure21 illustratestheROCPS/2connections.
YoucanconnecttheROCPS/2toapoweredoncomputer, butitmustbeinthe
followingorder:

USERGUIDE
16
1.ConnecttheMouseconnectortothecomputer’sMouseport.
2.ConnecttheKeyboardconnectortothecomputer’sKeyboardport.
3.ConnecttheScreenconnectortothecomputer’sVideoport.
Failuretoconnectintheaboveorderwhiletheserverisrunning,mayleadtothe
mousemalfunctioninguntiltheserverisrebooted.
ToKeyboardport
CAT5cabletoswitch
Serverport
ToMouseport
To Videoport
ROCPS/2
Keybd
Mouse 100T
VideoSerial A
Parallel
PCI33Mx32b
PCI33Mx32b
PCI 33Mx32b
PCI 33Mx32b
Serial B
SCSI
Figure21 ROCPS/2connections
7.2.2Connecting aROCUSB
TheROCUSBsupportsWindows98 SEand later, MAC,SUN, SGIand all
modernLinux distributions. Figure22 illustratestheROCUSBanditsconnections.
ToconnecttheROCUSB:
1.ConnecttheScreenconnectortothecomputer’sVideoport.
2.ConnecttheUSBconnectortothecomputer’sUSBport.
ToUSB port
ToVideo port
ROCUSB
CAT5cable toswitch
Server port
Figure22 ROCUSB

SMARTRACK 116IP
17
7.3ConnectingtheCAT5cables
1.ConnectoneconnectortotheROC’sRJ45port.
2.ConnecttheotherconnectortooneoftheSmartRackSwitchServerports.
3.Followtheabove2stepsforeachcomputer.
7.4Connectingtothenetwork
ConnectthenetworkcabletotheLANport.Thismustbedonebeforepoweringon
theSmartRack116IPSwitch.
7.5Connectingthepowersupply
1.ConnecttheswitchtothepowersupplyusingthePowercordprovided. Only
usethePowercordsuppliedwiththeunit.
2.Powerontheswitch.
8.Terminology
Belowaresometermsand theirmeaningsusedinthisguide.
Term Meaning
Targetserver Thecomputers/serversthat areaccessedremotelyviathe
SmartRack116IP.
Clientcomputer ThePCrunningaremoteSmartRack116IPsession
Remotesession Theprocess ofremotelyaccessing and controllingTarget
ServersconnectedtoSmartRack 116 IPfromauser
workstation
9.Initialsettings-DefaultIPaddress
ThefollowingsectionsprovideinstructionsforsettingtheIP address forthe
SmartRack116 IPunit. SeeFigure23 foranoverviewoftheboot-up process.
Bydefault, SmartRack116 IPbootswithanautomaticallyassignedIP address
froma DHCP(DynamicHostConfigurationProtocol)serveronthenetwork. The
DHCP serverprovidesa validIP address, gatewayaddress andsubnetmask.
ToidentifytheIP address, theSmartRack116 IPMACaddress appearson the
undersideoftheSmartRack116 IPbox.Thedevicenumber(D.N.)canalsobe
foundthere.
If noDHCP serverisfoundonthenetwork, SmartRack116 IP bootswiththestatic
IP address:192.168.0.155.

USERGUIDE
18
Note! If a DHCP serverlaterbecomesavailable, theunitpicksup theIP settings
fromDHCP server.TokeepthestaticIP address, disableDHCP –explainedin
section 11.1on page21.
9.1StaticIPaddressesforanumberofunits
Whereyouwanttoconnectmorethan1SmartRack116 IPtothesamenetwork
and thereisnoDHCPserver, oryouwanttousestaticIPaddresses, do the
following:
ConnecttheSmartRack116 IPunitsoneata timeandchangethestaticIPaddress
ofeachunitbeforeconnectingthenextunit.

SMARTRACK 116IP
19
IPaddressisassignedbytheDHCPserver
Yes
Unitbootsup
Toaccesstheconfigurationpageof theunit,openIE6.0orhigherandtype:
https://IPaddress/config
Defaultuser: admin
Defaultpassword: access
SetstaticIP
(deselecttheDHCP
andsettheIP)
Yes
TheunitoperateswiththestaticIPaddress
No
Devicenetworksetting
issettoobtain IPaddressfrom
DHCPServer
Yes
No
IsDHCPServer
presentinthe
connectedLAN? No
Every5minutes
DeviceIPis:
192.168.0.155
Figure23 boot-upprocess
Table of contents
Other Minicom LCD Drawer manuals
Popular LCD Drawer manuals by other brands

Network Technologies
Network Technologies RACKMUX-T15 Installation and operation manual

Avenview
Avenview RKVM Series user guide

NLS
NLS iTerm2 quick start guide

Zephyr
Zephyr Presrv PRRD24C1AS Use, care and installation guide

Smeg
Smeg CTPS613NR instruction manual

Synergy Global Technology
Synergy Global Technology LCD1U17-013 user manual