Mitsubishi WD-62530 User manual

LCD HIGH-DEFINITION TELEVISION
MODELS
WD-62530
WD-52531
WD-62531
OWNER’S GUIDE
• For questions:
- Call Consumer Relations at 800-332-2119.
- E-mail us at MDEAservice@mdea.com.
- Visit our website at www.mitsubishi-tv.com.
• For information on Demo Mode and System
Reset, please see the back cover.
• To order replacement or additional remote con-
trols, lamp cartridges, or Owner’s Guides, call
800-553-7278.
• Guidelines for setting up and using your new
widescreen TV start on page 13.

FCC Declaration of Conformity
Product: LCD High-Definition Receiver
Models: WD-62530, WD-52531, WD-62531
Responsible Party: Mitsubishi Digital Electronics America, Inc.
9351 Jeronimo Road
Irvine, CA 92618-1904
Telephone: 800-332-2119
This device complies with Part 15 of the FCC Rules. Operation is subject to the following two conditions:
(1) This device may not cause harmful interference, and
(2) this device must accept any interference received, including interference that may cause undesired operation.
Note: This equipment has been tested and found to comply with the limits for a Class B digital device, pursuant to
part 15 of the FCC Rules. These limits are designed to provide reasonable protection against harmful interference in a
residential installation. This equipment generates, uses and can radiate radio frequency energy and, if not installed and
used in accordance with the instructions, may cause harmful interference to radio communications. However, there is no
guarantee that interference will not occur in a particular installation. If this equipment does cause harmful interference to
radio or television reception, which can be determined by turning the equipment off and on, the user is encouraged to
try to correct the interference by one or more of the following measures:
• Reorient or relocate the receiving antenna.
• Increase the separation between the equipment and the receiver.
• Connect the equipment into an outlet on a circuit different from that to which the receiver is connected.
• Consult the dealer or an experienced radio/TV technician for help.
Changes or modifications not expressly approved by Mitsubishi could cause harmful interference and would void the
user’s authority to operate this equipment.
WARNING: This product contains chemicals known to the State of California to cause cancer and/or birth defects or
other reproductive harm.
CAUTION
The lightning flash with arrowhead symbol within an equilateral triangle is intended to alert the
user of the presence of uninsulated “dangerous voltage” within the product’s enclosure that
may be sufficient magnitude to constitute a risk of electric shock.
The exclamation point within an equilateral triangle is intended to alert the user to the pres-
ence of important operating and maintenance (servicing) instructions in the literature accom-
panying the appliance.
CAUTION: TO REDUCE THE RISK OF ELECTRIC SHOCK, DO NOT REMOVE COVER (OR BACK).
NO USER SERVICEABLE PARTS INSIDE. REFER SERVICING TO QUALIFIED SERVICE PERSONNEL.
RISK OF ELECTRIC SHOCK
DO NOT OPEN
C A U T I O N
WARNING: TO REDUCE THE RISK OF FIRE OR ELECTRIC SHOCK, DO NOT EXPOSE THIS
APPLIANCE TO RAIN OR MOISTURE.

For Your Records
Record the model number, serial number, and purchase date of your TV. The model and serial numbers are on the
back of the TV. Refer to this page when requesting assistance with this TV.
MODEL NUMBER (check one):
WD-62530
WD-52531
WD-62531
SERIAL NUMBER
PURCHASE DATE
Retailer Information
RETAILER NAME
LOCATION
Our Thanks...
Thank you for choosing Mitsubishi as your premier Home Entertainment provider.
This Owner’s Guide describes the features and functions of your Mitsubishi widescreen, high definition
TV. We urge you to examine this Owner’s Guide to become familiar with the innovative features and
operations this unique television offers.
The very core of our corporate philosophy is to provide our customers with the very best. Our
development team at Mitsubishi has worked to provide you with a television that defines “state-of-the-
art,” with the capability to meet your needs now and in the future.
Whether this is your first Mitsubishi electronic product, or an addition to your Mitsubishi collection, we
believe you and your family will continue to enjoy your Mitsubishi home theater for many years.
Thank you,
Mitsubishi Digital Electronics America, Inc.

Contents
Important Information About Your TV
General Warnings and Cautions, Notes on Installation, and Operation ........................... 6
Cleaning Recommendations ............................................................ 7
Important Safeguards .................................................................. 8
Chapter 1: Television Overview
Package Contents .................................................................... 12
Special Features of Your TV ............................................................ 12
Guidelines for Setting Up and Using Your New Widescreen TV ................................ 13
TV Front and Side Panels .............................................................. 15
Front Control Panel ................................................................ 15
Front Panel Indicators ............................................................. 15
System Reset Button .............................................................. 16
A/V Reset ....................................................................... 16
Side Panel Inputs ................................................................. 16
TV Back Panel ....................................................................... 17
Chapter 2: TV Connections
Before You Begin
Choosing a Language for Menus ..................................................... 20
ClearThought® Easy Connect Auto Input Sensing ....................................... 20
Connection Types ................................................................. 21
HDTV Cable Box or Satellite Receiver with Component Video ................................ 22
Standard Cable Box, Satellite Receiver, or Other Device with S-Video .......................... 22
Wall Outlet Cable (no cable box) ........................................................ 23
Antenna with a Single Lead ............................................................ 23
Antennas with Separate UHF and VHF Leads .............................................. 23
VCR to an Antenna or Wall Outlet Cable .................................................. 24
VCR to a Cable Box (Audio & Video) ..................................................... 25
HDMI Device
(Cable Box, Satellite Receiver, DVD Player, or Other Device) ........................... 26
DVI Device (Cable Box, Satellite Receiver, DVD Player, or Other Device) ........................ 26
DVD Player with Component Video ...................................................... 27
A/V Receiver (Stereo System) .......................................................... 27
Older Cable Box ..................................................................... 28
Camcorder .......................................................................... 28
Chapter 3: TV Operation
Remote Control ...................................................................... 30
Operating Tips ....................................................................... 32
Changing Channels ................................................................... 32
Choosing a Program Source ........................................................... 32
ChannelView™ Channel Listings ........................................................ 33
Status Display ....................................................................... 34
TV Signals and Picture Formats ......................................................... 35
Split Screen ......................................................................... 37
Chapter 4: TV Menu Settings
3D Graphical Menu System .................................................. 40

Main Menu .......................................................................... 41
Setup Menu ......................................................................... 42
Input Name Menu .................................................................... 44
Icon Order Menu ..................................................................... 44
Channel Menu ....................................................................... 45
Captions Menu ...................................................................... 47
Parental Lock Menu
Setting a Pass Code ............................................................... 49
Lock TV by Time and Front-Panel Lock ............................................... 49
Ratings Menus ................................................................... 49
Bypassing the Ratings Lock and Lock by Time ......................................... 51
V-Chip Signal Information
TV Ratings ....................................................................... 52
Movie Ratings .................................................................... 52
Audio/Video Menu ................................................................... 53
Audio Settings ................................................................... 54
Video Settings .................................................................... 54
Chapter 5: Operating Other A/V Devices with the Remote Control
Functions Available for Other A/V Devices ................................................ 58
Programming the Remote Control ....................................................... 59
Programming Codes .................................................................. 60
Appendices
Appendix A: Bypassing the Parental Lock ................................................ 71
Appendix B: Specifications ............................................................ 73
Appendix C: Replacing the Lamp Cartridge .............................................. 75
Appendix D: Troubleshooting, Service, and Support ........................................ 77
Trademark and License Information .................................................... 81
Mitsubishi TV Software ................................................................. 82
Mitsubishi LCD Rear Projection Television Limited Warranty ........................... 83
Index .................................................................................... 85

Installation Notes
Stand Requirement
CAUTION: Use these Mitsubishi TV models only with the
Mitsubishi stand models shown here. Other stands can
result in instability and possibly cause injury.
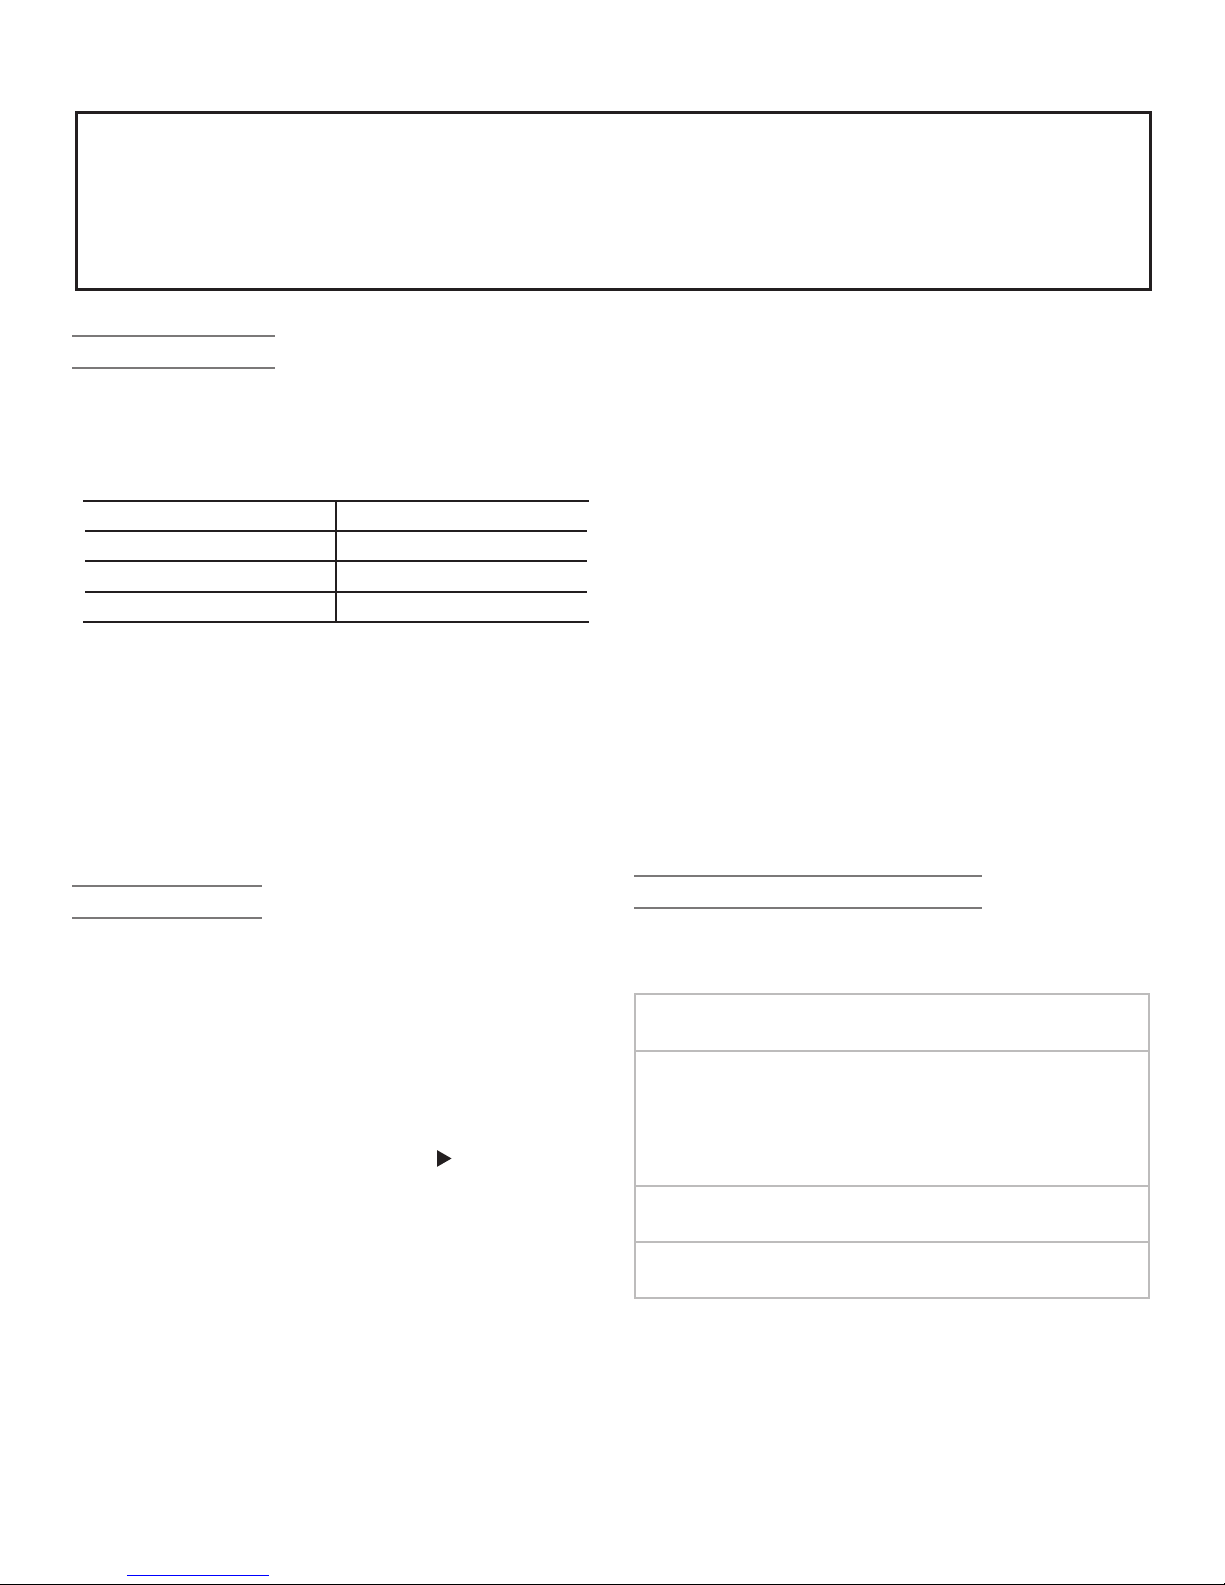
TV Model Stand Model
WD-62530 MB-62LS
WD-52531 MB-52B
WD-62531 MB-62B
Custom cabinet installation must allow for proper air
circulation around the television.
NOTE TO CATV SYSTEM INSTALLER: THIS REMINDER IS
PROVIDED TO CALL THE CATV SYSTEM INSTALLER’S ATTEN-
TION TO ARTICLE 820-40 OF THE NEC THAT PROVIDES
GUIDELINES FOR THE PROPER GROUNDING AND, IN PAR-
TICULAR, SPECIFIES THAT THE CABLE GROUND SHALL BE
CONNECTED TO THE GROUNDING SYSTEM OF THE BUILD-
ING, AS CLOSE TO THE POINT OF CABLE ENTRY AS PRACTI-
CAL.
Operating Notes
Demo Mode
This TV has a demo mode for use in retail stores. Demo
mode causes the TV to display a series of screens outlin-
ing the TV’s features.
If Demo Mode is turned on when you first use the TV:
1. Press
MENU
.
2. When the Main menu appears with Setup high-
lighted, press
ENTER.
3. When the Setup menu opens, press to highlight
the on-screen Demo Mode Off button.
4. Press
ENTER
.
Standby Fan
When the TV is off, you may hear a low-power standby
fan. This is normal operation. The fan cools advanced
circuitry in this TV that must continue to operate even
when the TV is turned off.
Temporary Residual Images
Prolonged display of stationary images on your TV may
cause faint residual “ghost” images to be visible when
viewing other programs. THIS EFFECT IS TEMPORARY.
The residual images will disappear within days or weeks.
Most TV and DVD programming is of generally uniform
brightness and will not produce this effect.
To prevent the appearance of residual images:
• Avoid display of stationary images for extended
periods on this or any other LCD projection TV.
Examples of such images include:
∙ Stationary images that may be part of video
games and web pages
∙ Bright, stationary icons overlaid on moving video
∙ Side bars displayed with narrow-format video
(see “Narrow” definition on page 35)
∙ Top and bottom bars displayed with letterbox
video (see “Expand” definition on page 35)
• Mix regular TV and video programming with uses
that display stationary images.
Replacing the Lamp Cartridge
See Appendix C for details on replacing the lamp car-
tridge.
To Order a Replacement Lamp Cartridge Under
Warranty
Call (800) 553-7278. Please have model number,
serial number, and TV purchase date available.
IMPORTANT: All lamps replaced under warranty must
be returned to Mitsubishi where they will be inspected
for defect verification.
To Order a Replacement Lamp Cartridge After
Warranty
Call (800) 553-7278. Order lamp cartridge part
number 915P043010.
WARNING: This product contains chemicals known to the State of California to cause cancer and/or birth defects
or other reproductive harm.
CAUTION: TO PREVENT ELECTRIC SHOCK, MATCH WIDE BLADE OF PLUG TO WIDE SLOT, FULLY INSERT.
TV WEIGHT: This TV is heavy! Exercise extreme care when lifting or moving it. Lift or move the TV with a minimum
of two adults. To prevent damage to the TV, avoid jarring or moving it while it is turned on. Always power off your TV
before moving it.

Important Information About Your TV 7
TV Software
Unauthorized Software
Do not attempt to update the software of this TV with
software or cards that are not provided by or authorized
by Mitsubishi Digital Electronics America, Inc. Non-autho-
rized software may damage the TV and will not be covered
by the warranty.
General Cleaning
Normally, light dusting with a dry, non-scratching duster
will keep your TV clean. If cleaning beyond this is needed,
please use the following guidelines:
First, turn off the TV and unplug the power cord from the
power outlet.
Top and Sides of the TV
• Gently wipe down your TV with a soft, non-abrasive
cloth such as cotton flannel or a clean cloth diaper,
lightly moistened with water. Dry with a second dry,
soft, non-abrasive cloth.
• For oily dirt, add a few drops of mild liquid detergent,
such as dish washing detergent, to the water used to
moisten the cloth. Rinse with a second cloth moist-
ened only with water. Dry with a third dry, soft, non-
abrasive cloth.
Screen
• Follow the instructions for the top and sides, wiping
gently in an up and down motion.
• Clean the entire screen evenly, not just sections of the
screen.
• Do not allow liquid to drip down the grooves of the
screen, as some liquid may enter the TV through the
gap between the screen and screen frame.
• You may purchase Mitsubishi Screen Cleaner, part
number CLEANER-VSS, by calling (800) 553-7278.
General Cleaning Warnings
• DO NOT allow liquid to enter the TV through the venti-
lation slots or any crevice.
• DO NOT use any strong or abrasive cleaners, as these
can scratch the surfaces.
• DO NOT use any cleaners containing ammonia,
bleach, alcohol, benzene, or thinners, as these can
dull the surfaces.
• DO NOT spray liquids or cleaners directly on the TV’s
surfaces.
• DO NOT scrub or rub the TV harshly. Wipe it gently.
IMPORTANT
DO NOT use any kind of abrasive cleaner
on the surface of the TV screen.

8 Important Information About Your TV
Important Safeguards
Please read the following safeguards for your TV and retain for future reference. Always follow all warnings and instruc-
tions marked on the television.
1. Read, Retain and Follow All Instructions
Read all safety and operating instructions before operating the TV. Retain the safety and operating instructions
for future reference. Follow all operating and use instructions.
2. Heed Warnings
Adhere to all warnings on the appliance and in the operating instructions.
3. Cleaning
Unplug the TV from the wall outlet before cleaning. Do not use liquid, abrasive or aerosol cleaners. Cleaners
can permanently damage the cabinet and screen. Use a lightly dampened cloth for cleaning.
4. Attachments and Equipment
Never add any attachments and/or equipment without approval of the manufacturer as such additions may
result in the risk of fire, electric shock or other personal injury.
5. Water and Moisture
Do not use the TV where contact with or immersion in water is possible. Do not use near bath tubs, wash
bowls, kitchen sinks, laundry tubs, swimming pools, etc.
6. Accessories
Do not place the TV on an unstable cart, stand, tripod, or table. The TV may fall,
causing serious injury to a child or adult and serious damage to the TV. Use only with a
cart, stand, tripod, bracket or table recommended by the manufacturer, or sold with the
TV. Any mounting of the TV should follow the manufacturer’s instructions, and should
use mounting accessories recommended by the manufacturer.
An appliance and cart combination should be moved with care. Quick stops, excessive
force, and uneven surfaces may cause the appliance and cart combination to overturn.
7. Ventilation
Slots and openings in the cabinet are provided for ventilation and to ensure reliable operation of the TV and to
protect it from overheating. Do not block these openings or allow them to be obstructed by placing the TV on
a bed, sofa, rug, or other similar surface. Nor should it be placed over a radiator or heat register. If the TV is to
be placed in a rack or bookcase, ensure that there is adequate ventilation and that the manufacturer’s instruc-
tions have been adhered to.
8. Power Source
This TV should be operated only from the type of power source indicated on the marking label. If you are not
sure of the type of power supplied to your home, consult your appliance dealer or local power company.
9. Grounding or Polarization
This TV is equipped with a polarized alternating current line plug having one blade wider than the other. This
plug will fit into the power outlet only one way. If you are unable to insert the plug fully into the outlet, try
reversing the plug. If the plug should still fail to fit, contact your electrician to replace your obsolete outlet. Do
not defeat the safety purpose of the polarized plug.
10. Power-Cord Protection
Power-supply cords should be routed so that they are not likely to be walked on or pinched by items placed
upon or against them, paying particular attention to cords at plugs, convenience receptacles, and the point
where they exit from the TV.
11. Lightning
For added protection for this TV during a lightning storm, or when it is left unattended and unused for long
period of time, unplug it from the wall outlet and disconnect the antenna or cable system. This will prevent
damage to the TV due to lightning and power-line surges.

Important Information About Your TV 9
Important Safeguards, continued
12. Power Lines
An outside antenna system should not be located in the vicinity of overhead power lines or other electric light or
power circuits, or where it can fall into such power lines or circuits. When installing an outside antenna system,
extreme care should be taken to keep from touching such power lines or circuits as contact with them might be
fatal.
13. Overloading
Do not overload wall outlets and extension cords as this can result in a risk of fire or electric shock.
14. Object and Liquid Entry
Never push objects of any kind into this TV through openings as they may touch dangerous voltage points or
short-out parts that could result in fire or electric shock. Never spill liquid of any kind on or into the TV.
15. Outdoor Antenna Grounding
If an outside antenna or cable system is connected to the TV, be sure
the antenna or cable system is grounded so as to provide some pro-
tection against voltage surges and built-up static charges.
Article 810 of the National Electric Code, ANSI/NFPA No. 70-2002,
provides information with respect to proper grounding of the mast
and supporting structure, grounding of the lead in wire to an antenna
discharge unit, size of grounding conductors, location of antenna dis-
charge unit, connection to grounding electrodes, and requirements
for the grounding electrode.
16. Servicing
Do not attempt to service this TV yourself as opening or removing
covers may expose you to dangerous voltage or other hazards. Refer all servicing to qualified service person-
nel.
17. Damage Requiring Service
Unplug the TV from the wall outlet and refer servicing to qualified service personnel under the following condi-
tions:
(a) When the power-supply cord or plug is damaged.
(b) If liquid has been spilled, or objects have fallen into the TV.
(c) If the TV has been exposed to rain or water.
(d) If the TV does not operate normally by following the operating instructions, adjust only those controls that
are covered by the operating instructions as an improper adjustment of other controls may result in damage
and will often require extensive work by a qualified technician to restore the TV to its normal operation.
(e) If the TV has been dropped or the cabinet has been damaged.
(f) When the TV exhibits a distinct change in performance - this indicates a need for service.
18. Replacement Parts
When replacement parts are required, be sure the service technician has used replacement parts specified by
the manufacturer or have the same characteristics as the original part. Unauthorized substitutions may result in
fire, electric shock or other hazards.
19. Safety Check
Upon completion of any service or repair to the TV, ask the service technician to perform safety checks to
determine that the TV is in safe operating condition.
20. Heat
The product should be situated away from heat sources such as radiators, heat registers, stoves or other prod-
ucts (including amplifiers) that produce heat.
ANT E NNA
LE AD IN W IR E
ANT E NNA
DIS C H AR G E U NIT
(NE C AR T IC L E 8 10- 20)
G R O UNDING
C O N DU C T O R S
(NE C AR T IC L E 8 10- 21)
G R O UND C L AMP S
P OWE R S E R V IC E G R O U NDING
E L E C T R O DE S Y S T E M
(NE C AR T 250, P AR T H)
G R O UND C L AMP
E LE C TR IC
S E R V I C E
E Q UIP ME NT
NE C — N AT IONA L E L E C T R IC AL C O D E
E X AMP L E O F A NT E N NA G R O UNDIN G


1
Television Overview
Package Contents .................................. 12
Special Features of Your TV ............................ 12
Guidelines for Setting Up and Using Your New Widescreen TV . . . 13
TV Front and Side Panels .............................. 15
Front Control Panel .................................. 15
Front Panel Indicators ................................ 15
System Reset Button ................................. 16
A/V Reset ........................................ 16
Side Panel Inputs ................................... 16
TV Back Panel ..................................... 17

12 Chapter 1. Television Overview
Package Contents
Please take a moment to review the following list of items to ensure
that you have received everything.
1. Remote Control
2. Two AA Batteries
AA
AA
3. Product registration card (not pictured)
4. Owner’s Guide (not pictured)
5. Quick Reference Guide (not pictured)
Special Features of Your TV
Your new high-definition widescreen television has many
special features that make it the perfect center of your
home entertainment system, including:
16:9 Widescreen Picture Format
Enjoy a full theatrical experience in the comfort of your
home. View pictures as film directors intended them.
Digital TV broadcasts, DVDs and newer video game con-
soles support this widescreen format.
Integrated HDTV Tuner
Your widescreen Mitsubishi HDTV has an internal HDTV
tuner able to receive both over-the-air HDTV broadcasts
(received via an antenna) and non-scrambled digital cable
broadcasts, including non-scrambled HDTV cable pro-
gramming.
High-Definition Video Inputs
Two Component Video Inputs
This television has two component video inputs, also
called Y/Pb/Pr inputs. These inputs receive standard
analog video formats of 480i (standard analog TV),
480p (progressive-scan signals), and 720p and 1080i
high-definition signals. This provides a high level of
flexibility when connecting DVD players/recorders,
cable boxes, and satellite receivers.
Two HDMI Inputs (One for the WD-62530 model)
This television also has two HDMI™ inputs that accept
digital 480i, 480p, 720p, and 1080i video signals plus
PCM digital stereo signals. Used with an adapter,
these inputs also accept compatible DVI signals.
HDMI inputs provide additional high-performance,
high-definition connections for maximum flexibility
in your choice of home theater products. The HDMI
inputs are HDCP copy-protection compatible.
LCD Light Engine
Mitsubishi’s exclusive LCD Light engine features supe-
rior corner focus and SmartShutter™ dynamic aperture
system.
SmartShutter™
SmartShutter™ technology displays deep blacks and
improved dark scene detail. It does this by reducing light
output during dark scenes without adversely affecting
other picture characteristics.
ClearThought® Easy Connect Auto Input
Sensing
ClearThought automatically recognizes the devices you
connected to TV inputs. The first time you connect
each
device you will be prompted to identify it by selecting
from
a pre-set list of device names.
Only the names of input devices currently connected will
appear in the Input Selection Menu. This makes it easy for
you to know which input devices are available for you to
use.
Plush720p™
Upconverts lower-quality video signals to deliver
maximum image clarity from every source.

Chapter 1. Television Overview 13
Guidelines for Setting Up and Using
Your New Widescreen TV
Getting Started
1. Read the section entitled “Important Information
About Your TV” starting on page 5.
2. Choose a location for your TV.
• Allow at least four inches of space on all sides of
the TV help prevent overheating.
• Avoid locations where light may reflect off the
screen.
• See the stand requirements under “Important
Information About Your TV.”
3. Install the batteries in the remote control. See
Chapter 3, “TV Operation,” for information on use
and care of the remote control.
4. Plug your TV into a power outlet. The
POWER
indicator
on the front of the TV will start blinking rapidly. After
the
POWER
indicator stops blinking, press the
POWER
key
to power on the TV.
5. When the Welcome screen appears the first time you
power on the TV, select a language for TV menus.
You can later change the language through the Setup
menu.
6. Some TVs are shipped from the factory with demo
mode active for use in retail stores. If demo mode is
active when you first turn on the TV:
a. Press
MENU
.
b. When the Main menu appears with Setup high-
lighted, press
ENTER.
c. When the Setup menu opens, press to highlight
the on-screen Demo Mode Off button.
d. Press
ENTER
.
7. Connect your other A/V devices to the TV and assign
device names to the TV inputs when prompted.
See Chapter 2, “TV Connections,” for connection
diagrams. You can reassign device names later if
needed. See “Input Name Menu” in chapter 4, “TV
Menu Settings.”
8. Memorize channels if you plan to watch over-the-air
channels or programming over direct cable. Channel
memorization may take up to 15 minutes to complete.
See “Setup Menu” in Chapter 4, “TV Menu Set-
tings,”
9. You can now start watching TV or you can perform
additional setup and customization through the TV
menus.
Additional TV Setup
Review Chapter 4, “TV Menu Settings,” to customize TV
operation. Press the
MENU
key to enter the menu system.
Some examples of settings you may wish to change
include:
• Energy Mode. For faster power-on, keep the Energy
Mode set to Fast Power On. For lower power con-
sumption while the TV is off, use the Low Power
setting. See “Setup Menu.”
• Input Name. Change the device names that appear
in the Input Selection menu. See “Input Name
Menu.”
• Icon Order. Rearrange the device icons in the Input
Selection menu to put frequently used icons near the
front. See “Icon Order Menu.”
• FAV. Create lists of your favorite channels so you can
find them quickly. See “Channel Menu.”
• Clock. If you wish to schedule future recordings or
use the Timer feature to have the TV come on auto-
matically, you must first set the TV clock to the correct
time. See “Setup Menu.”
• Parental Lock. You can restrict TV viewing by
program rating or by time of day. You can also disable
the front-panel buttons—useful if you have small chil-
dren. See “Parental Lock Menu.”
• Video Settings. Change the video adjustments to
get the best picture for your viewing conditions. See
“Audio/Video Menu.”
You may wish to change the Picture Mode from the default
Brilliant to either Bright or Natural,
TV Operation
Review Chapter 3, “TV Operation,” for TV features
including:
• Input Selection (viewing source). Select a con-
nected program source to watch, such as a VCR, DVD
player, or antenna. Press
INPUT
on the remote control
to select from icons for the TV inputs. See “Input
Selection Menu.”
• Channel Listings. Press
GUIDE
to view ChannelView™
channel listings. See “ChannelView™ Channel List-
ings.”
• Picture Formats. Press
FORMAT
to cycle through the
available picture sizes and shapes to find the one
best suited to the program you’re watching. See “TV
Signals and Picture Formats.”

14 Chapter 1. Television Overview
Guidelines for Setting Up and Using
Your New Widescreen TV, continued
TV Care
15
Caring for your TV:
• Lamp Cartridge. Eventually, you will need to
install a new lamp cartridge. When the lamp
cartridge needs to be replaced, replace it your-
self and save the cost of a service call. See
Appendix C for instructions.
• General Cleaning. To keep your TV looking its
best, see the cleaning recommendations under
“Important Information About Your TV.”
TV Tips
Turning the TV On or Off
To turn the TV on or off, point the remote control at the
front of the TV and press the
POWER
button. Alternatively,
press the
POWER
button on the front panel of the TV.
If You Turn Off the TV by Mistake
1. Press
POWER
again within about 30 seconds, while
the lamp is still hot, to have the TV come back on
immediately.
2. If the
LAMP
indicator starts blinking (about 30
seconds after you shut off power), wait about one
minute for the
LAMP
indicator to stop blinking and
press
POWER
to turn the TV on again.
Controlling Sound Volume
Press
VOL
/ to adjust the sound level.
Changing Channels
To change channels:
• Enter the channel number using the number keys
on the remote control and press
ENTER
. For a two-
part digital channel, press
—/CANCEL
to enter a dash
(separator) according to the broadcaster’s channel
information.
• Press
CH
/ to change channels one channel at
a time.
• Press and hold
CH
/ to move quickly through
channels.
• Press
QV
(QuickView) to switch back to the previ-
ously tuned channel.
• Use the FAV (Favorites) feature to set up lists of
favorite channels and tune to them with the
FAV
key.
See “Cannel Menu” in Chapter 4.
NOTE: Memorize channels to make finding channels
easier. See “Setup Menu” in Chapter 4, “TV
Menu Settings.”
Assistance
16
If you need assistance with this TV:
• For troubleshooting, service, and product support,
see Appendix D.
• For warranty information, see the TV warranty in
the back of this guide.

Chapter 1. Television Overview 15
TV Front and Side Panels
Front Control Panel
The shaded buttons shown in the illustration below
indicate duplicate keys on the remote control. The upper
labels show control functions when no TV menus are dis-
played; the lower labels indicate functions when TV menus
are displayed or when a special function has been acti-
vated. See “Remote Control Overview” for further details
on the functions of these buttons.
1. Shaded buttons are duplicates of keys on the remote control 2. Power/Timer indicator—lit during normal
operation; flashing when auto-on TV Timer is set 3. Lamp indicator shows lamp condition (usually off during normal
TV operation) 4. Status indicator (off during normal TV operation) 5. System Reset (see the next page)
Front Panel Indicators
Off Steady On Slow Blinking Fast Blinking
14
3 15
2
POWER/TIMER Indicator
LED Color TV Condition Additional Information
None TV is powered off. Normal operation.
Green TV is powered on. Normal operation.
Green 1. TV just plugged into AC outlet.
Wait until blinking stops before turning on (approximately 1
minute). Normal operation.
2. AC just restored after power failure.
3.
TV Rebooting after System Reset was
used.
4. TV Rebooting after power fluctuation
or receiving abnormal digital signals
from digital channel, or digital device.
5. You have begun the procedure to
update software from an authorized
flash memory device.
For detailed information, see the instructions that accom-
pany the authorized software update. IMPORTANT: Do not
use unauthorized software at any time.
Green TV powered off and auto-on timer is set. Normal operation. TV can be turned on at any time.

16 Chapter 1. Television Overview
System Reset Button
If the TV does not respond to the
remote control, front panel controls,
or will not power on/off, press the
SYSTEM RESET
button on the front panel
with a pointed object, such as the
point of a pencil or end tip of a paper-
clip. The green LED will flash quickly
for about one minute.
When the green LED stops flashing, you may turn on the
TV. The changes you made most recently, before using
SYSTEM RESET
, may be lost. Changes you made previously,
however, are not lost.
A/V Reset
If you wish to reset the A/V (Audio/Video) settings back to
the factory defaults:
• To reset all settings at once, press
GUIDE
and
FORMAT
on
the front panel at the same time.
• To reset the defaults for individual devices, use the
A/V Memory Reset selection on the Audio/Video
menu.
Side Panel Inputs
The side panel (Input 3) provides an easily accessible set
of standard audio/video jacks that allow you to connect a
camcorder or other audio/video device.
Note that if you connect to the S-VIDEO jack, the VIDEO
jack is deactivated; the
VIDEO
jack is active only when
there is no S-Video connection.
STATUS Indicator
LED Color TV Condition Additional Information
None Normal TV on or standby condition. Normal operation.
Yellow Room temperature is too high. TV will not operate when the ambient room temperature is too
high. Turn off the TV and wait until the room temperature drops.
Red
TV may require service. Turn off the TV and unplug the set from the AC power source.
Wait one minute and then plug the set back in.
If the LED is still on, contact your dealer or a Mitsubishi Authorized
Service Center.
See www.mitsubishi-tv.com or call 1-800-332-2119
to receive Authorized Service Center information.
LAMP Indicator
LED Color TV Condition Additional Information
None Normal TV on or standby condition. Normal operation.
Green TV just powered off and lamp is
cooling.
Starts to blink 30 seconds after turning off TV. TV can be turned
on before blinking starts or after blinking stops, but not while the
indicator is blinking. Normal operation.
Yellow 1. Lamp access door is open or
not secure.
TV will not operate until lamp access door is secure. See Appendix D
for installation information.
2. No lamp installed.
TV will not operate without a lamp. See Appendix C for installation
information.
Red Lamp no longer illuminates and has
reached the end of the lamp life.
Replace the lamp cartridge. The TV will not operate when the
lamp no longer illuminates. See Appendix C for installation infor-
mation.

Chapter 1. Television Overview 17
TV Back Panel
1. ANT 1/MAIN & ANT 2/AUX (Antenna)
If you are connecting an antenna or direct cable without a
cable box, connect the main antenna or cable source to
ANT 1/MAIN. You can also connect another antenna or
cable source to ANT 2/AUX.
ANT 1/MAIN
and
ANT 2/AUX
can each receive both
digital and analog over-the-air channels from a VHF/UHF
antenna or non-scrambled digital/analog cable source.
2. INPUT 1 & 2
(Audio and Video)
INPUT 1
and
INPUT 2
can be used to connect a VCR,
Super
VHS (S-VHS) VCR, DVD player, standard satellite
receiver,
or other A/V device to the TV. Please note that
if
S-VIDEO
and (Composite)
VIDEO
are both available,
you must choose to connect only one.
Note: Because S-Video provides a better video signal
than Composite Video, use S-Video if available on the
source A/V device.
3. COMPONENT INPUT 1 & 2
(Audio and Video)
Y Pb Pr (Support 480i/480p/720p/1080i video formats)
Use these jacks to connect devices with component video
outputs, such as DVD players, external HDTV receivers, or
compatible video game systems. Please see Appendix B
for signal compatibility.
4. HDMI™ 1 & 2 (Inputs)
(Both Audio and Video in each HDMI jack)
(Support 480i/480p/720p/1080i video formats)
HDMI (High Definition Multimedia Interface) supports
uncompressed standard and high-definition digital video
formats and PCM digital audio format. The WD-62530
model has only one HDMI jack.
Do not connect a computer to either of the HDMI jacks .
Use these inputs to connect to EIA/CEA-861 compliant
devices such as a high-definition receiver or DVD player.
These inputs can also accept DVI inputs. To connect a
DVI device, use an HDMI-to-DVI cable adapter plus analog
audio cables. Connect the analog audio cables to the
DVI ANALOG AUDIO
inputs (#5) on the TV to receive
left and right stereo audio from your DVI device. The WD-
62530 model has only one pair of DVI Analog Audio input
jacks.
These inputs are HDCP (High-Bandwidth Digital Copy
Protection) compliant.
These inputs are certified for proper interoper-
ability with other products certified by Simplay™.
5
3
8
2
1
746

18 Chapter 1. Television Overview
5. DVI ANALOG AUDIO INPUT
Use these analog audio inputs when connecting DVI
devices to the TV’s
HDMI
jacks. Unlike HDMI, DVI
does not carry audio information on the same cable.
The
WD-62530 model has only one pair of L/R DVI analog jacks.
6. AUDIO OUTPUT L/R
These jacks send analog audio of the program currently
shown on the screen to an A/V surround sound receiver
or stereo system. Digital audio from digital channels and
HDMI devices is converted to analog audio by the TV. If
using an analog A/V receiver or stereo system, this is the
only audio connection needed between it and the TV.
7. DIGITAL AUDIO OUTPUT
This output sends Dolby Digital or PCM digital audio to your
digital A/V surround sound receiver. Analog audio from
analog channels and devices is converted by the TV to PCM
digital audio. If you have a digital A/V receiver, in most
cases this is the only audio connection needed between the
TV and your A/V receiver.
8. RECORD OUTPUT
These Composite and L/R Audio jacks send analog video
and audio signals to an external recording
device, such
as a VCR. The signals from these jacks are from the
program currently being viewed on the TV screen. To
make recordings from this output, the TV must be in
normal full-screen mode rather than in Split Screen
mode.
• From this output you can record audio and video
signals from ANT 1, ANT 2 and INPUT 1, 2 and 3.
• Digital signals from
ANT 1
and
ANT 2
are
converted to analog video and audio signals.
• Some signals cannot be recorded because of
copy-protection flags in the content.
TV Back Panel, continued

Chapter 2
TV Connections
Before You Begin
Choosing a Language for Menus . . . . . . . . . . . . . . . . . . . . . . . . . . 20
ClearThought® Easy Connect Auto Input Sensing . . . . . . . . . . . . . . . 20
Connection Types ................................... 21
HDTV Cable Box or Satellite Receiver with Component Video .... 22
Standard Cable Box, Satellite Receiver, or Other
Device with S-Video ................................ 22
Wall Outlet Cable ................................... 23
Antenna with a Single Lead ............................ 23
Antennas with Separate UHF and VHF Leads ................ 23
VCR to an Antenna or Wall Outlet Cable ................... 24
VCR to a Cable Box (Audio & Video) ...................... 25
HDMI Device ...................................... 26
DVI Device ........................................ 26
DVD Player with Component Video ....................... 27
A/V Receiver (Stereo System) .......................... 27
Older Cable Box .................................... 28
Camcorder ........................................ 28

20 Chapter 2. TV Connections
Before You Begin
Choosing a Language for Menus
When you first power on the TV, you can select either
English or Spanish for all menus. You can later change
the language through the Setup menu.
Figure 1. The Welcome screen lets you change the menu
language when you first power on the TV.
ClearThought® Easy Connect Auto Input
Sensing
ClearThought automatically recognizes the devices you
connected to TV inputs. The first time you connect each
device you will be prompted to identify it by selecting
from a pre-set list of device names.
Only the names of input devices currently connected will
appear in the Input Selection Menu. This makes it easy
for you to know which input devices are available for you
to use.
The table below defines how connections on each TV
jack are handled.
Auto Detection Active No Auto Detection
INPUT 1, 2, 3
video jacks
ANT 1/ANT 2
COMPONENT 1 & 2
video jacks
RECORD OUTPUT
(
all jacks)
HDMI
*
1 & 2
All
AUDIO
jacks
* If the device is powered off when connected, detec-
tion will occur when the device is next powered on.
Figure 2. The Auto Input Sensing screen appears when a
device is first detected. Select a name for the connected
device in this screen.
1. Connect your devices to the TV.
The TV and the devices can be either on or off when
connecting. If the TV is powered off, the detection
process will occur the next time you turn on the TV.
2.
When the Auto Input Sensing screen opens (figure 2),
you can accept the default name or press to
select from a list of device names (e.g., cable box,
DVD, Satellite, VCR).
Choose a name that will help you when selecting
inputs in the Input Selection menu.
3. Press
EXIT
to close the screen. If you connected
several devices at the same time, the screen for the
next connection will open.
More About Auto Input Sensing
• You can change the input name at a later time using
the Input Name menu.
• If you disconnect a device and then later connect a
different device to that jack, open the Input Name
menu to update the device name.
• Antenna inputs (
ANT 1/ANT 2),
all audio and all
Record Output jacks are never detected.
• Be careful to choose different names for each input.
This manual suits for next models
2
Table of contents
Other Mitsubishi LCD TV manuals

Mitsubishi
Mitsubishi UNISEN LT-46153 User manual

Mitsubishi
Mitsubishi Diamond LT-46246 User manual

Mitsubishi
Mitsubishi WS-73517 User manual

Mitsubishi
Mitsubishi LT-2220 User manual

Mitsubishi
Mitsubishi LT-46149 User manual

Mitsubishi
Mitsubishi WD-52531 User guide

Mitsubishi
Mitsubishi WD-62526 User manual

Mitsubishi
Mitsubishi LDT551V User manual

Mitsubishi
Mitsubishi WD-62531 User guide