9
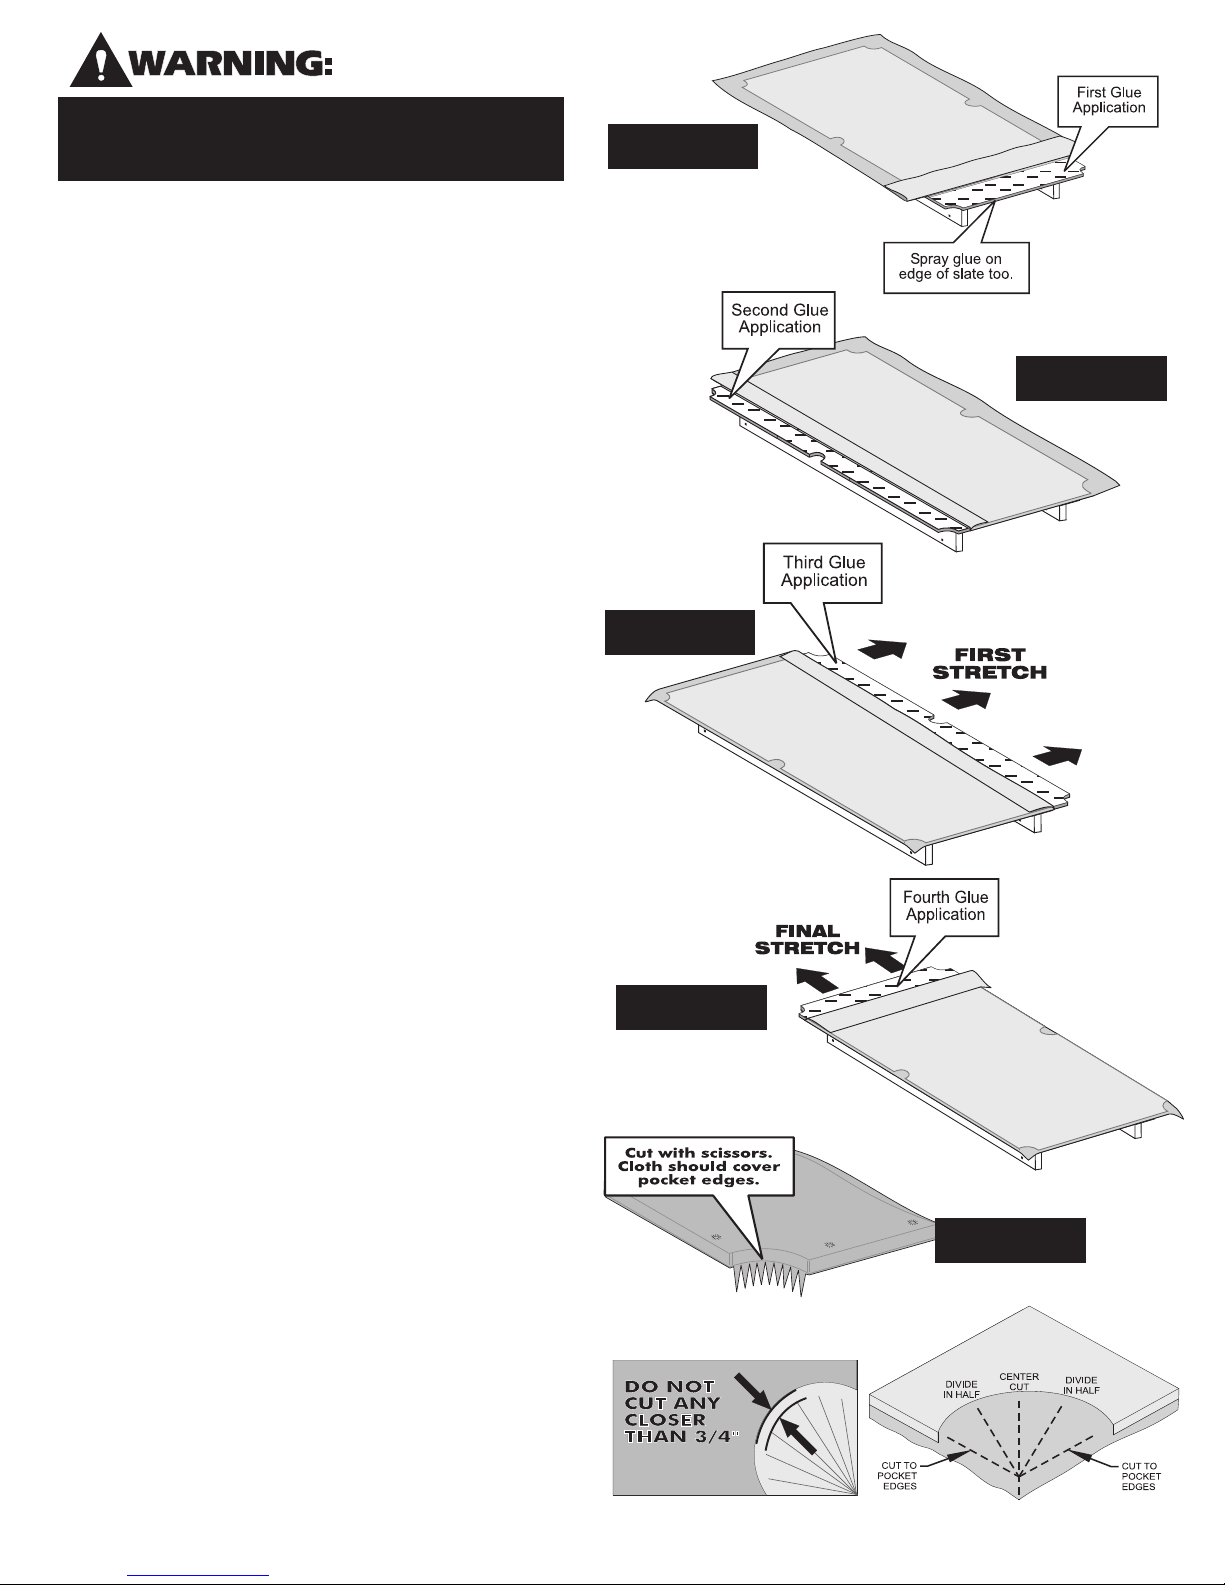
Figure 16
Figure 15
Figure 14
Figure 13
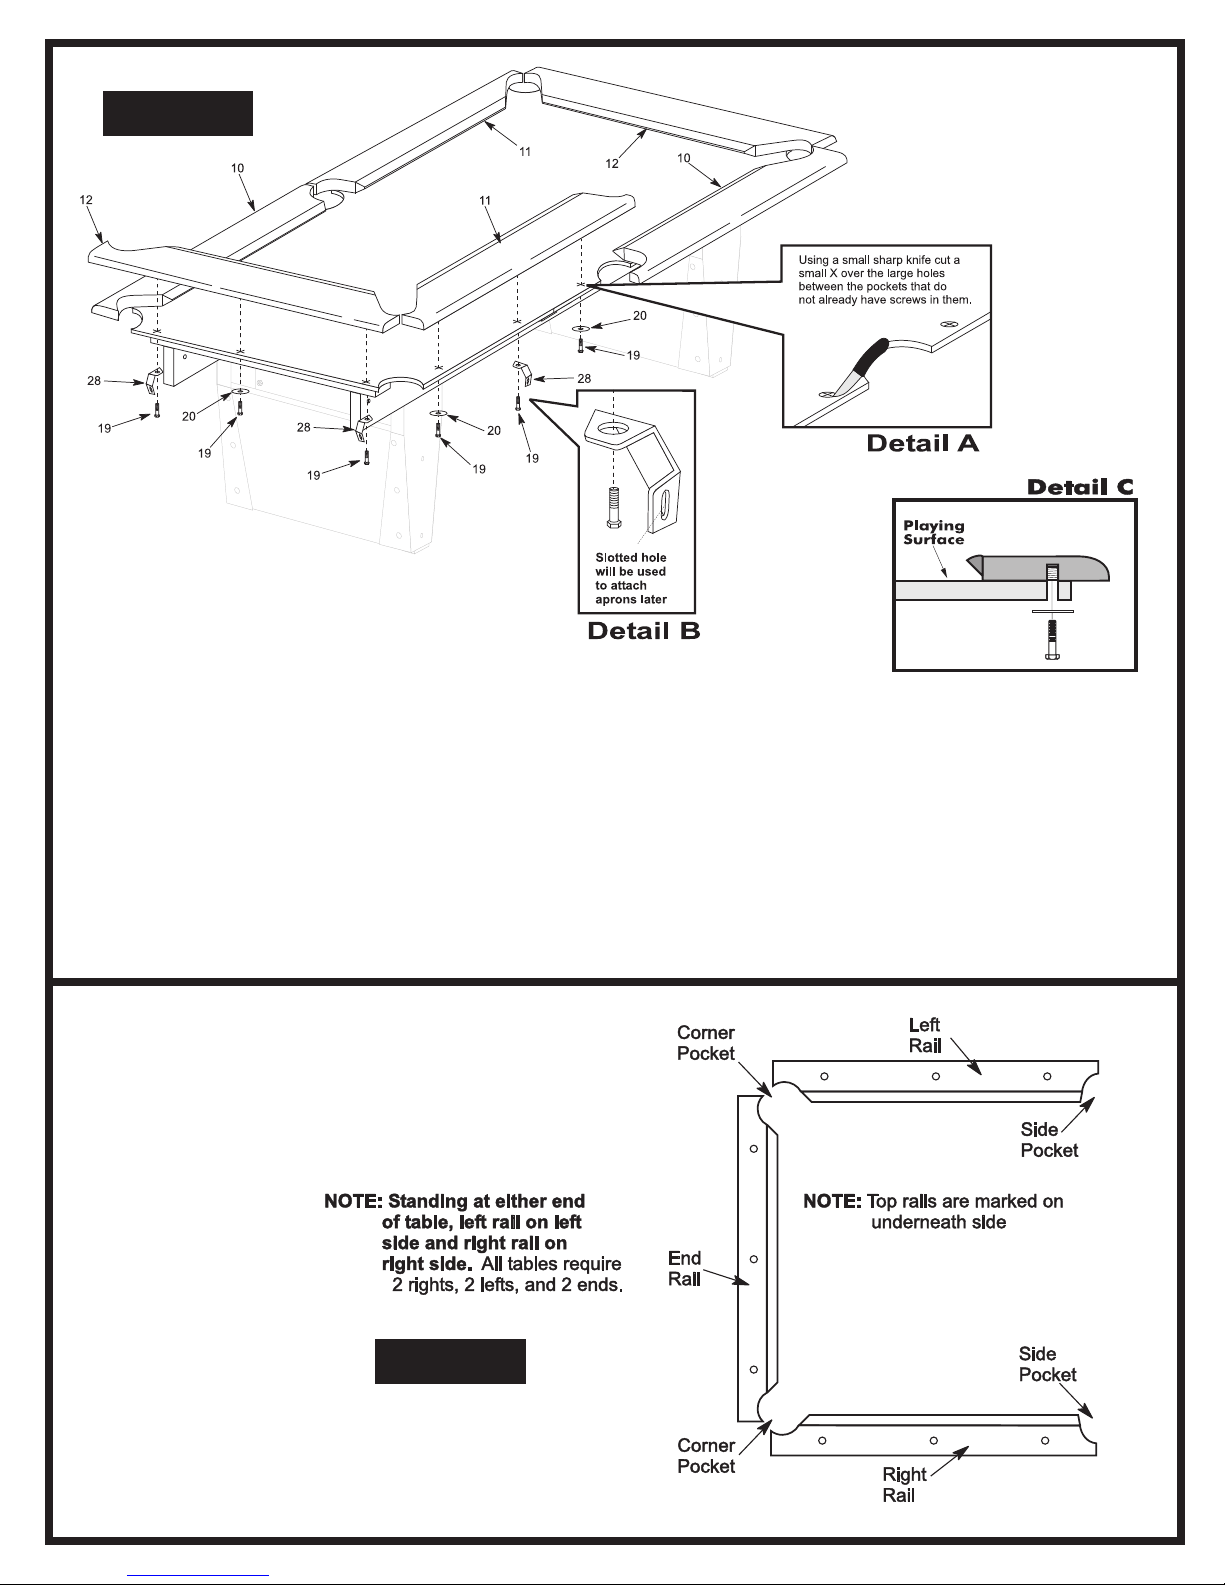
Detail A
DO NOT SMOKE WHILE WORKING
WITH CONTACT CEMENT! READ LABEL
ON CEMENT CONTAINER CAREFULLY!
Applying the cloth
34. Make sure slate/slatron is dry and free of dust.
NOTE: Before spraying adhesive, cut a portion of the shipping
carton to use as a shield to prevent cement overspray.
35. Place cloth over slate/slatron with equal overhang on all sides.
NOTE: Cloth may seem small but it will stretch a great
deal.
36. Fold cloth away from end to expose slate/slatron for your first
glue application. Apply contact cement to top surface in a band
4 inches wide on this end. (See figure 13) Coat edge also. Spray
cement smoothly and evenly. Allow cement to become tacky,
wait at least one minute.
37. Fold cloth back over the table. With firm even pressure, press
cloth onto the area that has been coated with cement. Smooth
cloth down and over edges.
38. Fold cloth away from side to expose slate/slatron for your second
glue application. (See figure 14). Apply cement to the side in
the same manner as your first glue application. Allow cement
to become tacky, wait at least one minute.
39. Fold cloth back over the table. With firm even pressure, press
cloth onto the area that has been coated with cement. Smooth
cloth down and over edges.
40. Fold cloth away from other side to expose slate/slatron for your
third glue application. (See figure 15). Apply cement to this side
in the same manner. Allow cement to become tacky, wait at least
one minute.
41. Stretch the cloth across the width and over the edge of the table.
STRETCH HARD ENOUGH TO TAKE OUT WRINKLES,
BUT NOT SO HARD THAT THE CLOTH SLIPS.
42. Fold cloth away from other end to expose slate/slatron for your
fourth glue application. (See figure 16) Apply cement to this end
in the same manner. Allow cement to become tacky, wait at least
one minute.
43. Make a final stretch along the length of and over the edge of the
table, stretch hard enough to work out all wrinkles. (See figure
16) If cloth is not smooth, lift and re-apply. NOTE: Rubbing
fingers lightly across cloth should not make cloth move.
44. Locate center of pocket opening. (See Detail A and B) Using
sharp scissors, make a straight cut. Next, cut to pocket edge to
form pie shapes. (See detail B) Divide these pie shapes in half.
As you do, the pie shapes begin to relax to allow for placement.
You may need to make additional cuts.
45. Spray adhesive on the underneath side of the slate around
pocket face to adhere the cloth. Make sure not to get overspray
of glue on table. Allow cement to become tacky, wait at least
one minute. Stretch the pie shapes down and under the pocket
opening. Press the cloth against the cement on the underside of
the slate/slatron. Be sure entire pie shape is fully attached to
underneath side of table.
Figure 17
Detail B