!
IMPORTANT: Use ONLY a fingertip or other NON-SHARP object to select touch screen
options. Using sharp objects can damage the screen and void the warranty.
!
Specific small icons are created for each paired camera at the top edge of the screen which relate
to that individual camera (except Battery Level, which is for the monitor only). To use them...
!
just observe or touch one of the following Individual Channel icons to either...
!
A... view current Camera Number, or change to the next camera you want to view
B... view current VOX level, or change VOX sound sensitivity level for that camera
C... view Lullaby status, change the Lullaby selection, or turn off Lullabys from that camera
D... add Zoom / Pan / Tilt controls over the scene to manipulate the image from that camera
!
NOTE: Other individual camera icons appear for informational purposes, such as
Ro om Temp e rature, Switching Mode and Signal Strength, and when in
Quad Mode, each camera screen shown will also display the Signal Strength of that
particular camera.
!
To view a larger version of the monitor screen on your PC* screen...
Note: Using this feature allows viewing only on the computer. Once USB Connection
is established the monitor screen is turned off and all features and buttons (with the
exception of the ESC Button) will not be functional.
1. Set the USB Output on the monitor to the Webcam icon (refer to page 13)
2. Using the USB Cord (included), connect the monitor to an available USB port on your PC*
3. Wait for your computer to automatically recognize and install the appropriate drivers and you
receive a Successful Installation message.
4. Once you have installed the device driver, your MobiCam® DXR Touch can be utilized as a wireless
webcam.
5. Once the picture from the monitor is displayed on your computer screen, pressing the ESC Button on
the monitor toggles between Single and Quad View modes.
!
The DXR Touch can be used with Skype®, Windows Messenger®, Google Talk® and Yahoo Messenger®.
When utilizing Skype®, Windows Messenger®, Google Talk® or Yahoo Messenger®, please refer to their
documentation for techical support.
!
* The MobiCam® DXR Touch is only compatable with Windows® PCs.
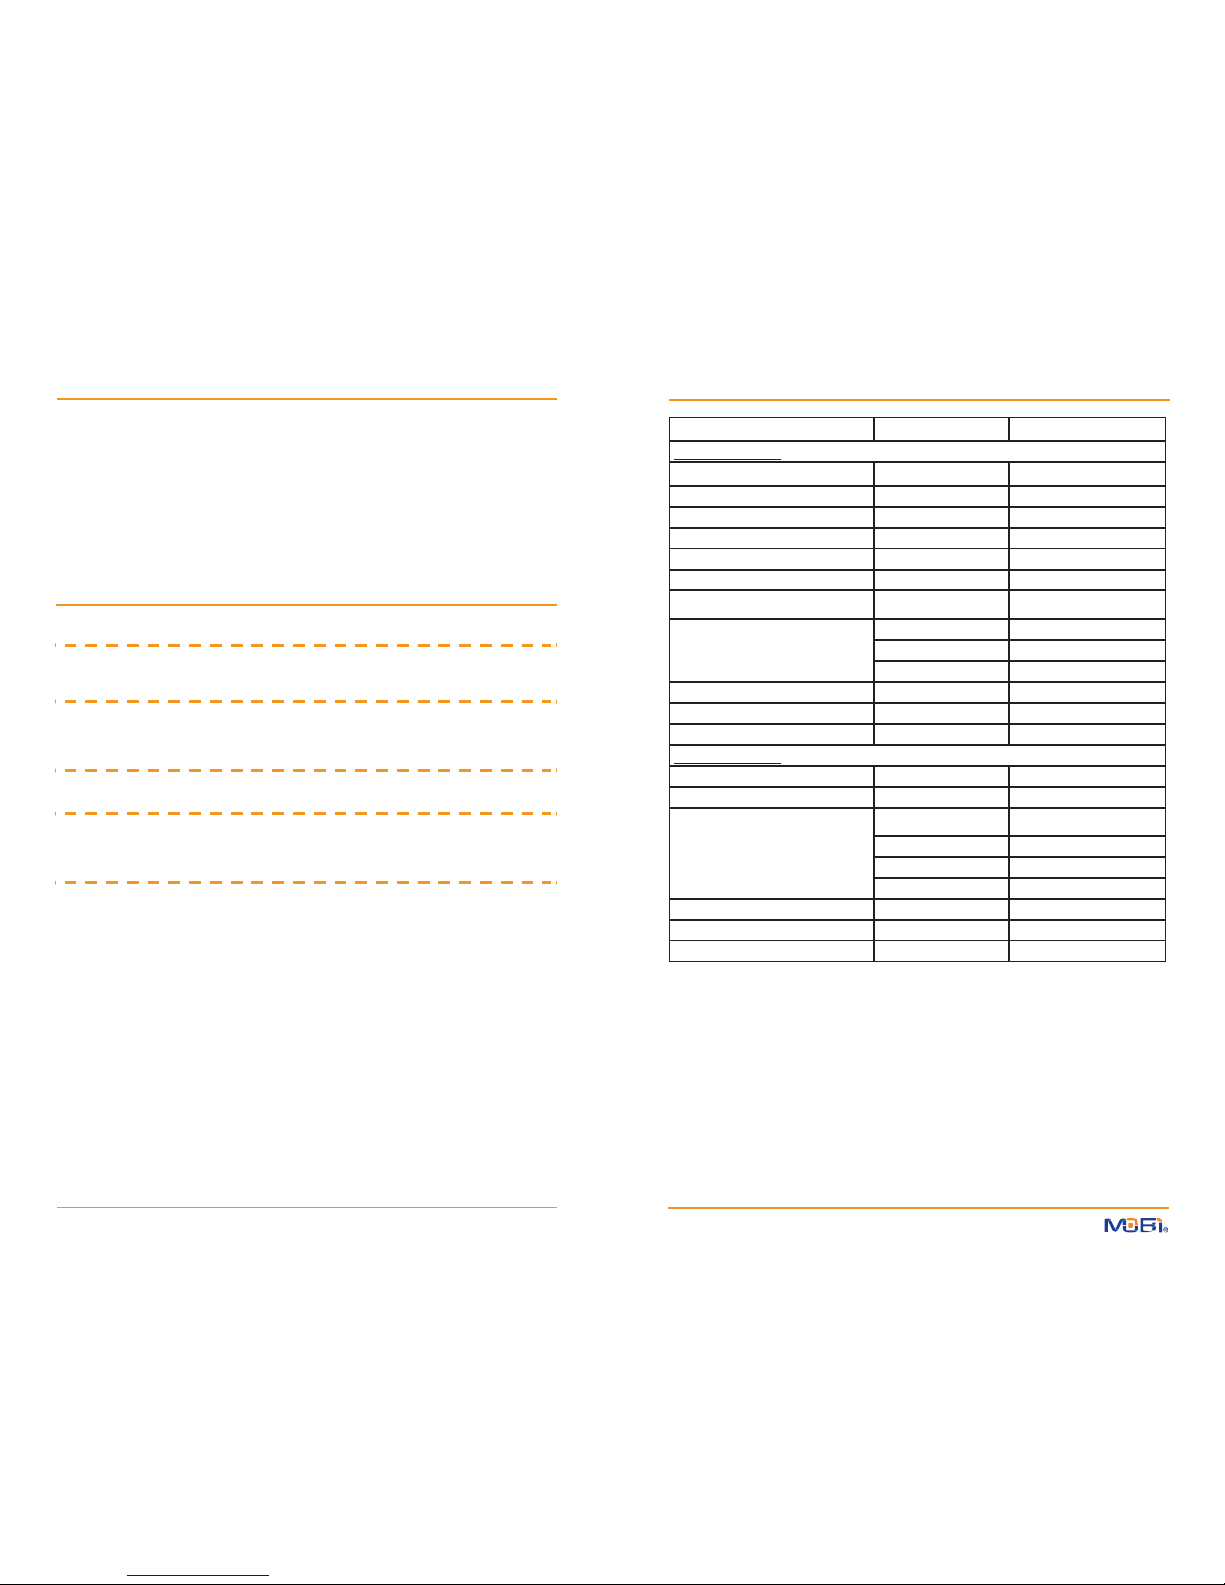
Number Level Status Pan/ Tilt Temperature Mode (On) (monitor) Strength
!
!
!
!
DATA/FILE TRANSFERS
!
!
!
!
!
!
!
!
!
!
!
!
!
DATE/TIME STAMP
Year/Month/Day
!
!
!
!
!
!
!
!
!
!
!
!
direct to
VOLUME
!
!
!
!
!
!
!
!
!
!
!
!
direct to
PLAY
!
!
!
!
!
!
!
!
!
!
!
!
direct to
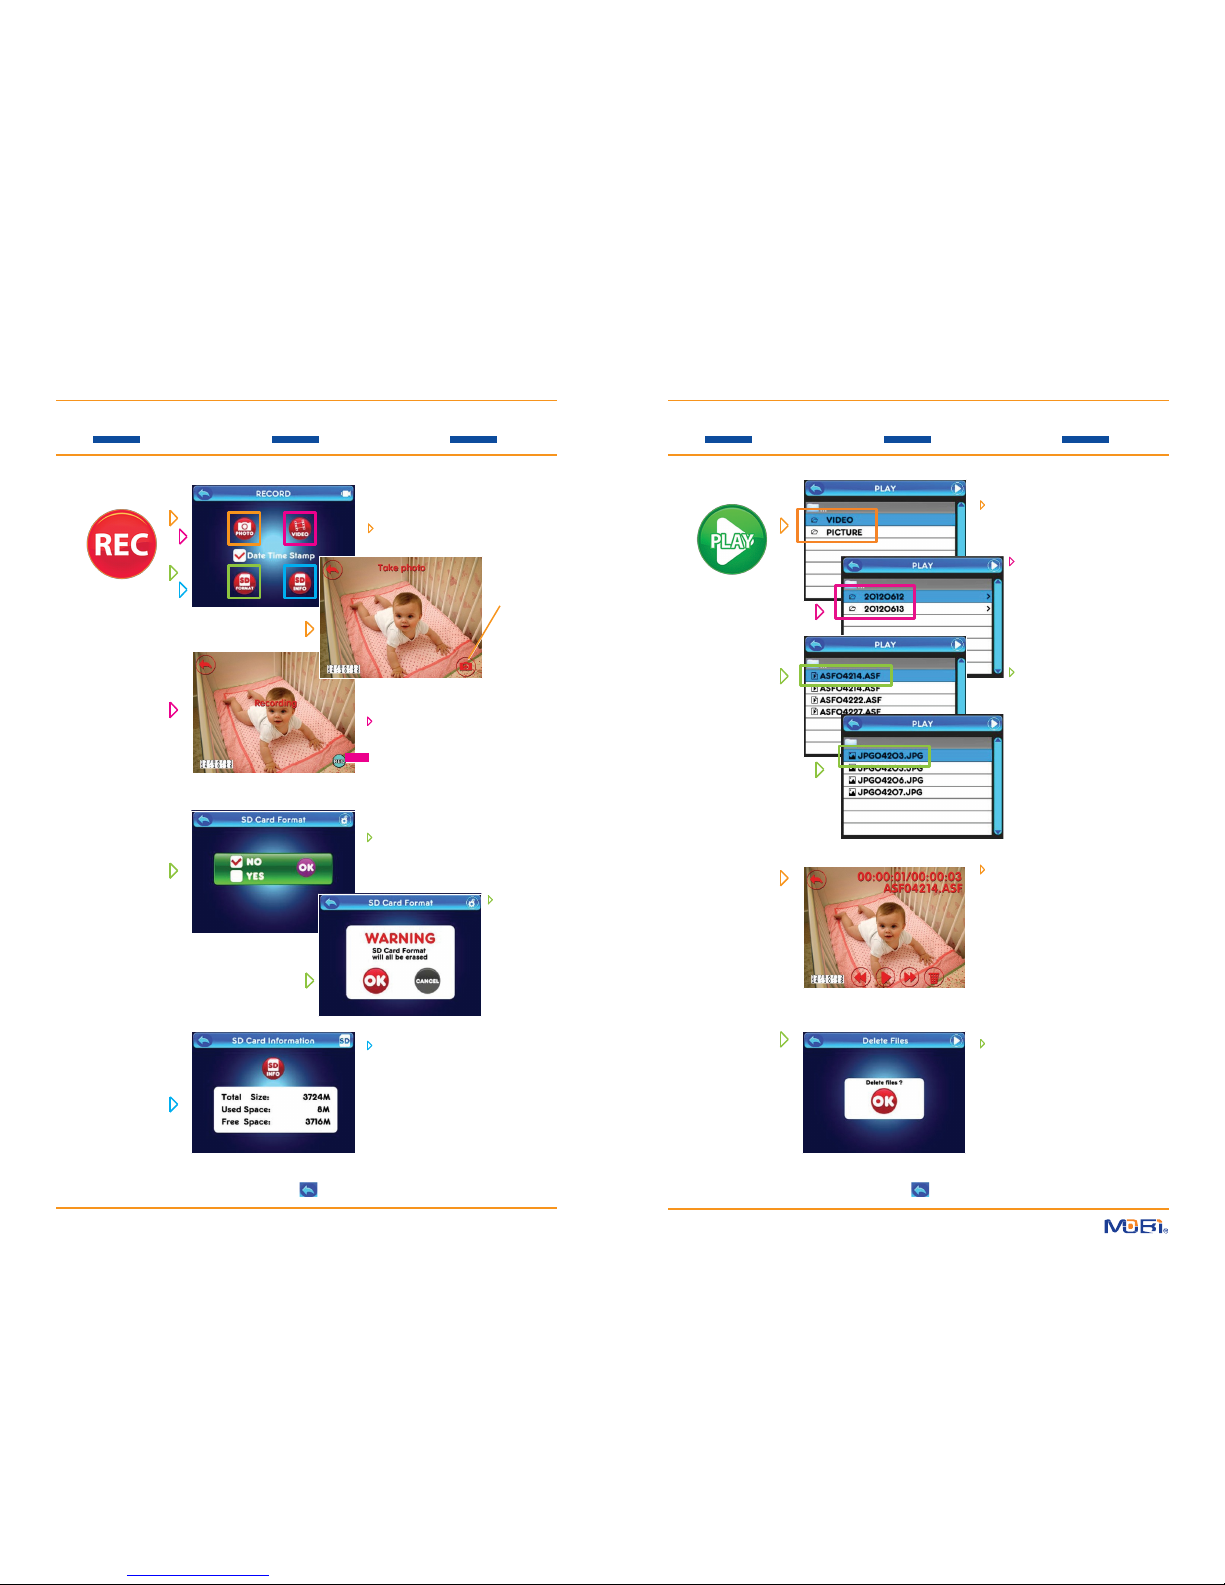
RECORD
To transfer photo and video files from the monitor to your PC* ...
Note: Using this feature allows viewing only on the computer. Once USB Connection
is established the monitor screen is turned off and all features and buttons (with the
exception of the ESC Button) will not be functional.
1. Set the USB Output on the monitor to the USB Connection icon (refer to page 13)
2. Using the USB Cord (included), connect the monitor to an available USB port on your PC*
3. Wait for your computer to automatically recognize and show the outside Memory Device
!
4. You may then move or copy files from the SD Card (not included) as you normally would with
any such storage device (provided an SD Card is in the monitor and has data stored on it)
!
* The MobiCam® DXR Touch is only compatable with Windows® PCs.
Hour/Minute/Second 1 2 3
!
!
Each paired camera scene also displays Convenience Icons (shown along the bottom of the screen)
so you can either view the current Date/Time Stamp or...
touch and bypass the Main Menu to...
1... instantly adjust Volume controls for that camera
2... instantly access the Play Video/View Photo control panel
3... instantly Record Video from that camera...with just one touch!
!
!
16 17