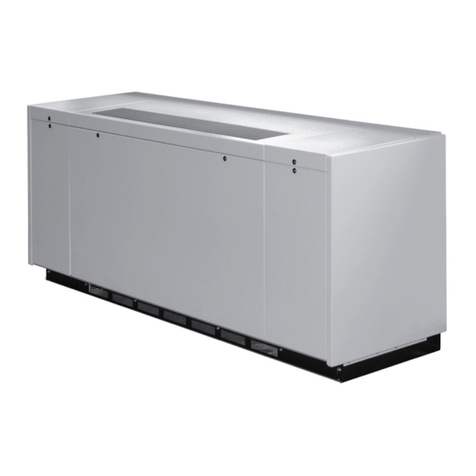
Modine Manufacturing Sentinel UVV Manual

WARNING
Improper installation, adjustment, alteration,
service or maintenance can cause property
damage, injury or death, and could cause
exposure to substances which have been
determined by various state agencies to cause
cancer, birth defects or other reproductive harm.
Read the installation, operating and maintenance
instructions thoroughly before installing or
servicing this equipment.
IMPORTANT
Theuseofthismanualisspecicallyintended
foraqualiedinstallationandserviceagency.
Aqualiedinstallationandserviceagencymust
perform all installation and service of these
appliances.
AIR 3-500.3
5H1015460000
INSTALLATION AND SERVICE MANUAL
Sentinel®
Unit Ventilator
Models UVV and UVD
April, 2019
Inspection On Arrival
1. Inspect unit upon arrival. In case of damage, report
immediately to transportation company and your local factory
sales representative.
2. Check serial plate on unit to verify that the power supply
meets available electric power at the point of installation.
3. Inspect unit upon arrival for conformance with description of
productordered(includingspecicationswhereapplicable).
THIS MANUAL IS THE PROPERTY OF THE OWNER.
PLEASE BE SURE TO LEAVE IT WITH THE OWNER WHEN YOU LEAVE THE JOB.

2AIR 3-500.3
CAUTION
1. Ensure that the supply voltage to the appliance, as
indicated on the serial plate, is not 5% less than the rated
voltage.
2. Units not approved for use in potable water systems.
3. Hot water supplied to the hot water heating option must
not exceed 200°F temperature or 125 PSIG pressure.
4. Do not operate the units within steam pressure greater
than 10 PSIG. Steam pressure must be 10 PSIG or lower
to avoid excessive discharge air temperatures that could
cause burns or personal injury.
5. Do not attempt to reuse any mechanical or electrical
component which has been wet. Such component must
be replaced.
DANGER
Appliances must not be installed where they may be exposed to
potentiallyexplosiveorammableatmosphere.
SPECIAL PRECAUTIONS
SPECIAL PRECAUTIONS
THE INSTALLATION AND MAINTENANCE INSTRUCTIONS
IN THIS MANUAL MUST BE FOLLOWED TO PROVIDE
SAFE, EFFICIENT, AND TROUBLE-FREE OPERATION. IN
ADDITION, PARTICULAR CARE MUST BE EXERCISED
REGARDING THE SPECIAL PRECAUTIONS LISTED BELOW.
FAILURE TO PROPERLY ADDRESS THESE CRITICAL
AREAS COULD RESULT IN PROPERTY DAMAGE OR LOSS,
PERSONAL INJURY, OR DEATH. THESE INSTRUCTIONS
ARE SUBJECT TO ANY MORE RESTRICTIVE LOCAL OR
NATIONAL CODES.
HAZARD INTENSITY LEVELS
1. DANGER: Indicates an imminently hazardous situation
which, if not avoided, WILL result in death or serious injury.
2. WARNING: Indicates a potentially hazardous situation which,
if not avoided, COULD result in death or serious injury.
3. CAUTION: Indicates a potentially hazardous situation which,
if not avoided, MAY result in minor or moderate injury.
4. IMPORTANT: Indicates a situation which, if not avoided, MAY
result in a potential safety concern.
IMPORTANT
1. Start-up and adjustment procedures should be performed
byaqualiedserviceagency.
2.Nowater-owcancauseafreezeconditionresultingin
damage to the coil.
3. Do not release refrigerant to the atmosphere. When
adding or removing refrigerant, all national, state/
province, and local laws must be followed.
4. To check most of the Possible Remedies in the
troubleshooting guide listed in Table 23.1, refer to the
applicable sections of the manual.
WARNING
1. Disconnect power supply before making wiring
connections to prevent electrical shock and equipment
damage.
2. All appliances must be wired strictly in accordance with
the wiring diagram furnished with the appliance. Any
wiringdierentfromthewiringdiagramcouldresultina
hazard to persons and property.
3. Any original factory wiring that requires replacement must
be replaced with wiring material having a temperature
rating of at least 105°C.
4. Ensure that the supply voltage to the appliance, as
indicated on the serial plate, is not 5% greater than rated
voltage.
5. When servicing or repairing this equipment, use only
factory-approved service replacement parts. A complete
replacement parts list may be obtained by contacting
Modine Manufacturing Company. Refer to the rating plate
on the appliance for complete appliance model number,
serial number, and company address. Any substitution of
parts or controls not approved by the factory will be at the
owner’s risk.
Table of Contents
General Information ..................................1
Inspection on Arrival ..................................1
Special Precautions ..................................2
SI(Metric)ConversionFactors..........................3
Unit Location........................................3
Installation ........................................ 3
Wiring/Terminal Strip Connections....................4
Start-Up Procedure
General ........................................5
EnergyRecoveryVentilator(Optional) ................5
Start-Up Sheet – Examples ..........................6-7
Unit Dimensions ..................................8-11
Performance Data ..................................12
Accessory Installation
Wall Sleeve and Louver........................13-14
Rear Extension .................................15
Plenum........................................15
Duct Shroud,Filler Panel and Floorstand..............16
Maintenance.......................................17
Replacement Parts ..............................18
Model Nomenclature . . . . . . . . . . . . . . . . . . . . . . . . . . . . .18
Serial Plate – Example ...........................18
Troubleshooting ....................................19
Warranty ..........................................20

3
AIR 3-500.3
UNIT LOCATION / INSTALLATION
To Convert Multiply By To Obtain
"W.C. 0.24 kPa
psig 6.893 kPa
°F
(°F-32)x0.555
°C
inches 25.4 mm
feet 0.305 meters
CFM 0.028 m3/min
To Convert Multiply By To Obtain
CFH 1.699 m3/min
Btu/ft30.0374 mJ/m3
pound 0.453 kg
Btu/hr 0.000293 kW/hr
gallons 3.785 liters
psig 27.7 "W.C.
Table 3.1 - SI (Metric) Conversion Factors
Handling
Each unit will be shipped to the site on a wood skid. Whenever
possible, all lifting and handling of the unit should be done with
the packing and skid in position.
When slinging or using a forklift to lift the unit, the support points
shouldbesucientlyaparttogivestabilitywhenlifting.Unless
otherwise noted, the lifting points should be equidistant from the
centerline. Extreme care should be taken not to drop the unit.
Considerable damage can occur to the unit during positioning,
in particular, to the paneling and exterior paint. Use an adequate
number of personnel and the correct tools when moving the unit.
The unit is designed to remain upright so care should be taken
when lifting the unit up steps.
The use of torque screwdrivers on panel, cover or component
mounting screws is not recommended. Hand-start all screws.
If electric drills are used – set at the lowest possible torque.
Preparation
1. Before installation, ensure that the correct electrical power
supply is available for the unit.
2. Each unit requires an independently fused and isolated power
supply.
3. If the installation has multiple units, check that unit
identicationscorrespondwiththenetworkdiagrams.Advise
Modine immediately if discrepancies are noted.
4. Check to make sure that the units will have adequate
installation clearance around them.
5. Note that each unit has a condensate connection at the
rear and suitable provisions should be made for draining. If
multiple units tee into a common drain manifold, the drain
line must be sized to ensure free draining with all the units in
operation.
6. Inspect the wall sleeve installation for gaps that would allow
leakage of outdoor air into the space. All joints and abutments
should be sealed with waterproof sealant.
Drainage
Each unit has an internal condensate drain, terminating
internally to the unit. A 1-3/8" condensate drain hole is available
onthebacksideoftheunit(seeFigure9.1forthelocation).
This must be connected to the main drain system in accordance
with any local codes and general good piping practice.
Electrical
Electrical wiring should be done in accordance with all
applicable national and local codes. It is the responsibility of the
electrical contractor to adhere to such codes. The warranty will
bevoidedifwiringisnotinaccordancewiththespecicationsof
the unit. Modine recommends using copper conductors only.
All power supply wiring must be capable of carrying the
maximum current load under no fault conditions at the stipulated
voltages.Careshouldbetakentoavoidsignicantvoltage
drops.
A 1.38" diameter knockout for power connection is provided at
the top of the unit.
Plumbing
If the unit provided has a hot water or steam coil, all plumbing
connectionsintheeldmustbecompliantwithlocalbuilding
codes.Whenleaktestingconnectionsintheeld,components
will be leak tight up to 125PSIG water pressure, or 50PSIG of
Nitrogen.
INSTALLATION
The instructions detailed below are for the Installation of a
“Standard” unit. Accommodations and adjustments will be
required for the usage of additional unit accessories. Should
assistance be required for the installation of these additional
items, consult Modine at the phone number listed on the back
cover of this manual.
1.Checktheoorforlevelnessandchecktoensurethewallis
atarightangletotheoor.Shouldtherebeanyirregularity,
the placement of foam tape on the outside edges of the unit
willllthegapsbetweentheunitandthewall,allowingforthe
use of a sealant, to create a smooth transition from the unit to
the wall.
2. After adjusting for any irregularity in the location site, locate
thepositionfortheoormountingbolts(seegures8.1-11.1).
Drill the appropriate sized holes, for the fasteners that are to
be utilized, and insert the anchors that are to be used.
3. Remove the backing strip from the gasket on the wall sleeve.
Place the unit in the correct location, ensuring a tight seal with
the wall sleeve and the wall.
4. Check to ensure that the unit is plumb and level in both
directions. If adjustment is necessary, Modine recommends
the placement of metal shims in the outer most corners of the
base.
5. The cabinet must be secured to either the back wall or the
oor.Theoorofthecabinethasfourpre-punchedholesand
the back of the cabinet has a hole on each side. The type of
materialsusedfortheoorandthewallswilldeterminethe
typeoffastenertouse.Ifunitismountedonaoorstand,use
mounting hardware supplied by the factory, otherwise Modine
recommends the use of 1/2" diameter fasteners with 1-1/2"
diameterwashers.Securingthecabinettotheoororwall
helps to reduce movement and noise due to vibration.
6. Once the cabinet is secured, seal any gaps caused by
unevenoorsorwallsurfacestopreventnoisefromescaping
through these openings.
7. Make the condensate drain connection and the necessary
electrical connections to the unit.
8.Whenconnectingaductangeorductworkdirectlytothetop
of the unit, do not drill or put screws into the area immediately
surroundingthesupplyairopening(s).SeeFigure4.1
(dimensionsininches).Holesinthetopofthecabinet
indicate recommended mounting locations.
DANGER
Appliances must not be installed where they may be exposed to
potentiallyexplosiveorammableatmosphere.
UNIT LOCATION
4AIR 3-500.3
INSTALLATION
Figure 4.1 - Do Not Drill Zone - UVD Only
Figure 4.2 - Terminal Strip
Wiring
CAUTION
Ensure that the supply voltage to the appliance, as indicated
on the serial plate, is not 5% less than the rated voltage.
WARNING
1. Disconnect power supply before making wiring
connections to prevent electrical shock and equipment
damage.
2. All appliances must be wired strictly in accordance with
the wiring diagram furnished with the appliance. Any
wiringdierentfromthewiringdiagramcouldresultina
hazard to persons and property.
3. Any original factory wiring that requires replacement must
be replaced with wiring material having a temperature
rating of at least 105°C.
4. Ensure that the supply voltage to the appliance, as
indicated on the serial plate, is not 5% greater than rated
voltage.
Installation of wiring must conform with local building codes,
or in the absence of local codes, with the National Electric
Code ANSI/NFPA 70 - Latest Edition. Unit must be electrically
grounded in conformance to this code. In Canada, wiring must
comply with CSA C22.1, Part 1, Electrical Code.
Electric wiring must be sized to carry the full load amp draw of
the motor, starter and any controls that are used with the unit.
Any damage to or failure of units caused by incorrect wiring of
the units is not covered by warranty.
The electrical supply can be connected to the unit power lead
extension at a customer supplied junction box.
When installing any wiring into the electrical panel, extra cable
must be left outside the panel to allow the panel to open fully.
Failure to follow these instructions may cause damage to the
wiring and/or the unit.
Terminal Strip Connections
The terminal strip connections are designed to clamp down on
the wires. To properly connect the wires to the terminal strip:
1.Pushasmallat-headscrewdriverintothesquareholeonthe
terminal.Pressrmlyuntilthescrewdriverhitsthebackstop
andopenstheterminal(seeFigure4.2).
2. Remove approximately 3/8" of insulation from the end of
the wire and push the stripped wire into the oval hole in the
terminal.
3. Remove the screwdriver. Pull on the wire to make sure that it
is securely clamped in the terminal.
4. Make sure that the terminal clamp is in contact with bare wire
(insulationremoved).
4.00
9.50
9.50
5. 00
“DO NOT
DRILL”
ZONE

5
AIR 3-500.3
START-UP PROCEDURE
IMPORTANT
Start-up and adjustment procedures should be performed by
aqualiedserviceagency.
START-UP PROCEDURE
The unit has been factory tested and set for proper operation,
but a full unit start-up is recommended.
See start-up sheet examples - Figures 6.1 and 7.1.
Pre-Start Checks
1. Check that the supply voltage matches the unit supply voltage
listed on the Unit Serial Plate. Verify that all wiring is secure
and properly protected. Trace circuits to insure that the unit
has been wired according to the wiring diagram.
2. Check that the unit has no visible damage and that all the
components are secure.
3.Checkthatalleldelectricalandmechanicalworkhasbeen
performed according to all applicable Federal, State, and
Local codes.
4. Check the supply voltage to the unit is within +/- 5% of the
voltage on the unit serial plate.
Unit Start-Up Procedure
1. Turn the disconnect switch to the “ON” position.
2. Follow the instructions in the Modine microprocessor book.
The control parameters and setpoints have all been factory
set to the default values.
3. During the unit operation, measure and record all the
information that is required to complete the Start-Up Sheets
that are supplied with the unit. Copy the information onto the
Start-Up Sheets, Figures 6.1 and 7.1, in this manual for your
records.
Sequence of Operation
Microprocessor: A Carel microprocessor will control the
unit and allow for networking and remote monitoring. The
microprocessor will monitor the room temperature (either via
anoptionalwallthermostatorreturnairsensor),supplyairand
outdoor air. With this information the unit is able to operate at
maximumeciency.Theoccupied/unoccupiedcontrolcanbe
via optional time clock or from a signal from a building central
time clock.
If a wall or unit mounted thermostat is selected, the setpoint can
be either fully adjustable or +/- three degrees. This allows some
control of the room temperature while limiting its adjustment.
The thermostat will also have an occupied override button to
allow a temporary override until the next scheduled occupancy
change.
Fan: The fan will run continuously during occupied mode
and will be intermittent on a call for cooling or heating during
unoccupied mode. A built in fan purge time allows for maximum
heatingandcoolingeciency.
Cool: When the temperature increases above the cooling
setpoint, the cooling valve will modulate open and fan will be
energized.
Hot Water/Steam Heat: When the temperature decreases
below the heating setpoint, the heating valve will modulate open
and fan will be energized.
Electric Heat: When the temperature decreases below the
heatingsetpoint,therststageofelectricheatwillbeenergized.
Iftwostagesofelectricheataretted,thesecondstagewill
onlybeenablediftherststageofheatisnotkeepingupwith
heating demand.
Economizer Damper (Digit 9 = A, B or C): The economizer
damper controls the mixture of return air and outside air drawn
through the unit. During occupied mode the damper will open
to a minimum position to provide ventilation requirements to
the space. The damper shall be fully closed during unoccupied
mode.
The damper is controlled by an actuator requiring a 2.5-7.5VDC
proportional signal. At 2.5V, the damper is positioned for full
return air and no outside air. At 7.5V, the damper is positioned
for full outside air and no return air.
Economizer Damper (Digit 9 = E): The economizer damper
controls the mixture of return air and outside air drawn through
the unit. During occupied mode the damper will open to a
minimum position to provide ventilation requirements to the
space. The damper shall be fully closed during unoccupied
mode. The economizer damper and motorized exhaust damper
aretiedtothesamesignalforairowbalancing.
The damper is controlled by an actuator requiring a 2-10VDC
proportional signal. At 2V, the damper is positioned fully closed
to outside air. At 10V, the damper is positioned fully open to
outside air.
Energy Recovery Ventilator (Optional): During operation
whentheunitiscoolingtheroom(summer),coolroomreturnair
is drawn across the enthalpy wheel. This air is then exhausted
external to the room. Warm, humid ambient air is drawn across
the other side of the ERV and as the enthalpy wheel turns, the
airiscooledanddehumidied.Thisairisthenmixedwiththe
room air and recirculated through the indoor section.
Duringoperationwhentheunitisheatingtheroom(winter)the
warm, moist air from the room is used to temper the cold, dry
external ambient air.

6AIR 3-500.3
START-UP SHEET - EXAMPLE
Figure 6.1 - Start-Up Sheet - EXAMPLE Page 1

7
AIR 3-500.3
START-UP SHEET - EXAMPLE
Figure 7.1 - Start-Up Sheet - EXAMPLE Page 2

8AIR 3-500.3
DIMENSIONS
Figure 8.1 - Dimensions – Base Unit UVV (Digit 9: Ventilation Conguration = A, B or C)
NOTE:
1.BaseUnitUVV(Digit9:VentilationConguration=A)willbeprovidedwithnoExhaustAirOutlet.
2. Unit will be provided with top and bottom piping knockouts. Reference Digit 20 in unit nomenclature to understand where terminations are located.

9
AIR 3-500.3
Figure 9.1 - Dimensions – Base Unit UVV (Digit 9: Ventilation Conguration = D)
NOTE:
Unit will be provided with top and bottom piping knockouts. Reference Digit 20 in unit nomenclature to understand where terminations are located.

10 AIR 3-500.3
DIMENSIONS
Figure 9.1 – Dimensions – Base Unit UVV (Digit 9: Ventilation Conguration = E)
NOTE:
Unit will be provided with top and bottom piping knockouts. Reference Digit 20 in unit nomenclature to understand where terminations are located.

11
AIR 3-500.3
DIMENSIONS
Figure 11.1 – Dimensions – Base Unit UVD (Digit 9: Ventilation Conguration A, B or C)
NOTE:
1.BaseUnitUVD(Digit9:VentilationConguration=A)willbeprovidedwithnoExhaustAirOutlet.
2. Unit will be provided with top and bottom piping knockouts. Reference Digit 20 in unit nomenclature to understand where terminations are located.

12 AIR 3-500.3
PERFORMANCE DATA
Table 12.1 - Technical Data
UV Units 30 40 50 60
Coils - ‘A’ Frame - Chilled Water and Hot Water
Quantity 2 2 2 2
Face Area FT²4.36 4.36 4.36 4.36
Coils - Slab - Hot Water and Steam
Quantity 1 1 1 1
Face Area FT²3.33 3.33 3.33 3.33
SUPPLY FAN Direct Drive Centrifugal
Fan Quantity 1 1 1 1
MotorSize(Qty1) HP 1/2 1/2 1/2 3/4
Motor Type ElectronicallyCommutatedMotor(ECM)
NominalAirow(High/Med/Low) CFM 750 / 600 / 500 1000 / 750 / 600 1250 / 1000 / 750 1500 / 1250 / 1000
Rated/Max External Static Pressure IN. WG 0.5 0.5 0.5 0.5
POWERED EXHAUST (optional) Direct Drive Centrifugal
Fan Quantity 1 1 1 1
MotorSize(Qty1) HP 1/2 1/2 1/2 3/4
Motor Type ElectronicallyCommutatedMotor(ECM)
MaxRoomExhaustAirow CFM 600 800 1000 1200
Rated/Max External Static Pressure IN. WG 0.5 0.5 0.5 0.5
UNIT WEIGHT
Operating Weight LBS 340 340 340 340
FILTER MERV 8,11,13
Quantity 2
Dimensions IN 12 x 24
ELECTRIC HEATING (optional)
Electric Heating Capacity KW 10
Stages 2
ENERGY RECOVERY WHEEL (optional) DATA SHOWN FOR ALL UNITS
Outdoor Air Volume CFM 225 300 375 450
TotalCapacityRecovered(Cooling)jMBH 9.9 12.4 14.5 16.3
MeasuredCoolingEectiveness %77.8 73.3 68.8 64.4
TotalCapacityRecovered(Heating)kMBH 8.7 11.0 13.1 14.8
MeasuredHeatingEectiveness %80.1 76.2 72.2 68.4
jCoolingcapacitybasedon:Room75/63˚FDry/WetBulb,Ambient95/78˚FDry/WetBulb.
kHeatingcapacitybasedon:Room70/58.5˚FDry/WetBulb,Ambient35/33˚FDry/WetBulb.

13
AIR 3-500.3
ACCESSORY INSTALLATION
3. Use the masonry screws provided to fasten the wall sleeve
angetothewall.Donotattachthewallsleevetothe
classroom unit.
4.Slidethelouver(soldseparately)intotheinnerwallsleeve.
Useself-tappingscrews(byothers)tosecurethelouverto
the wall sleeve. See Figure 13.2.
5. From outside the building, slide the louver and inner wall
sleeve into the wall opening and the outer wall sleeve until
thelouverangeisintightcontactwiththewall.
6. Use an exterior grade sealant to seal the louver to the wall.
7.Frominsidethebuilding,useself-tappingscrews(byothers)
to fasten the two halves of the wall sleeve together. See
Figure 13.3.
8. Seal the seam between the inner and outer wall sleeve.
IMPORTANT
Theuseofthismanualisspecicallyintendedfora
qualiedinstallationandserviceagency.Aqualied
installation and service agency must perform all
installation and service of these appliances.
Wall Sleeve and Louver (Optional)
Instructions only applicable to accessories sold by Modine. If not
provided by Modine, consult manufacturer’s recommendations.
The wall sleeve is designed to provide a sealed plenum from
the fresh air intake and exhaust air outlet on the back of the
classroom unit to the outside of the building. When a single wall
sleeve is used, the intake and exhaust airstreams are separated
with a splitter plate. Units may use a single wall sleeve with
horizontal splitter plate or double wall sleeves depending on the
unitconguration.
Wall Sleeve Kit Includes:
• Outer wall sleeve
•Innersplitterplate(ifapplicable)
•Outersplitterplate(ifapplicable)
• Inner wall sleeve
• Masonry screws
• One roll of gasket material
Assembly/Installation
The recommended procedure for assembly and installation is
described as follows:
1. Check to insure that the opening in the wall is at the correct
heightfromtheoorandthatthesizeoftheopening
is correct. This information is contained in the Modine
Engineering Manual or submittal.
2. From inside the building, slide the outer wall sleeve into the
wallopeninguntiltheangeisintightcontactwiththewall.
See Figure 13.1.
ACCESSORY INSTALLATION
Figure 13.1 - Outer Wall Sleeve
INTERIOR WALL OF BUILDING
OUTER WALL
SLEEVE
FLANGE
MASONRY SCREWS
(FASTENTOWALL)
GASKET
Figure 13.3 - Wall Installation
FROM THE OUTSIDE PUSH
LOUVER AND INNER WALL
SLEEVE INTO THE WALL
OPENING SO THE LOUVER
FLANGE IS IN TIGHT
CONTACT WITH THE WALL
Figure 13.2 - Louver and Inner Wall Sleeve
INNER WALL
SLEEVE
LOUVER
SELF-TAPPING SCREW
(BYOTHERS)

14 AIR 3-500.3
ACCESSORY INSTALLATION
9.Cleanthefrontangeoftheoutersplitterplateandattachthe
gaskettotheange.SeeFigure14.1.
10. Place the outer splitter plate in the proper position inside the
wall sleeve. The splitter plate must be positioned between
the fresh air intake and the exhaust air outlet on the back
of the classroom unit. The splitter plate should be angled
slightlydownward(approx1/2"overadistanceof8"),
toward the outside of the building, and the gasket should be
in tight contact with a blade near the center of the louver.
11.Useself-tappingscrews(byothers)tofastentheouter
splitter plate to the wall sleeve.
12. Place the inner splitter plate over the outer splitter plate,
ensuringthattheroomsideangeisushwiththewall
sleeveange.Figure14.1.
13.Useself-tappingscrews(byothers)tofastentheinner
splitter plate to the outer splitter plate.
14. Seal the inner and outer splitter plates to the wall sleeve,
ensuring that no air can pass from one side to the other.
15. Clean the top surface of the two splitter plates and attach 1"
thickfoil-facedinsulation(byothers).SeeFigure14.2.
16.Cleanthewallsleeveangeandinnersplitterplateange
and attach the double-sided gasket. Note: Do not remove
the backing strip from the room side of the gasket until the
classroom unit is ready for installation. See Figure 14.1.
Figure 14.2 - Splitter Plate Insulation
CLEAN TOP SURFACE
OF SPLITTER PLACE
BEFORE INSTALLING
INSULATION
1" FOIL FACED
INSULATION
(BYOTHERS)
Figure 14.1 - Splitter Plate Installation
ANGLE SPLITTER PLATE
SLIGHTLY DOWNWARD
TOWARD THE OUTSIDE
OF THE BUILDING
GASKET
GASKET
FLANGE
DOWN
OUTER SPLITTER
PLATE
INNER SPLITTER
PLATE
ALL FLANGES
UP

15
AIR 3-500.3
ACCESSORY INSTALLATION
REAR EXTENSION (Optional)
Instructions only applicable to accessories sold by Modine. If not
provided by Modine, consult manufacturer’s recommendations.
The rear extension is designed to provide a sealed transition
from the fresh air intake and exhaust air outlet on the back of
theclassroomunittotheoutsideofthebuilding,specically
when the wall openings are not aligned. Units are available with
a 15" deep or 6" deep rear extension with adjustable sill heights.
Installation
The recommended procedure for installation is described as
follows (reference Unit Installation Instructions beginning on
page 3 of this manual. Unit must comply with all requirements,
regardlessifarearextensionisinstalledornot):
1.Checktheoorforlevelnessandchecktoensurethewallis
atarightangletotheoor.Shouldtherebeanyirregularity,
the placement of foam tape on the outside edges of the rear
extensionwillllthegapsbetweentherearextensionand
the wall. The tape will act as a sealant, creating a smooth
transition from the rear extension to the wall.
2. After adjusting for any irregularity in the location site, locate
the position for the unit mounting bolts.
3. Remove the backing strip from the gasket on the rear
extension. Place the unit against the rear extension in the
correct location, ensuring a tight seal between the two.
4.Usingsheetmetalscrews(byothers)screwabovetopplate
and below bottom plate, totaling 4 connection points from the
rearextension,intotheunit(seeFigure15.1).
5. Measure the sill height and adjust the movable plates prior to
moving cabinet and rear extension to the wall. The movable
plates and rear extension openings are designed so there is
an overlap of the wall opening, allowing for a sealing surface
from the outside.
6. Move the cabinet and rear extension against the wall.
7. Check to ensure that the unit is plumb and level in both
directions. If adjustment is necessary, Modine recommends
the placement of metal shims in the outer most corners of the
base.
8. Remove the backing strip from the gasket on the wall sleeve,
and place the unit and rear extension in the correct location
(seeFigure15.1).
9.Usingscrews(byothers)screwabovetopplateandintothe
wall in each side panel – 2 connection points.
10. Complete installation of unit referencing page 3 of this
manual(unitmustbesecuredtotheoor).
Figure 15.2 - Plenum Installation (Top Discharge Shown)
ACCESS PANEL
MOUNTING HOLES
Figure 15.1 - Rear Extension
TOWARD WALL
MOUNTING HOLES MOUNTING HOLES
TOWARD UNIT
PLENUM (Optional)
Instructions only applicable to accessories sold by Modine. If not
provided by Modine, consult manufacturer’s recommendations.
Theeldinstalledplenumisdesignedtodischargeairdirectly
into the space without ductwork to distribute air. Plenums
are provided in 2” height increments, and multiple discharge
congurations.
Installation
The recommended procedure for installation is described as
follows:
1.Unitmustbesecuredtotheoorbeforeplenumsare
mounted on top to prevent injury.
2. Place plenum centered on the top of the unit.
3. Remove the front access panel, so interior base of plenum is
available.
4.Mounttheplenumbyusingsheetmetalscrews(byothers)
through mounting holes at bottom center of each side panel
(seeFigure15.2).Besuretouseaminimumofonescrew
for each side panel even if you are not able to use holes
provided.

16 AIR 3-500.3
DUCT SHROUD (Optional)
Instructions only applicable to accessories sold by Modine. If not
provided by Modine, consult manufacturer’s recommendations.
Theeldinstalledductshroudisdesignedtocoverductwork
that is connected to the unit, until it is above a ceiling. Duct
shrouds are provided as 26" or 38" high.
Installation
The recommended procedure for installation is described as
follows:
1.Unitmustbesecuredtotheoorbeforeductshroudcanbe
mounted on top to prevent injury.
2. Place duct shroud centered on the top of the unit.
3. Mount the duct shroud by using sheet metal screws (by
others)throughmountingholesatbottomcenterofeachside
panel(seeFigure16.1).Besuretouseaminimumofone
screw for each side panel even if you are not able to use
holes provided.
ACCESSORY INSTALLATION
Figure 16.1 - Duct Shroud Installation
MOUNTING HOLES
Figure 16.2 - Filler Panel
FLOORSTAND (Optional)
Instructions only applicable to accessories sold by Modine. If not
provided by Modine, consult manufacturer’s recommendations.
Theeldinstalledoorstandisdesignedtobeinstalledbelow
the unit to move the unit to match existing sill heights.
Installation
The recommended procedure for installation is described as
follows:
1. Refrence unit installation steps on page 3, steps 1 and 2.
2.Floorstandmustbesecuredtotheoor.Theoorstand
has four pre-punched holes. The type of materials used for
theoorwilldeterminethetypeoffastenertouse.Modine
recommends the use of 1/2" diameter fasteners with 1-1/2"
diameterwashers.Securingtheoorstandtotheoorhelps
to reduce movement and noise due to vibration.
3.Unitneedstobeinstalledtotheoorstand,perinstructionson
page 3, use mounting hardware supplied by the factory.
FILLER PANEL (Optional)
Instructions only applicable to accessories sold by Modine. If not
provided by Modine, consult manufacturer’s recommendations.
Theeldinstalledllerpanelisdesignedtobeinstalledabove
a rear extension, and behind a plenum or duct shroud so the
sheet metal goes all the way to the ceiling, and to the wall.
Installation
The recommended procedure for installation is described as
follows:
1.Mountthellerpanelbyusingsheetmetalscrews(byothers)
throughmountingholesonanges(seeFigure16.2).Besure
touseaminimumofonescrew,ontwodierentsidesfor
proper installation of each panel, even if you are not able to
use holes provided.

17
AIR 3-500.3
MAINTENANCE
CAUTION
Do not attempt to reuse any mechanical or electrical
component which has been wet. Such component must be
replaced.
IMPORTANT
To check most of the Possible Remedies in the troubleshooting
guide listed in Table 23.1, refer to the applicable sections of
the manual.
WARNING
When servicing or repairing this equipment, use only factory-
approved service replacement parts. A complete replacement
parts list may be obtained by contacting Modine Manufacturing
Company. Refer to the rating plate on the appliance for
complete appliance model number, serial number, and
company address. Any substitution of parts or controls not
approved by the factory will be at the owner’s risk.
MAINTENANCE
The routine care and maintenance of this unit will increase
longevity, provide for the proper operational performance, and
reduce the probability of failure.
Once the unit is operational, it will be necessary to perform
certain routine maintenance/service checks. Following is a
Maintenance Schedule with the recommended checks. If your
unit is equipped with special features, there may be additional
checks that are required. Consult Modine for assistance.
The use of torque screwdrivers on panel, cover or component
mounting screws is not recommended. Hand-start all screws.
If electric drills are used – set at the lowest possible torque.
Access
1. Access to the unit is gained by opening the door using the
Modine door key that is provided.
2. Access to the optional powered exhaust fan is gained by
removal of the sound trap panel in the bottom section of the
unit.
3. Access to the supply fan is gained by carefully swinging open
the control panel.
Maintenance Schedule
Every THREE (3) MONTHS
Changethemainltersbyslidingthelteroutofthetrack.The
ltersarepositionedundertheindoorcoil.Neverruntheunit
withoutlters.
Every SIX (6) MONTHS
(Before the heating and cooling season)
1. With the Disconnect Switch in the “OFF” position, inspect
all electrical circuits for loose connections and signs of
overheating,arcing,changorotherphysicaldamage.The
electrical control section should also be wiped clean of all dirt
thatmayaecttheunitoperation.
2. Check for correct fan operation, no excessive noise or
vibrations.
3.Washtheoutsideairlters(energyrecoverywheelor
economizerlters(Optional).
4.Checktheelectricheat(Optional).Seeprocedurebelow.
5. Wash down the cabinet using mild detergent and treat any
paint damage or rust as necessary.
6. Check the control wiring and sensors. Check the operation
and sequencing of controls and ensure that all relevant set
points are recorded.
Every EIGHTEEN (18) MONTHS
1. Clean the Energy Recovery Wheel. See procedure below.
Energy Recovery Wheel (Optional)
The Energy Recovery Wheel is mounted in a fully assembled
cartridge for easy installation, removal and maintenance.
Rotarycounterblowheatexchangers(heatwheels)with
laminarairoware“selfcleaning”withrespecttodryparticles.
Small particles may pass through, while larger particles that
landonthesurfaceareblownclearastheowdirectionis
reversed. For this reason, the primary need for cleaning is to
removelmsofoilbasedaerosolsthathavecondensedon
energy transfer surfaces.
1. Remove the bolts holding the ERV assembly to the right
hand and left hand side panels and lower sound panel
section. Disconnect the ERV plug and socket and slide the
entire assembly out of the unit. It is recommended that two
people are used for this operation.
2. Remove the top panel of the ERV assembly and
disconnect the wheel motor plug and socket. Lift the
wheel(attachedtoplate),topedgerst,outoftheERV
assembly. After detaching the wheel belt, unscrew the
wheel fasteners and crossbar and remove the wheel from
the plate.
3. Clean the wheel according to the Cleaning Airxchange
Energy Recovery Wheels instructions available on the
Airxchange website: www.airxchange.com.
Electric Heat (Optional)
1. Check that the electrical connections are secure.
2. Check the operation of the electric heaters.
3. Check the operation of the manual and auto-reset overheat
cut-out switches. The auto-reset overheat cut-out switch
opens at 130°F and the manual reset overheat cut-out switch
opens at 180°F.

18 AIR 3-500.3
MAINTENANCE
REPLACEMENT PARTS
Foreaseofidenticationwhenorderingreplacementpartsor
contacting the factory about your unit, please quote the unit type
and unit serial number. This information can be found on the
serialplateattachedtoyourunit(seeFigure18.2).
When a component part fails, a replacement part should be
obtained through our Parts Department. If the part is considered
to be under warranty, the following details are required to
process this requirement:
1. Full description of part required, including Unit’s part number,
if known.
2. The original equipment serial number.
3. An appropriate purchase order number.
Figure 18.1 - Model Number Designations
Figure 18.2 - Serial Plate EXAMPLE
1,2 - Product Type (PT)
UV - Sentinel
3 - Cooling Control (CC)
V - Valve Control, Blow Thru
D - Face & Bypass, Draw Thru
4,5 - Nominal Capacity (MBH)
30 - 30,000 Btu/Hr
40 - 40,000 Btu/Hr
50 - 50,000 Btu/Hr
60 - 60,000 Btu/Hr
6 - Supply Voltage (SV)
A - 115/60/1
B - 208/60/1
C - 230/60/1
H - 277/60/1
7 - Generation (G)
A - Current Design
8 - Control (C)
M - Modine Control System
F - Factory Installed Free Issue
B - By Others - Field Installed
9 - Ventilation Conguration (VC)
A - Economizer with No Exhaust
B - Economizer with Gravity Exhaust
C - Economizer with Powered Exhaust
D-ERVwithOADamper(Digit3=Vonly)
E - ERV with OA Damper & Economizer
(Digit3=Vonly)
10 - Filtration (F)
A-MERV8(Standard)
B - MERV 11
C - MERV 13
11 - Case Gauge (CG)
A-20Ga(Standard)
B - 16Ga
12 - Door Mounted Stat (DS)
N - None
V - Vertical Stat
H - Horizontal Stat
13 - Door Mounted Other (DO)
N - None
K - Key Over-ride
S - Occupancy Sensor
L - Indicator Light
T - Twist Timer
14 - Piping Arrangement (PA)
2 - 2 Pipe
4 - 4 Pipe
15 - Cooling Option (CO)
0 - None
6 - 6-row coil
16 - Heating Option (HO)
0 - None
1 - 1-row coil
2 - 2-row coil
6 - 6-row coil
9 - 1-row steam coil
17 - Heating Position (HP)
N - Not Applicable
R - Reheat
18,19 - Electric Heat (EH)
00 - None
02-2kW(1-stage)
03-3kW(1-stage)
04-4kW(1-stage)
05-5kW(1-stage)
06-6kW(2-stage)
07-7kW(2-stage)
08-8kW(2-stage)
09-9kW(2-stage)
10-10kW(2-stage)
20 - Piping Connections (PC)
T - Top Connections
B - Bottom Connections
1,2 3 4,5 6 7 8 9 10 11 12,13 14 15 16 17 18,19 20
PT CC MBH SV G C VC F CG DM PA CO HO HP EH PC

19
AIR 3-500.3
TROUBLESHOOTING
Figure 19.1 - Troubleshooting - General
Trouble Possible Cause Possible Remedy UV
A. Unit Not Operating -
Power On
1. Unit mounted disconnect in the “OFF” position. 1. Turn the disconnect switch to the “ON” position.
2. Unit mounted 3-speed selector switch in the “0”
position.
2. Turn the 3-speed selector switch to the “1, 2, or 3” position.
2. Unit switched OFF in the microprocessor. 2. Consult microprocessor documentation.
3. Delay on start set incorrectly. 3. Consult microprocessor documentation.
4. Unit not in occupied mode. 4. Consult microprocessor documentation, and consult
microprocessor occupied setpoints.
5. Fire/smoke alarm tripped. 5. De-energize and re-energize unit.
6. Tripped circuit breakers. 6.Resetthetrippedcircuitbreaker(s).
7. Loose mains or control wiring. 7.WithpowerOFFfromdistributionpanelinspecttheeld
wiring connections in the electrical panel.
8. Occupancy sensor malfunction. 8. Inspect connections beginning with sensor input from the
microprocessor.
9.Hotwaterfreezeprotection(optional)stattripped. 9. Manually reset at stat.
B. Unit Operating -
No Mechanical
Heating/Cooling
1. Heating/cooling not required. 1. Verify applicable set point with return air temperature.
2. No output from microprocessor. 2. Consult microprocessor documentation.
3. Loose control wiring connections. 3. Inspect connections beginning with compressor output from
the microprocessor.
4. Tripped circuit breakers. 4.Resetthetrippedcircuitbreaker(s).
5. Low temperature unit lockout. 5. Consult microprocessor setpoints.
6.Condensatepan/pumpoatswitchtripped. 6. Check condensate pan/pump and piping for blockage.
C. No Indoor Fan 1. Motor tripped on internal overload. 1. Let motor cool down and reset - possible bad motor or
blockedlter.
2. Fan not required 2. Consult microprocessor documentation, or set thermostat to
“ON”. Check if unit is in unoccupied and standby mode.
3. No power to the fan. 3. Check to make sure plugs are locked in place and all pins
are secure. Check for 24V control signal.
4. Current sensor fault. 4. Make sure sensor is functioning correctly.
D. Electric Heat Not
Operation (Optional)
1. Electric heat not required. 1. Consult microprocessor documentation.
2. Faulty electric heat relay. 2. Check operation of relay and wiring connections.
3. Automatic or Manual reset overheat cutout switch
istripped(open).
3. The manual switch requires manual reset. Check automatic
reset switch is closed. Check current draw of heating
elements and compare to nameplate. Check location of
sensing probe. To avoid incidental tripping of switch, do not
powerounitinelectricheatingmode.Checkfordirtylters
andconrmcorrectairow.
4.Faultyheatingelement(s). 4. Replace elements as necessary.
E. Hot Water / Chilled
Water Valve Not
Operational (Option)
1. Heating not required. 1. Consult microprocessor documentation.
2. Loose wiring connections. 2. Inspect connections beginning with valve output from the
microprocessor. Check to ensure 24V supply power is
present at actuator.
3. Faulty heating actuator. 3. Replace actuator if faulty.
4. Isolation valves are open. 4. Check for additional external isolation valves.
5. Check for DC control signal. 5. Check for 2-10vDC signal from microprocessor.
F. Condensate Leaking 1. Condensate drain not piped up. 1. Pipe condensate drain.
2. Condensate pan/line plugged. 2. Clean drain pan and piping.
3.Condensatepump(optional)faulty. 3. Check operation of condensate pump. Replace pump if
necessary.
G. Microprocessor Not
Working - Faulty
Operation
1. Loose sensor wire connectors. 1. Inspect sensor connections at the microprocessor.
2.Strategylecorrupted. 2. Consult microprocessor documentation.
3. Loose control wiring. 3. Check 24V power supply wiring.

Commercial Products Group
Modine Manufacturing Company
1500 DeKoven Avenue
Racine, WI 53403
Phone:1.866.823.1631(tollfree)
www.modinehvac.com/schoolsystems
© Modine Manufacturing Company 2019
As Modine Manufacturing Company has a continuous product improvement program, it reserves the right to change design and specifications without notice.
COMMERCIAL WARRANTY
Seller warrants its products to be free from defects in material and
workmanship, EXCLUSIVE, HOWEVER, of failures attributable to the use
of materials substituted under emergency conditions for materials normally
employed. This warranty covers replacement of any parts furnished from the
factory of Seller, but does not cover labor of any kind and materials not
furnished by Seller, or any charges for any such labor or materials, whether
such labor, materials or charges thereon are due to replacement of parts,
adjustments, repairs, or any other work done. This warranty does not apply to
any equipment which shall have been repaired or altered outside the factory of
Seller in any way so as, in the judgment of Seller, to affect its stability, nor
which has been subjected to misuse, negligence, or operating conditions in
excess of those for which such equipment was designed. This warranty does
not cover the effects of physical or chemical properties of water or steam or
other liquids or gases used in the equipment.
BUYER AGREES THAT SELLER’S WARRANTY OF ITS PRODUCTS TO BE
FREE FROM DEFECT IN MATERIAL AND WORKMANSHIP, AS LIMITED
HEREIN, SHALL BE IN LIEU OF AND EXCLUSIVE OF ALL OTHER
WARRANTIES, EITHER EXPRESS OR IMPLIED, WHETHER ARISING
FROM LAW, COURSE OF DEALING, USAGE OF TRADE, OR OTHERWISE,
THERE ARE NO OTHER WARRANTIES, INCLUDING WARRANTY OF
MERCHANTABILITY OR FITNESS FOR PURPOSE, WHICH EXTEND
BEYOND THE PRODUCT DESCRIPTION CONFIRMED BY BUYER AND
SELLER AS OF THE DATE OF FINAL AGREEMENT.
This warranty is void if the input to the product exceeds the rated input as
indicated on the product serial plate by more than 5% on gas-fired and oil-fired
units, or if the product in the judgment of SELLER has been installed in a
corrosive atmosphere, or subjected to corrosive fluids or gases, been subjected
to misuse, negligence, accident, excessive thermal shock, excessive humidity,
physical damage, impact, abrasion, unauthorized alterations, or operation
contrary to SELLER’S printed instructions, or if the serial number has been
altered, defaced or removed.
BUYER AGREES THAT IN NO EVENT WILL SELLER BE LIABLE FOR
COSTS OF PROCESSING, LOST PROFITS, INJURY TO GOODWILL, OR
ANY OTHER CONSEQUENTIAL OR INCIDENTAL DAMAGES OF ANY KIND
RESULTING FROM THE ORDER OR USE OF ITS PRODUCT, WHETHER
ARISING FROM BREACH OF WARRANTY, NONCONFORMITY TO
ORDERED SPECIFICATIONS, DELAY IN DELIVERY, OR ANY LOSS
SUSTAINED BY THE BUYER.
BUYER’S REMEDY FOR BREACH OF WARRANTY, EXCLUSIVE OF ALL
OTHER REMEDIES PROVIDED BY LAW, IS LIMITED TO REPAIR OR
REPLACEMENT AT THE FACTORY OF SELLER, ANY COMPONENT WHICH
SHALL, WITHIN THE APPLICABLE WARRANTY PERIOD DEFINED HEREIN
AND UPON PRIOR WRITTEN APPROVAL, BE RETURNED TO SELLER
WITH TRANSPORTATION CHARGES PREPAID AND WHICH THE
EXAMINATION OF SELLER SHALL DISCLOSE TO HAVE BEEN DEFECTIVE;
EXCEPT THAT WHEN THE PRODUCT IS TO BE USED BY BUYER AS A
COMPONENT PART OF EQUIPMENT MANUFACTURED BY BUYER,
BUYER’S REMEDY FOR BREACH, AS LIMITED HEREIN, SHALL BE
LIMITED TO ONE YEAR FROM DATE OF SHIPMENT FROM SELLER. FOR
GAS-FIRED PRODUCTS INSTALLED IN HIGH HUMIDITY APPLICATIONS
AND UTILIZING STAINLESS STEEL HEAT EXCHANGERS, BUYER’S
REMEDY FOR BREACH, AS LIMITED HEREIN, SHALL BE LIMITED TO
TEN YEARS FROM DATE OF SHIPMENT FROM SELLER.
These warranties are issued only to the original owner-user and cannot be
transferred or assigned. No provision is made in these warranties for any
labor allowance or field labor participation. Seller will not honor any expenses
incurred in its behalf with regard to repairs to any of Seller’s products. No
credit shall be issued for any defective part returned without proper written
authorization (including, but not limited to, model number, serial number,
dateoffailure,etc.)andfreightprepaid.
OPTIONAL SUPPLEMENTAL WARRANTY
Provided a supplemental warranty has been purchased, Seller extends the
warrantyhereinforanadditionalfour(4)yearsoncertaincompressors.
Provided a supplemental warranty has been purchased, Seller extends the
warrantyhereinforanadditionalfour(4)yearsornine(9)yearsoncertain
heat exchangers.
EXCLUSION OF CONSUMABLES & CONDITIONS BEYOND SELLER’S
CONTROL
This warranty shall not be applicable to any of the following items: refrigerant
gas, belts, filters, fuses and other items consumed or worn out by normal wear
and tear or conditions beyond Seller’s control, including (without limitation as
togenerality)pollutedorcontaminatedorforeignmattercontainedintheairor
waterutilizedforheatexchanger(condenser)coolingorifthefailureofthepart
is caused by improper air or water supply, or improper or incorrect sizing of
power supply.
Component
Applicable Models “APPLICABLE WARRANTY PERIOD”
Heat Exchangers
Gas-Fired Units except PSH/BSH
Heat Exchangers
Low Intensity Infrared Units
Compressors
Condensing Units for Cassettes
Burners
Low Intensity Infrared Units
Other
Components excluding Heat Exchangers,
Coils, Condensers, Burners, Sheet Metal
Heat Exchangers/Coils
Indoor and Outdoor Duct Furnaces and
System Units, PSH/BSH, Steam/Hot Water Units,
Oil-Fired Units, Electric Units, Cassettes,
Vertical Unit Ventilators, Geothermal Units
Compressors
Vertical Unit Ventilators, Geothermal Units
Burners
High Intensity Infrared Units
Sheet Metal Parts
All Products
TEN YEARS FROM DATE OF FIRST BENEFICIAL USE BY BUYER OR ANY OTHER USER, WITHIN
TEN YEARS FROM DATE OF RESALE BY BUYER OR ANY OTHER USER, WITHIN TEN YEARS
FROM DATE OF RESALE BY BUYER IN ANY UNCHANGED CONDITION, OR WITHIN ONE
HUNDRED TWENTY-SIX MONTHS FROM DATE OF SHIPMENT FROM SELLER, WHICHEVER
OCCURS FIRST
FIVE YEARS FROM DATE OF FIRST BENEFICIAL USE BY BUYER OR ANY OTHER USER, WITHIN
FIVE YEARS FROM DATE OF RESALE BY BUYER OR ANY OTHER USER, WITHIN FIVE YEARS
FROM DATE OF RESALE BY BUYER IN ANY UNCHANGED CONDITION, OR WITHIN SIXTY-SIX
MONTHS FROM DATE OF SHIPMENT FROM SELLER, WHICHEVER OCCURS FIRST
TWO YEARS FROM DATE OF FIRST BENEFICIAL USE BY BUYER OR ANY OTHER USER, WITHIN
TWO YEARS FROM DATE OF RESALE BY BUYER IN ANY UNCHANGED CONDITION, OR WITHIN
THIRTY MONTHS FROM DATE OF SHIPMENT FROM SELLER, WHICHEVER OCCURS FIRST
ONE YEAR FROM DATE OF FIRST BENEFICIAL USE BY BUYER OR ANY OTHER USER, WITHIN
ONE YEAR FROM DATE OF RESALE BY BUYER IN ANY UNCHANGED CONDITION, OR WITHIN
EIGHTEEN MONTHS FROM DATE OF SHIPMENT FROM SELLER, WHICHEVER OCCURS FIRST
This manual suits for next models
2
Table of contents
Other Modine Manufacturing Fan manuals

Modine Manufacturing
Modine Manufacturing Atherion ERM Manual

Modine Manufacturing
Modine Manufacturing ECO EGK User manual

Modine Manufacturing
Modine Manufacturing MPR Series Manual

Modine Manufacturing
Modine Manufacturing ECO IDE 41A04 User manual

Modine Manufacturing
Modine Manufacturing GLW Series Manual

Modine Manufacturing
Modine Manufacturing VFV Manual

Modine Manufacturing
Modine Manufacturing Atherion MPR Manual

Modine Manufacturing
Modine Manufacturing SSD Manual

Modine Manufacturing
Modine Manufacturing Varsity ZCV Series Manual

Modine Manufacturing
Modine Manufacturing MPR Manual