5. Display Light
Green:
Turnon/offcommand:ThreeLEDlightsgreenatthesametime,flashingt
wiceand
accompaniedbytwosounds.
Product is functioning : Light blinks once every 5 sec. Indicating power is
on and working.
Electric shock transmitted: Once detect dog barking, the green LED will
light up once and an extended period of time, meaning electric shock has
given.
RED:
Low battery warning : ThreeLEDlights turn red at the same timefor5
times,accompaniedbytwosoundsthenturnoff.
Automatic protection mode: If collar transmits electric shock for 10 times
within 1 minute, the collar will go into protection mode. In this mode, the
collar will stop working for 1 minute, and the red LED will blink every 2 sec
for 1 minute. After 1 minute, the unit will revert back to normal mode and
the green LED will blink.
CARE AND MAINTENANCE
1. Do not submerse the unit in water or any other liquid.
2. Please remove the battery before cleaning.
3. Use a clean damp cloth for cleaning.
4. Do not use any household or industrial cleaning agents.
TECHNICAL SPECIFICATIONS
Model Number: M-225
Color: Black
Battery: 2X CR2032 3V battery
Product Dimensions: 2.28*1.16*1.57 in
Collar Adjustable range: 6.10-22.83 in
Collar Width: 0.55 in
Product Width: 1.16 in
Product Weight: ~1.62 oz
Working Temperature :0 ℃ — 40 ℃
Waterproof level (main unit):Ip(65)
HINTS AND TIPS
1. This device should only be used for bark deterrent training for dogs.
2. This device is not a toy; keep out of reach of children.
3. Do not submerse the unit in water or any other liquid Do not go near
heat sources place.
4. This device is not intended to provide protection against aggressive
dogs.
5. Your dog should be in good health when using this product.
6. This product is not to be used on dogs less than 9 lbs. or less than 6
months old.
7. Check the probe everyday to make sure no harm to dog’s skin. This
device shall not be used if no body present.
8. Do not leave the collar on the dog for more than 10 continuous hours
per day. Remember this is not part of your dog’s apparel. Prolonged
collar use can cause pressure sores which may lead to skin irritation
such as contact dermatitis or decubitus ulcers. Discontinue usage until
it skin is healed. If condition persists for more than 48 hours, contact
your veterinarian.
9. This device uses two Lithium (CR 2032) coin type batteries. Keep the
batteries out of reach of children and dogs. If swallowed, immediately
seek medical help.
10. Turn off the device if not in use, it extend battery life.
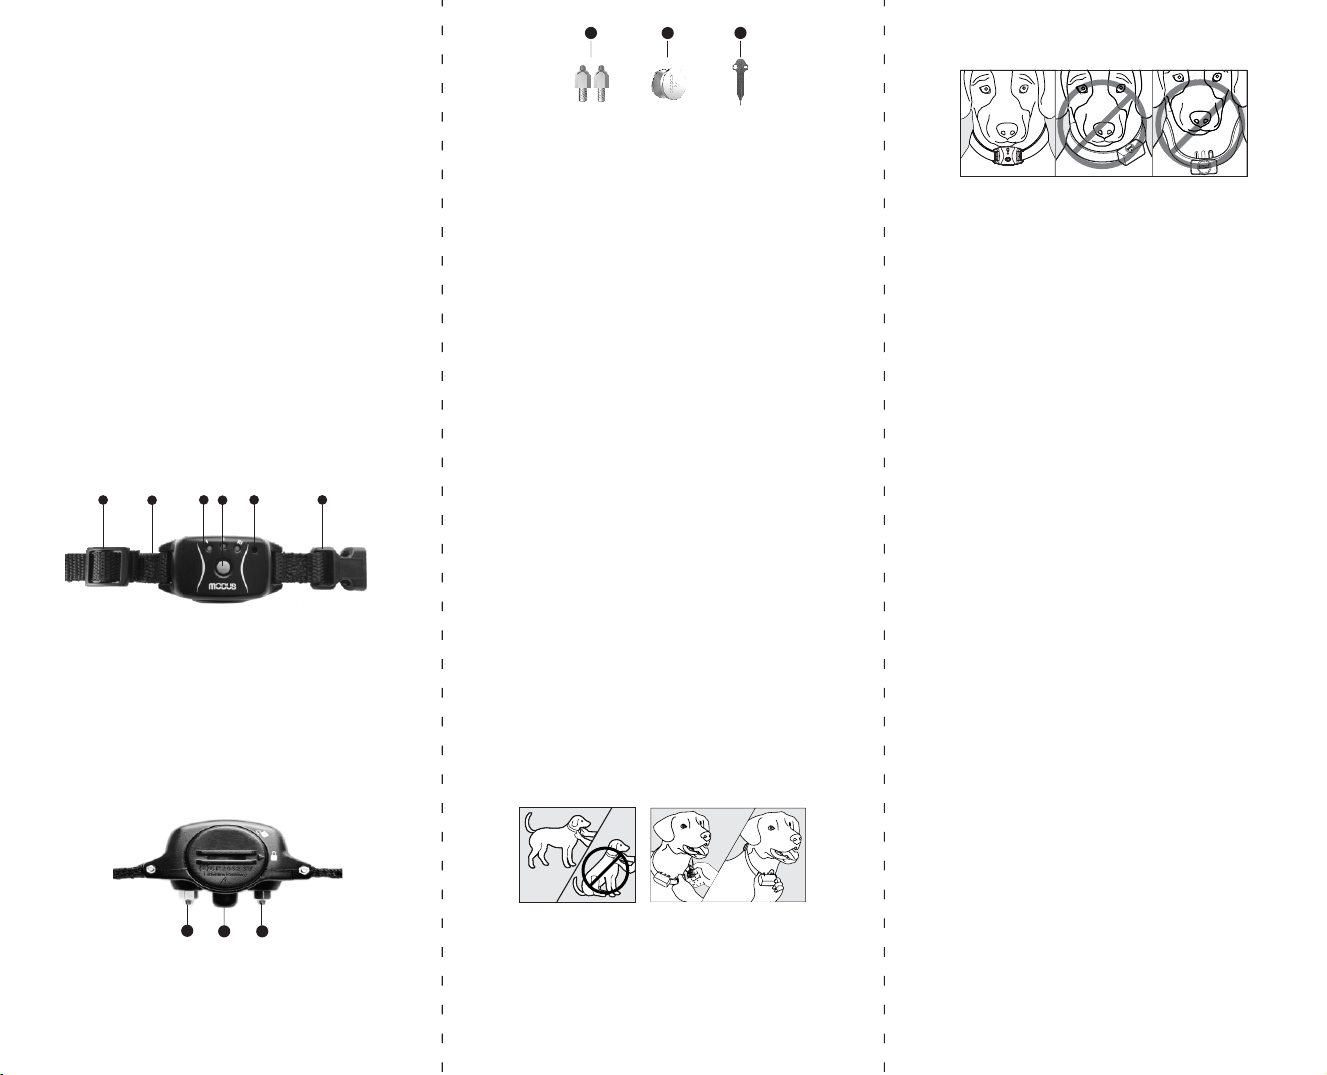
11. Suggest to adjust collar on dogs neck every 1-2 hours to make sure it
is putting on dogs neck and in front of throat.
12. Regularly check whether the unit is on firmly, do not put on too tight.
13. Use this collar for training purposes. Do not use this collar as normal
usage such as put leashes.
14. Once a week, please use damp cloth to clean collars/probes and dogs
neck area.
15. If dog faces skin allergic reaction on the neck, please stop using
immediately. You may use it again when dog is healthy and skin allergy
is gone.
TRAINING GUIDE
1. When first starting to use the bark control collar, you should closely
monitor your dog’s reaction when barking behavior is exhibited.
2. When you begin using the bark control collar, your dog should be inside
a protected area. If outside, your dog should be in a safe protected area
so that your dog is unable to run away when they receive the correction
from the bark control collar.
3. Each dog can have a different reaction from the bark control collar’s
correction. These reactions can vary from a dip of the head, to shaking
the head, whining, excessive barking, confusion, or running away. In the
event of an extreme reaction, wait unit your dog is calm before
approaching your dog.
4. The reaction your dog will have depends on your dog’s personality. The
first several times you use the bark control collar, you must be present.
It is not recommended that you leave the bark control collar on your dog
when you will not be present for extended periods of time.
5. The bark control collar should be worn when you want to deter
unwanted barking behavior. Consistently using the bark collar at the
correct time will give the best results. The more disciplined you are
when choosing to use the bark control collar the better you dog will
understand that barking behavior is not wanted when wearing the collar.
6. The training process needs to be interactive. Once your dog has
received a bark collar correction and stopped barking, you can reward
your dog by praising and / or giving a treat.
7. After initial usage of the product, you will see dogs barking will be
reduced. Please continue to put the collar on for a longer period so that
the dog can learn this new behavior.
WARRANTY
MODUS stands behind the quality of everything we sell and hope you’re
happy with your products. Please kindly refer to our warranty policy below.
The warranty service of MODUS smart pet products is provided by
BONSO’s Technology service center. From the date of purchase, the
product is protected under the “Three Guarantees”.
During the “Three Guarantees” service period, this product is free from
repairing, replacement or refund if it is found to be defective under normal
use.
THREE GUARANTEES
1. Within 7 days of purchase, you may return/refund the products back to
MODUS.
2. Within 15 days of purchase, we will support free replacement if there is
any problem with the product.
3. Within 1 year of purchase, we will support by repairing the units if it is
found to be defective under normal use.
During warranty period, warranty for this product will be charged under
below circumstances
1. Damage caused by irresistible natural disasters.
2. Defective or man-made damage caused by misuse or inability of the
product and not follow the instructions on the instruction manual.
3. Damages caused by disassembly, repair or alteration by anyone other
than MODUS or Authorized MODUS service center.
FCC STATEMENTS:
This device complies with part 15 of the FCC rules. Operation is subject to
the following two conditions:
(1) this device may not cause harmful interference, and (2) this device
must accept any interference received, including interference that may
cause undesired operation. NOTE: The manufacturer is not responsible for
any radio or TV interference caused by unauthorized modifications or
changes to this equipment. Such modifications or changes could void the
user’s authority to operate the equipment.NOTE: This equipment has been
tested and found to comply with the limits for a Class B digital device,
pursuant to part 15 of the FCC Rules. These limits are designed to provide
reasonable protection against harmful interference in a residential
installation. This equipment generates uses and can radiate radio
frequency energy and, if not installed and used in accordance with the
instructions, may cause harmful interference to radio communications.
However, there is no guarantee that interference will not occur in a
particular installation. If this equipment does cause harmful interference to
radio or television reception, which can be determined by turning the
equipment off and on, the user is encouraged to try to correct the
interference by one or more of the following measures: Reorient or
relocate the receiving antenna. Increase the separation between the
equipment and receiver. Connect the equipment into an outlet on a circuit
different from that to which the receiver is connected. Consult the dealer
or an experienced radio/TV technician for help.
Bonso Technology(Shenzhen)Co.,Ltd. Http://www.moduspets.com service01@moduspets.com