manuals.online logo
Brands
  1. Home
  2. •
  3. Brands
  4. •
  5. Petsafe
  6. •
  7. Pet Care Product
  8. •
  9. Petsafe Electronic SmartDoor User manual

Petsafe Electronic SmartDoor User manual

Get Started!
Commençons!
Aan de slag!
¡En marcha!
Iniziamo!
Auf geht’s!
Scan for more
Scannez pour ensavoirplus
Verder zoeken
Escanee para más información
Esegui la scansione
persapernedi più
Scannen für mehr
Informationen
SmartDoor™Connected Pet Door
Porte connectée pour animaux SmartDoor™
SmartDoor™Slim luik
Puerta para mascotas conectada SmartDoor™
Porta per animali connessa SmartDoor™
SmartDoor™Vernetzte Haustiertür
Now you can stay connected with your pet
even as you both come and go.
Désormais, vous pouvez rester connecté à votre animal de
compagnie même lorsque vous n’êtes pas à la maison.
Je kunt nu altijd contact blijven houden met je huisdier.
Ahora puede mantenerse conectado con su mascota incluso
cuando ambos entran y salen.
Ora puoi restare in contatto con il tuo animale domestico
in ogni momento.
Jetzt können Sie mit Ihrem Haustier in Verbindung bleiben,
auch wenn Sie beide unterwegs sind.
2
EN Your new SmartDoor™provides the ultimate in
freedom and convenience while keeping you
connected to your pet. It connects to your home’s Wi-Fi
network and the My PetSafe®app on your smartphone,
allowing you to:
• Let your pet come and go while keeping while keeping
wildlife and others’ pets out.
• Set up individual access schedules for each of your pets.
• Receive alerts for pet activity so you’ll know when each pet
is in or out.
• Change the schedule or access mode from your
smartphone, even when you are not home.
FR Votre nouvelle SmartDoor™vous offre une liberté et un
confort sans égal, tout en vous permettant de rester
connecté à votre animal de compagnie. Elle se connecte au
réseau Wi-Fi de votre maison et à l’application My PetSafe®sur
votre smartphone, vous donnant la possibilité de :
• Laisser votre animal rentrer et sortir tout en évitant que des
animaux sauvages ou les animaux de compagnie de vos
voisins n’entrent chez vous.
• Configurer des horaires d’accès spécifiques pour chacun de
vos animaux de compagnie.
• Recevoir des alertes concernant l’activité de vos animaux
pour être au courant de leurs entrées et sorties.
• Modifier les horaires ou le mode d’accès depuis votre
smartphone, même lorsque vous n’êtes pas chez vous.
NL Je nieuwe SmartDoor™zorgt voor vrijheid en gemak,
terwijl je toch contact blijft houden met je huisdier. De
SmartDoor™maakt verbinding met het wifi-thuisnetwerk en de
My PetSafe®-app op je smartphone, waarmee je het volgende
kunt doen:
• Je huisdier naar buiten kunt laten gaan en naar binnen laten
komen, terwijl je de huisdieren van je buren buiten houdt.
• Afzonderlijke toegangsschema’s voor elk van je
huisdieren instellen.
• Op de hoogte worden gehouden van wat je huisdier doet,
zodat je weet of het binnen of buiten is.
• Het schema of de toegangsmodus vanaf je smartphone
wijzigen, ook als je niet thuis bent.
ES Su nueva SmartDoor™le aporta la máxima libertad
y comodidad mientras le mantiene conectado a su
mascota. Se conecta a la red wifi de su hogar y a la aplicación
My PetSafe®en su teléfono inteligente, lo que le permite:
• Dejar que su mascota entre y salga mientras mantiene
fuera de su casa a animales silvestres y a las mascotas de
sus vecinos.
• Configurar programas de acceso individuales para cada una
de sus mascotas.
• Recibir alertas de actividad de mascotas para que sepa
cuándo entra o sale cada mascota.
• Cambiar el programa o el modo de acceso desde su
teléfono inteligente, incluso cuando no esté en casa.
IT La tua nuova SmartDoor™ti offre la massima libertà
e praticità, mantenendoti connesso al tuo animale
domestico. Si collega alla rete Wi-Fi di casa tua e all’app My
PetSafe®sul tuo smartphone e così potrai:
• Lasciare che il tuo animale domestico vada e venga tenendo
fuori al tempo stesso gli animali selvatici e gli animali
domestici dei tuoi vicini.
• Impostare degli orari di accesso individuali per ognuno dei
tuoi animali domestici.
• Ricevere avvisi per l’attività dei tuoi animali domestici per
sapere se ciascun animale è dentro o fuori.
• Modificare la modalità di accesso oppure la
programmazione dal tuo smartphone, anche quando sei
fuori casa.
DE Ihre neue SmartDoor™bietet Ihnen ein Höchstmaß an
Freiheit und Komfort, während Sie mit Ihrem Haustier
in Verbindung bleiben. Sie verbindet sich mit dem WLAN-Netz
Ihres Hauses und der My PetSafe®App auf Ihrem Smartphone
und ermöglicht es Ihnen,
• Lassen Sie Ihr Haustier herein und hinaus und halten Sie
gleichzeitig Wildtiere und die Haustiere Ihrer Nachbarn fern.
• Richten Sie für jedes Ihrer Haustiere einen individuellen
Zugangsplan ein.
• Sie erhalten Benachrichtigungen über die Aktivität Ihrer
Haustiere, damit Sie immer genau wissen, wann welches
herein- oder hinausgegangen ist.
• Ändern Sie den Zeitplan oder den Zugangsmodus von Ihrem
Smartphone aus, auch wenn Sie nicht zu Hause sind.
3

EN This guide will lead you through the following steps:
1Unbox the SmartDoor™and start gathering what you will
need for setup — see page 6.
2Get to know the SmartDoor™buttons and indicator lights
— see page 8.
3Install batteries in the SmartDoor™— see page 15.
4Download the My PetSafe®app and use it to connect the
SmartDoor™to Wi-Fi and pair it to each of your pets
— see page 17.
5Install the SmartDoor™in your home — see page 20.
Once you have completed the steps in this guide, remember
to take the time to train your pet to use the SmartDoor™.
The included training guide will walk you through our
recommended training procedure step by step.
FR Ce manuel vous guidera dans la réalisation des étapes
suivantes :
1Déballer la SmartDoor™et commencer à rassembler ce
dont vous aurez besoin pour l’installation (voir page 6).
2Se familiariser avec les boutons et les voyants lumineux
SmartDoor™(voir page 8).
3Insérer les piles dans la SmartDoor™(voir page 15).
4Télécharger l’application My PetSafe®et l’utiliser pour
connecter la SmartDoor™au Wi-Fi et l’appairer à chacun
de vos animaux de (voir page 17).
5Installer la SmartDoor™dans votre maison (voir page 20).
Une fois que vous avez terminé les étapes de ce guide,
n’oubliez pas de prendre le temps d’entraîner votre animal
à utiliser la SmartDoor™. Le manuel de dressage fourni
vous guidera pas à pas pour appliquer notre méthode
recommandée.
Setup at a glance
Aperçu de la configuration
Instellen in één oogopslag
Un resumen de la configuración
Impostazione a colpo d’occhio
Einrichtung im Überblick
4
NL In deze gids word je stap voor stap begeleid bij het:
1Uitpakken van de SmartDoor™uit en alles bij elkaar leggen
wat je nodig hebt voor de installatie — zie pagina 6.
2Bekijken van de knoppen en controlelampjes van de
SmartDoor™— zie pagina 8.
3Plaatsen van de batterijen in de SmartDoor™— zie pagina 15.
4Downloaden van de My PetSafe®-app en die gebruiken
om de SmartDoor™met wifi te verbinden en te koppelen
aan elk van je huisdieren — zie pagina 17.
5Installeren van de SmartDoor™— zie pagina 20.
Nadat je de stappen in deze gids hebt gevolgd, moet je
voldoende de tijd nemen om je huisdier te laten wennen aan
de SmartDoor™en die te leren gebruiken. De meegeleverde
trainingsgids leidt je stapsgewijs door onze aanbevolen
trainingsprocedure.
ES Con esta guía podrá seguir los siguientes pasos:
1Saque la SmartDoor™de la caja y comience a recopilar lo
que necesitará para la configuración; consulte la página 6.
2Familiarícese con los botones y las luces indicadoras de la
SmartDoor™; consulte la página 8.
3Instale las pilas en la SmartDoor™; consulte la página 15.
4Descargue la aplicación My PetSafe®y utilícela para
conectar la SmartDoor™a la wifi y sincronizarla con cada
una de sus mascotas; consulte la página 17.
5Instale la SmartDoor™en su hogar; consulte la página 20.
Una vez que haya realizado los pasos de esta guía, recuerde
tomarse un tiempo para adiestrar a su mascota en el uso de la
SmartDoor™. La guía de adiestramiento incluida le indicará paso
a paso el método de adiestramiento que recomendamos
IT Questa guida ti condurrà attraverso le seguenti fasi:
1Apertura della confezione della SmartDoor™e
preparazione del necessario per l’installazione - Vedi a pagina 6.
2Descrizione dei pulsanti e delle spie luminose della
SmartDoor™- Vedi a pagina 8.
3Installazione delle batterie nella SmartDoor™- Vedi a
pagina 15.
4Download dell’app My PetSafe®e suo utilizzo per
connettere la SmartDoor™al Wi-Fi e associarla a ognuno
dei tuoi animali domestici - Vedi a pagina 17.
5Installazione della SmartDoor™nella tua abitazione - Vedi
a pagina 20.
Dopo aver completato i passaggi illustrati in questa guida,
ricordati di addestrare il tuo animale domestico all’utilizzo della
SmartDoor™. Il manuale di addestramento in dotazione illustra
il metodo da noi consigliato e ti guiderà passo passo.
DE Dieser Leitfaden führt Sie durch die folgenden Schritte:
1Packen Sie die SmartDoor™aus und legen Sie alles bereit,
was Sie für die Einrichtung benötigen – siehe Seite 6.
2Machen Sie sich mit den SmartDoor™-Tasten und -LED-
Leuchten vertraut – siehe Seite 8.
3Setzen Sie die Batterien in die SmartDoor™ein – siehe
Seite 15.
4Laden Sie die My PetSafe®App herunter und verwenden
Sie sie, um die SmartDoor™mit dem WLAN zu verbinden
und sie mit jedem Ihrer Haustiere zu koppeln – siehe Seite 17.
5Bauen Sie die SmartDoor™in Ihrem Haus oder Ihrer
Wohnung ein – siehe Seite 20.
Sobald Sie die Schritte in dieser Anleitung ausgeführt haben,
sollten Sie sich etwas Zeit nehmen, um Ihr Haustier für die
Nutzung der SmartDoor™zu trainieren. Die mitgelieferte
Trainingsanleitung führt Sie Schritt für Schritt durch unsere
empfohlene Trainingsmethode.
5
What you have
Ce que vous avez
Dit is wat je hebt
Lo que tiene
Di cosa disponi
Das haben Sie
x4
x4
x4
Interior frame
Cadre intérieur
Binnenframe
Marco interno
Struttura interna
Innenrahmen
Exterior frame
Cadre extérieur
Buitenframe
Marco exterior
Struttura esterna
Außenrahmen
Screws
Vis
Schroeven
Tornillos
Viti
Schrauben
Blanking plugs
Bouchons d'obturation
Afdichtdopjes
Tapones ciegos
Tappi di chiusura
Verschlussstopfen Cutting template
Gabarit de découpe
Sjabloon voor uitsnijden
Plantilla de corte
Sagoma per il taglio
Schneideschablone
PetSafe® Pet Door Key
Médaille pour animaux pour porte PetSafe®
PetSafe® Luiksleutel
Llave para puerta de mascotas de PetSafe®
Chiave per animali PetSafe®
PetSafe® Haustiertür-Schlüssel
Spacer
Pièce d'espacement
Opvulling
Espaciador
Distanziatore
Distanzstück
6
What you need
Ce dont vous avez besoin
Dit heb je nodig
Lo que necesita
Di cosa hai bisogno
Das brauchen Sie
EN To connect the pet door to Wi-Fi and get set up in the
app, you will need:
• Wireless router (2.4 GHz)
• High-speed internet connection
• Smartphone
• Four alkaline batteries: C cell for the medium SmartDoor™,
D cell for the large SmartDoor™
• Additional PetSafe®Pet Door Keys (optional, sold
separately): If you have more than one pet who will be using
the SmartDoor™
FR Pour connecter la porte pour animaux au Wi-Fi et la
configurer dans l’application, vous aurez besoin des
éléments suivants :
• Routeur sans fil (2,4 GHz)
• Connexion Internet à haut débit
• Smartphone
• Quatre piles alcalines : LR14 pour la SmartDoor™moyenne,
LR20 pour la grande SmartDoor™
• Médailles pour animaux pour porte PetSafe®
supplémentaires (facultatives, vendues séparément) : si
plusieurs animaux de compagnie utilisent la SmartDoor™
NL Je hebt het volgende nodig om het huisdierluik te
verbinden met wifi en in de app in te stellen:
• Draadloze router (2,4 GHz)
• Snelle internetverbinding
• Smartphone
• Vier Alkaline-batterijen: C cell voor de medium SmartDoor™,
D cell voor de large SmartDoor™
• Extra PetSafe®-luiksleutels voor het huisdierluik (optioneel,
afzonderlijk verkrijgbaar): Als je meerdere huisdieren hebt
die je van de SmartDoor™gebruik wilt laten maken
ES Para conectar la puerta para mascotas a la wifi y
configurarla en la aplicación, necesitará:
• Router inalámbrico (2,4 GHz)
• Conexión a Internet de alta velocidad
• Teléfono inteligente
• Cuatro pilas alcalinas: de tipo C para la SmartDoor™
mediana, de tipo D para la SmartDoor™grande
• Llaves adicionales para puerta de mascotas PetSafe®
(opcionales, se venden por separado): Si tiene más de una
mascota que vaya a usar la SmartDoor™
IT Per connettere la porta per animali domestici alla tua
rete Wi-Fi e configurarla nell’app, avrai bisogno di:
• Router wireless (2,4 GHz)
• Connessione internet ad alta velocità
• Smartphone
• Quattro batterie alcaline: batteria di tipo C per
la SmartDoor™media, batteria di tipo D per la
SmartDoor™large
• Chiavi per animali aggiuntive PetSafe®(opzionali, vendute
separatamente): Se hai più di un animale domestico che
userà la SmartDoor™
DE Um die Haustiertür mit dem WLAN zu verbinden und
in der App einzurichten, benötigen Sie Folgendes:
• Drahtloser Router (2,4 GHz)
• Schnelle Internetverbindung
• Smartphone
• Vier Alkalibatterien: C-Zellen-Batterien für die mittlere
SmartDoor™, D-Zellen-Batterien für die große SmartDoor™
• Zusätzliche PetSafe®Haustiertür-Schlüssel (optional, separat
erhältlich): Wenn Sie mehr als 1 Haustier haben, das die
SmartDoor™benutzen soll
7
Get to know your new pet door
Familiarisez-vous avec votre
toute nouvelle porte pour
animaux
Je nieuwe huisdierluik leren
kennen
Conocimiento de la nueva puerta
para mascotas
Conosci la tua nuova porta per
animali domestici
Lernen Sie Ihre neue Haustiertür
kennen
EN Although you will control most of the pet door
functionality through the My PetSafe®app, there are
a few buttons and indicator lights on the pet door that are
important to understand.
FR Bien que vous contrôliez la plupart des fonctionnalités
de la porte pour animaux via l’application My PetSafe®,
il est très important de comprendre la signification de certains
boutons et voyants lumineux sur la porte.
NL Hoewel je de meeste functies van het huisdierluik
via de My PetSafe®-app bedient, zitten er op het
huisdierluik een paar knoppen en controlelampjes waarvan je
moet weten waarvoor ze dienen.
ES Aunque controlará la mayor parte de la funcionalidad
de la puerta para mascotas a través de la aplicación My
PetSafe®, hay algunos botones y luces indicadoras en la puerta
para mascotas cuyo uso es importante comprender.
IT Anche se controllerai la maggior parte delle funzionalità
della porta per animali domestici tramite My PetSafe®
app, ci sono alcuni pulsanti e spie luminose sulla portiera
dell’animale domestico che è importante capire.
DE Wenngleich Sie die meisten Funktionen der Haustiertür
über die My PetSafe®App steuern, gibt es einige
Tasten und LED-Leuchten an der Haustiertür, die Sie unbedingt
kennen sollten.
8
EN There are three buttons inside the battery
compartment that allow you to reset the Wi-Fi,
turn Smart Mode on and off and lock or unlock the pet
door manually.
FR Le compartiment à pile est doté de trois boutons qui
vous permettent de réinitialiser le Wi-Fi, d’activer et
de désactiver le Mode intelligent, ainsi que de verrouiller ou
déverrouiller la porte pour animaux manuellement.
NL In het batterijvak zitten drie knoppen waarmee je
de wifi kunt resetten, de slimme modus kunt in- en
uitschakelen en het huisdierluik handmatig kunt vergrendelen
en ontgrendelen.
ES Hay tres botones dentro del compartimiento de la pila
que le permiten restablecer la wifi, activar y desactivar
el modo inteligente y bloquear o desbloquear la puerta para
mascotas manualmente.
IT Sono presenti tre pulsanti nel vano batteria che
consentono di ripristinare il Wi-Fi, attivare e disattivare la
modalità intelligente e bloccare o sbloccare manualmente la
porta per animali domestici.
DE Im Batteriedeckelfach befinden sich drei Tasten, mit
denen Sie das WLAN zurücksetzen, den Smart-Modus
ein- und ausschalten und die Haustiertür manuell ver- und
entriegeln können.
Button icon
Icône du bouton
Knoppictogram
Ícono del botón
Icona del pulsante
Knopf-Symbol
Button name
Nom du bouton
Naam knop
Nombre del botón
Nome del pulsante
Schaltflächenname
Usage
Utilisation
Gebruik
Uso
Utilizzo
Verwendung
Wi-Fi connect button Press and release this button to reset Wi-Fi but retain your Wi-Fi credentials. Press this
button for more than 8 seconds to erase your Wi-Fi credentials and return the pet door to
factory settings.
Bouton de connexion
Wi-Fi Appuyez brièvement sur ce bouton pour réinitialiser le Wi-Fi tout en conservant vos
informations d'identification. Appuyez sur ce bouton pendant plus de 8 secondes pour
effacer vos informations d'identification Wi-Fi et rétablir les paramètres d'usine de la porte
pour animaux.
Wifiknop Druk kort op deze knop om wifi opnieuw in te stellen zonder je inloggegevens te wissen.
Je kunt de wifi-inloggegevens wissen door die knop langer dan 8 seconden ingedrukt te
houden waarmee het huisdierluik wordt teruggezet op de fabrieksinstellingen.
Botón de conexión wifi Pulse y suelte este botón para restablecer la wifi, pero conservar sus credenciales de
wifi. Pulse este botón durante más de 8 segundos para borrar sus credenciales de wifi y
restablecer los ajustes de fábrica de la puerta para mascotas.
Pulsante per la
connessione Wi-Fi Premi e rilascia questo pulsante per ripristinare il Wi-Fi conservando le tue credenziali
Wi-Fi. Premi questo pulsante per più di 8 secondi per eliminare le tue credenziali Wi-Fi e
riportare la porta per animali alle impostazioni di fabbrica.
WLAN-Verbindungstaste Drücken Sie diese Taste und lassen Sie sie los, um das WLAN zurückzusetzen, aber Ihre
WLAN-Anmeldedaten zu behalten. Drücken Sie diese Taste länger als 8 Sekunden, um
Ihre WLAN-Anmeldedaten zu löschen und die Haustiertür auf die Werkseinstellungen
zurückzusetzen.
9
Button icon
Icône du bouton
Knoppictogram
Ícono del botón
Icona del pulsante
Knopf-Symbol
Button name
Nom du bouton
Naam knop
Nombre del botón
Nome del pulsante
Schaltflächenname
Usage
Utilisation
Gebruik
Uso
Utilizzo
Verwendung
Smart Mode button Press and release this button to put the pet door in Smart Mode. In Smart Mode, the pet
door will only unlock for pets who have been paired to the pet door with a Pet Door Key or
implanted microchip.
Bouton de sélection du
Mode intelligent Appuyez brièvement sur ce bouton pour mettre la porte pour animaux en Mode intelligent.
En Mode intelligent, la porte pour animaux ne se déverrouillera que pour les animaux
appairés à l'aide d'une Médaille pour animaux pour porte ou d'une micropuce implantée.
De knop voor de slimme
modus Druk kort op deze knop om het huisdierluik in de slimme modus te zetten. In de slimme
modus wordt het huisdierluik alleen ontgrendeld voor de huisdieren die met een luiksleutel
of een geïmplanteerde microchip aan het huisdierluik zijn gekoppeld.
Botón de modo
inteligente Pulse y suelte este botón para poner la puerta para mascotas en modo inteligente. En el
modo inteligente, la puerta para mascotas solo se desbloqueará para las mascotas que se
hayan sincronizado con la puerta para mascotas con una llave para puerta de mascotas o
un microchip implantado.
Pulsante per la modalità
intelligente Premi e rilascia questo pulsante per mettere la porta per animali domestici in modalità
intelligente. In modalità intelligente, la porta per animali domestici si sbloccherà solo per
gli animali domestici che sono stati accoppiati alla porta con una chiave per animali o con
un microchip impiantato.
Smart-Modus-Taste Drücken Sie diese Taste und lassen Sie sie los, um die Haustiertür in den Smart-Modus
zu versetzen. Im Smart-Modus wird die Haustiertür nur für Haustiere entriegelt, die
mit einem Haustürschlüssel oder einem implantierten Mikrochip mit der Haustiertür
gekoppelt wurden.
Standard Mode
Lock/Unlock button Press and release this button to put the pet door in Standard Mode and toggle the pet door
between locked and unlocked. In Standard Mode, the pet door operates like a standard pet
door and will be locked or unlocked for all pets regardless of whether they are paired with
the pet door.
Bouton de verrouillage/
déverrouillage du mode
standard
Appuyez et relâchez ce bouton pour mettre la porte pour animaux en mode standard et
la basculer entre les modes verrouillé et déverrouillé. En mode standard, la porte pour
animaux fonctionne comme une porte pour animaux conventionnelle et sera verrouillée
ou déverrouillée pour tous les animaux, qu'ils soient appairés ou non.
Vergrendel-/
ontgrendelknop in de
standaardmodus
Druk kort op deze knop om het huisdierluik in de standaardmodus te zetten en het
huisdierluik te laten vergrendelen en ontgrendelen. In de standaardmodus werkt het
huisdierluik als een standaardhuisdierluik en wordt het voor alle huisdieren vergrendeld of
ontgrendeld, ongeacht of ze wel of niet aan het huisdierluik zijn gekoppeld.
Botón de bloqueo/
desbloqueo del modo
estándar
Pulse y suelte este botón para poner la puerta para mascotas en modo estándar y alternar
entre el bloqueo y el desbloqueo de la puerta para mascotas. En el modo estándar, la
puerta para mascotas funciona como una puerta para mascotas estándar y se bloqueará o
desbloqueará para todas las mascotas, independientemente de si están sincronizadas o no
con la puerta para mascotas.
Pulsante di blocco/
sblocco nella modalità
standard
Premi e rilascia questo pulsante per mettere la porta per animali domestici in modalità
standard e passare dalla modalità bloccata alla modalità sbloccata. In modalità standard, la
porta per animali domestici funziona come una porta per animali domestici standard e sarà
bloccata o sbloccata per tutti gli animali domestici, indipendentemente dal fatto che siano
accoppiati con essa.
Standardmodus Ver-/
Entriegelungs-Taste Drücken Sie diese Taste und lassen Sie sie los, um die Haustiertür in den Standardmodus
zu versetzen und sie zu ver- oder zu entriegeln. Im Standardmodus funktioniert die
Haustiertür wie eine normale Haustiertür und wird für alle Haustiere ver- oder entriegelt,
unabhängig davon, ob sie mit der Haustiertür gekoppelt sind.
10
Wi-Fi
Wi-Fi
Wifi
wifi
Wi-Fi
WLAN
Battery
Autonomie
Batterij
Pila
Batteria
Batterie
Smart Mode
Mode intelligent
Slimme modus
Modo inteligente
Modalità intelligente
Smart-Modus
Lock
Verrouillage
Vergrendelen
Bloqueo
Blocco
Verriegeln
Unlock
Déverrouillage
Ontgrendelen
Desbloqueo
Sblocco
Entriegeln
EN Indicator lights on the interior side of the pet door
provide information about the Wi-Fi and internet
connection, battery life and current operating mode of the
door. To save battery power, the indicator lights illuminate only
when the pet door motion sensor is activated or when you
change a setting.
FR Les voyants lumineux situés à l’intérieur de la porte
pour animaux fournissent des informations sur la
connexion Wi-Fi et Internet, sur l’état des piles, ainsi que
sur le mode de fonctionnement actuel de la porte. Pour
économiser l’autonomie des piles, les voyants lumineux
s’allument uniquement lorsque le détecteur de mouvement
de la porte pour animaux est activé ou lorsque vous modifiez
un paramètre.
NL De controlelampjes aan de binnenkant van het
huisdierluik geven de wifi- en internetverbinding, de
levensduur van de batterij en de huidige bedrijfsmodus van het
luik aan. Om op de batterijstroom te besparen, branden deze
controlelampjes alleen wanneer de bewegingssensor van het
huisdierluik is geactiveerd of wanneer je een instelling wijzigt.
ES Las luces indicadoras en el lado interior de la
puerta para mascotas aportan información sobre la
conexión wifi e Internet, la duración de la pila y el modo de
funcionamiento actual de la puerta. Para ahorrar energía de la
pila, las luces indicadoras se iluminan solo cuando el sensor
de movimiento de la puerta para mascotas se activa o cuando
cambia una configuración.
IT Le spie luminose sul lato interno della porta per animali
domestici offrono informazioni relative a connessione
Wi-Fi, connessione Internet, durata della batteria e modalità
di funzionamento corrente della porta. Per risparmiare la
carica della batteria, le spie luminose si accendono solo
quando il sensore di movimento della la porta per animali
domestici viene attivato oppure quando viene modificata
un’impostazione.
DE Die LED-Leuchten an der Innenseite der
Haustiertür geben Auskunft über die WLAN- und
Internetverbindung, die Batterielebensdauer und den aktuellen
Betriebsmodus der Tür. Um Batteriestrom zu sparen, leuchten
die LED-Leuchten nur auf, wenn der Bewegungssensor der
Haustiertür aktiviert ist oder Sie eine Einstellung ändern.
11
Indicator
Indicateur
Indicator
Indicador
Indicatore
Indikator
Light color/colour
Couleur du voyant
Kleur van het lampje
Color de la luz
Colore della spia
LED-Farbe
Meaning
Signification
Betekenis
Significado
Significato
Bedeutung
Yellow, slow blinking The SmartDoor™is powered on but not yet connected to the app, Wi-Fi, or the internet.
Jaune, clignotement lent La SmartDoor™est allumée mais n’est pas encore connectée à l’application, au Wi-Fi ou
à Internet.
Geel, langzaam
knipperend De SmartDoor™is ingeschakeld maar nog niet verbonden met de app, wifi of internet.
Amarillo, parpadeo lento La SmartDoor™está encendida pero aún no se ha conectado a la aplicación, a la wifi o
a Internet.
Giallo lampeggiante lento La SmartDoor™è accesa ma non è ancora connessa all’app, al Wi-Fi oppure a Internet.
Langsam gelb blinkend Die SmartDoor™ist eingeschaltet, aber noch nicht mit der App, dem WLAN oder dem
Internet verbunden.
Yellow, solid The SmartDoor™is connected to the app, but not Wi-Fi or the internet.
Jaune, fixe La SmartDoor™est connectée à l'application, mais pas au Wi-Fi ou à Internet.
Brandt geel De SmartDoor™is verbonden met de app maar nog niet met wifi of internet.
Amarillo, fijo La SmartDoor™está conectada a la aplicación, pero no a la wifi ni a Internet.
Giallo fisso La SmartDoor™è connessa all'app, ma non è ancora connessa al Wi-Fi oppure a Internet.
Dauerhaft Gelb leuchtend Die SmartDoor™ist mit der App, aber nicht mit dem WLAN oder dem Internet verbunden.
Blue, fast blinking The SmartDoor™is attempting to connect to Wi-Fi.
Bleu, clignotement rapide La SmartDoor™tente de se connecter au Wi-Fi.
Blauw, snel knipperend De SmartDoor™probeert verbinding te maken met wifi.
Azul, parpadeo rápido La SmartDoor™está intentando conectarse a la wifi.
Blu lampeggiante veloce La SmartDoor™sta cercando di collegarsi al Wi-Fi.
Schnell blau blinkend Die SmartDoor™versucht, eine WLAN-Verbindung herzustellen.
Blue, slow blinking The SmartDoor™is connected to Wi-Fi but not internet.
Bleu, clignotement lent La SmartDoor™est connectée au Wi-Fi, mais pas à Internet.
Blauw, langzaam
knipperend De SmartDoor™is verbonden met wifi maar nog niet met internet.
Azul, parpadeo lento La SmartDoor™está conectada a la wifi, pero no a Internet.
Blu lampeggiante lento La SmartDoor™è connessa al Wi-Fi, ma non è ancora connessa a Internet.
Langsam blau blinkend Die SmartDoor™ist mit dem WLAN, aber nicht mit dem Internet verbunden.
12
Indicator
Indicateur
Indicator
Indicador
Indicatore
Indikator
Light color/colour
Couleur du voyant
Kleur van het lampje
Color de la luz
Colore della spia
LED-Farbe
Meaning
Signification
Betekenis
Significado
Significato
Bedeutung
Blue, solid The SmartDoor™is connected to Wi-Fi and internet.
Bleu, fixe La SmartDoor™est connectée au Wi-Fi et à Internet.
Brandt blauw De SmartDoor™is verbonden met wifi en met internet.
Azul, fijo La SmartDoor™está conectada a la wifi y a Internet.
Blu fisso La SmartDoor™è connessa al Wi-Fi e a Internet.
Dauerhaft blau leuchtend Die SmartDoor™ist mit dem WLAN und dem Internet verbunden.
Red, fast blinking The SmartDoor™was unable to connect to the Wi-Fi network.
Rouge, clignotement
rapide La SmartDoor™n'a pas pu se connecter au réseau Wi-Fi.
Rood, snel knipperend De SmartDoor™kon geen verbinding maken met het wifinetwerk.
Rojo, parpadeo rápido La SmartDoor™no ha podido conectarse a la red wifi.
Rosso lampeggiante
veloce La SmartDoor™non è riuscita a collegarsi alla rete Wi-Fi.
Schnell rot blinkend Die SmartDoor™konnte keine Verbindung mit dem WLAN-Netz herstellen.
Red, slow blinking Batteries are weak; replace batteries.
Rouge, clignotement lent Les piles sont faibles ; remplacez-les.
Rood, langzaam
knipperend De batterijen zijn bijna leeg; vervang ze.
Rojo, parpadeo lento Las pilas se están gastando; sustituya las pilas.
Rosso lampeggiante
lento Le batterie sono scariche; sostituire le batterie.
Langsam rot blinkend Die Batterien sind schwach; ersetzen Sie die Batterien.
13
Indicator
Indicateur
Indicator
Indicador
Indicatore
Indikator
Light color/colour
Couleur du voyant
Kleur van het lampje
Color de la luz
Colore della spia
LED-Farbe
Meaning
Signification
Betekenis
Significado
Significato
Bedeutung
Blue The pet door is in Smart Mode. In this mode, the pet door will activate only when a paired
pet approaches it.
Bleu La porte pour animaux est en Mode intelligent. Dans ce mode, la porte pour animaux ne
s'active que lorsqu'un animal appairé s'en approche.
Blauw Het huisdierluik staat in de slimme modus. In deze modus wordt het huisdierluik alleen
geactiveerd wanneer er een gekoppeld huisdier in de buurt komt.
Azul La puerta para mascotas está en modo inteligente. En este modo, la puerta para mascotas
se activará solo cuando se acerque una mascota que se haya sincronizado.
Blu La porta per animali domestici è in modalità intelligente. In questa modalità, la porta per
animali domestici si attiverà solo quando un animale abbinato vi si avvicina.
Blau Die Haustiertür befindet sich im Smart-Modus. In diesem Modus wird die Haustiertür nur
aktiviert, wenn sich ein gekoppeltes Haustier ihr nähert.
Blue The pet door is currently locked.
Bleu La porte pour animaux est actuellement verrouillée.
Blauw Het huisdierluik is vergrendeld.
Azul La puerta para mascotas está bloqueada en este momento.
Blu La porta per animali domestici è attualmente bloccata.
Blau Die Haustiertür ist derzeit verschlossen.
Blue The pet door is currently unlocked.
Bleu La porte pour animaux est actuellement déverrouillée.
Blauw Het huisdierluik is ontgrendeld.
Azul La puerta para mascotas está desbloqueada en este momento.
Blu La porta per animali domestici è attualmente sbloccata.
Blau Die Haustiertür ist derzeit offen.
14
Install batteries in the pet door
Insérer les piles dans la porte
pour animaux
Plaats de batterijen in het
huisdierluik
Colocación de las pilas en la
puerta para mascotas
Installazione delle batterie nella
porta per animali domestici
Setzen Sie die Batterien in die
Haustiertür ein
EN Locate the battery door on the top edge of the
interior frame.
FR Localisez le couvercle du compartiment à pile sur le
bord supérieur du cadre intérieur.
NL Zoek de batterijklep op in de bovenrand van
het binnenframe.
ES Localice la tapa del compartimento de las pilas en el
borde superior del marco interno.
IT Individua il coperchio del vano batteria sul bordo
superiore della struttura interna.
DE Der Batteriefachdeckel befindet sich an der Oberkante
des Innenrahmens.
1
15
EN Remove the battery door by pressing down and sliding
it in the direction of the arrow. Insert four alkaline
batteries (C cell for the medium SmartDoor™, D cell for the
large SmartDoor™). Replace the battery door.
The Wi-Fi icon ( ) on the front of the pet door will start
blinking yellow.
FR Retirez le couvercle du compartiment à pile en
le faisant glisser dans le sens de la flèche tout en
exerçant une légère pression. Insérez les quatre piles alcalines
(LR14 pour la SmartDoor™moyenne et LR20 pour la grande
SmartDoor™). Replacez le couvercle du compartiment à pile.
L’icône Wi-Fi ( ) à l’avant de la porte pour animaux clignote en
jaune.
NL Verwijder die klep door deze naar beneden te drukken
en in de richting van de pijl te schuiven. Plaats vier
alkaline-batterijen (C cell voor de medium SmartDoor™, D cell
voor de large SmartDoor™). Plaats het batterijdeksel terug.
Het wifipictogram ( ) aan de voorkant van het huisdierluik
begint geel te knipperen.
ES Retire la tapa del compartimento de las pilas
presionando hacia abajo y deslizándola en la dirección
de la flecha. Inserte cuatro pilas alcalinas (C para la SmartDoor™
mediana, D para la SmartDoor™grande). Vuelva a colocar la
tapa del compartimento de las pilas.
El icono de wifi ( ) en la parte delantera de la puerta para
mascotas comenzará a parpadear en amarillo.
IT Rimuovi il coperchio del vano batterie premendolo e
facendolo scorrere nella direzione indicata dalla freccia.
Inserisci quattro batterie (tipo C per la SmartDoor™media, tipo
D per la SmartDoor™large). Sostituisci il coperchio del vano
batterie.
L’icona del Wi-Fi ( ) sulla parte anteriore della porta per
animali domestici inizierà a lampeggiare in giallo.
DE Entfernen Sie den Batteriefachdeckel, indem Sie ihn
nach unten drücken und in Pfeilrichtung schieben.
Setzen Sie vier Alkalibatterien (C-Zellen-Batterien für die
mittlere SmartDoor™, D-Zellen-Batterien für die große
SmartDoor™) ein. Setzen Sie den Batteriefachdeckel wieder ein.
Das WLAN-Symbol ( ) an der Vorderseite der Haustiertür
beginnt gelb zu blinken.
2
16
Download and set up the app
Télécharger et configurer
l’application
De app downloaden en instellen
Descarga y configuración de la
aplicación
Download e configurazione
dell’app
Laden Sie die App herunter und
richten Sie sie ein
EN Download the My PetSafe®app from your phone’s app
store. Open the app and follow the on-screen prompts to:
• Create an account and sign into the app. You will need a
valid email address.
• Add your SmartDoor™to the app. You will need your home
Wi-Fi password.
• Create a pet profile for each pet that will use
the SmartDoor™.
FR Téléchargez l’application My PetSafe®depuis la boutique
d’applications de votre téléphone. Ouvrez l’application
et suivez les invites à l’écran pour :
• Créer un compte et vous connecter à l’application. Vous
aurez besoin d’une adresse e-mail valide.
• Ajouter votre SmartDoor™à l’application. Vous aurez besoin
de votre mot de passe Wi-Fi.
• Créez un profil d’animal pour chaque animal de compagnie
qui utilisera la SmartDoor™.
1
NL Download de My PetSafe®-app vanuit de App Store op
je telefoon. Open de app en volg de aanwijzingen op
het scherm om:
• Een account aan te maken en in te loggen bij de app.
Hiervoor heb je een geldig e-mailadres nodig.
• Je SmartDoor™toe te voegen aan de app. Hiervoor heb je
het wachtwoord van je wifiverbinding nodig.
• Een huisdierenprofiel aan te maken voor elk huisdier dat de
SmartDoor™gaat gebruiken.
ES Descargue la aplicación My PetSafe®en la tienda de
aplicaciones de su teléfono. Abra la aplicación y siga las
indicaciones que se muestran en pantalla para:
• Crear una cuenta e iniciar sesión en la aplicación. Necesitará
una dirección de correo electrónico válida.
• Añadir su SmartDoor™a la aplicación. Necesitará la
contraseña de wifi de su hogar.
• Crear un perfil de mascota para cada mascota que vaya a
utilizar la SmartDoor™.
IT Scarica l’app My PetSafe®dall’app store del telefono. Apri
l’app e segui le istruzioni indicate a schermo per:
• Crea un account e accedi all’app. Avrai bisogno di un
indirizzo e-mail valido.
• Aggiungi la tua SmartDoor™all’app. Avrai bisogno della
password del tuo Wi-Fi.
• Crea un profilo per ogni animale domestico che userà la
SmartDoor™.
DE Laden Sie die My PetSafe®App aus dem App Store Ihres
Smartphones herunter. Öffnen Sie die App und folgen
Sie den Anweisungen auf dem Bildschirm:
• Erstellen Sie ein Konto und melden Sie sich bei der App an.
Sie benötigen eine gültige E-Mail-Adresse.
• Fügen Sie Ihr SmartDoor™zur App hinzu. Sie benötigen Ihr
hauseigenes WLAN-Passwort.
• Erstellen Sie ein Haustierprofil für jedes Haustier, das die
SmartDoor™nutzen soll. 17
EN Continuing in the app, add each pet to the
SmartDoor™by scanning their Pet Door Key. During
the pairing process, move the Pet Door Key a little to activate
the motion sensor.
If you have a cat and a medium SmartDoor™, you also have the
option of pairing the door to your cat’s implanted microchip.
If you choose this option, do a little additional testing after
pairing to make sure the pet door consistently senses your
cat as she passes near the pet door. The location of your
cat’s microchip can affect how well the pet door detects her
presence. If you find that the pet door is not reliably responding
to your cat’s microchip, you may need to pair her to the pet
door with a Pet Door Key instead.
2
FR En poursuivant dans l’application, ajoutez chaque
animal à la SmartDoor™en scannant sa Médaille pour
animaux pour porte. Pendant le processus de jumelage,
déplacez légèrement la Médaille pour animaux pour porte afin
d’activer le détecteur de mouvement.
Si vous avez un chat et une SmartDoor™de taille moyenne,
vous avez également la possibilité de coupler la porte à la
micropuce de votre chat. Si vous optez pour cette option,
effectuez quelques tests supplémentaires après l’appairage
afin de vous assurer que la porte pour animaux détecte
systématiquement votre chat lorsqu’il s’en approche. La
position de la micropuce de votre chat peut affecter la
capacité de la porte pour animaux à détecter sa présence.
Si vous constatez que la porte pour animaux ne répond pas
correctement à la micropuce de votre chat, il conviendrait
d’effectuer un jumelage avec une Médaille pour animaux pour
porte à la place.
NL Ga verder in de app en voeg elk huisdier toe aan de
SmartDoor™door de luiksleutel voor het huisdierluik te
scannen. Beweeg tijdens het koppelen de luiksleutel voor het
huisdierluik een beetje heen en weer om de bewegingssensor
te activeren.
Als je een kat en een medium SmartDoor™hebt, kun je het
huisdierluik ook koppelen aan de geïmplanteerde microchip
van je kat. Als je voor deze mogelijkheid kiest, moet je na het
koppelen nog wat extra testen om er zeker van te zijn dat de
sensor in het huisdierluik je kat detecteert wanneer die in de
buurt van het huisdierluik komt. De plaats waar de microchip in
je kat is geïmplanteerd, kan van invloed zijn op hoe goed je kat
door het huisdierluik wordt gedetecteerd. Als je merkt dat het
huisdierluik niet goed reageert op de microchip van je kat, kun
je je kat beter met een luiksleutel aan het huisdierluik koppelen.
18
ES Siguiendo en la aplicación, añada cada mascota a
la SmartDoor™escaneando su llave de puerta para
mascotas. Durante el proceso de sincronización, mueva un
poco la llave para puerta de mascotas para activar el sensor
de movimiento.
Si tiene un gato y una SmartDoor™mediana, también tiene la
opción de sincronizar la puerta con el microchip implantado
del gato. Si elige esta opción, realice algunas pruebas
adicionales después de la sincronización para asegurarse de
que la puerta para mascotas detecta en todo momento a su
gato cuando pasa cerca de ella. La ubicación del microchip
de su gato puede afectar a la detección de su presencia.
Si observa que la puerta para mascotas no responde de
manera fiable al microchip de su gato, es posible que deba
sincronizarlo con la puerta para mascotas con una llave para
puerta para mascotas.
IT Successivamente, all’interno dell’app devi aggiungere i
vari animali domestici alla SmartDoor™scansionando la
chiave per animali. Durante il procedimento di associazione,
muovi leggermente la chiave per animali in modo da attivare il
sensore di movimento.
Se hai un gatto e una SmartDoor™media, puoi anche abbinare
la porta al microchip impiantato del tuo gatto. Se scegli
questa opzione, esegui un semplice test aggiuntivo dopo
l’abbinamento per verificare che la porta per animali domestici
percepisca costantemente il tuo gatto mentre vi passa vicino.
La posizione del microchip del tuo gatto può influenzare
il modo in cui la porta per animali domestici rileva la sua
presenza. Se ti accorgi che la porta per animali domestici non
risponde in modo affidabile al microchip del tuo gatto, potresti
doverlo accoppiare alla porta per animali domestici con una
chiave per animali.
DE Verknüpfen Sie anschließend über die App
jedes Haustier mit der SmartDoor™, indem Sie
den Haustiertür-Schlüssel scannen. Bewegen Sie den
Haustürschlüssel während des Kopplungsvorgangs ein wenig,
um den Bewegungssensor zu aktivieren.
Wenn Sie eine Katze und eine mittlere SmartDoor™haben,
können Sie die Tür auch mit dem implantierten Mikrochip Ihrer
Katze koppeln. Wenn Sie sich für diese Option entscheiden,
führen Sie nach der Kopplung einige zusätzliche Tests durch,
um sicherzustellen, dass die Haustiertür Ihre Katze immer
erkennt, wenn sie an der Haustiertür vorbeigeht. Die Position
des Mikrochips Ihrer Katze kann beeinflussen, wie gut die
Haustiertür ihre Anwesenheit erkennt. Wenn Sie feststellen,
dass die Haustiertür nicht zuverlässig auf den Mikrochip Ihrer
Katze reagiert, müssen Sie sie möglicherweise stattdessen über
einen Haustiertür-Schlüssel mit der Haustiertür koppeln.
19
Plan your installation
Planifier votre installation
De installatie plannen
Planificación de la instalación
Pianifica la tua installazione
Planen Sie Ihre Montage
EN You are now ready to install the SmartDoor™in your
home. Some installation locations require additional
PetSafe®accessories and professional assistance; see the
following below to find out what you need to install your pet
door and where to go for step-by-step installation instructions.
You can purchase PetSafe®accessories at petsafe.com or by
contacting our Customer Care team.
FR Vous êtes désormais prêt à installer la SmartDoor™dans
votre maison. Certains emplacements d’installation
nécessitent des accessoires PetSafe®et une assistance
professionnelle supplémentaires. Reportez-vous au tableau
ci-dessous pour savoir ce dont vous avez besoin pour installer
votre porte pour animaux et où obtenir des instructions
d’installation détaillées.
Vous pouvez acheter des accessoires PetSafe®sur le site
petsafe.com ou en contactant notre équipe de service à la
clientèle.
NL Je kunt nu de SmartDoor™gaan plaatsen. Soms heb je
voor het plaatsen van het huisdierluik extra accessoires
van PetSafe®en professionele hulp nodig. Zie het volgende
gedeelte voor wat je nodig hebt voor het installeren van het
huisdierluik en waar je de stapsgewijze instructies ervoor kunt
vinden.
Accessoire van PetSafe®kun je aanschaffen op petsafe.com of
door contact op te nemen met onze klantenservice.
ES Ya está listo para instalar la SmartDoor™en su
hogar. Algunas ubicaciones de instalación requieren
accesorios adicionales de PetSafe®y ayuda profesional;
consulte las siguientes secciones para determinar qué necesita
para instalar la puerta para mascotas y dónde encontrar
instrucciones de instalación paso a paso.
Puede comprar accesorios de PetSafe®en petsafe.com o
poniéndose en contacto con nuestro equipo de atención al
cliente.
IT Ora hai tutto quello che serve per installare la
SmartDoor™nella tua casa. Alcuni luoghi di installazione
richiedono accessori PetSafe®aggiuntivi e assistenza
professionale. Consulta le informazioni riportate di seguito
per scoprire di cosa hai bisogno per installare la tua porta
per animali domestici e dove trovare istruzioni dettagliate
sull’installazione.
Puoi acquistare gli accessori PetSafe®sul sito petsafe.com
oppure contattando il nostro team assistenza clienti.
DE Sie sind nun bereit, die SmartDoor™in Ihrem Haus zu
installieren. Bei einigen Montageorten ist zusätzliches
PetSafe®Zubehör und professionelle Hilfe erforderlich.
Im Folgenden erfahren Sie, was Sie für die Montage
Ihrer Haustiertür benötigen und wo Sie eine schrittweise
Montageanleitung erhalten.
Sie können PetSafe®Zubehör unter petsafe.com kaufen oder
sich an unsere Kundenbetreuung wenden.
20

Other manuals for Electronic SmartDoor

7

Other Petsafe Pet Care Product manuals

Petsafe PBC17-16193 User manual

Petsafe

Petsafe PBC17-16193 User manual

Petsafe PIF19-14186 Stay Plus Play Wireless Fence... User manual

Petsafe

Petsafe PIF19-14186 Stay Plus Play Wireless Fence... User manual

Petsafe PIF-300-21 Setup guide

Petsafe

Petsafe PIF-300-21 Setup guide

Petsafe PDT17-16118 User manual

Petsafe

Petsafe PDT17-16118 User manual

Petsafe Mr.Hezher's 14402 User manual

Petsafe

Petsafe Mr.Hezher's 14402 User manual

Petsafe PBC00-16368 User manual

Petsafe

Petsafe PBC00-16368 User manual

Petsafe PBC17-13475 User manual

Petsafe

Petsafe PBC17-13475 User manual

Petsafe PDT00-15102 Setup guide

Petsafe

Petsafe PDT00-15102 Setup guide

Petsafe comfortfit trainer Setup guide

Petsafe

Petsafe comfortfit trainer Setup guide

Petsafe PBC19-14778 User manual

Petsafe

Petsafe PBC19-14778 User manual

Petsafe In-Ground Cat Fence Setup guide

Petsafe

Petsafe In-Ground Cat Fence Setup guide

Petsafe PFD00-15426 User manual

Petsafe

Petsafe PFD00-15426 User manual

Petsafe Barkender PBC13-13208 User manual

Petsafe

Petsafe Barkender PBC13-13208 User manual

Petsafe PBC19-10766 User manual

Petsafe

Petsafe PBC19-10766 User manual

Petsafe SmartDoor PPA11-10709 User manual

Petsafe

Petsafe SmartDoor PPA11-10709 User manual

Petsafe PTY19-16445 User manual

Petsafe

Petsafe PTY19-16445 User manual

Petsafe Healthy Pet Simply Feed PFD19-15521 User manual

Petsafe

Petsafe Healthy Pet Simply Feed PFD19-15521 User manual

Petsafe DrinkWell User manual

Petsafe

Petsafe DrinkWell User manual

Petsafe Pawz Away ZND-1200 Setup guide

Petsafe

Petsafe Pawz Away ZND-1200 Setup guide

Petsafe PBC19-16174 User manual

Petsafe

Petsafe PBC19-16174 User manual

Petsafe Stubborn Dog In Ground Fence RF-275-11 User manual

Petsafe

Petsafe Stubborn Dog In Ground Fence RF-275-11 User manual

Petsafe PPA19-15794 User manual

Petsafe

Petsafe PPA19-15794 User manual

Petsafe PRF-275-19 User manual

Petsafe

Petsafe PRF-275-19 User manual

Petsafe KIT11124 User manual

Petsafe

Petsafe KIT11124 User manual

Popular Pet Care Product manuals by other brands

PitPat PP02 user manual

PitPat

PitPat PP02 user manual

Schwinn Rascal owner's manual

Schwinn

Schwinn Rascal owner's manual

K&H Small Animal quick start guide

K&H

K&H Small Animal quick start guide

SHOR-LINE 006.3230.00 Product guide

SHOR-LINE

SHOR-LINE 006.3230.00 Product guide

juwel Rio 240 instruction manual

juwel

juwel Rio 240 instruction manual

Datamars OMNI MAX user manual

Datamars

Datamars OMNI MAX user manual

Trixie 24444 instructions

Trixie

Trixie 24444 instructions

Roverpet 30DDPP Assembly instructions

Roverpet

Roverpet 30DDPP Assembly instructions

SportDOG SD-105S-C manual

SportDOG

SportDOG SD-105S-C manual

Staywell 400 Series Magnetic user guide

Staywell

Staywell 400 Series Magnetic user guide

Dogtek Sonic Birdhouse user guide

Dogtek

Dogtek Sonic Birdhouse user guide

Togfit Deluxe Trigger Lock Door Gate Instructions for use

Togfit

Togfit Deluxe Trigger Lock Door Gate Instructions for use

Girafus 227PA user manual

Girafus

Girafus 227PA user manual

ubbink KoiFeeder Solar operating instructions

ubbink

ubbink KoiFeeder Solar operating instructions

CADOCA Deuba 106911 instructions

CADOCA

CADOCA Deuba 106911 instructions

Dogtra RR Deluxe owner's manual

Dogtra

Dogtra RR Deluxe owner's manual

Carson CONVERTIBLE PET YARD 2200 owner's manual

Carson

Carson CONVERTIBLE PET YARD 2200 owner's manual

Creative Cedar Designs K-9 Kabin Assembly instruction

Creative Cedar Designs

Creative Cedar Designs K-9 Kabin Assembly instruction

manuals.online logo
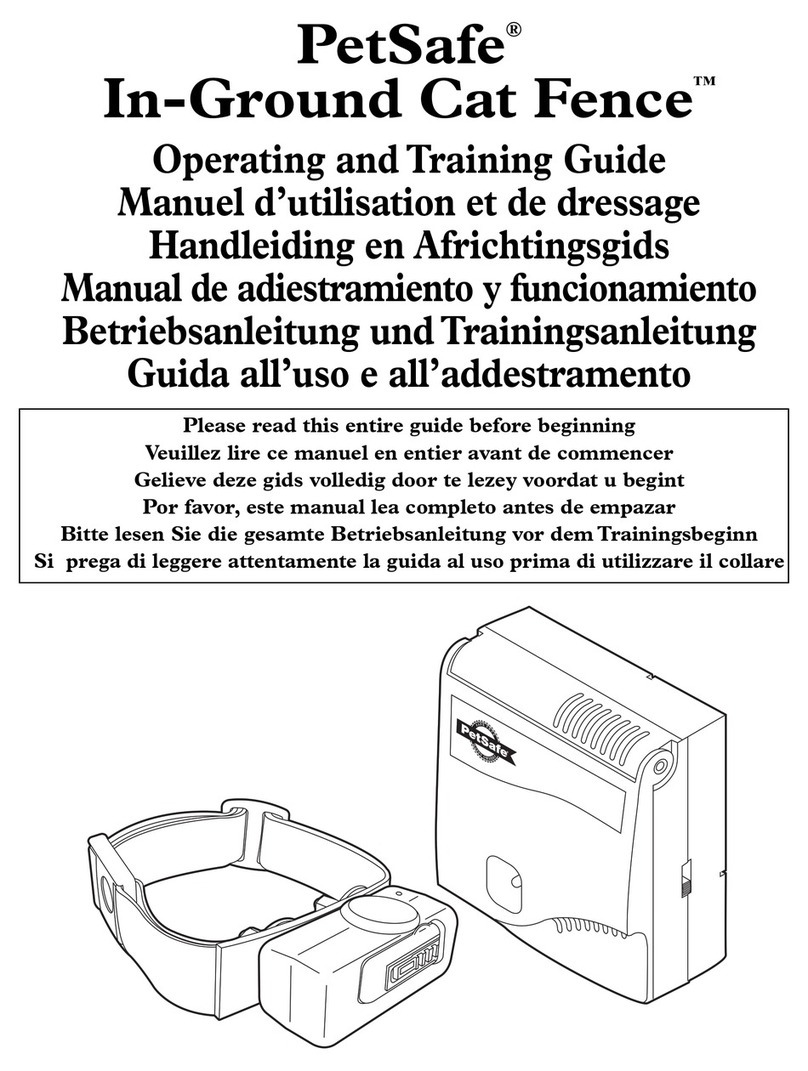
manuals.online logoBrands
  • About & Mission
  • Contact us
  • Privacy Policy
  • Terms and Conditions

Copyright 2025 Manuals.Online. All Rights Reserved.