MoistAir MA 0800 User manual

CAUTION: READ ALL INSTRUCTIONS CAREFULLY BEFORE INSTALLATION.
SAVE THIS OWNER’S MANUAL FOR FUTURE REFERENCE.
anihCnidetnirP9956PS.oNtraP
MA 0800
Evaporative Console
Humidifier Owner’s Manual
®
MD
Model No.
MA 0800 0
TM
MC
SP6599-1 MoistAIR 3/29/06 1:13 PM Page 1

5. Do not put foreign objects inside the
humidifier.
6. Do not allow to be used as a toy.
Close attention is necessarywhen
used by or near children.
7. Never use your humidifier while any
part is missing or damaged in any
manner.
8. To reduce the risk of electrical hazard
or damage to humidifier, do not tilt, jolt
or tip humidifier while unit is running.
9. Toreduce the risk of damage to
humidifier, unplug when not in use.
10. To reduce the risk of accidental
electrical shock, do not touch the cord
or controls with wet hands.
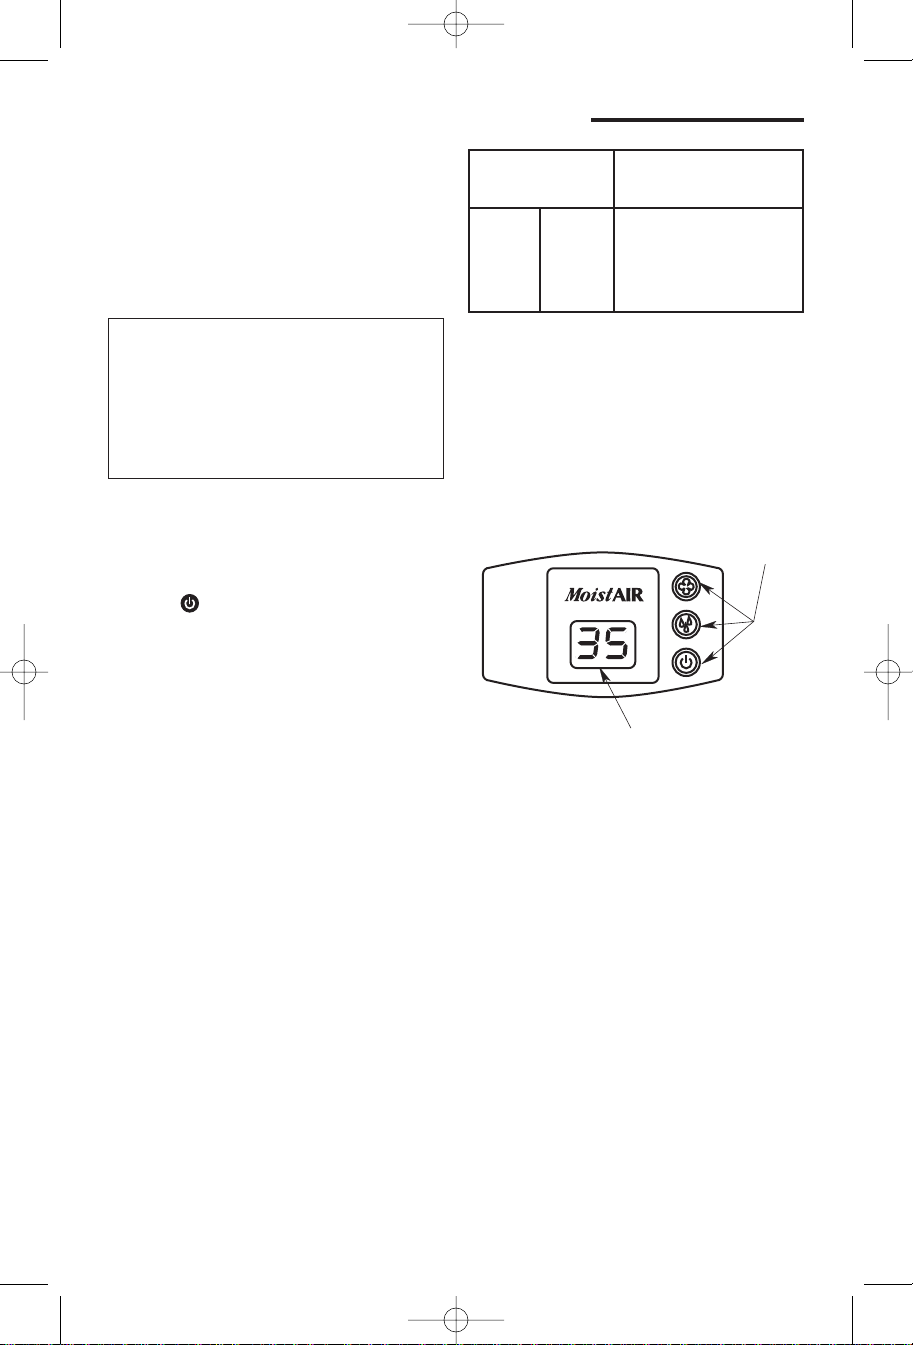
11. Note the warning label shown below.
Limited Warranty
All products covered by this Owner’s Manual are warranted against defects in workmanship
and materials for one year from the date of sale except for motors, which are warranted for two
years. This warranty does not apply to damage from accident, misuse, alteration, nor where
the connected voltage is more than 5% above the nameplate voltage, nor to the equipment or
products being improperly installed or wired or maintained in violation of this Owner’s Manual.
THIS IS THE SOLE AND EXCLUSIVE WARRANTY GIVEN BY MANUFACTURER WITH
RESPECT TO THE PRODUCTS AND IS IN LIEU OF AND EXCLUDES ALL OTHER
WARRANTIES AND CONDITIONS, EXPRESS OR IMPLIED, ARISING BY OPERATION OF
LAW OR OTHERWISE, INCLUDING WITHOUT LIMITATION, MERCHANTABILITY AND/OR
FITNESS FOR A PARTICULAR PURPOSE. No employee, agent, dealer or other person is
authorized to give any warranties or conditions on behalf of the manufacturer. The customer
shall be responsible for all costs incurred in the removal or reinstallation and shipping of the
product for repairs. Within the limitations of this warranty, inoperative units should be returned,
with a copy of the sales receipt, freight prepaid to an authorized repair service center and the
manufacturer will repair or replace the product, at its option, at no charge to the customer with
return freight paid by the manufacturer. It is agreed that such repair or replacement is the
exclusive remedy available from the manufacturer and that THE MANUFACTURER IS NOT
RESPONSIBLE FOR DAMAGES OF ANY KIND, INCLUDING INCIDENTAL AND
CONSEQUENTIAL DAMAGE OR LOSS OF PROFITS OR REVENUES. Some provinces and
states do not allowthe exclusion or limitation of incidental or consequential damages,so the
above exclusion or limitation maynot apply in some cases.
The warranty gives the customer specific legal rights, and the customer may also have other
rights which vary from province to province, or state to state.
SALES RECEIPT REQUIRED AS PROOF OF PURCHASE FOR WARRANTY CLAIMS.
GENERAL SAFETY INSTRUCTIONS
2
WARNING: To reduce risk of fire,
electric shock, or injury always unplug
before servicing or cleaning.
Safety Signal Words
DANGER: means if the safety information
is not followed someone will be seriously
injured or killed.
WARNING: means if the safety
information is not followed someone could
be seriously injured or killed.
CAUTION: means if the safety information
is not followed someone may be injured.
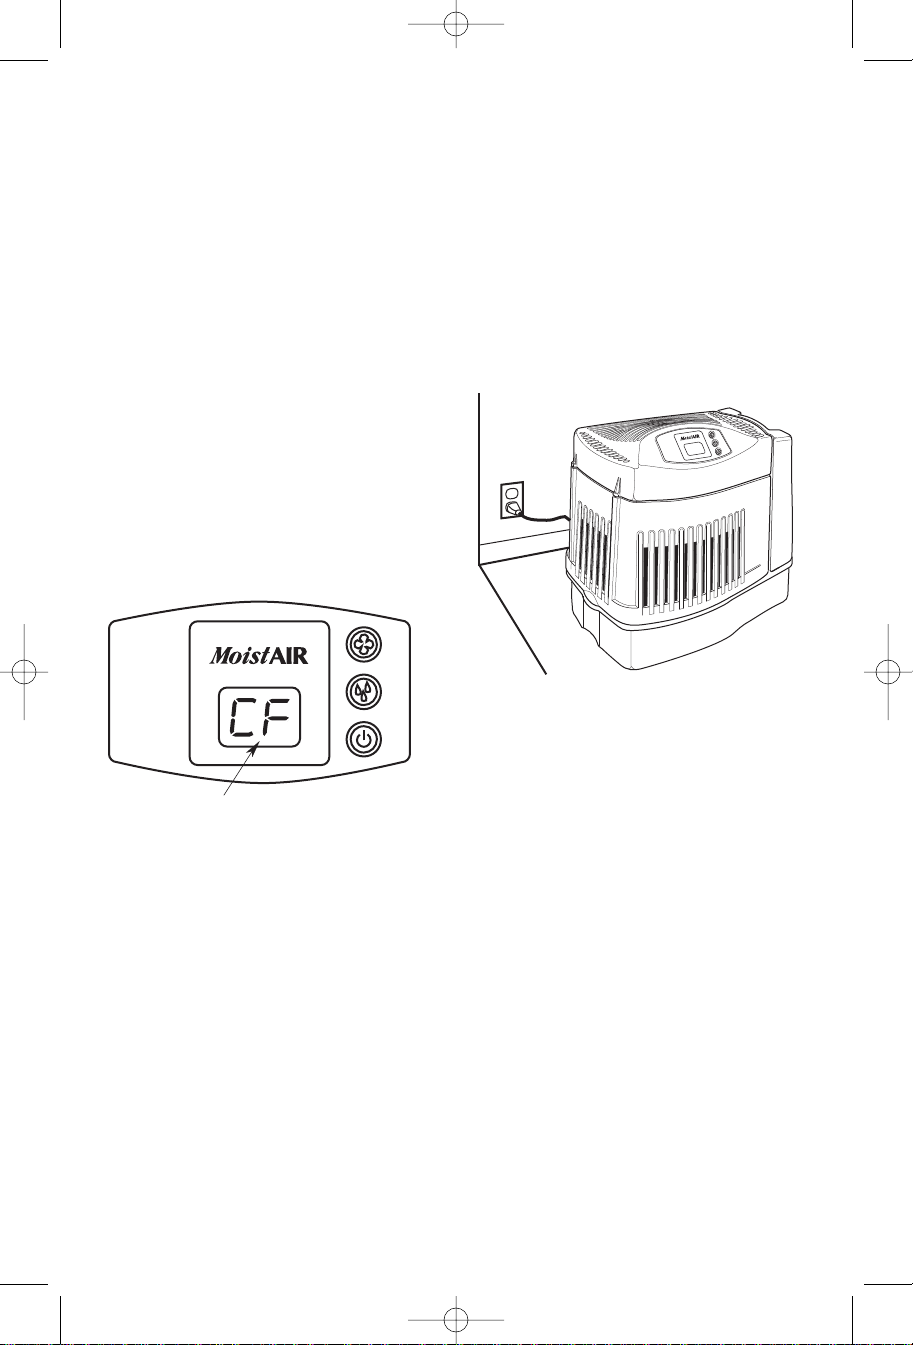
1. To reduce the risk of fire or shock
hazard, plug humidifier directly into a
120V,A.C.electrical outlet. Do not use
extension cords.
2. Keep the electric cord out of traffic
areas. To reduce the risk of fire hazard,
never put the electric cord under rugs,
near heat registers, radiators, stoves or
heaters.
3. Always unplug the humidifier before
moving it, removing the fan assembly
section, before cleaning, or whenever
the humidifier is not in service.
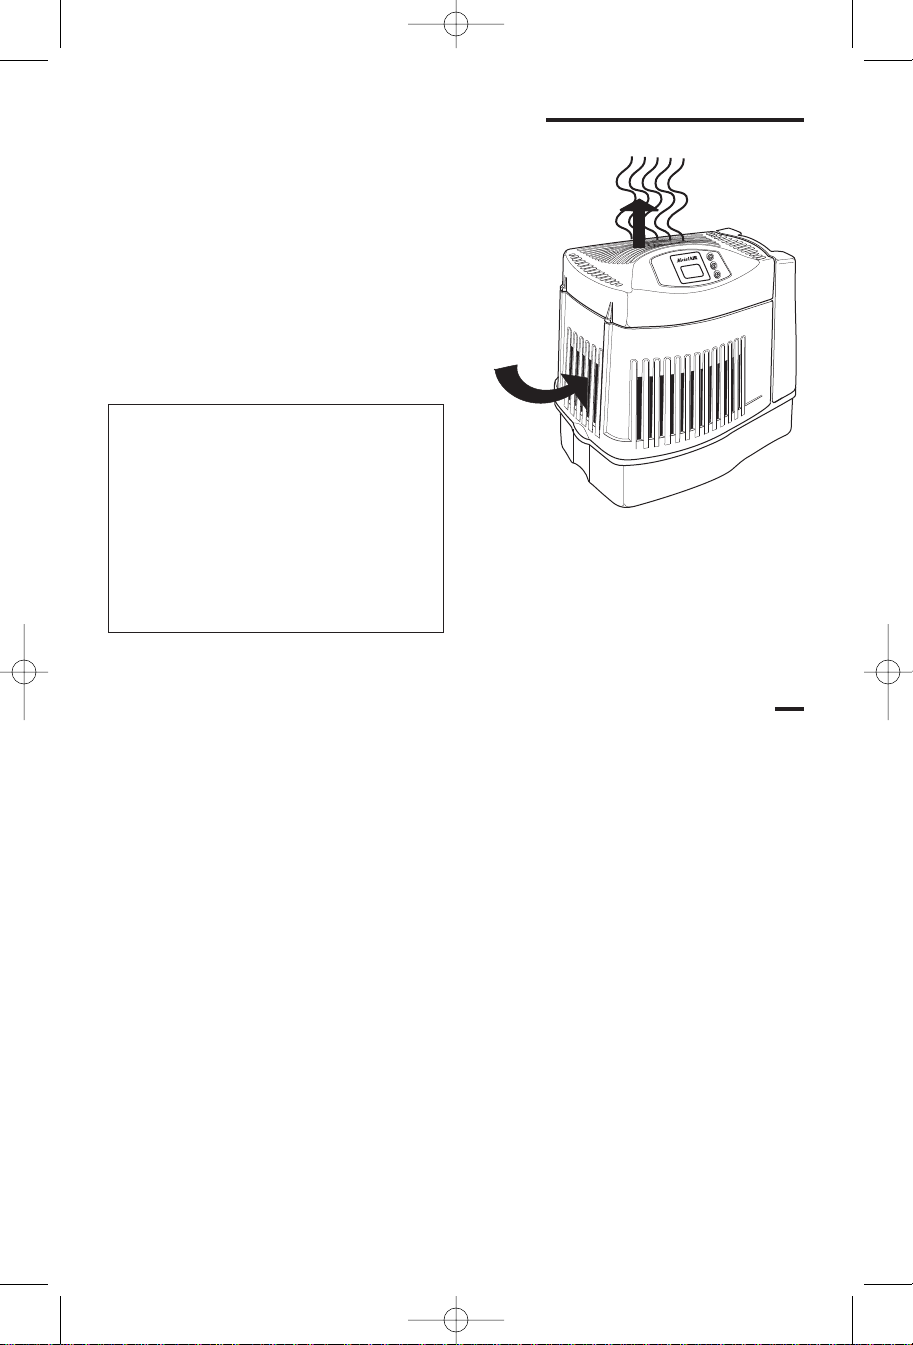
4. Keep the humidifier clean.
SP6599-1 MoistAIR 3/29/06 1:13 PM Page 2

3
Know Your Humidifier
Description MA 0800
* Output/24 hrs 8 Gallons/30.2 Litres
Capacity of Bottle 1.2 Gallons/4.54 Litres
Capacity of Base 1.2 Gallons/4.54 Litres
* Sq. Ft. Coverage 1700
Fan Speeds 3
Replacement Filter MAF2
Auto Humidistat Yes
Auto Shut Off Yes
Controls
Electronic (Push Button)
Rubber Feet 6
CUL Listed Yes
Volts 120 A.C.
Hertz 60
Amps (High Speed) 1.2
Watts (High Speed) 81
* Based on an area with average insulation and an 8 foot
ceiling height
Base
Bottle
Speed &
Humidity
Controls
Bottle HandleFan Assembly
Housing
Assembly
Filter:
Replacement No.
MAF2
Humidistat
(On Power
Cord)
SP6599-1 MoistAIR 3/29/06 1:13 PM Page 3

4
How Your Humidifier Works
Your new MoistAIR humidifier is designed
tosatisfy home humidity requirements
through the principle of evaporation of
water in the air.
Once the filter becomes saturated, air is
drawn in, passes through the filter and
moisture is absorbed into the air.
All evaporation occurs in the humidifier
so any residue remains in the filter.
This natural process of evaporation
virtually eliminates white dust.
CAUTION: To reduce the risk of
injury, fire or damage to humidifier,
use only cleaners specifically
recommended for humidifiers. Never
use flammable, combustible or
poisonous materials to clean your
humidifier.
To reduce the risk of scalds and
damage to humidifier,never put hot
water in humidifier.
Dry air
enters
through
the
louvers
in the
housing
Humidified air is
then released
through the top
Step 1. Getting Your Humidifier Up and Running
Once removed from its carton, remove all
packing materials. Verify the filter is
properly seated (See page 10).
SP6599-1 MoistAIR 3/29/06 1:13 PM Page 4

5
Electrical Hook-Up
Locate nearest 120V A.C. wall socket in
the location desired, preferably on inside
wall. With the humidifier in the desired
location, route the electrical cord safely
so no one will trip or upset the humidifier.
Plug in the electrical cord.
To reduce the risk of electrical shock,
this humidifier has a polarized plug (one
blade is wider than the other). This plug
will fit in a polarized outlet only one way.
Step 2. Location and Electrical Hook Up
Selecting A Location
Place humidifier on a flat level surface,
take extra care in leveling when placing
the unit on carpet. Position the humidifier
where the most humidity is needed or
where the most air will be circulated
throughout the house such as near a
cold air return.
Moist air (humidity) produced will
disperse into the whole house, but the
area closest to the unit will have the
highest humidity. If the unit is positioned
close to a window,condensation may
form on the window pane. If this occurs
the unit should be repositioned in another
location.
NOTE: Due to release of cool, moist air
from humidifier, it is best to direct air
awayfrom thermostat and hot air
registers and to position humidifier next
to an inside wall. Unit should not be
placed where cold air from outside walls
or warm air from a hot air register blows
directly on it.
WARNING: For your own safety, do
not use humidifier if any parts are
damaged or missing.
Positioning The Unit
The humidifier should be positioned with
the back (cord exit side) and left side, at
least 2 inches (5 centimetres) away from
the wall. Air needs to enter through all of
the louvers in the housing assembly in
order for the humidifier to operate at peak
efficiency.
WARNING: To reduce the risk of fire
or shock hazard, humidifier should
be plugged into a 120V A.C. outlet.
Do not use extension cords.
If the plug does not fit fully in the outlet,
reverse plug. If it still does not fit, contact
aqualified electrician to install the proper
outlet. Do not change the plug in any
way.
NOTE: Be sure that the humidistat, which
is located on the power cord, is free from
obstruction and away from any hot air
source.
At least 2 inches
(5 cm) from wall
SP6599-1 MoistAIR 3/29/06 1:13 PM Page 5

6
Step 3. Water Fill
After the humidifier is positioned where it
will be operating you are ready to fill the
humidifier. The bottle lifts straight up and
away from the base. Take care not to
bump or damage fill valve assembly on
the bottom of the bottle.
Invert the bottle. Press the valve stem
button into the bottle and turn clockwise
to lock in open position. Place bottle
under the faucet. Fill the bottle,being
careful not to allow any debris to get in
the bottle. Debris may interfere with the
valve seating. Once the bottle is full,
press the valve stem button and turn
counter clockwise to release and close.
WARNING: T
oreduce the risk of fire
or shock hazard, do not pour or spill
water into control or motor area.
If controls get wet, let them dry
completely and have unit checked by
authorized service personnel before
plugging in.
CAUTION: Use only EPA Registered
Bacteriostat. Under no circumstances
should you use water treatment
products designed for Roto belt or
Ultrasonic humidifiers.
Place the water bottle back into the
humidifier base. When positioned
properly, the plunger will open and the
water will flowinto the base. The base will
hold the entire contents of the water
bottle. Once the bottle is empty,remove it
and repeat the filling process. The
humidifier is now filled to capacity. To
benefit from less frequent filling let the
humidifier exhaust both the water from
the bottle and the base before filling.
Bottle
Base
Spring Valve
Assembly
PUSH IN TURN
CLOCKWISE
SP6599-1 MoistAIR 3/29/06 1:13 PM Page 6

Step 4. Operating the Controls
Where you set your desired humidity
levels depends on your personal comfort
level, outside temperature and inside
temperature. A starting set point of 30% -
40% ROOM humidity is recommended
but there may be conditions that require
adifferent setting.
7
IMPORTANT: Water damage may
result if condensation starts to form
on windows or walls. Humidity SET
point should be lowered until
condensation no longer forms. We
recommend room humidity levels do
not exceed 50%.
-10° F
2° F
10° F
20° F*
-24° C
-18° C
-12° C
-6° C*
20%
25%
30%
35%
When Outdoor Recommended Indoor
Temperature is: Relative Humidity is:
*and above
To Operate the Controls
Digital Display
Press the power button once to turn the
unit on* . Initially there is a slight
delaywhile the electronics calibrate.
Two bars (- -) appear during this time.
Once calibration is complete a ROOM
humidity reading between 20% - 95% will
be displayed. A flashing 20 display
indicates that the room humidity is less
than 20%.
NOTE: The default settings at initial
startup are (LOW) F1 fan speed and 65%
SET humidity. After desired settings are
selected bythe user,theyremain as long
as the unit remains plugged in and there
is no power interruption. If the unit is
unplugged the original default settings
are employed.
*Humidifier fan should operate at initial start
up. If it does not, refer to “Fan not operating
(digital display is illuminated)” in the “Trouble
Shooting” section on page 12 of this manual.
Function
Buttons
Digital Display
SP6599-1 MoistAIR 3/29/06 1:13 PM Page 7

8
Operating the Controls (cont’d.)
Using Your Humidifier
Speed Button
This humidifier is equipped with a
3-speed fan control. Initially depressing
the speed button will display the current
speed setting. Each push of the speed
button advances the mode through the
settings of (HIGH) F3, (MEDIUM) F2
and (LOW) F1.
The selected setting is displayed on the
digital readout. The higher the setting, the
faster water is evaporated and released
into the air. F1 (LOW) is the quietest
setting and is provided for conditions that
do not require a rapid evaporation rate.
Refill Display
For maximum run time both the bottle
and the base should be filled. When both
the bottle and the base are empty, the
display alternates the room humidity
reading and “F” (FILL),informing
additional water is required.
Humidity Control
This button allows you to adjust the
humidity to suit your needs. This humidifier
will automatically cycle on and off as
required to maintain the selected setting.
The readout displays both actual (ROOM)
and desired (SET) humidity percentage
(%) settings when humidity control button
is pressed. The ROOM readout has a
range of 20% to 95% RH. If the room
humidity level is equal to or less than 20%
RH the display will show a flashing 20.
The SET readout has a range of 25% to
65% RH and is adjusted in increments of
5%. Initially depressing the humidity
button will display the current humidity
setting. Each additional press of the
button increases the setting by 5%. A
SET point of 65% RH operates the
humidifier continuously regardless of the
ROOM reading. The humidistat that
senses the readings is located on the
power cord. Insure that it is free from
obstruction.
Humidity
Button
Speed Button
Refill Display
SP6599-1 MoistAIR 3/29/06 1:13 PM Page 8

Check Filter
Indicator
The ability of any humidifier to efficiently
supply humidity output relies heavily on the
condition of the filter. As the filter loads with
impurities it gradually loses its wicking
capability. When this happens, moisture
output is reduced and the humidifier has to
work longer to satisfy the selected setting.
This humidifier has a check filter reminder
timed to appear after 720 hours of
operation. When the display shows an
alternating “CF” and “room humidity”
setting at 5 second intervals it is a
reminder to check the filter condition.
NOTE: Some areas have high water
mineral content causing the need for more
frequent filter changes.
Refer to Replacement and Care of Filter on
page 10. If a build-up of deposits or severe
discoloration is evident replace the filter to
restore maximum efficiency.
9
NOTE: Be sure that the humidistat, which
is located on the power cord, is free from
obstruction and awayfrom anyhot air
source.
Check Filter
Display
Humidistat
The humidistat located on the power cord
senses the percentage of humidity in the
air. It causes the humidifier to cycle on
and off to maintain the selected humidity
SET point. The fan will turn on if the
“ROOM” reading falls 3% below the SET
point and will continue to run the
humidifier until a reading of 1% above the
SET point is achieved. The fan will turn
off until the ROOM reading falls 3%
below the SET point again.
SP6599-1 MoistAIR 3/29/06 1:13 PM Page 9

10
Replacement and Care of Filters
WARNING: T
oreduce the risk of
shock or injury from moving parts,
always unplug humidifier before
removing or replacing any parts.
CAUTION: To help retard bacteria
growth and keep maximum efficiency,
the filter should be replaced at least
once per season, or more often
under hard water conditions. Use
MoistAIR MAF2 recommended
replacement filter.
Replace the evaporative wicking filter at
least once per humidification season or
more depending on water conditions in
your area.
Filter Replacement
1. Unplug humidifier. Before removing the
filter, we recommend moving the
humidifier to an area where floor
coverings are not susceptible to water
damage. (i.e. kitchen or bath areas.)
2. Removethe water bottle and set aside.
Be sure not to bump or damage the fill
valve.
3. Grasp the housing assembly and lift
straight up and away from the base
and set aside. The filter is now
accessible.
4. Takenote of the filter position. Remove
the filter. You may want to clean the
base at this time. See the "Cleaning
and Maintenance" section of this
manual.
5. Install a new filter (MAF2) into the
base. Coil the filter and position it
between the uprights in the bottom of
the base. The start and finish of the
coil should be captured at the center
of the base (see diagram) and the
filter should be resting on the floor of
the base.
6. Return the housing assembly to the
top of the base. Reposition the
humidifier to its operating position.
7. The humidifier is now ready to be filled
for operation.
Grasp housing
assembly
securely and
lift off
Position start
and finish of
coiled filter at
center of base
Align housing
assembly
bottom with
top of base
and reposition
securely
SP6599-1 MoistAIR 3/29/06 1:13 PM Page 10

Cleaning and Maintenance
11
WARNING: To reduce the risk of injury,
fire or damage to humidifier, use only
cleaners specifically recommended for
humidifiers. Never use flammable,
combustible or poisonous materials to
clean your humidifier. To reduce the risk
of scalds and damage to humidifier,
never put hot water in humidifier.
CAUTION: Local water purity varies
from area to area and under certain
conditions water impurities and
airborne bacteria may promote the
growth of microorganisms in the
reservoir of the humidifier.
To retard bacteria growth that may
cause odors and be harmful to your
health, use only MoistAIR replacement
filters. We also recommend using EPA
approved bacteriostat, and humidifier
cleaner, available at your local store.
Step 1
To make cleaning easier, the humidifier
base should be empty and completely
dried out. To accomplish this, use the
following method:
a. Allowthe humidifier to run until the
REFILL
message “F” illuminates and
the automatic shutoff has stopped the
humidifier fan.
b. Unplug humidifier.
Step 2
To Remove Parts
See “Replacement and Care of Filters”
page 10.
NOTE: There may be a little water still in
the base. Carefully dump the water out or
removewith a sponge.
WARNING: To reduce the risk of shock,
always unplug humidifier before
cleaning or servicing. If humidifier is not
un-plugged, fan could start after
housing is removed.
Step 3
Bi-Weekly Maintenance
End of Season Maintenance
1. Follow“Bi-Weekly Maintenance”
instructions at end of humidification
season.
2. Remove filter.
3. Let humidifier dry completely before
storing.
4. Store in cool, drylocation.
5. Install a new filter in clean humidifier
before next season begins.
NOTE: “Bi-Weekly Maintenance”
procedure is also recommended if you
do not plan to run the humidifier for
one week or more.
NOTE: Remove excess
water before cleaning
Removing Scale
1. Fill the humidifier base with one
8oz. cup (236 milliliters) of
undiluted white vinegar. Let
solution stay20 minutes.
2. Clean all interior surfaces with a
soft brush. Dampen a soft cloth
with undiluted white vinegar and
wipe out the base to removescale.
3. Rinse thoroughly with clean warm
water to remove scale and
cleaning solution.
Disinfecting Base
1. Pour 1/2 gallon (1.89 litres) of
water and 1/2 teaspoon (2.5
millilitres) chlorine bleach into the
base. Let solution stay for 20
minutes, carefully swishing every
fewminutes. Wet all surfaces
normally exposed to water.
2. Empty base after 20 minutes.
Rinse with water until bleach smell
is gone. Allow unit to dry out
completely.
NOTE: The water bottle should be
cleaned in the same manner as the
base. Rinse thoroughly with clean
water after all steps are complete.
SP6599-1 MoistAIR 3/29/06 1:13 PM Page 11

12
Troubleshooting
Trouble
Digital display not illuminated.
Fan not operating (digital
display is illuminated).
Fan running continuously.
Poor evaporation of water.
Bottle empties completely.
Bottle continues to empty
after complete filling.
Bottle not emptying.
Probable Cause
•No Power.
•Power button has not been
depressed.
•ROOM humidity level is not
3% or more below SET
humidity level.
• Reservoir is empty.
•SET humidity level is 65%.
•ROOM humidity level has not
reached 1% or more above
SET humidity level.
•CHECK FILTER message
flashing.
•Mineral buildup on filter.
• This is normal for initial filling.
• Air is entering water bottle.
• Spring Valve Assembly
damaged or missing post
in bottom of base.
•Base full of water.
Remedy
•Check 120 volt power source.
•Press power button once to
turn on.
•Raise SET humidity level if
desired.
• Increase fan speed.
• Fill humidifier with water.
•A
SET humidity percentage
of 65% operates fan
continuously. Adjust SET
level between 25% - 60%.
• Continue to run until desired
humidity level is achieved.
This may take up to 48 hours
initially.
• Change to a fresh new
filter.
• NOTE: Local water varies
from area to area and under
certain conditions minerals
will build up more rapidly in
the filter.
• Refill bottle for maximum run
time.
• Check for leak in water bottle.
• Ensure fill valve position is
turned to closed and valve
has no interfering debris.
• Check orientation of bottle.
Reposition so that fill valve on
bottom of bottle is depressed
bypost in bottom of base.
•The base will hold the
contents of water bottle (1.2
gallons). Continue to run
humidifier to deplete water
from base.
SP6599-1 MoistAIR 3/29/06 1:13 PM Page 12

13
Trouble
“CF” message does not appear
even when filter is dirty or
humidifier performance is
clearly reduced.
Display blinks or fan moves
slightly when humidifier is
plugged in.
Alternating “F” and room
humidity displayed.
Alternating “CF” and room
humidity displayed.
Probable Cause
• Loss of power or a power
failure has caused the CF
message to prematurely
reset.
•Normal
•Reservoir is empty.
•Filter may be dirty.
Remedy
• Replace filter.
•No action required.
•Fill humidifier with water.
•Replace filter.
•Unplug unit for 30 seconds
and replug in to clear display.
SP6599-1 MoistAIR 3/29/06 1:13 PM Page 13

Repair Parts
14
Parts List for MoistAIR Humidifier
Model No. MA 0800 0
2
7
8
1
3
4
6
5
SP6599-1 MoistAIR 3/29/06 1:13 PM Page 14

Key No Part No. Description
1 MA 0800 0 Housing, Upper Assembly
(includes all parts 1-9)
2 MAF2 † Filter
3 831188-1 Support, Float
4 831189 Float, Reservoir
5831187-1
Base
6 831190 Foot Rubber
7 831199 Bottle Assembly
8831207 Cap,Screw
9 SP6599 Owner’s Manual (not shown)
15
Parts List for MoistAIR Humidifier
Model No. MA 0800 0
Always order by part number - Not by key number
* Standard Hardware Item - May be purchased locally
† Stock item - Purchase locally or call 1-800-654-3545 from the
USA or 416 833 7062 from Canada to order.
• Any attempt to repair the control assembly or motor may
create a hazard unless repair is done by a qualified service
technician.
Toorder parts,call:
USA 1-800-654-3545
Canada 416 833 7062
SP6599-1 MoistAIR 3/29/06 1:13 PM Page 15

c 2007
Part No. SP6599 Form No. SP6599-1 Printed in China 06/07
For more information about MoistAIR®humidiers, visit our website at
www.moistair.com
MD
®
MD
FOR TECHNICAL HELP, CALL
(800) 654-3545 FROM USA OR (888) 744-4687 FR OM CANADA
(Please have complete model number)
SP6599-1 MoistAIR 3/29/06 1:13 PM Page 16
5800 Murray Street
Little Rock, AR. 72209 U.S.A.

MISE EN GARDE : LISEZ SOIGNEUSEMENT TOUTES LES INSTRUCTIONS AVANT D’INSTALLERCET
L’APPAREIL.CONSERVEZ LE PRÉSENT MODE D’EMPLOI AFIN DE POUVOIR VOUS Y REPORTERÀ L’AVENIR.
enihCneémirpmI9956PS:ecèiped°N
MA0800
Moded’emploidel’humidi cateur
console à évaporation
®
MD
N° de modèle
MA08000
TM
MC
SP6599-1 MoistAIR 3/29/06 1:13 PM Page 17 fi
fi

Garantie limitée
Tous les produits couverts par ce Mode d'emploi sont garantis contre les défauts de façon et de matériau
pendant un an à compter de la date de la vente, à l'exception des moteurs, qui sont garantis pendant deux
ans. La présente garantie ne s'applique pas aux dommages résultant d'un accident, d'un emploi non
conforme, d'une altération, d'un emploi sur un circuit électrique caractérisé par une tension supérieure de
plus de 5 % à la tension nominale indiquée sur la plaque signalétique, ou d'une installation, d'un câblage ou
d'un entretien des équipements ou des produits ne respectant pas les instructions de ce Mode d'emploi.
CECI CONSTITUE LA SEULE ET UNIQUE GARANTIE ACCORDÉE PAR LE FABRICANT EN RAPPORT AVEC LES
PRODUITS ET ELLE SE SUBSTITUE À TOUTES LES AUTRES GARANTIES ET CONDITIONS, EXPLICITES ET
IMPLICITES, OCTROYÉES PAR LA LOI OU AUTREMENT, Y COMPRIS, MAIS DE FAÇON NON LIMITATIVE,
LES GARANTIES DE QUALITÉ MARCHANDE ET/OU D'ADÉQUATION À UN BUT PARTICULIER, ET ELLE
EXCLUT DE TELLES GARANTIES ET CONDITIONS. Aucun employé, agent, concessionnaire ou autre individu
n'a reçu l'autorisation de donner de quelconques garanties ou conditions au nom du fabricant. Il appartiendra
au client de payer tous les frais encourus en liaison avec le retrait ou la réinstallation et l'expédition du produit
pour le faire réparer. Dans les limites d'application de la présente garantie, les appareils ne fonctionnant pas
doivent être renvoyés, accompagnés par une copie du reçu, en port payé, à un centre de réparations agréé,
et le fabricant réparera ou remplacera le produit, à son choix, sans frais pour le client, les frais de renvoi
depuis le centre de réparations agréé étant payés par le fabricant. Il est convenu qu'une telle réparation ou
un tel remplacement est le remède exclusif à la charge du fabricant et que LE FABRICANT NE SAURAIT ÊTRE
TENU RESPONSABLE DE DOMMAGES QUELCONQUES, Y COMPRIS DES DOMMAGES ACCESSOIRES OU
SECONDAIRES, OU DE PERTES DE BÉNÉFICES OU DE REVENUS. Étant donné que certaines Provinces et
certains États ne permettent pas l'exclusion ou la limitation des dommages accessoires ou secondaires,
l'exclusion ou la limitation qui précède peut ne pas s'appliquer dans certains cas.
Cette garantie vous confèredes droits légaux précis, et vous pouvez également avoir d’autres droits selon
l'État ou la Province où vous résidez.
REÇU EXIGÉ COMME JUSTIFICATIF D'ACHATPOUR TOUTE RÉCLAMATION VISANT À FAIRE JOUER LA
GARANTIE.
5. Ne placez pas de corps étrangers à l’intérieur de
l’humidificateur.
6. Ne laissez pas des enfants se servir de cet appareil
comme d’un jouet. Il faut faire très attention quand
cet appareil est utilisé par des enfants ou à
proximité d’enfants.
7. N’utilisez jamais votre humidificateur quand une
pièce est absente ou endommagée de quelque
façon que ce soit.
8. Pour réduire le risque de danger électrique ou
d’endommagement de l’humidificateur d’air, n’incli-
nez pas, ne heurtez pas et ne faites pas basculer
l’humidificateur d’air quand il est en marche.
9. Pour réduirele risque d’endommager l’humidifi-
cateur d’air, débranchez-le quand il n’est pas utilisé.
10. Pour réduire le risque de choc électrique accidentel,
ne touchez pas le cordon ou les commandes si vos
mains sont mouillées.
11. Tenez compte de l’étiquette d’avertissement ci-
dessous.
CONSIGNES DE SÉCURITÉ GÉNÉRALES
18
Termes relatifs à la sécurité
DANGER : si les informations relatives à la sécurité ne
sont pas respectées, quelqu’un sera gravement blessé
ou tué.
AVERTISSEMENT : si les informations relatives à la
sécurité ne sont pas respectées, quelqu’un risque
d’être gravement blessé ou tué.
MISE EN GARDE : si les informations relatives à la
sécurité ne sont pas respectées, quelqu’un sera
peut-êtreblessé.
1. Pour réduirele risque d’incendie ou de choc élec-
trique, branchez l’humidificateur d’air directement
dans une prise de courant alternatif de 120 V c.a.
N’utilisez pas de rallonges.
2. Ne laissez pas le cordon électrique traîner dans des
passages très fréquentés. Pour réduire le risque
d’incendie, ne placez jamais le cordon électrique
sous un tapis, ou à proximité d’un registre de
chaleur, d’un radiateur, d’un four ou d’un appareil
de chauffage.
3. Débranchez toujours l’humidificateur d’air avant de
le nettoyer ou de le déplacer,de retirer la section de
ventilation, ou chaque fois que l’humidificateur
n’est pas en service.
4. Veillez à ce que l’humidificateur reste propre.
AVERTISSEMENT : Pour réduire le risque
d’incendie, de choc électrique ou de blessure,
débranchez toujours l’appareil avant d’effectuer
une réparation ou un nettoyage.
SP6599-1 MoistAIR 3/29/06 1:13 PM Page 18

Familiarisez-vous avec votre humidificateur d’air
Description MA 0800
* Débit /24 h 8 gallons/30,2 litres
Capacité du bidon 1,2 gallons/4,54 litres
Capacité de la base 1,2 gallons/4,54 litres
* Couverture en pi21 700
Vitesses de ventilation 3
Filtre de rechange MAF2
Humidostat automatique Oui
Fermetureautomatique Oui
Commandes Électroniques (bouton-poussoirs)
Pieds en caoutchouc 6
Classification CUL Oui
Volts 120 (c.a.)
Hertz 60
Ampères (haute vitesse) 1,2
Watts (haute vitesse) 81
* Chiffres basés sur une aire avec isolation standard et un plafond de
8pieds de hauteur
Base
Bottle
Speed &
Humidity
Controls
Bottle HandleFan Assembly
Housing
Assembly
Filter:
Replacement No.
MAF2
Humidistat
(On Power
Cord)
Ensemble de
ventilateur
Bâti
Humidostat
(sur le cordon
électrique)
Filtre :
N° de remplacement
MAF2
Base
Bidon
Commandes de
vitesse et d’humidité
Poignée du bidon
19
SP6599-1 MoistAIR 3/29/06 1:13 PM Page 19

20
Comment fonctionne votre humidificateur d’air
Votre nouvel humidificateur d’air MoistAIR a été conçu
pour répondre aux besoins d’humidité de votre domicile
au moyen du principe d’évaporation de l’eau dans l’air.
Une fois que le filtre est saturé d’eau, de l’air est attiré
dans l’appareil, il passe à travers le filtre et l’humidité est
absorbée dans l’air. Toute évaporation se produit à
l’intérieur de l’humidificateur, c’est pourquoi tous les
résidus restent dans le filtre. Ce processus naturel
d’évaporation élimine virtuellement la poussière
blanche.
Dry air
enters
through
the
louvers
in the
housing
Humidified air is
then released
through the top
Première étape : mise en état de marche
Une fois que l’humidificateur aura été retiré de son
carton, retirez tous les produits d’emballage. Vérifiez
que le filtre est mis en place correctement (cf. page
26).
MISE EN GARDE : pour réduire le risque de vous
blesser, de causer des incendies ou d’endommager
l’humidificateur, n’utilisez que des détergents
spécialement recommandés pour les humidifi-
cateurs. N’utilisez jamais de produits inflam-
mables, combustibles ou toxiques pour nettoyer
votre humidificateur.
Pour réduire le risque de vous ébouillanter et
d’endommager l’humidificateur, ne mettez jamais
d’eau chaude dans l’humidificateur.
L’air humidifié est
ensuite libéré depuis
la partie supérieure
de l’appareil
Del’air
sec entre
par la
grille
d’aération
sur le bâti
SP6599-1 MoistAIR 3/29/06 1:13 PM Page 20
Table of contents
Languages:
Other MoistAir Humidifier manuals
Popular Humidifier manuals by other brands

Pure Humidifier
Pure Humidifier SX Series Installation instructions and operation and maintenance manual

river systems
river systems NEBULA user manual

Boneco
Boneco U700 Instructions for use

Levoit
Levoit Classic 100 user manual

Vava
Vava VA-AH015 user guide

Scarlett
Scarlett comfort SC-AH986E10 instruction manual