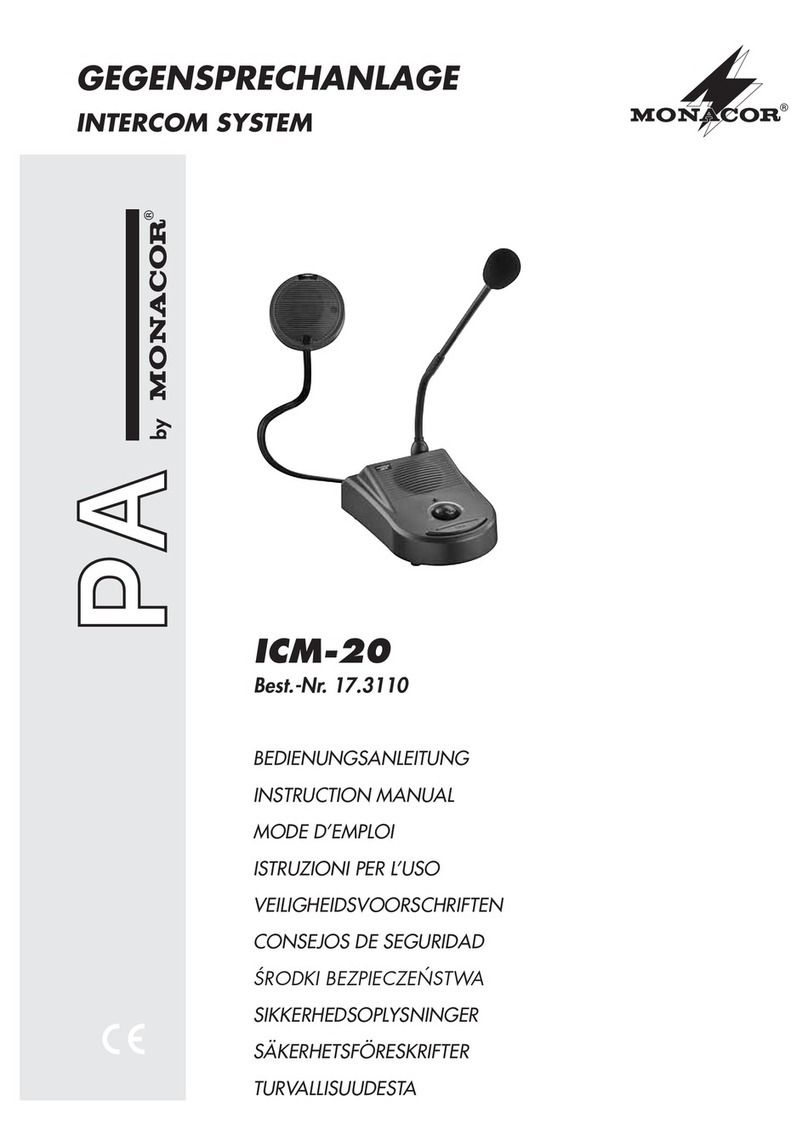
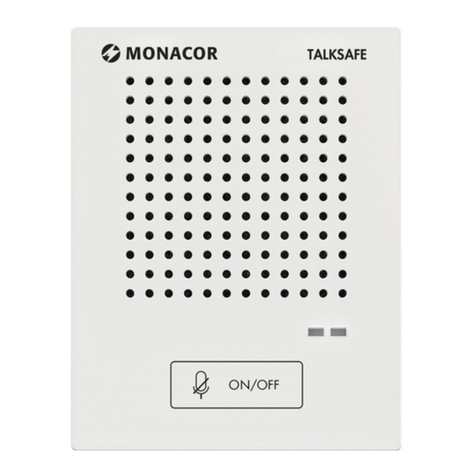
Monacor TALKSAFE-1 User manual

TALKSAFE-1
Bestellnummer 1000190
MONACOR INTERNATIONAL GmbH & Co. KG • Zum Falsch 36 • 28307 Bremen • Germany Copyright©by MONACOR INTERNATIONAL. All rights reserved. A-2087.99.01.01.2021
ELECTRONICS FOR SPECIALISTS ELECTRONICS FOR SPECIALISTS ELECTRONICS FOR SPECIALISTS ELECTRONICS FOR SPECIALISTS ELECTRONICS FOR SPECIALISTS ELECTRONICS FOR SPECIALISTS ELECTRONICS FOR
Bluetooth-Gegensprechanlage
Diese Anleitung richtet sich an das Installa-
tionspersonal und an die Bediener der Anlage.
Bitte lesen Sie die Anleitung vor dem Betrieb
gründlich durch und heben Sie sie für ein spä-
teres Nachlesen auf.
1 Einsatzmöglichkeiten
Die Gegensprechanlage TALKSAFE-1 dient zur Er-
leichterung von Gesprächen von Personen, die durch
eine Wand, eine Glas-/Plexiglasscheibe etc. getrennt
sind (z.B. an Kassen oder Serviceschaltern). Sie be-
steht aus einem Headset (Personalseite) und einer
Sprechstelle (Kundenseite). Die Verbindung zwischen
Headset und Sprechstelle erfolgt über Funk (Blue-
tooth). Zum Lieferumfang gehören ein Netzgerät für
die Sprechstelle und ein Ladekabel für das Headset.
2 Sicherheitshinweise
Das Produkt entspricht allen relevanten Richtlinien
der EU und trägt deshalb das -Zeichen.
WARNUNG Das Netzgerät wird mit lebensgefährli-
cher Netzspannung versorgt. Nehmen
Sie deshalb niemals selbst Eingriffe
daran vor. Es besteht die Gefahr eines
elektrischen Schlages.
•
Verwenden Sie das Produkt nur im Innenbereich
und schützen Sie es vor Tropf- und Spritzwasser
sowie hoher Luftfeuchtigkeit. Der zulässige Ein-
satztemperaturbereich beträgt −10°C bis +40°C.
•
Benutzen Sie das Produkt nicht und trennen Sie es
sofort von der Stromversorgung
1. wenn sichtbare Schäden an einem der Geräte
vorhanden sind,
2. wenn nach einem Sturz oder Ähnlichem der Ver-
dacht auf einen Defekt besteht,
3. wenn Funktionsstörungen auftreten.
Lassen Sie Schäden in jedem Fall in einer Fachwerk-
statt reparieren.
•
Säubern Sie das das Netzgerät nur mit einem tro-
ckenen, weichen Tuch. Die Sprechstelle und das
Headset können mit einem handelsüblichen Ober-
flächenreiniger und einem weichen Tuch gereinigt
werden. Achten Sie darauf, dass keine Flüssigkeit in
die Geräte eindringt.
•
Wird das Produkt falsch verwendet oder nicht fach-
gerecht repariert, kann keine Haftung für daraus re-
sultierende Sach- oder Personenschäden und keine
Garantie für das Produkt übernommen werden.
Soll das Produkt endgültig aus dem Be-
trieb genommen werden, entsorgen Sie es
gemäß den örtlichen Vorschriften.
3 Übersicht
3.1 Sprechstelle (Kunde)
1 Anschluss für das beiliegende Netzgerät
2 Ein-/Ausschalter für die Sprechstelle
3 Potentiometer zur Lautstärkeregelung
(bei der Installation)
4 Lautsprecher
5 versenkte Bluetooth-Taste
kurz drücken: Bluetooth ein-/ausschalten
lang drücken: Pairing-Modus
6 Bluetooth-Anzeige (blaue LED)
blinkt schnell (für max. 60 Sek.) Pairing-Modus
blinkt langsam keine Bluetooth-Verbindung
leuchtet konstant Bluetooth-Verbindung
leuchtet nicht Bluetooth ausgeschaltet
7 Infrarotsensor (Näherungssensor)
8 Statusanzeigen (grüne LED und rote LED)
grüne
LED
leuchtet, wenn keine Bluetooth-Verbindung besteht
erlischt, sobald eine Bluetooth-Verbindung besteht
rote
LED
leuchtet: Sprechstelle deaktiviert
(Mikrofon und Lautsprecher ausgeschaltet)
leuchtet nicht: Sprechstelle aktiviert
(Mikrofon und Lautsprecher eingeschaltet)
9 Mikrofon
3.2 Headset (Personal)
10 Tasten +/− zum Einstellen der Lautstärke
11 LED-Anzeige
Blau blinkt 3 × eingeschaltet
Rot für 1 Sek. an ausgeschaltet
Rot und Blau blin-
ken abwechselnd Pairing-Modus
Blau blinkt
1 × alle 10 Sek.
über Bluetooth verbunden und im Standby
(Kopfhörer und Mikrofon ausgeschaltet)
Blau blinkt
2 × alle 10 Sek.
über Bluetooth verbunden und aktiviert
(Kopfhörer und Mikrofon eingeschaltet)
Blau blinkt
2 × alle 5 Sek. keine Bluetooth-Verbindung
Rot an Ladevorgang
Blau an Ladevorgang beendet
Rot blinkt Akku laden!
12 Multifunktionstaste
3 Sek. lang drücken: Einschalten
5 Sek. lang drücken: Ausschalten
Wenn aus, 5 Sek. lang drücken: Pairing
Im Betrieb: 2 × kurz drücken zum Stummschalten/
Wiedereinschalten des Mikrofons
13 Micro-USB-Buchse zum Laden des Akkus
14 Mikrofon
Deutsch
Personal Kunde
Aufbau
13
14
11
10
12
12V DC ON / OFF
TALKSAFE-1
®
3
6
5
4
8
9
7
1
2

TALKSAFE-1
Bestellnummer 1000190
MONACOR INTERNATIONAL GmbH & Co. KG • Zum Falsch 36 • 28307 Bremen • Germany Copyright©by MONACOR INTERNATIONAL. All rights reserved. A-2087.99.01.01.2021
ELECTRONICS FOR SPECIALISTS ELECTRONICS FOR SPECIALISTS ELECTRONICS FOR SPECIALISTS ELECTRONICS FOR SPECIALISTS ELECTRONICS FOR SPECIALISTS ELECTRONICS FOR SPECIALISTS ELECTRONICS FOR
Schritt 4: Die Lautstärke der Sprechstelle (im Werk voreingestellt) bei
Bedarf vorsichtig mit dem beiliegenden Mini-Kreuzschlitzschrauben-
dreher anpassen. Dabei den Endanschlag beachten. Treten Echos oder
Rückkopplungen (Pfeifen) auf, die Lautstärke reduzieren.
max.
120°
max.
120°
5 Technische Daten
Art Bluetooth-Gegensprechanlage mit 1 Headset und 1 Sprechstelle;
Aktivierung/Deaktivierung über Infrarot
Einsatztemperatur −10 °C bis +40 °C
Sprechstelle
Bluetooth-Version 3.1
verwendete Technolo-
gien für das Mikrofon
AEC (Acoustic Echo Cancellation: Echokompensation) und
NR (Noise Reduction: Unterdrückung der Umgebungsgeräusche)
Gehäuse weißer ABS-Kunststoff, Schutzart IP 33
Montage über doppelseitiges Klebeband
Stromversorgung
⎓
12V über beiliegendes Netzgerät an 100 –240V, 50/60 Hz
Abmessungen, Gewicht 86 × 111 × 26mm (B × H × T), 160 g
Kabel des Netzgeräts Länge 2 m
Headset
Bluetooth-Version 5.0, Klasse 2 Reichweite bis zu 10 m
Eingebauter Akku 3,7 V / 180 mAh Ladedauer ca. 2 Stunden
Abmessungen 151 × 49 × 51 mm Gewicht 43 g
Betriebsdauer Standby-Zeit: ca. 60 Stunden, Gesprächszeit: ca. 11 Stunden
Konformität und Zulassung: Hiermit erklärt MONACOR INTERNATIONAL,
dass das Produkt TALKSAFE-1 der Richtlinie 2014/53/EU entspricht. Die EU-
Konformitätserklärung ist im Internet verfügbar (www.monacor.de). Das Pro-
dukt ist für den Betrieb in den EU- und EFTA-Staaten allgemein zugelassen. Der
Betrieb des Produkts ist anmelde- und gebührenfrei.
Änderungen vorbehalten.
4 Installation
Die Gegensprechanlage sollte nur von technisch versiertem Personal in-
stalliert werden. Verkabelungsarbeiten nur bei ausgeschalteter Sprech-
stelle durchführen.
Zum Testen der Anlage muss sich immer auch auf der Kundenseite
eine Person befinden, da der Infrarotsensor der Sprechstelle die Anlage
nur aktiviert, wenn er eine Person vor der Sprechstelle erkennt (bis zu
einer Entfernung von ca.80–100 cm). Nach dem Entfernen der Person
von der Sprechstelle bleibt die Anlage noch für ca. 1 Minute aktiviert.
Schritt 1: Die Sprechstelle ist mit
einem stark haftenden Spiegel-
klebeband bestückt. Daher un-
bedingt die beste Position testen,
bevor sie aufgeklebt wird. Ist die
gewünschte Position gefunden,
die Schutzfolie von der Rückseite
der Sprechstelle abziehen und das
Gerät auf die Oberfläche drücken.
Positionierung: Das Gerät auf Kopf-
höhe anbringen: Die Verständlichkeit ist
besser, je näher der Sprecher sich am
Mikrofon befindet. Das Mikrofon be-
findet sich rechts unten, weshalb eine
Anbringung eher links des Sprechers
empfohlen wird.
Schritt 2: Das beiliegende Netzge-
rät an die Sprechstelle anschließen
und in eine Steckdose (230V/50Hz)
stecken. Den Ein-/Ausschalter der
Sprechstelle auf ON (Ein) stellen.
Hinweis: Auch wenn der Schalter auf
OFF steht, hat das an eine Steckdose
angeschlossene Netzgerät einen gerin-
gen Stromverbrauch.
Um Störungen durch Echos und
Rückkopplungen zu minimieren,
misst sich die Sprechstelle nach
dem Einschalten für einige Se-
kunden auf die jeweilige Umge-
bung ein.
Schritt 3: Das Headset einschalten (Ein-/Ausschalten ☞Kapitel3.2,
Taste
). Da das Headset bereits werkseitig mit der Sprechstelle ge-
koppelt wurde, ist es nach dem Einschalten sofort einsatzbereit: Die
Bluetooth-Verbindung wird hergestellt, an der Sprechstelle leuchtet die
blaue LED konstant und die grüne LED erlischt. Solange der IR-Sensor
der Sprechstelle keine Person erkennt, befindet sich das Headset im
Standby. Erkennt der IR-Sensor eine Person, ist das Headset aktiviert
und ein Gespräch ist möglich. Die Kopfhörerlautstärke kann über die
Tasten +/− eingestellt werden. (Vorsicht: Die Lautstärke nicht zu hoch
einstellen. Hohe Lautstärken können auf Dauer das Gehör schädigen.)
Doppeltes Drücken der Taste schaltet das Mikrofon stumm bzw.
wieder ein und es ertönt eine akustische Rückmeldung. Im Zustand
„Stumm“ werden in regelmäßigem Abstand 2 Signaltöne abgegeben.
Akku des Headsets laden: Bei zu niedrigem Akku-Ladestand blinkt
die LED am Headset rot. Zum Laden des Akkus das mitgelieferte
Ladekabel in die Micro-USB-Buchse des Headsets stecken und mit
einer USB-Buchse an einem Computer oder einem 5-V-USB-Netzgerät
verbinden. Während des Ladevorgangs leuchtet die LED am Headset
rot. Ist der Ladevorgang beendet (LED leuchtet blau), das Headset von
der USB-Buchse trennen.
Hinweis: Wird das Headset längere Zeit nicht benutzt, sollte der Akku mindes-
tens alle 2 Monate nachgeladen werden.
Koppeln (Pairing) eines anderen Headsets mit der Sprechstelle:
Es ist möglich, ein anderes Bluetooth-Headset mit der Sprechstelle
zu koppeln (z.B. für einen weiteren Mitarbeiter). Das im TALKSAFE-1
enthaltene Headset ist auch als Einzelartikel TALKSAFE-HS erhältlich.
Dieses kann als zusätzliches Headset verwendet werden.
Vor dem Koppeln sicherstellen, dass die
Sprechstelle nicht noch mit dem vorher
genutzten Headset verbunden ist. Zum
Koppeln die versenkte Bluetooth-Taste an
der Sprechstelle lang drücken (blaue LED
blinkt schnell) und das Headset in den
Pairing-Modus schalten (TALKSAFE-HS: im
ausgeschalteten Zustand die Taste für
5Sek. drücken). Nach der Kopplung leuch-
tet die blaue LED der Sprechstelle konstant.
Hinweise:
1. Insgesamt können 7 zusätzliche Bluetooth-Headsets gekoppelt und ihre Ver-
bindungsdaten in der Sprechstelle gespeichert werden. Die meisten handels-
üblichen Bluetooth-Headsets werden unterstützt.
2. Die Sprechstelle kann nur mit einem Headset zurzeit betrieben werden. Ver-
bindet sie sich nicht mit dem Headset, ist sie vermutlich noch mit dem vorher
verwendeten Headset verbunden. Dieses dann ausschalten. Das Headset ggf.
noch einmal neu koppeln.

MONACOR INTERNATIONAL GmbH & Co. KG • Zum Falsch 36 • 28307 Bremen • Germany Copyright©by MONACOR INTERNATIONAL. All rights reserved. A-2087.99.01.01.2021
ELECTRONICS FOR SPECIALISTS ELECTRONICS FOR SPECIALISTS ELECTRONICS FOR SPECIALISTS ELECTRONICS FOR SPECIALISTS ELECTRONICS FOR SPECIALISTS ELECTRONICS FOR SPECIALISTS ELECTRONICS FOR
Bluetooth Intercom System
These instructions are intended for installers
and users of the system. Please read these in-
structions carefully prior to installation/opera-
tion and keep them for later reference.
1 Applications
The intercom system TALKSAFE-1 is used to make
conversations easier when persons are separated by
a wall, a glass pane or an acrylic glass pane, etc. (e.g.
at checkouts or service counters). The system consists
of a headset (for the staff) and a microphone unit
(forthe customers). The wireless Bluetooth technol-
ogy is used to connect the headset and the micro-
phone unit. A power supply unit for the microphone
unit and a charging cable for the headset are supplied
with the system.
2 Safety Notes
The product corresponds to all relevant directives of
the EU and is therefore marked with .
WARNING The power supply unit uses danger-
ous mains voltage. Leave servicing to
skilled personnel only. Inexpert han-
dling may result in electric shock.
•
The product is suitable for indoor use only. Protect
it against dripping water, splash water and high
air humidity. The admissible ambient temperature
range is −10°C to +40°C.
•
Do not use this product and immediately discon-
nect it from the power supply
1. if one of the devices is visibly damaged,
2. if a defect might have occurred after a device
was dropped or suffered a similar accident,
3. if malfunctions occur.
Any repairs must be carried out by specialists.
•
For cleaning the power supply unit, only use a dry,
soft cloth. For cleaning the microphone unit and
the headset, a commercial surface cleaner and a
soft cloth may be used. Always make sure that no
fluid gets inside the devices.
•
No guarantee claims for the product and no liability
for any resulting personal damage or material dam-
age will be accepted if the product is not correctly
used or not expertly repaired.
If the product is to be put out of operation
definitely, dispose of the product in accord-
ance with local regulations.
3 Overview
3.1 Microphone unit (customer)
1 Connection for the power supply unit provided
2 Power switch for the microphone unit
3 Potentiometer to adjust the volume
(during installation)
4 Speaker
5 Recessed Bluetooth button
Press briefly to activate/deactivate the Bluetooth
function.
Keep pressed to activate the pairing mode.
6 Bluetooth indicator (blue LED)
LED flashing rapidly (for 60s max.) pairing mode
LED flashing slowly no Bluetooth connection
LED permanently on Bluetooth connection
LED off Bluetooth deactivated
7 IR sensor (proximity sensor)
8 Status indicators (green LED and red LED)
green
LED
on: no Bluetooth connection
off: Bluetooth connection
red
LED
on: microphone unit deactivated
(microphone and speaker off)
off: microphone unit activated
(microphone and speaker on)
9 Microphone
3.2 Headset (staff)
10 Buttons +/− to adjust the volume
11 LED indicator
blue, flashing 3 times
power on
red, on for 1 second power off
red and blue,
flashing alternately pairing mode
blue, flashing once
every 10 seconds
connected via Bluetooth and on standby
(headphone and microphone off)
blue, flashing twice
every 10 seconds
connected via Bluetooth and activated
(headphone and microphone on)
blue, flashing twice
every 5 seconds no Bluetooth connection
red, on charging
blue, on charging completed
red, flashing charge battery!
12 Multifunction button
Keep pressed for 3 seconds to switch on.
Keep pressed for 5 seconds to switch off.
When off, keep pressed for 5 seconds for pairing.
During operation: briefly press twice to mute/
unmute the microphone.
13 Micro USB port to charge the battery
14 Microphone
TALKSAFE-1
Order number 1000190
English
staff customer
Setup
13
14
11
10
12
12V DC ON / OFF
TALKSAFE-1
®
3
6
5
4
8
9
7
1
2

MONACOR INTERNATIONAL GmbH & Co. KG • Zum Falsch 36 • 28307 Bremen • Germany Copyright©by MONACOR INTERNATIONAL. All rights reserved. A-2087.99.01.01.2021
ELECTRONICS FOR SPECIALISTS ELECTRONICS FOR SPECIALISTS ELECTRONICS FOR SPECIALISTS ELECTRONICS FOR SPECIALISTS ELECTRONICS FOR SPECIALISTS ELECTRONICS FOR SPECIALISTS ELECTRONICS FOR
Step 3: Switch on the headset (Switching on/off ☞chapter 3.2,
button
). The headset has already been paired with the microphone
unit in the factory. It is therefore ready to use as soon as it has been
switched on: The Bluetooth connection is established and on the mi-
crophone unit, the blue LED is permanently on and the green LED is
off. As long as the IR sensor of the microphone unit does not detect
a person, the headset is on standby. When the IR sensor detects a
person, the headset is activated and allows the user to communicate
with the person behind the partition. Use the buttons +/− to adjust
the headphone volume. (Caution: Never adjust a very high volume.
Permanent high volumes may damage your hearing.) To mute/unmute
the microphone, press the button twice. There will be a sound signal.
In the mode “mute”, there will be two signal tones at regular intervals.
Charging the battery of the headset: When the battery status is
low, the LED of the headset starts flashing in red. To charge the bat-
tery, connect the charging cable provided to the micro USB port of the
headset and to a USB port on a computer or a 5V USB power supply
unit. While the battery is being charged, the LED of the headset is red.
When the battery has been fully charged (LED is blue), disconnect the
headset from the USB port.
Note: If the headset is not used for a longer period of time, it is recommended
to recharge the battery at least every two months.
Pairing of another headset with the microphone unit: It is possible
to pair another Bluetooth headset (e.g. for another member of staff)
with the microphone unit. The headset supplied with TALKSAFE-1 is
also available as a separate item (TALKSAFE-HS) which can be used as
an additional headset.
Before pairing, make sure that the micro-
phone unit is no longer connected to the
headset used previously. For pairing, keep
the recessed Bluetooth button of the micro-
phone unit pressed (blue LED starts flashing
rapidly) and set the headset to the pairing
mode (TALKSAFE-HS: keep the button
pressed for 5 seconds when the headset
is switched off). After pairing, the blue LED
of the microphone unit is permanently on.
Notes:
1. A total of 7 additional Bluetooth headsets can be paired and their connection
data stored in the microphone unit. Most standard Bluetooth headsets are
supported.
2. The microphone unit can only be operated with one headset at a time. If the
microphone unit does not connect to the headset, it is probably still connected
to the headset used previously. Switch off this headset. If necessary, pair the
headset once again.
Step 4: If necessary, use the mini cross-head screwdriver provided to
carefully adjust the volume of the microphone unit (preset in the fac-
tory), taking into account the left and right stops of the potentiometer.
In case of echoes or feedback (whistling), reduce the volume.
max.
120°
max.
120°
5 Specifications
Type Bluetooth intercom system with 1 headset und 1 microphone unit;
activation/deactivation via infrared
Ambient temperature −10 °C to +40 °C
Microphone unit
Bluetooth version 3.1
Technologies used
for the microphone
AEC (Acoustic Echo Cancellation) and
NR (Noise Reduction: suppression of ambient noise)
Housing white ABS plastic, class IP33 protection
Mounting via double-sided adhesive tape
Power supply
⎓
12V via PSU provided, connected to 100– 240V, 50/60 Hz
Dimensions, weight 86 × 111 × 26mm (W × H × D), 160g
Cable of the PSU length 2 m
Headset
Bluetooth version 5.0, class 2 Range up to 10 m
Built-in battery 3.7 V / 180 mAh Charging time approx. 2 hours
Dimensions 151 × 49 × 51 mm Weight 43 g
Operating time standby time: approx. 60 hours, talking time: approx. 11 hours
Conformity and approval: Herewith, MONACOR INTERNATIONAL declare that
the product TALKSAFE-1 is in accordance with the directive 2014/53/EU. The EU
declaration of conformity can be found on the Internet (www.monacor.com).
The product is generally approved for operation in EU and EFTA countries; the
operation of the product is licence-free and requires no registration.
Subject to technical modification.
TALKSAFE-1
Order number 1000190
4 Installation
The intercom system should only be installed by technically experienced
personnel. Always switch off the microphone unit before carrying out
any wiring.
The IR sensor of the microphone unit will only activate the intercom
system when it detects a person in front of the microphone unit (up
to a distance of approx. 80–100 cm). Therefore, the intercom system
can only be tested with someone present on the customer’s side of
the partition. After the person has moved away from the microphone
unit, the intercom system will remain activated for about one minute.
Step 1: The microphone unit is
equipped with a highly adhesive
mirror tape. Always test the best
position before you attach the unit.
When the right position has been
found, remove the protection film
from the back of the unit and press
the unit onto the surface.
Positioning: Attach the unit at head
level: The closer the customers are to
the microphone, the better the clarity
of communication. The microphone is
located at the bottom on the right of
the unit. This is why it is recommended
to attach the unit slightly to the left of
the head level position.
Step 2: Connect the power supply
unit provided to the microphone
unit and plug it into a mains socket
(230V/50 Hz). Set the power switch
of the microphone unit to ON.
Note: Even when the power switch is
set to OFF, the power supply unit con-
nected to a mains socket will still con-
sume some power.
To minimize interference due to
echoes and feedback, the micro-
phone unit will adjust to its envi-
ronment after it has been switched
on. This will take a few seconds.
This manual suits for next models
1
Table of contents
Languages:
Other Monacor Intercom System manuals