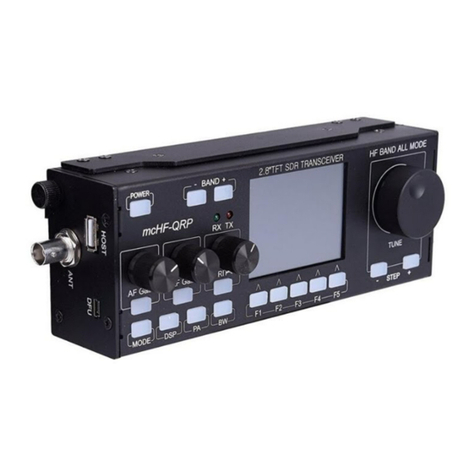
Monka mcHF User manual

第1页

Release Note
Ver1.02: Initial Release …2015/8/1
Ver1.03: 正其他日期格式输入校验错误 …2015/9/4
修正 CW 左右浆反置无效错误
修正宏发射过程中 转动 B2 显示会错乱问题。
修正宏录制过程中退格删除跨两行后显示错误 添加宏录制剩余字符数显示
添加轻按 B1 转旋可选宏(选中可预览内容 顶行显示对方呼号)松开 B1 调用该宏.
添加发射状态轻按 B2 取消发射。接收状态轻按 B2 为开关对方呼号捕捉。
添加 TU E 调谐功能 Pause/Break 键。
添加 ALT+TAB 为第二发射热键 原 I SERT 为发射热键
添加免键盘调用宏的数量由 M1~7 到 M0~M9 所有宏
***添加语音录音和回放功能, 回放时可暂停 快进 快退。录音仅录接收的语音。
回放时:1.不可录音(关闭目前录音) 2.不可发射 3.不可调用宏 4.不可进 CO FIG 菜单
<功能键尽量集中于 B2 不使用主控 B1 按钮, 除了快进快退>
回放状态:短按 B2(空格): 暂停/播放 长按 B2(ESC): 退出回放
接收状态:短按 B1 转义命令\ 长按 B1(TAB) CO FIG 配置
短按 B2(CTRL+C):开关呼号捕捉 长按 B2(CTRL+V) :开始/暂停录音
双击 B1 未定义 双击 B2 未定义
发射状态;短按 B2(I SERT 或ALT+TAB): 取消发射 长按 B2:未定义
( 快进快退使用键盘 Ctrl+ ↑↓← → 箭头操作快进快退 )
注:在 回放暂停 状态 转动编码器可以实现大小步进的快进快退 ( 按住
B1
为大步进 )
V1.04A:
1. USB disk is supported on "Import/Export Config" Menu,
USB disk has priority over microsd card inside MODEM. when USB disk is inserted,
config.txt file is automatically saved/loaded to or from USB disk, while OT sd card as usual.
2. "Connect to PC" Menu is added, when choosing this item, MODEM itself is simulated to a
USB disk, connecting via USB cable accessory,
there will be read/write all files inside MODEM as easy as normal USB disk.
ote: when USB disk is inserted, there is a tiny "U" symbol near the "SD" in the top line.
=========================================================================
Press B1 and rotate encoder can play macro without support of keyboard.
Press B2 while TX cancel the emitting.
ALT+TAB can also switch RX/TX,
Replay mode: Press B2 for pause(SPACE) long press B2 exit replay mode(ESC)
RX: Press B1 for Escape control long press B1 for configuration(TAB)
Press B2 for callsign capture(CTRL+C)
long press B2 for voice recording(CTRL+V)
TX: Press B2 cancelling TX(INSERT or ALT+TAB)
Ctrl+ ↑↓← → can backward and forward while re lay voice record .
B1 + Rotate encoder/ Rotate encoder do same functions while ause in re lay mode.
*Thanks: BD6RN, BG8ON BH4LGE and some friends here.
第2页

Contents
1.Introduction......................................................................................................................................5
2.Battery replacement..........................................................................................................................7
3.Digital Mode operations...................................................................................................................9
4.1 Receiving...............................................................................................................................9
4.2 Transmitting..........................................................................................................................9
3.3Practical use..........................................................................................................................10
3.4Macro....................................................................................................................................11
4.5 Import & Export configuration...........................................................................................13
4.CW Mode.......................................................................................................................................13
5.Upgrade firmware..........................................................................................................................16
Appendix 1. Configure Menu...........................................................................................................18
Appendix 2. Keyboard hotkey..........................................................................................................18
Appendix 2. Op Manual...................................................................................................................19
Appendix 4. CW Escape...................................................................................................................21
Appendix 5. Data cable.....................................................................................................................23
第3页

Parameter List
Modem Size: 160 X 65 X 27 MM
Charge Volt: 5~16V (3.5MM DC)
Internal battery: AAx2 OR 4.2v Lith. (inner battery volt<5v)
AA AA+TRX Lith lith+TRX
Battery life
Weight
Note: AAx2: Panasonic 2550mah Lith: 3100mah
2.2v 2.6v 3.0v 3.4v 3.8v 4.2v
Current
1
Current
2
注:Current1: Without internal TRX Mod installed
Current2:With internal TRX Mod installed
TRX Mod(OPT) :internal transreceiver mod.(Coming soon)
Accessories list
USB Cable DC Charge cable
Radio data cable Digital modem
第4页

1.Introduction
Digital Modem can encode/decode BPSK31/63, RTTY,
PSK and CW modes without PC, specially for portable
digital communication 。 With its internal high performance
DSP chips can process radio data。Internal SD card can save
the regular Logs and real time audio data(Including FFT data).
Its external USB host interface can be used for a USB
Keyboard 。 This modem use 12864 standards screen for
display, and AAs(or 4.2v lithium battery) for power.
Furthermore, this modem can freely download firmware to
upgrade new features.
Press B1+B2 1-2S is power ON/OFF
Cautions:
1. DO NOT Enable “Force charge” when using AA
battery。
2. Modem can not charge lithium battery when
volt<3.35v. Choose “force charge”.
3. Mo em begins charge when it turns on(ju ge
battery type by volt), power off automatically when
complete。
第5页

4. Screws in top are slightly different in size with others,
DO NOT mix it。
Overall Architecture
Internal pictures
第6页

Wire connection
Connecting Modem and your radio by Data cable。If
used for DIY radios, just connect 4 pins to MODEM: 1.GND,
2.PTT 3. Au io out 4. Au io in. Take reference of following
pictures.
Data cable
USB cable
Keyboard
DIGI MODEM Interface defines:
<< Modem pin defines
<Radio sides pins defines reference to related manual>
Normally, you should provide your radio model to us, for
supply of related data cable。
2.Battery re lacement
Battery replacement is no necessary for lithium. Only
needs to be recharged by DC cable, when system beeps(volt
< 3.5). Extern volt between 5 to 26V can be used for charging.
第7页

(Higher volt lower current is required)
DO NOT reverse battery polarity , DO NOT charge
AAs。
Diagram of Battery replacement:
Screw down three of them in both sizes。
=====================================
AA battery is better for outdoor use。
Lithium battery is long life for use. But will lose its capacity
for long keeping. Both of them effect by low temperature
AAs is advised for occasionally use.
Lithium is recommended for regular use.
第8页

3.Digital Mode o erations
4.1 Receiving
Firstly, ensure your wire connection is all right 。 Turn on
power of digital modem(Press
B1+B2 for 1~2s
),If there is
FFT spectrum display. Congratulations, Receiving is OK。Easy
work,
(Some ra io nee s to turn OFF SQL)
Set the appropriate MODE(see Appendix
1.<Mode>),Then adjust the cursor to the peak, Decoding
message will shows。
Spectrum isplay Signal peak & Deco ing text
4.2 Transmitting
First, please make sure Radio station is connected with
ANT or dummy load for TX。Then, Check the radio pwr meter
if there is any power output, after press Insert for
transmitting. If does, Nice work, Modem could output
normally.
第9页

3.3 Practical use
First find the data communications sound on radio, and
align with the cursor on the crest range of about 2 grids, the
machine will automatically lock and calibration signal. If the
mode is no error, the decoded information will soon appear
at the bottom of the screen.
Press Insert, MODEM turned to TX status, radio controlled
into the transmit mode. Now you can enter the text you want
to transmit, that is emitted content. If the input error, use
backspace key in a non-CW mode (The receiver side will get a
backspace flag and delete one word correspondingly). Press
Insert again after transmits complete return to the receiving
state, thus completing the launch.
第10 页

3.4 Macro
With skillful use,Users need to be given a lot of tedious
and type of input and simplify operations, this time you need
to use a macro 。 Through a series of macro includes a
switching transmitting/receiving, content input and other
operations defined on the F1 ~ F10, when using only need to
enter F1 ~ F10 machine will perform a series of actions that
you set in advance。
1) Record my callsign to Macro:
Ctrl+M BG5XXX Ctrl+Z
2) Edit a standard call macro:
Ctrl+F1 Ctrl+S cq cq cq de Alt-M Alt-M pse k Ctrl+Q Ctrl+Z
Save a macro to F1 Press F1 execute the macro
Displays: Tx, cq cq cq de BG5XXX BG5XXX psk k
Ctrl+F1: save macro to F1 key
Ctrl+S : PTT ON Alt-M: Put callsign mark to macro
Ctrl+Q: PTT OFF Ctrl+Z:
Report your callsign three times, just in case of error.
Commonly used macro:
Record call to flash: Record others call to
RAM(volatile)
Ctrl+M BG5XXX Ctrl+Z Ctrl+T DX1XXX Ctrl+Z
Macro for call (F1) :
Ctrl+F1 Ctrl+S cq cq cq de Alt+M Alt+M Alt+M pse k Ctrl+Q Ctrl+Z
(Triple times ALT+M for call sign, just in case for error)
Macro for reply (F2) :
Ctrl+F2 Ctrl+S Alt+T Alt+T Alt+T de Alt+M Alt+M Alt+M pse k Ctrl+Q Ctrl+Z
Waiting for reply……
Exchange info (F4) :
Ctrl+F4 Ctrl+S NAME:XXX 817ND ANT:DP PWR:5W
QTH:FUZHOU,CHINA Ctrl+Q Ctrl+Z
Waiting for reply……
Fare ware macro (F5)
第11 页

Ctrl+F5 Ctrl+S Dear OM, Thanks for your calling and Happy new
year! de Alt+M Ctrl+Q Ctrl+Z
Do not copy, again please(F6)
Ctrl+F6 Ctrl+S Alt+T Alt+T Alt+T AGN AGN de Alt+M Alt+M Alt+M k
Ctrl+Q Ctrl+Z
Note : Put some......or****** for delay. As......CQ DX CQ
DX DE BD2IEQ BD2IEQ CQ DX PSE K. It always needs a few seconds
for others cursor move to your signal peak。
By pressing B1, then rotating the coder, you could run the
macro, without keyboard support.
第12 页

4.5 Import & Export con iguration
This function is mainly designed for modification of
macros and copy configurations between Digital Modems,
Export configuration file is stored in directory of /conf/*.txt in
internal TF card or external USB disk, and can be directly
accessed by PC.
1. Menu “Connect to PC”with USB cable connected, can
simulate Modem as an USB disk, mainly for PC access
of files in Digital Modem internal TF card.
2. “Import/Export config”to an external USB disk is for
copy configurations between Digital modems without
PC on hand.
4.CW Mode
Transmitting:
1.> Set Modem in CW mode (see MODE configuration menu option), press
Insert to enter the transmit mode, input (default uppercase), the
第13 页

machine detects the first space after launch hyphenation. The rotary
encoder adjustment CW transmit speed WPM (Word per minute words per
minute) on CW emission state.
2.> By CW transmit mode, press ESC on / off the side tone. While holding
down the B1 + rotary encoder selection sidetone frequency (or while
holding down the keyboard CTRL + rotary encoder achieve the same
function).
3.> Press Insert again back to receive mode。
Note: CW Practice mode without triggering PTT on radio emission. By
CW Direct mode, PTT should connect directly to the CW key control
lines.
Receive:(Skillful):
1.> Adjust the radio to a CW signal, CW spectrum display in
MODEM will near the cursor, if CW signals in the spectrum is too wide,
accounting for two grid (once to move the cursor one space or more,
adjust the cursor near the crest, the system will automatic alignment of
the strongest in more than a grid cell signal.
2.> If the signal is strong enough, and basic standards keying
encountered, the MODEM will quickly synchronize their speed and
demodulate the contents, which can not be decoded displayed on the
screen as "*"。 If still no any decoding pressing‘T’ Enable Goertzel
filter, and set MARK-SPACE Threshold 。 If you can hear CW signal
clearly But without any decoding text It may set to
high 。 Use“+”/“–”to adjust it 。 Press“–”To tweak
down Press“Enter”to confirm。
3.> Activate Word space adjust menu by pressing“W, “+”/“–”for
adjustment。If word space is to narrow press”–“。
第14 页

If char is cut into many chars ( since char space is too narrow,
Dots becomes T , Dash becomes E Only happens in lower WPM) Dot and
dash space adjust by“C”key and“+”/“–”key。
C key adjust Char s ace W key adjust Word s ace
4.> Pressing "B" key and the "+" / "-" keys to adjust the receiver
bandwidth, equivalent to a narrow band filter, when noisy in band. Some
machines have build-in narrowband filter, but it will make the spectrum
less on the MODEM, and is not conducive to tuning. MODEM use this
feature on beneficial alignment signal.
But setting too narrow bandwidth, is not conducive to decode at high
speed CW. WPM speed synchronous will unstable, WPM judgment will
exceed 5-10 hopping around, this time decoded data is inaccurate.
Others:
CW mode spectrum is limited within 1500HZ, through the radio
and then adjusted MODEM to a suitable audio alignment signal. By
B, G, C, W, Z key for manual adjustment, see Appendix 3 for detail.
Tap B1, the left side of the spectral lines appear '\' symbol,
Enters escape command mode。
Note : Automatic key is recommended for escape control
and text input. Modem will enter hand key mode by press
right paddle when booting 。
第15 页

5.U grade firmware
About upgrading firmware, mainly to allow supports
some new features or fix some BUG, it is an important
aftermarket product support means. A good product is
capable of continuous appreciation or hedging products.
Spend the same money to buy more and more, or improve
the function, rather than developing completely on the
matter.
Upgrade method is as follows:
1.> Turn Vol pot to the right, Enters upgrade interface.
2.>Connecting your computer by USB cable.
select USB enabled, click connect shows on Figure
1.
3.>Load latest HEX file, shows on Figure2
4.>Flash into new firmware。Shows on Figure3
Latest Firmware can be downloaded
At HTTP://BG5ROJ.3322.ORG:88),
5.>Wait for a prompts OK, the upgrade is
第16 页

complete。
图 1 Figure 1
图 2 Figure 2
图 3 Figure 3
图 4
Figure 4
第17 页

A endix 1. Configure Menu
Press B1 for 1~2 S enters CONFIG menu(
Tab
),rotate coder(
↑↓
)to
choose,tap B1(
Enter or →
)confirm,Tap B2(
ESC or ←
)cancel。
Menu structure:
Digital mode: BPSK31 BPSK63 RTTY …
Input signal:
External Data(default)
Internal Mic
External I
Internal TRX
S L Threshold
Input Gain(Page Up/down)
TBD
Backlight adjustment
Beacon interval
Export config to file
(Del/ Ctrl+Del:delete/delete all)
RTCC Display ON/OFF
RTCC Display format
CW ID ON/OFF
CW auto Keyer mode
CW paddle reverse
Force charge on battery.
Reset all setting and macro.
A endix 2. Keyboard hotkey
--- ALT CTRL SHIFT
BCW Bandwidth Insert beacon sn
to macro
第18 页

CCW Char s ace
D Set Time Set Date
F Save cur freq Retrieve cur freq
GThreshold
H
I Record text to log
L Clear text area
M Set my call Insert my call
symbol to macro
N Set Their call
and name
Set log filename
O ON/OFF Backlight
P
QInsert TX OFF sym
R
S Set Sn num Insert Sn num
symbol to macro
Insert TX ON sym
T Set their call Insert their call
symbol to macro
U Text record mode
ON/OFF
V Voice record mode
ON/OFF
WCW Word s ace
X Sn + Their call
Y
ZSkew count
*Red font for Macro insert symbol *Pur le font for CW only shortcut
A endix 2. O Manual
Insert RX/TX Switch. <<(or Alt+TAB)
第19 页

F11 Display Settings F12 ON/OFF
Beacon
Ctrl+F/Alt+F save/load freq. HOME Back to 1500HZ
Ctrl+C call sign capture Ctrl+V ON/OFF voice rec
Ctrl+L Clear text area Ctrl+O ON/OFF
backlight
Ctrl+R: Switch Mark and Space on RTTY mode
N: Input name and callsign(TAB switch cursor)
S: Input serial number X: Input callsign and name
<CW> Rx:
W :Word space C :Dot and Dash space
B : Bandwidth Z :SKEW count
G: Threshold
<CW> Tx:
Encoder: Adjust WPM on CW transmission
Ctrl+Encoder: Adjust side tone freq Esc :O /OFF side
tone
note: N,S,X,B,W,C,Z use +/- or U/D to increase or decrease value。
<Time & Date>
ALT+D Set time CTRL+D Set date
Note: Backspace to delete first, and then enters according
to the original format, Ctrl + Z or ENTER to confirm.
<Macro>
*Fn Play Macro (End Key stops macro play )
Ctrl+*Fn Record Macro (Note: Max length 255 chars.)
Alt +*Fn Delete Macro
Symbols in Macro
Ctrl+S Insert TX ON symbol Ctrl+Q Insert Tx OFF symbol
Ctrl+M Record my callsign Alt +M Insert my callsign symbol.
Ctrl+T Record their call Alt +T Insert their call
N Record their call & name ALT+N Insert their name symbol
Note: Ctrl+Z or ENTER to confirm in marco recroding.
Cltr+backspace to empty, ESC to cancel。
<Cursor control>
Left: 1x: ← 2x: ↓ 5x: ALT + ← 10x: ALT
+ ↓
Right: 1x: → 2x: ↑ 5x: ALT + → 10x: ALT +
↑
第20 页
Other manuals for mcHF
1
Table of contents
Other Monka Transceiver manuals