Monsoon M2 D5 Premium User manual


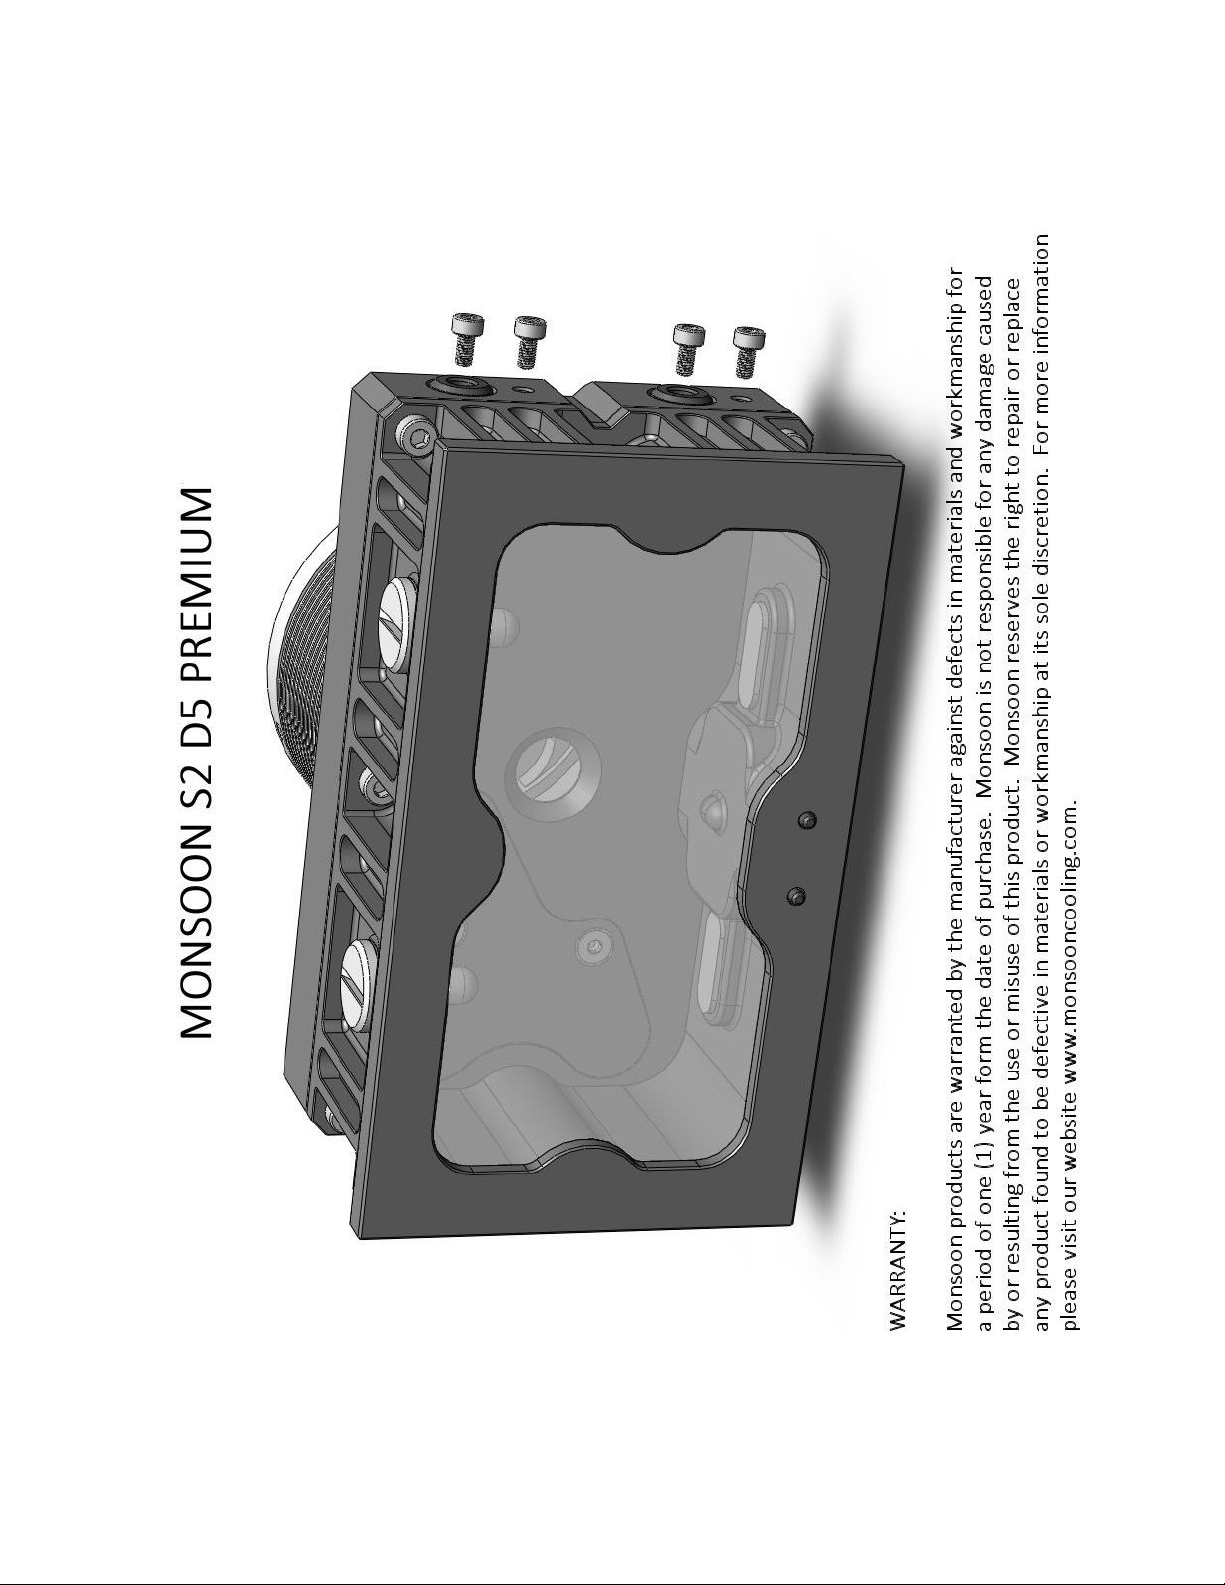
Monsoon S2 Dual Bay Reservoir Instructions: M2-D5P
CAUTION: our new reservoir has arrived assembled and ready for pump installation. We do
not recommend that you disassemble the reservoir unless necessary or you have previous
mechanical experience. Novice users or those unfamiliar with threads cut in plastic parts may
have a tendency to over tighten screws and could possibly strip out the threads. Every effort has
been made to provide the strongest threads possible within the limitations of the materials used.
To ensure all threads are in working order, we populate all threaded holes and ports prior to
shipping. Monsoon is not responsible for damage caused by over tightening of screws or fittings
and all returned parts will be inspected prior to the resolution of an RMA. If you have damaged
threads, replacement parts are available at your favorite reseller or directly from Monsoon.
Monsoon (like all manufacturers) assumes no responsibility for damage to your system caused by
misuse or leaks. It is the end user's responsibility to test for leaks prior to installation into their
system and we highly recommend the use of a non-conductive fluid such as distilled water.
Although we try to test our products for compatibility with every cooling fluid available, it is the
responsibility of the end user to ensure that the fluid they choose to use is safe for use in this
reservoir. Materials used include plastics such as glass filled nylons, PVC, and acrylic. Metals
used include Aluminum (not usually in contact with fluid), Brass, and SAE 316 Stainless. Rubber
used in O rings is premium Silicone.
BOX CONTENTS:
1. Assembled reservoir x 1
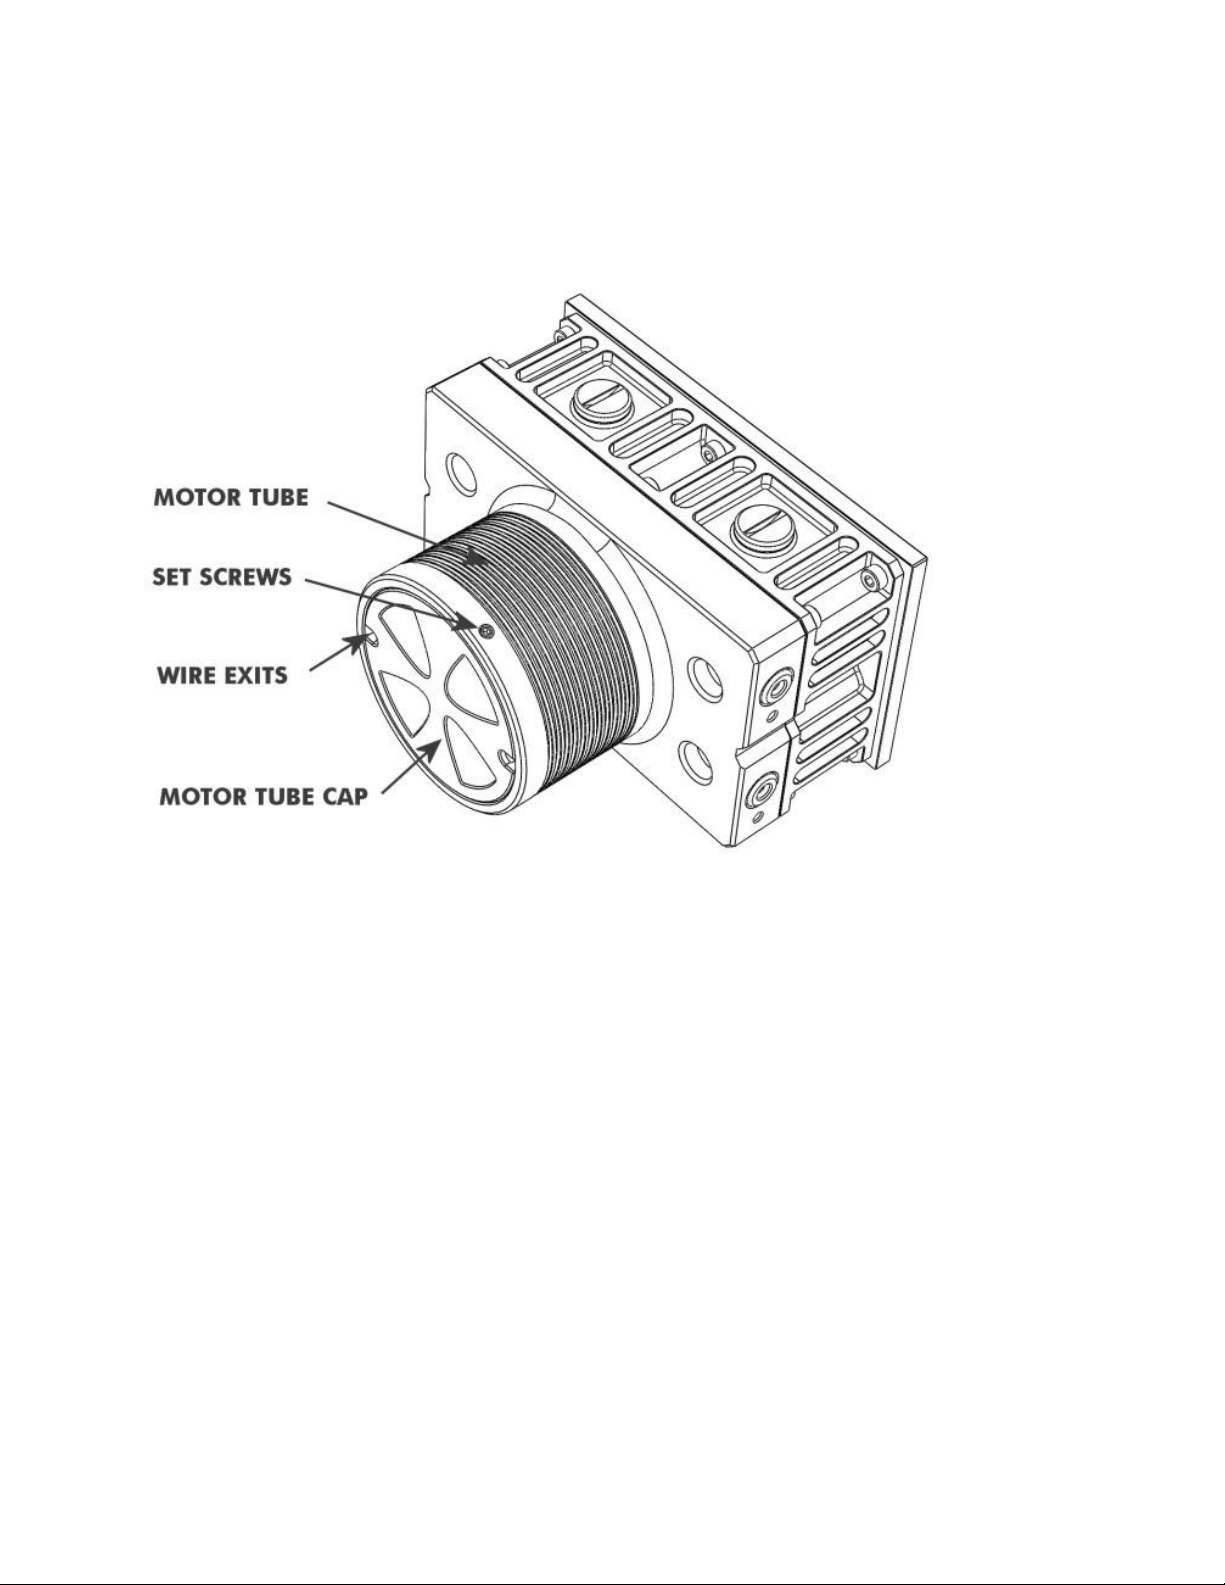
2. Machined aluminum motor mounting tube x 1
3. Machined aluminum motor mounting tube cap x 1
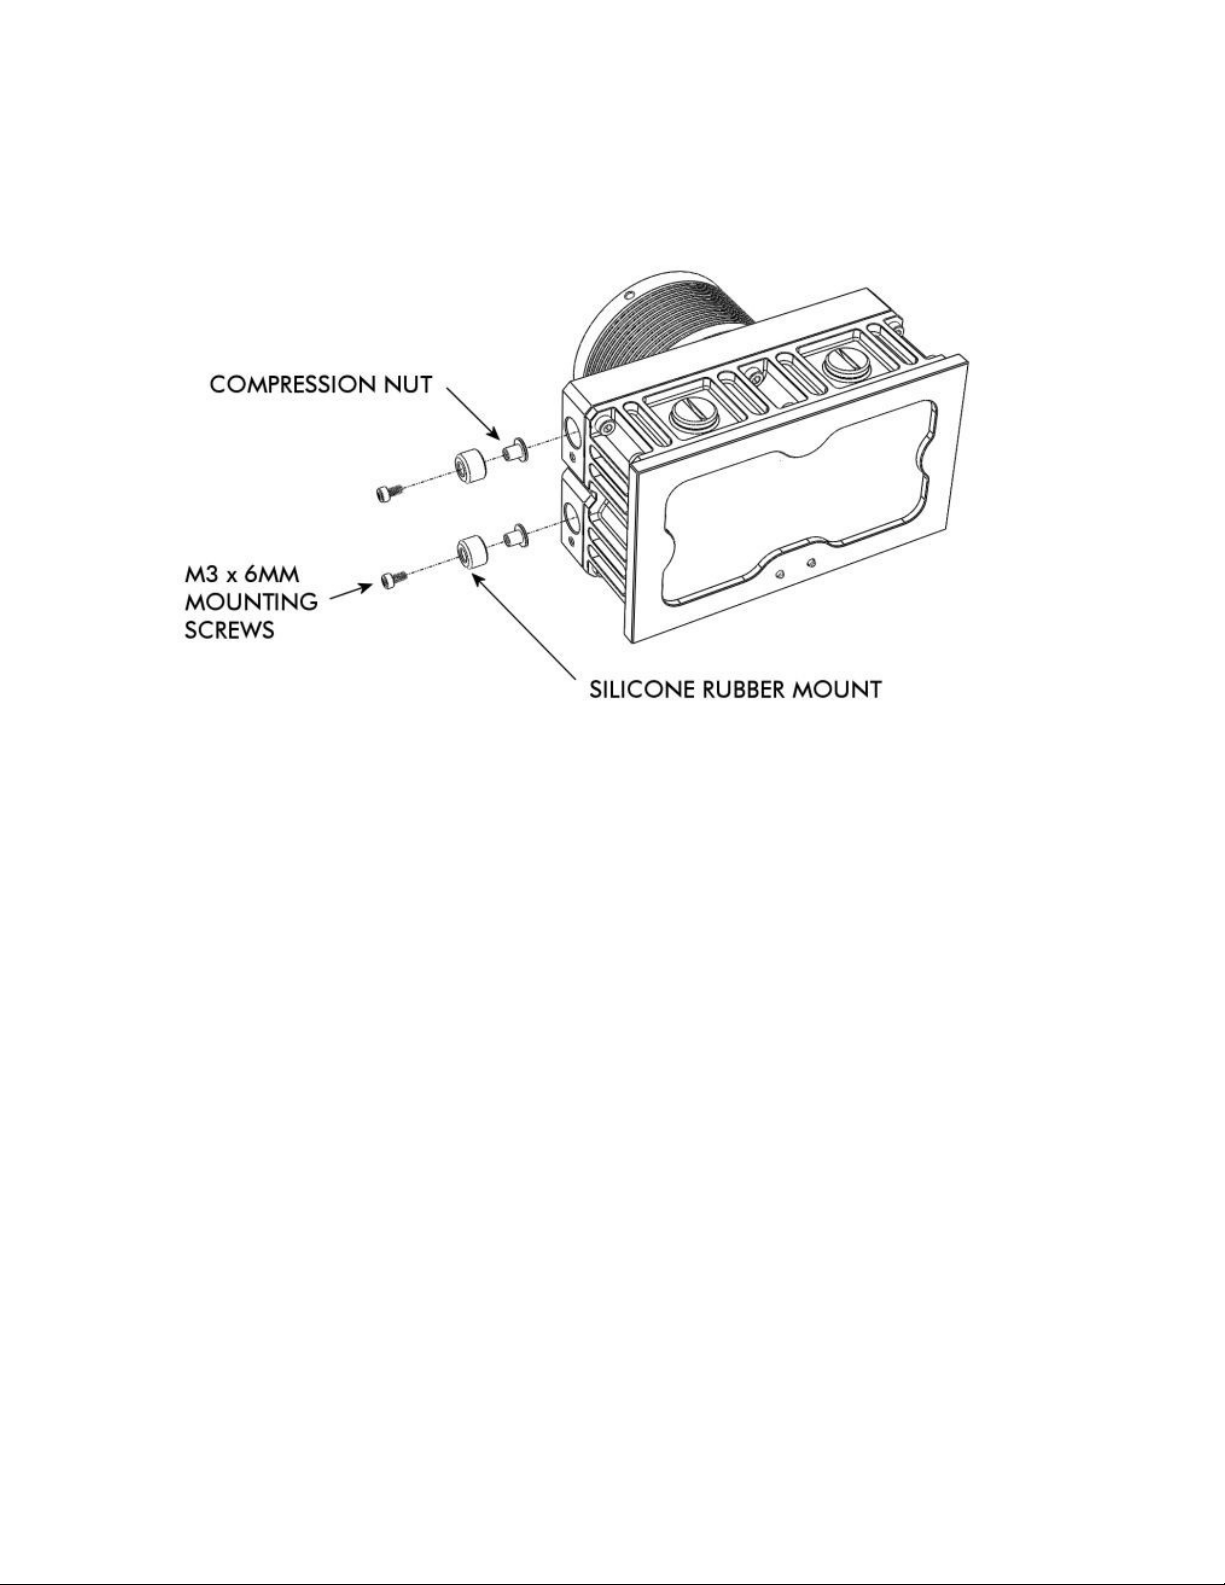
4. M3 x 6mm stainless case mounting screws x 8
5. M3 stainless compression nuts or case mounting x 4
6. M3 black nylon washers or case mounting x 8
7. M4 x 4mm stainless motor tube cap set screws x 2
8. G ¼ machined brass plugs x 4
9. Limited time only—Monsoon Silver Bullet Antimicrobial plugs x 2
10. Allen wrenches x 3
Please take a moment to look over your new reservoir and make sure and con irm all the parts listed
above are present.
PUMP MOUNTING:
Since your reservoir ships with the machined aluminum pump mounting tube already installed onto the
reservoir body, it is a good idea to rotate the mounting tube back and orth 3 or 4 turns be ore removing
till you get an idea o how it “ eels” when threaded on correctly. Because the pump mounting tube has
a large diameter with ine threads (M70 x 1mm) it is easier than normal to cross thread (locking the
threads together in an uneven way) so extra care should be taken to ensure that you're threading the
pump mounting tube on correctly.
PAGE 1

PUMP MOUNTING CONTINUED:
A ter removing the motor mounting tube, loosen the 2 set screws with the included wrench and remove
the motor mounting tube cap and set it aside.
It is easier to mount the pump with the reservoir placed on a lat sur ace ace down, (be sure to put a
so t cloth or towel down irst to prevent scratching) then checking at eye level i needed to ensure the
mounting tube is threading on correctly. I you screw the mounting tube on a ew turns and it suddenly
becomes more di icult to turn, this may be an indication that it's cross threaded and you should STOP
and remove the mounting tube and start over. This does not apply near the end o installation as the
mounting tube will eventually engage the D5 pump and begin to drive it into the O ring creating the
seal and naturally become harder to tighten.
Novice users should use the included 2.5mm thick BLACK O ring as it o ers a little more leeway and
is a bit easier to install. More advanced users can opt to use the 1.5mm thick “red line” O ring or a
small boost in overall per ormance. Care should be taken when using the red line 1.5mm thick O ring
because there are always manu acturing tolerances in mass produced parts--this includes the reservoir
body as well as your D5 pump. A small gain in per ormance is possible by putting the impeller
opening as close to the reservoir eed inlet as possible—but this can lead to the impeller rubbing on the
reservoir body i the pump and D5 body are near their extremes or tolerance. Obviously, this is not
good and can cause damage to your pump. USE THE RED LINE 1.5MM O RING AT OUR
OWN RISK. MONSOON ACCEPTS NO LIABILIT IN THE EVENT OU DAMAGE OUR
PUMP.
PAGE 2

PUMP MOUNTING CONTINUED:
Set the pump body onto its ace, (so t cloth on the work sur ace irst) place the O ring into the pump
area located on the back o the reservoir in the location shown in the above image. The O ring
should easily drop into position without stretching or compressing being needed. I it doesn't, re er
to the drawing showing the O ring location and try again.
With the O ring in place, set your D5 pump into the reservoir pump mounting area making sure it is in
contact with the O ring and centered. Rotate the pump till the power cord is acing the direction you
want. Pull the power plug through the aluminum D5 mounting tube threaded end irst and begin
threading the mounting tube onto the reservoir body being care ul not to cross thread as mentioned at
the beginning o this section. Once you have the mounting ring snugged up, you can pick up the
reservoir to more easily tighten the mounting tube—being care ul not to over tighten it.
Place the pump power wires where you want them to exit and replace the motor mounting tube cap you
removed earlier and tighten the set screws to secure it.
LED LIGHTING OPERATION:
The two small buttons on the ront o your reservoir operate the LED lights. The irst powers on the
LED's and toggles between high and low light levels. The second button allows you to scroll through
the available user selectable LED colors. The LED board is now equipped with a chip that allows it to
remember your present brightness level and color selection on system power down. When you power
your system up the next time, it will be preset to that last state.
PAGE 3

PLUG INSTALLATION:
There are our plugs included with your Monsoon reservoir. Two are used on the convenient top ill
ports. PLEASE NOTE that or a limited time all Monsoon reservoirs are shipping with two FREE
Silver Bullet Antimicrobial Plugs--these are already installed in the top ill ports and you must remove
the rubber anti tarnish covers prior to use.
The other two plugs on the back are only used i you have opted or a single loop rather than a
dual/parallel con iguration. The plug O rings are 13mm x 2.4mm and we have included two extra O
rings. The plugs are plated brass and eature an O ring retention channel to prevent the O ring rom
migrating during installation. They are also “tool ree” in that you do not need a screw driver or wrench
to tighten them as they have a 25mm diameter radial slot designed to accept any coin approximately the
size o a US quarter—about 25mm in diameter. As with all the other threaded holes, take care not to
over tighten or cross thread plugs and ittings.
PORT SELECTION:
Inlet and outlet ports are shown in the illustration below. I you're running a single loop setup, you can
use the inlet and outlet port o your choice and simply plug the others o with the included G1/4 Plugs.
I you chose to use a Silver Bullet Antimicrobial Plug in a back port (we recommend using the top
ports) do NOT use an outlet port as this can damage your reservoir because o depth limitations.
The reason we recommend top ports or the Silver Bullet Antimicrobial plugs is ease o replacement.
Top mounted ill port plugs can be removed without draining the water rom your loop.
PAGE 4

CASE MOUNTING:
Your new Monsoon Series 2 reservoir eatures vibration isolation mounting to reduce noise. Although
mounting is essentially the same as mounting any other device in an optical bay, there are a ew small
di erences.
The goal o vibration isolation is to break any hard mechanical paths between the reservoir and your
case that would normally allow vibration rom the pump to be transmitted to the chassis causing
“squeaks”. Start by pressing a compression nut into the back o each silicone rubber mount and then
placing them into the large mounting holes on each side o your reservoir. Be sure to orient them as
shown above.
Slide the reservoir into your case and, i needed, use the temporary mounting holes with the included
M3 x 6mm screws to hold the reservoir in the position you want. Do not tighten these temporary
screws any tighter than needed as they can shi t the reservoir le t or right i over tightened. Once the
reservoir is where you want it, use the included M3 x 6mm screws and M3 black nylon washers in the
vibration isolation mounting holes being care ul not to over tighten. Once you have all our screws in
place or the vibration isolation mounts, you can remove the temporary alignment screws i you used
them.
PAGE 5

IT IS HIGHL RECOMMENDED THAT OU PERFORM A 12 OR 24 HOUR LEAK TEST OF
OUR COOLING LOOP PRIOR TO INSTALLING IT IN OUR S STEM IF AT ALL
POSSIBLE.
If you're not able to perform the leak test outside your system for whatever reason, we
recommend the “Darth Bevis” leak test method. We actually recommend BOTH if possible. As
mentioned above, we also strongly recommend that you use a non conductive fluid like distilled
water.
This leak testing method essentially comes down to putting wadded or rolled up paper towels under or
around every single connection point and cooling component in your loop and then checking
periodically to see i the paper towels have collected any moisture. DB may or may not have invented
this method, but he has done more to promote it as a best practice than anyone else we know by posting
pictures o his many beauti ul builds “in their curlers and bathrobes”.
I you do ind a small leak, generally a very slight tightening o the element that is leaking (plug, pump,
ace plate etc.) is all that is required. Be sure not to over tighten as you can strip threads as mentioned
previously. Generally ¼ turn will stop a leak. I a slight tightening does not stop a leak it is not a good
idea to keep tightening because the problem is o ten oreign debris under an O ring like stray cat hair or
lint rom a cloth used to wipe down the parts prior to assembly and no amount o tightening will
correct this.
To ill your reservoir or loop, simply use a quarter to remove the top ill port plugs and ill as needed. I
you use a unnel (recommended), then remove both ports so that displaced air can easily escape via the
other port. Once you have the loop topped o , bleeding o the entrapped air rom the loop is required.
The best method or doing this is to set the speed selector on your pump to 3 i possible and start your
system. As air is purged rom the blocks and radiators in your system it will tend to accumulate in the
reservoir. I the pump is running at 5 or the reservoir is not completely ull, air can be rapidly drawn
back into the pump's inlet—running the pump on a lower speed lessens this.
Once you have the bulk o the entrapped air bled rom the loop, you can turn the pump's speed up
though smaller air bubbles may still arrive in the reservoir or a ew hours. Check the luid level again
at that time and top o i needed. It is a good idea to keep the luid level in your reservoir near ull at
all times, especially i you're running at speed 5. Once all the air is bled rom your cooling loop/s, you
should be pleasantly surprised just how quietly your new Monsoon Series Two D5 Premium Reservoir
runs.
You can ind many other parts and products that are designed to work with the Monsoon Modular
Reservoir System at your avorite reseller or at http://www.monsooncooling.com/
We appreciate your business--thank you.
The Monsoon Team
PAGE 6
This manual suits for next models
1
Table of contents
Popular Accessories manuals by other brands

ALCON
ALCON CT-88 owner's guide

Fiamma
Fiamma F65eagle Series Installation and usage instructions

USC
USC Tube Series 3500 Operator's manual

Sartorius
Sartorius WZA224-LC installation instructions

Siemens
Siemens QFM2100 Installation instructions manual

Johnson Controls
Johnson Controls NS Series installation instructions

ekwb
ekwb EK-FC980 GTX TF5 R2.0 Backplate Installation and mounting manuals

Hummingbird Communications
Hummingbird Communications Paracube Micro instruction manual

Acuity Brands
Acuity Brands sensorswitch SFR Series Programming instructions

WINDTECH
WINDTECH BANTOO manual

Solarbotics
Solarbotics GP2Y0A02YK0F manual

Avidsen
Avidsen Bamboo quick start guide