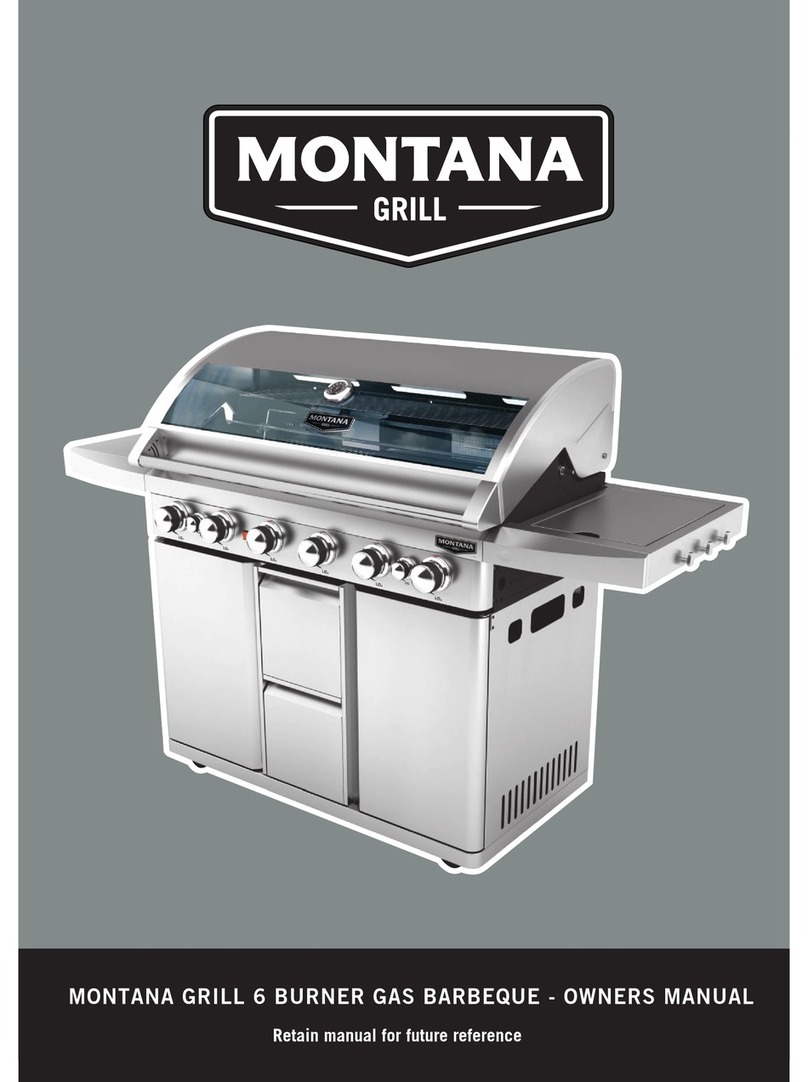
Montana MSRGG4B User manual

MONTANA GRILL 4 BURNER SEARER BBQ - OWNERS MANUAL
Retain manual for future reference

Table of Contents
Read Me First...............................................................................................................................3
Safety Guide.................................................................................................................................5
Information...................................................................................................................................11
Exploded View...............................................................................................................................12
Parts List......................................................................................................................................13
Assembly Instructions..................................................................................................................15
Hardware List...............................................................................................................................14
Operating Instructions…….......................................................................................................…28
Maintenance…………………................................................................................................…...30
Troubleshooting………............................................................................................….....……....33
Warranty…………………...............................................................................................…..…….34
2

BBQ
Read Me First
Please read these instructions & user manual carefully.
Take extra care when unpacking and assembling your Montana BBQ. Some edges may be
sharp from the manufacturing process and may result in cuts if not handled with care.
Before attempting to assemble your montana BBQ, ensure all parts are correct and contained
within the box as per the components list.
We suggest laying out all components on a large flat surface and removing any plastic or
protective material before assembling your BBQ.
If your BBQ has lockable castors ensure these are locked before attempting to assemble
otherwise the BBQ may move during assembling resulting in injury.
Do not dispose of packaging until completely satisfied with assembly of your BBQ.
Please refer to your user manual for operating instructions, further information or trouble
shooting before you call the Customer Service number listed within the user manual.
Lid must be in open position before lighting.
When cooking with hood closed, all burners should be on low and never exceed maximum
temperature of 250c (450f).
Caution: hood maybe hot, avoid contact.
Warning all surfaces are hot.
If your BBQ has any Powder Coated Steel please note the following:
Note: Powder coated Steel will rust.
Failure to store with a BBQ cover, and to clean & maintain your BBQ regularly will result
in Steel ‘tea staining’ & rusting. Consequently it will not be covered by the
warranty.
We recommend the use of BBQ protectors & cleaners to also pro-long the
life of your BBQ.
For use with ULPG.

GAS LEAK TESTING
It is important that you leak test the BBQ before first use and every time the gas cylinder is
refilled and reconnected to the BBQ.
To complete a Leak Test:
0DNHVXUHDOOWKHFRQWURONQREVDUH2))
,QDVPDOOFRQWDLQHUPL[XSDVROXWLRQRIZDWHUDQGGHWHUJHQWVRDS
0L[WKHVROXWLRQZHOODERXWWKHVDPHFRQFHQWUDWLRQDVZDVKLQJXSZDWHU
7XUQWKHF\OLQGHU21E\URWDWLQJWKHNQREWRWKHRSHQSRVLWLRQ
8VLQJDEUXVKRUVSUD\ERWWOHDSSO\WKHVRDSVROXWLRQWRWKHJDVOLQHDQGHDFKMRLQLQWKHJDV
line including:
7KHJDVFRQQHFWLRQDWWKHLQOHWRIWKH%%4
7KHJDVKRVH
7KHJDVFRQQHFWLRQDWWKHJDVF\OLQGHU
,IEXEEOHVDSSHDUWKHUHLVDJDVOHDN
,IWKHOHDNLVDWWKHFRQQHFWLRQUHWLJKWHQDQGUHVHDO
,IWKHOHDNLVDQ\ZKHUHHOVHRU\RXFDQQRWUHVROYHWKHOHDNE\WLJKWHQLQJWKH
connection DO NOT PROCEED.
5HSODFHJDVKRVHDQGUHJXODWRU
5HSODFHPHQWKRVHDQGUHJXODWRUVFDQEHSXUFKDVHGIURP\RXUORFDO%%4UHWDLO
specialist.
Read Me First

Safety Guide
'RQRWRSHUDWHWKLV%%4EHIRUHUHDGLQJWKHLQVWUXFWLRQERRNOHW
'RQRWSODFHDUWLFOHVRQRUDJDLQVWWKLV%%4
'RQRWXVHRUVWRUHIODPPDEOHRUFRPEXVWLEOHPDWHULDOVFKHPLFDOVRUVSUD\DHURVROVQHDU
\RXU%%4
'RQRWRSHUDWHWKLV%%4LQGRRUVWKH%%4LVIRURXWGRRUXVHRQO\
'RQRWREVWUXFWDQ\YHQWLODWLRQRIWKH%%4
'RQRWOLJKWRURSHUDWHZLWKFRYHURQ
1HYHUVWRUHDVSDUH8/3*F\OLQGHUXQGHURUQHDU\RXU%%47KLVFRXOGFDXVHH[FHVV
SUHVVXUHWREHH[SHOOHGWKURXJKWKHUHOLHIYDOYHUHVXOWLQJLQILUHH[SORVLRQRUVHYHUHSHUVRQDO
LQMXU\LQFOXGLQJGHDWK
8/3*JDVLVKHDYLHUWKDQDLUDQGZLOOFROOHFWLQORZDUHDVSURSHUYHQWLODWLRQLVH[WUHPHO\
LPSRUWDQW
.HHSWKHYHQWLODWLRQRSHQLQJRIWKH8/3*F\OLQGHUHQFORVXUHIUHHDQGFOHDUIURP
REVWUXFWLRQDQGGHEULV
'RQRWLQVHUWDQ\IRUHLJQREMHFWVLQWRWKHYDOYHRXWOHW'DPDJHPD\UHVXOWFDXVLQJDOHDN
SRVVLEOHH[SORVLRQILUHVHYHUHERGLO\KDUPRUGHDWK
&KLOGUHQDQGDGXOWVVKRXOGEHDOHUWHGWRWKHKD]DUGVRIKLJKVXUIDFHWHPSHUDWXUHEXUQV
DQGFORWKLQJLJQLWLRQ
1HYHUOHDYHFKLOGUHQXQDWWHQGHGLQWKHDUHDZKHUHWKH%%4LVEHLQJXVHG
'RQRWVWRUHLWHPVRILQWHUHVWWRFKLOGUHQDURXQGEHORZRULQWKHVKHOIRIWKH%%4
1HYHUDOORZFKLOGUHQWRVLWRUVWDQGRQDQ\SDUWRIWKH%%4
6RPHXVHUVSUHIHUFRRNLQJRQ+RWSODWHV<RXPXVWDOZD\VKDYHDWOHDVW*ULOOSODWHWR
HQVXUHDGHTXDWHDLUIORZ)XOO\FRYHULQJ\RXU%%4ZLOOFUHDWHDVDIHW\KD]DUG

Safety Guide
Always choose a safe location for the BBQ, keeping in mind the safety precautions outlined.
Ensure all packaging has been removed from the unit before use.
This BBQ shall only be used in an above
ground open air situation with natural
ventilation, without stagnant areas, where
gas leakage and products of combustion are
rapidly dispersed by wind and natural
convection.
Any enclosure in which the BBQ is used
shall comply with one of the following:
An enclosure with walls on all sides, but at
least one permanent opening at ground level
and no overhead cover. (Refer to Figure 1).
Within a partial enclosure that includes an
overhead cover and no more than two walls.
(Refer to Figure 2 and Figure 3).
Within a partial enclosure that includes an
overhead cover and more than two walls, the
following shall apply:
$WOHDVWRIWKHWRWDOZDOODUHDLV
completely open, (refer to Figure 4), and
$WOHDVWRIWKHUHPDLQLQJZDOODUHDLV
RSHQDQGXQUHVWULFWHGUHIHUWR)LJXUH
,QWKHFDVHRIEDOFRQLHVDWOHDVWRIWKH
total wall area shall be and remain open and
unrestricted.
NOTE
Figure 1 - Figure 1 - Enclosure with walls on all sides
but no overhead cover
- Partial Enclosure with overhead cover
and no more than two walls
- Partial Enclosure with overhead cover
and no more than two walls
2SHQVLGHDWOHDVWRIWRWDOZDOODUHD
RUPRUHLQWRWDORIWKHUHPDLQLQJZDOODUHDLVRSHQ
and unrestricted.
2SHQVLGHDWOHDVWRIWRWDOZDOODUHD
RUPRUHLQWRWDORIWKHUHPDLQLQJZDOODUHDLVRSHQ
and unrestricted.
Figure 2
Figure 3
Figure 4
Figure 5

A strong gas smell or hissing sound of escaping gas indicates a serious problem with the BBQ
or ULPG cylinder. Failure to immediately follow the steps listed below could result in a fire or
explosion that could cause serious injury, death or property damage.
6KXWRIIJDVVXSSO\DWF\OLQGHU
7XUQWKHFRQWURONQREVRIWKH%%4WRWKHRIISRVLWLRQ
([WLQJXLVKDQ\RSHQIODPH
2SHQWKH%%4KRRG
*HWDZD\IURPWKH8/3*F\OLQGHU
'RQRWWU\DQGIL[WKHSUREOHP\RXUVHOI
,IJDVRGRXUFRQWLQXHVRU\RXFDQQRWH[WLQJXLVKILUHFDOOILUHEULJDGH
7RSUHYHQWILUHDQGVPRNHGDPDJHUHPRYHDOOSDFNDJLQJPDWHULDOEHIRUHRSHUDWLQJ%%4
$OHDNWHVWPXVWEHFDUULHGRXWSULRUWRXVLQJWKH%%4IRUWKHILUVWWLPHDQGHDFKWLPHWKH
JDVF\OLQGHULVUHILOOHGRUHDFKWLPHWKHJDVKRVHDQGJDVUHJXODWRUKDYHEHHQGLVFRQQHFWHG
&KHFNDOOJDVKRVHDQGOLQHFRQQHFWLRQVIRUGDPDJHFXWVRUFUDFNVHDFKWLPH\RXXVH
the BBQ.
,IWKHKRVHVKRZVVLJQVRIGHWHULRUDWLRQRUGDPDJHFRPSOHWHDOHDNWHVWWRLGHQWLI\DQ\
OHDNVDQGLIUHTXLUHGUHSODFHWKHKRVH
7KHKRVHPXVWUHPDLQIUHHRINLQNVDQGVKDUSEHQGV1HYHUSXQFWXUHRUSXWVWUHVVRQWKH
hose or fittings. Hose connection is located at the lower front area on the right side wall of the
main body of the BBQ.
Replacement hose and regulators can be purchased from your local BBQ retail specialist.
/HDN7HVWSURFHGXUHLVORFDWHGRQ3DJHRIWKLVPDQXDO
7KHORFDWLRQRIWKHWXEHEXUQHUWRWKHMHWLVYLWDOIRUVDIHRSHUDWLRQ&KHFNWRDVVXUHWKHMHWVDUH
inside the burner tubes before using the gas BBQ
6RPHWLPHVVSLGHUVDQWVDQGRWKHULQVHFWVFOLPELQWRWKH
WXEHEXUQHUVJDVOLQHVDQGRWKHUDUHDVRIWKH%%47KH
LQVHFWVFDQVSLQZHEVEXLOGQHVWVDQGOD\HJJV7KHZHEV
RUQHVWVFDQEHYHU\VPDOOEXWWKH\DUHYHU\
VWURQJDQGFDQEORFNWKHIORZRIJDV
7RDYRLGWKLVRFFXUULQJFOHDQEXUQHUVSULRUWRXVHDIWHUVWRULQJDWWKHEHJLQQLQJRI
your BBQ season or after a period of one month with out use. Guards are on the air
LQWDNHVLQDQHIIRUWWRUHGXFHWKLVSUREOHPEXWLWZLOOQRWHOLPLQDWHLW$QREVWUXFWLRQ
FDQUHVXOWLQD³IODVKEDFN´DILUHLQWKHEXUQHUWXEHV7KHEXUQHUPD\VWLOOOLJKWEXW
the obstruction does not allow full gas flow to the burners.
127(&RPSOLFDWLRQVDULVLQJIURPVSLGHUDQGLQVHFWZHEVEXLOWXSLQVLGHJDVOLQHVDUH
expressly excluded from Warranty
HOSE ASSEMBLY AND SAFETY
BURNERS
SPIDER AND INSECT WEBS
Safety Guide

Warning
Safety Guide
GAS CYLINDER INFORMATION
1. This BBQ is designed to be used with a gas cylinder not exceeding 9KG.
2. The gas cylinder supply valve must be turned off when the BBQ is not in use.
3. Gas cylinders must be stored outdoors, out of reach of children and must not be stored in a
building, garage or any other enclosed area.
4. The gas cylinder used must incorporate a safety collar to protect the valve assembly.
5. Any ULPG cylinder not attached to the BBQ for use should be stored outdoors and well away
from the BBQ.
IMPORTANT
1. When disconnecting and removing the gas cylinder for the purpose of refilling, always follow
these procedures.
2. Ensure that all gas control valves on the BBQ and the gas cylinder are turned off before
disconnecting the regulator from the cylinder.
3. Do not smoke or use a naked flame near the BBQ or gas cylinder while disconnecting the
gas line between the BBQ and gas cylinder.
4. Remove the gas cylinder from the enclosure before disconnecting the regulator from the BBQ.
5. Tighten all connections before placing the gas cylinder back in to place.
6. The gas leak testing procedure should be conducted every time the gas cylinder is refilled
and reconnected to the BBQ prior to using the BBQ
For safe use of your BBQ and to avoid serious injury:
DO NOT let children operate or play near the BBQ.
KEEP BBQ area clear and free from materials that burn.
DO NOT block holes in bottom or back of BBQ.
Check burner flames regularly.
Use BBQ in well-ventilated space. NEVER use in enclosed spaces such as a carport,
garage, porch, covered patio, etc.
DO NOT use charcoal or ceramic briquettes in a gas BBQ.
8

Safety Guide
REGULATOR CONNECTION
1. Check that all control knobs are in the ‘Off’ position.
2. Make sure the cylinder valve is off.
3. Remove the protective cap from the cylinder, if present.
4. Leak test the connection with a soapy water solution
NOTE
1. Never use a rusty or dented gas cylinder with a damaged gas valve
2. Never fill the gas cylinder beyond 80% capacity
3. Always have the gas cylinder filled by an authorized ULPG supplier
4. If you have any questions concerning assembly or operation, consult your dealer or
ULPG Gas Company.
5. When used always place the BBQ and cylinder on flat level ground.
6. You will need to have the ULPG cylinder serviced or replaced every ten years. The date of
the last service should be stamped on the neck of the bottle.
7. Always use a spanner to tighten all gas fittings.

Safety Guide
'RQRWOHDYHIRRGXQDWWHQGHGRQWKH%%4
,QFDVHRIDIDWILUHWXUQJDVRIIDWF\OLQGHULPPHGLDWHO\
3DUWLFXODUFDUHPXVWEHWDNHQZKHQUHPRYLQJWKHIDWGULSWUD\+RWIDWFDQFDXVHVHULRXVEXUQ
LQMXULHV
3URSHUFOHDUDQFHIURPFRPEXVWLEOHPDWHULDOVPXVWEHPDLQWDLQHGDWDOOWLPHV7KHPLQLPXP
FOHDUDQFHLVFPIURPDOOVLGHV
7XUQRIIDOOJDVYDOYHVLQFOXGLQJF\OLQGHUDIWHUXVH
'RQRWDOORZEXLOGXSRIXQEXUQHGJDV
&RROWKH%%4EHIRUHUHSODFLQJWKHOLGRUFRYHU
$FFHVVLEOHSDUWVPD\EHYHU\KRW$OZD\VNHHSFKLOGUHQDZD\IURPWKH%%4
$OZD\VZHDUSURWHFWLYHJORYHVZKHQKDQGOLQJKRWFRPSRQHQWV
1HYHUOHDQRYHU%%4ZKHQOLJKWLQJ
1HYHUXVH%%4ZLWKDQ\FRYHURQ
1HYHUGLVPDQWOHFRQWUROYDOYHV
1HYHUPRGLI\WKHFRQVWUXFWLRQRIWKH%%4RUWKHVL]HRIDQ\EXUQHULQMHFWRURULILFHRUDQ\RWKHU
FRPSRQHQWV7KLVZLOOYRLG\RXU:DUUDQW\
1HYHUPRYHWKH%%4GXULQJXVH
7KHXVHRIXQDXWKRULVHGSDUWVZLOOYRLG\RXU:DUUDQW\DQGFDQFUHDWHDQXQVDIHHQYLURQPHQW
DQGFRQGLWLRQVRIXVH
1HYHUXVHFKDUFRDORUDQ\RWKHUVROLGIXHOLQWKLV%%4
1HYHUGLVFRQQHFWDQ\JDVILWWLQJVZKLOHWKH%%4LVLQXVH
,QWKHHYHQWWKDWDEXUQHUJRHVRXWDQGJDVHVFDSHVWXUQRIIWKHEXUQHUNQREVRSHQWKH%%4
KRRGIXOO\DQGOHWLWDLURXW:DLWPLQXWHVEHIRUHDWWHPSWLQJWRUHOLJKWWKH%%4
1HYHUOHWFORWKLQJSRWKROGHUVRURWKHUIODPPDEOHPDWHULDOVFRPHLQFRQWDFWZLWKRUFORVHWR
DQ\JULOOEXUQHURUKRWVXUIDFHXQWLOLWKDVFRROHG)DEULFPD\LJQLWHDQGUHVXOWLQSHUVRQDOLQMXU\
&HUWDLQPDWHULDOVRULWHPVZKHQVWRUHGXQGHURUQHDUWKH%%4ZLOOEHVXEMHFWHGWRUDGLDQWKHDW
DQGFRXOGEHVHULRXVO\GDPDJHG
&ORWKLQJRURWKHUFRPEXVWLEOHPDWHULDOVVKRXOGQRWEHKXQJIURPWKH%%4RUSODFHGRQRUQHDU
WKH%%4&RPEXVWLEOHPDWHULDOVDUHFRQVLGHUHGWREHZRRGFRPSUHVVHGSDSHUSODQWILEUHV
SODVWLFRURWKHUPDWHULDOVFDSDEOHRIEHLQJLJQLWHGDQGEXUQHG

Information
11
SUPPLIED BY:
Distributed by Asia Pacific Brands Limited
PO Box 301145, Auckland 0752, New Zealand
Product Name 4 + 2 BURNER GAS GRILL Model No. MSRGG4B
PIN Number 51CQ4637 Qn
Qn
17.7kW (1276 g/h)
Main burners Qn :
Side burner Qn : 10kW (717g/h)
2.8kW (203g/h)
Main infrared burner
Qn
Back burner
2.45kW (178g/h)
2.45kW (178g/h)
Category Injector Size
(Main Burner)
Injector Size
(Main Infrared
Burner)
Injector Size Injector Size
(Side Burner) (Back Burner) Gas &
Pressure
0.79 mm 0.79 mm
I3B/P(30) 0.90 mm 0.83 mm
G30
Propane at
30mbar
Butane
CAUTION :
USE OUTDOORS ONLY. If stored indoors, detach and leave cylinder outdoors.
WARNING: For Storage and Cylinder exchange, disconnect hose at the cylinder only, do not
disconnect hose from the appliance.
Read the instructions before using the appliance.
Minimum clearance from side and back of unit to combustible construction: 100cm.
WARNING: Accessible parts may be very hot. Keep young children away.
MADE IN CHINA
and G31

19
Optional:
19: Cast iron cooking grate 1pc
Cast iron cooking plate 1pc
1
2
5
67
4
9
10
11
16
15
12
17
18
25
28
26
36
35
24
22
23
20
21
13
14
33
32
31
30
29
34
27
3
19
8
Exploded View
12

1 Lid
48 Grill body support1
219 Cooking grate
Match extension lighter
Right door
Rear locking caster
Front non-locking caster
2 Warming rack
Baffle plate
Infrared burner
Side burner cooking grate
Side burner assembly
Ignition electrode
3
4
5
6
7
8 Right side shelf
9 Grill body
Side burner valve
10
11 Regulator & hose assembly
12 Control knob bezel
5
1
1
1
1
1
1
1
1
1
1
1
1
1
1
1
5
13 Control knob
14 Grease tray
Underside horizontal panel
15
16 Cart rear panel
17 Cart right panel
Part # Description Picture Qty (pcs)
1
1
2
2
21
20
22
23
13
Parts List

Part # Description Picture Qty (pcs)
1
1
1
1
1
1
3
3
29
30
31
32
33
34
35
36
1
1
1
2
2
24 Cart bottom base
Door magnet
Left door
25
26
27 Cylinder wire retainer
28 Handle
Cart left panel
Pulse igniter
Left side shelf front panel
Left side shelf tabletop panel
Main burner
Heat diffuser
Control knob bezel
Control knob
44CC M5 x 10
Hardware List
Part #
AA M6 x 12 18
16BB M6 x 10
Dimensions Picture Qty (pcs) Part #
DD M5 x 12 4
2
2
EE
FF
M4 x 10
M4 x 12
Dimensions Picture Qty (pcs)
14
Parts List

Please read these instructions carefully before assembly and use.
Find a large, clean area to assemble your barbecue. Please refer to the parts list and assembly
diagram as necessary. Assembly of the barbecue involves many large components; it is
advisable to have two people assemble the unit.
Please use protective gloves when assembling this product.
To avoid losing any small component or hardware, assemble your product on a hard level
surface that does not have cracks or openings.
To avoid damage to soft floor or carpet, do not assemble or move the appliance on soft floor or
carpet.
Follow all steps in order to properly assemble your product.
Make sure all the plastic protection rip off before assembling.
Do not force parts together as this can result in personal injury or damage to the product.
When applicable, tighten all hardware connections by hand first, once the step is completed, go
back and full tighten all hardware.
Caution: Whilst every effort has made in manufacture of your barbecue to remove any sharp edge,
you should handle all components with care to avoid accidental injury.
STEP 1
BBx16 M6x10
23
22
24
BB
Assembly instructions

STEP 2
STEP 3
24
FFx2 M4x12
CCx3 M5x10
FF
CC
25
Assembly instructions

STEP 4
STEP 5
CCx8 M5x10
CCx3 M5x10
29
18
CC
17
24
CC
Assembly instructions

STEP 6
STEP 7
CCx8 M5x10
CCx7 M5x10
CC
29 17
16
24
18 CC
17
Assembly instructions

15
26
21
STEP 8
STEP 9
DD
DDx4 M5x12
CCx4 M5x10
DD
CC
24
26
21
Assembly instructions

3
9
CC X 4
1
STEP 10
STEP 11
CCx4 M5x10
CCx4 M5x10 9
18
CC X 4
Assembly instructions
Table of contents
Other Montana Grill manuals
Popular Grill manuals by other brands

Landmann
Landmann Avalon PTS Plus 5.1 Plus 12122 Assembly and operating manual

Kenyon
Kenyon B70200 owner's manual

Better Homes and Gardens
Better Homes and Gardens GBC1486W owner's manual

Orbegozo
Orbegozo GR 2300 instruction manual

bora
bora PT11 Operating and installation instructions

Klarstein
Klarstein 10031664 manual

Garland
Garland MWE3W Installation and operation manual

Char-Broil
Char-Broil 463722714 Product guide

MPM
MPM MOP-03 user manual

Kenmore
Kenmore 415.16123800 Use and care guide

Tucker Barbecues
Tucker Barbecues GTR Series Assembly, installation and operating instructions

Monogram
Monogram ZGG540NCP1SS owner's manual