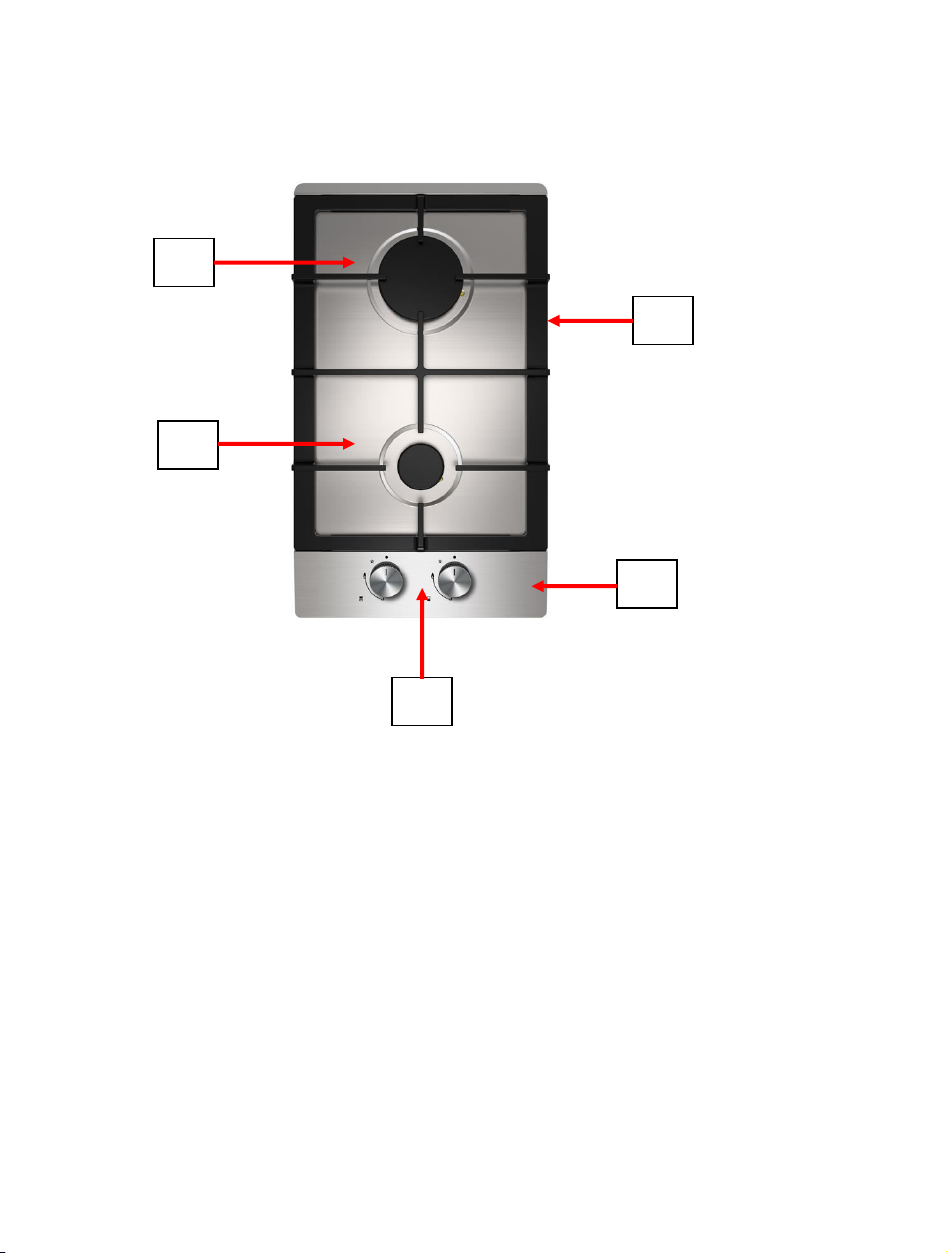
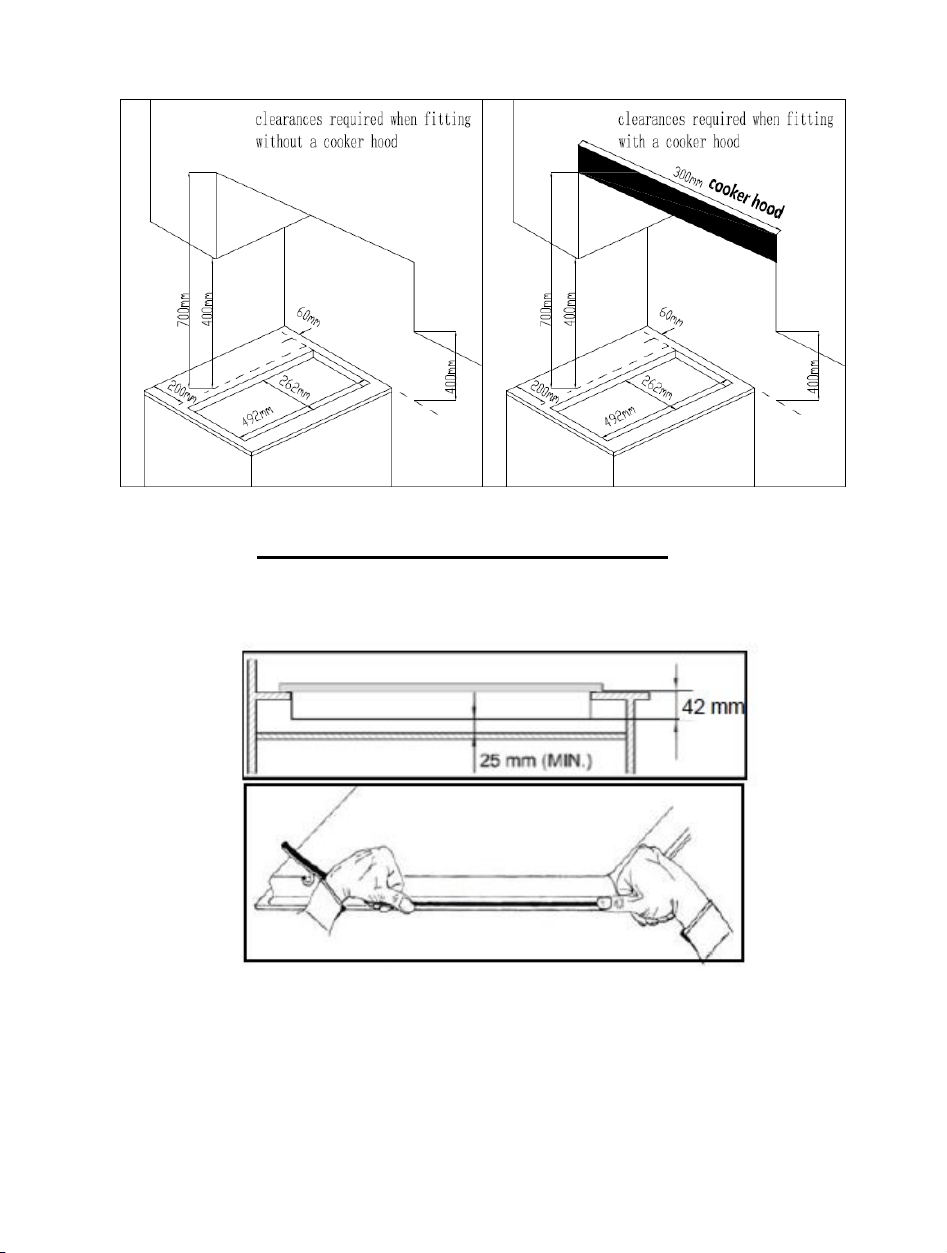
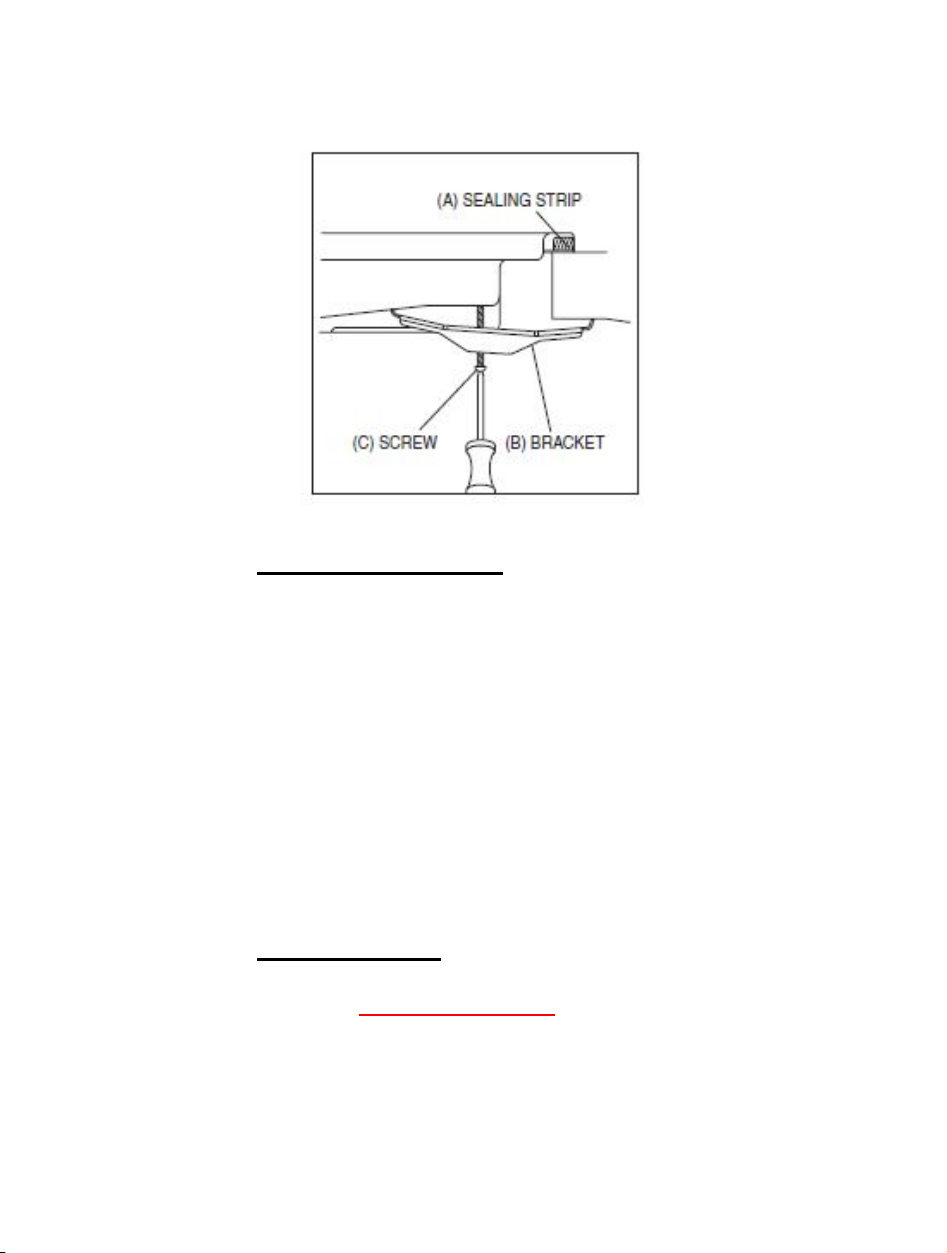
montpellier MON-GH30BG User manual
Other montpellier Hob manuals

montpellier
montpellier CT400 User manual

montpellier
montpellier MINH59 User manual

montpellier
montpellier INT400 User manual

montpellier
montpellier INT300 User manual

montpellier
montpellier MON-INT785 User manual

montpellier
montpellier MON-GH75BG User manual

montpellier
montpellier MON-INT30TT2 User manual

montpellier
montpellier CS440 User manual

montpellier
montpellier SP200X User manual

montpellier
montpellier MON-INT30T15 User manual

montpellier
montpellier INT750 User manual

montpellier
montpellier MCH77 User manual

montpellier
montpellier MON-INT251 User manual

montpellier
montpellier GH91X User manual

montpellier
montpellier CT750 User manual

montpellier
montpellier INT61T99-13A User manual

montpellier
montpellier GH60BG User manual

montpellier
montpellier MON-CER60T15 User manual

montpellier
montpellier INT750 User manual

montpellier
montpellier CT251 User manual