manuals.online logo
Brands
  1. Home
  2. •
  3. Brands
  4. •
  5. montpellier
  6. •
  7. Refrigerator
  8. •
  9. montpellier MS152W User manual

montpellier MS152W User manual

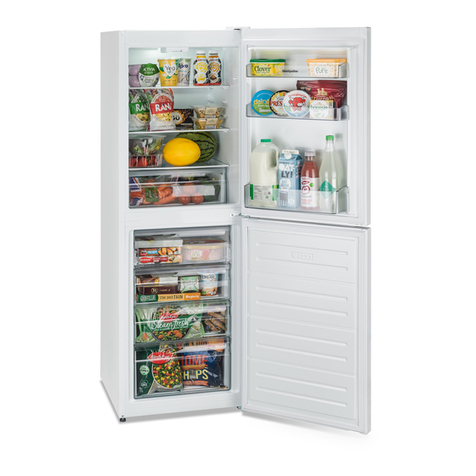
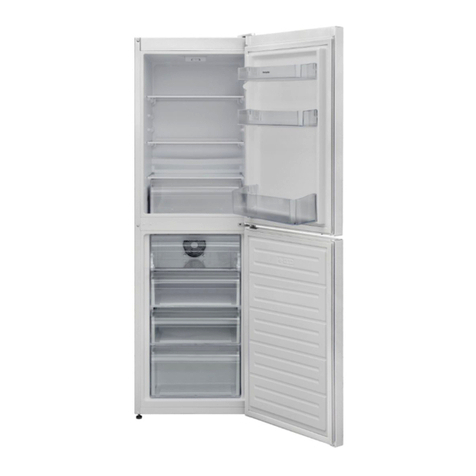
54cm Wide Static Combi Fridge Freezer
MS152W - White
Please read these instructions carefully before attempting to install or use this appliance.
We recommend that you keep these instructions in a safe place for future reference.
Installation and Operating Instructions
THE PERFECT BALANCE OF FUNCTION AND STYLE
LAUNDRY - DISHWASHING - COOKING - COOLING
- 1-
Thank you for choosing this Montpellier Fridge Freezer.
Our fridge freezers has been designed to provide you with the best combination of style, reliability and
performance to give you years of trouble-free use.
You may be familiar with a similar product, but please take time to read these instructions carefully before installing
or using your fridge freezer to ensure you get the most from your purchase.
We recommend that you keep this manual in a safe place for future reference.
Your fridge freezer is covered by a comprehensive two year Parts & Labour
Guarantee. In the unlikely event that you experience a problem with your fridge
freezer, you can rest assured that you are fully protected against the cost of
repairs for the first 24 months . Please note that any claim must be accompanied
by the model reference number, serial number and proof of purchase.
To activate your guarantee, you will need your product serial number. This can be
found on the rear of the machine.
There are two ways to register your Guarantee:
•Online: Visit the Support page on our website and complete the online Product
Registration form. www.montpellier-appliances.com
•By Post: Simply detach and ll in the form provided, attach a stamp and send
it in the post. Don’t forget to include your e-mail address so that we can send
conrmation through to you.
Welcome
Note: We are unable to take registrations over the phone.
ACROSS ALL OUR MODELS
YEAR
GUARANTEE
PA R T S & L A B O U R
www.montpellier-appliances.com
- 2-
This diagram is only for informative purposes about parts of the appliance. Parts may vary
according to the appliance model.
A) Fridge compartment
B) Freezer compartment
7) Door shelves
8) Egg holder
9) Freezer – upper drawer
10) Freezer – middle drawer
11) Freezer – bottom drawer
12) Ice tray
13) Levelling feet
14) Kick plate
1) Thermostat dial
2) Refrigerator lamp & cover
3) Refrigerator shelves
4) Crisper shelf
5) Crisper
6) Bottle shelf
Description of Appliance:
- 3-
CONTENTS:
Section 1: Installation
Section 2: Safety Advice
Section 3: Operating the Appliance
Section 4: Maintenance
- 4-
-
IMPORTANT! This appliance must be left to stand in an upright
position for at least 4 hours before being switched on for the first
time.
-
Remove all packaging and securing tape from the appliance.
-
Wash the interior of the appliance with lukewarm water containing a
small amount of bicarbonate soda (5ml to 0.5 litres of water).
-
Your appliance should never be used outdoors.
-
Position the appliance in a dry atmosphere and out of direct sunlight.
-
Do not position next to a cooker or other sources of heat, i.e. radiator.
-
If positioned next to another fridge or freezer, leave a minimum gap of
2cm between the appliances in order to avoid condensation.
-
A clearance of 150mm should be left above the appliance. If this
cannot be achieved you should ensure a clearance of 25mm is
maintained on each side of the appliance.
-
Please ensure that there is a small ‘air-gap’ between the condenser on
the rear of the appliance and the rear wall.
-
Do not place or store heavy items on the top of this appliance.
-
Ensure that the appliance is positioned on a firm flat floor.
-
This appliance must be level. Adjust the level by screwing the
adjustable feet up or down (use your fingers or a suitable spanner).
-
Ensure that the appliance is upright and both feet are in firm contact
with the floor so that the cabinet is stable.
-
Connect the plug to an adjacent 13amp socket outlet and ensure that
the appliance is not standing on the supply cable.
-
The appliance may give off an odour when it is operated for the
first time. This odour will fade away as your fridge starts to cool.
Section 1: Installation.
- 5-
Section 2. Safety Advice
-
Please read this booklet thoroughly before installing and switching on the
appliance. The manufacturer accepts no responsibility for incorrect
installation and usage.
-
If this appliance is to replace an old appliance with a lock, as a safety measure
break or remove the lock and/or door before disposal.
-
Your old appliances contain insulation gases and refrigerant that must be
disposed of correctly. Please ensure that the refrigerant circuit is not
damaged before the appliance is taken away for correct disposal in line with
current legislation. If there is any doubt contact your Local Authority for
instructions.
-
This appliance may contain the refrigerant isobutene (R600a). This is a natural
gas with a high level of environmental compatibility; however, caution is
required as isobutene is a flammable gas. It is essential to ensure that
refrigerant tubes are not damaged during transportation and the installation of
the appliance. In the event that the refrigerant circuit is damaged, avoid naked
flames or sources of ignition and ventilate the room in which the appliance is
situated.
-
Do not damage the refrigerant circuit.
-
Do not allow children to play with plastic bags – tear the bag(s) immediately
and ensure that they are placed in a dust-bin out of reach.
-
The appliance is not intended for use by persons (including children) with
reduced physical, sensory or mental capabilities, or lack of experience
and knowledge, unless they have been given supervision or instruction
concerning the use of the appliance by a person responsible for their safety.
Children should be supervised to ensure that they do not play with the
appliance.
-
If using an adaptor, this must be used in accordance with the manufacturers
instructions and ensure that the electrical circuit is not overloaded as this
could cause overheating.
-
Do not twist or bend the cables, and keep them away from hot surfaces.
-
Do not plug ın or unplug this appliance with wet hands.
-
Following installation make sure that the power cable is not trapped
underneath the appliance.
-
If the power supply cord is damaged, it must be replaced by the manufacturer,
its service agent or similarly qualified persons in order to avoid a hazard.
-
Do not use mechanical/electrical devices or other means to accelerate
the defrosting process.
-
Do not store explosive substances such as aerosol cans with a
flammable propellant in this appliance.
-
Do not place glass bottles/cans in the freezer compartment, as they may
explode.
- 6-
Section 3. Operating the Appliance
3.1. Switching on the Appliance
-
Allow the appliance to stand for a minimum of 4 hours after installation, before
switching on.
-
Plug in the appliance and switch on at the mains supply.
-
Set the thermostat control to the required setting as detailed in the
Temperature Control section (3.2.).
-
Leave the appliance for approximately 4 hours for the correct
temperature to be reached, before putting in food.
3.2. Temperature Control
The freezer thermostat automatically regulates the inside temperature of the
compartments. By rotating the knob from position 1 to 5, colder temperatures
can be obtained.
Important Note: Do not try to rotate the knob beyond position “1” as it will turn off
your appliance.
Freezer & Refrigerator Thermostat Settings
-For short term storage of food in the freezer compartment you can set the knob
between the 1 and 2 position.
-For long term storage of food in the freezer compartment, you can set the knob
between the 3 and 4 position.
-For freezing fresh food you should set the knob to position 5, please note that after you
have achieved the desired level of freezing you should revert the knob to the previous
position.
Important!
During high ambient temperatures e.g. on hot summer days, it may be necessary to set
the thermostat to the coldest setting (position 5). This may cause the compressor to run
continuously in order to maintain a low temperature in the cabinet.
Should a layer of frost develop on the rear wall of the cabinet, turn the temperature
regulator back to a warmer setting (e.g. position 1 or 2), as this will cause the compressor
to switch off and allow automatic defrosting to take place as normal.
Important note:
If the unit is switched off or unplugged, you must allow at least 5 minutes before restarting
or re-plugging in the unit in order to avoid damage to the compressor.
Refrigerator and Freezer
Thermostat Control
- 7-
3.3. Normal Operating Sounds
You may hear faint gurgling or bubbling sounds when the refrigerant is pumped
to the cooling system and through the coils or tubing at the rear of the appliance.
When the compressor is in operation you may hear a slight whirring sound or
pulsating noise. The thermostat controls the operation of the compressor, and
you may hear a slight click as it cycles in and out.
3.4. Energy Saving Advice
-Do not install the appliance close to sources of heat, such as a cooker,
dishwasher or radiator.
-Locate the appliance in a cool well-ventilated room and make sure that
the air vents are clear.
-Try to avoid keeping the door open for long periods as warm air will enter
the cabinet and may cause a buildup of ice and affect the energy
consumption. Ensure there are no obstructions preventing the door from
closing properly.
-Ensure that the door seal is clean and there are no tears or splits.
-Keep the most perishable foods, (those with a short shelf-life, such as
cooked meats), in the coldest part of the fridge. The Salad Crisper Box
should be used for vegetables, salads and fruits etc. (see Description of
Appliance on Page 3).
-Do not overload the fridge: the cooling air that circulates to keep the
fridge cold gets blocked and pockets of warm air form.
-Do not put hot food into the fridge – let it cool down first.
3.5. In the Event of a Power Failure
If there is a power failure, keep the door closed. When the power has been
restored the appliance will start to operate but it may take some time to achieve
the pre-set operating temperature. Check the condition of your stored food
items and liquids.
Warnings for Temperature Settings
The ambient temperature, the temperature of the freshly stored food and how
often the door is opened, affects the temperature in the refrigerator
compartment. If necessary, change the temperature setting to suit the situation.
- 8-
Accessories
Ice Tray
Fill the ice tray with water and place in freezer compartment. After
the water has completely turned to ice, you can twist the tray as
shown below to remove the ice cubes.
Note: All written and visual descriptions in the accessories may vary
according to the appliance model.
- 9-
Arranging food in the appliance
Refrigerator Section
-To reduce the humidity and consequentially decrease the amount of frost, never
place liquids in unsealed containers in the refrigerator. Frost tends to concentrate on
the coldest parts of the evaporator and over time will require more frequent
defrosting.
-Never place warm food in the refrigerator. Warm food should be allowed to cool
until room temperature and then be placed in the fridge ensuring there is adequate
air circulation.
-Try to avoid keeping the door open for long periods.
-Nothing should touch the back wall as it will cause frost and the packages can stick
to the back wall.
-Keep the most perishable foods, (those with a short shelf-life, such as cooked
meats), in the coldest part of the fridge.
-The Salad Crisper Box should be used for vegetables, salads and fruits etc.
(see Description of Appliance on Page 3).
-Do not put oversize bottles into the bottle holder as this will cause damage.
Freezer Section
-The use of the freezer is storing deep-frozen or frozen foods for long periods of
time and making ice cubes.
-To freeze fresh food, ensure that as much of the surface of the food is in contact
with the cooling surface.
-Do not put fresh food with frozen food side by side as it can thaw the frozen food.
-Once the unit has been defrosted, replace the food and remember to consume it in
a short period of time.
-Never place warm food in the freezer compartment.
-For storing frozen foods; the instructions shown on packages should always be
carefully followed and if no information is provided, food should not be stored for
more than 3 months from the purchase date.
-When buying frozen foods ensure that the packing is intact.
-Frozen foods should be transported in appropriate containers to maintain the
quality of the food and should be returned to the freezing surfaces of the unit in the
shortest possible time.
-If a package of frozen food shows any sign of humidity and abnormal swelling it is
likely that it has been previously stored at an unsuitable temperature and that the
contents have deteriorated.
-The storage life of frozen foods depends on the room temperature, thermostat
setting, how often the door is opened, the type of food and the length of time
required to transport the product from the shop to your home.
Always follow the instructions printed on the package and never exceed the
maximum storage life indicated.
- 10-
Section 4. Maintenance
Before any maintenance or cleaning work is carried out, DISCONNECT
the appliance from the ELECTRICITY supply.
4.1 Internal Cleaning
Clean the interior and accessories with warm water and bicarbonate of
soda (5ml to 0.5 litre of water). Rinse and dry thoroughly. Do not use
detergents, abrasive powders, highly perfumed cleaning products, wax
polishes or cleaning products containing bleach or alcohol.
Ensure that the defrost water channel and outlet are clean and free of
debris (see Defrosting).
4.2 External Cleaning
Wash the outer cabinet with warm soapy water. Do NOT use abrasive
products. There may be sharp edges on the underside of the product, so
care should be taken when cleaning. Once or twice a year dust the rear
of the appliance and the compressor at the back of the appliance, with a
brush or vacuum cleaner, as an accumulation of dust will affect the
performance of the appliance and cause increased energy consumption.
4.3 Defrosting
Refrigerator
-Defrosting occurs automatically during operation, the defrost water is collected
by the evaporating tray and evaporates automatically.
-The evaporating tray and the defrost water drain hole should be cleaned
periodically to prevent the water from collecting on the bottom of the
refrigerator instead of flowing out.
-You can also pour a glass of water in the drain hole to clean inside.
Freezer Compartment
-The frost accumulated in the freezer compartment should be removed
periodically. The freezer compartment should be cleaned in the same way as the
refrigerator compartment (see Section 4.1) and defrosted fully at least twice a
year.
-The day before you defrost you should set the thermostat dial to 5 to freeze the
food completely.
-During defrosting, frozen food should be removed and wrapped in several layers
of paper after which it should be kept in a cool place, or a cool box container/bag.
The inevitable rise in temperature will shorten the storage life.
-Remember to use this food within a relatively short period of time.
-Set the thermostat to position “ . “ or unplug the unit, leave the door
open until completely defrosted.
-To accelerate the defrosting process one or more basins of warm water can be
placed in the freezer compartment.
-After defrosting and cleaning, dry the inside of the unit carefully and set the
thermostat knob to max position.
- 11-
4.4. When the appliance is not in use
When the appliance is not in use for long periods, remove the contents,
disconnect from the electricity supply, defrost and clean the appliance (see
Section 4.1), leaving the door ajar until you wish to use the appliance again.
Failure to do so will cause the fridge to smell.
4.5. Changing the Interior Light Bulb
-
Switch off the power supply to the appliance
-
Press the hooks on the sides of the light cover top, and remove the light
cover.
-
Change the present light bulb with a new one of not more than 15W.
-
Replace the light cover and after waiting 5 minutes turn the power supply
back on.
4.6. Reversing the door
The door opening can be reversed from “right hand hinged” to “left hand hinged”.
Your appliance is supplied “right hand hinged”. To reverse the door opening please
use the following procedure.
Warning!
When reversing the door, the appliance must not be connected to the mains.
Remove the plug from the mains beforehand and do not plug back into the mains
for a period of at least four hours after completion of the door change.
1. Unscrew the two screws fixing the top hinge and remove it.
2. Remove the refrigerator door.
- 12-
3. Unscrew the two screws fixing the middle hinge and remove it.
4. Remove the freezer door.
5. Lie the appliance carefully down on its right hand side, ensure the floor surface
is flat and clean. It is suggested that a sheet or something similar is placed on the
floor in order to protect the paint finish.
Remove both leveling feet and unscrew the bottom hinge fixing screws. Remove
the hinge. Unscrew the bottom hinge pin and screw it into the next hole. Fix the
hinge bracket into place on the left hand side using the screws.
Now replace the leveling feet and return the product to the upright position.
6. Remove the two large caps on the left. Insert the two large caps into the holes
on the right side.
- 13-
Bottom stopper Bushing
7. Remove the top hinge cover plate from the left and position it on the right hand
side.
8. Replace the freezer door top bushing and top bushing cap.
9. Remove the refrigerator door bottom bushing and bottom stopper and then
insert them into the left side.
- 14-
10. Assemble the freezer door. Turn the middle hinge through 180°. Fix the middle
hinge by tightening the screws. Assemble the refrigerator door.
11. Unscrew the pin of the top hinge. Turn the hinge through 180° then screw it
into the left side hinge holes. Screw the pin of the top hinge. Assemble the top
hinge to the left side.
Do not plug in appliance for at least four hours after completion of the door
change.
NOTE: Service calls relating to door problems and/or cooling issues will be
chargeable if the fault found is to be due to an incorrect door reversal procedure
carried out by the consumer!
- 15-
4.7. What to do if something goes wrong
There is no power to the appliance:
-
Check there is not a power cut
-
Check there is power to the electric socket/appliance
-
Check the fuse in the plug (Must be 13 amp)
-
Check that the thermostat is set to 1 or above (see Section 3.2.)
The compressor runs continuously:
-Check the door is properly closed.
-Check that the Temperature Control has not been set to maximum
-Check that the fridge is not overloaded
The temperature in the cabinet appears to be too high:
-
Check the interior cabinet temperature with a thermometer.
-
The operating temperature should be within a range of +3 degrees to +10
degrees.
-
Is the door closed correctly?
-
Have large quantities of food recently been added to the appliance? – if yes,
allow the interior temperature to recover
-
Has the appliance door been opened frequently? – if yes, allow the interior
temperature to recover
There is excessive frost/ice buildup:
-
Ensure that the door has been closed correctly
-
Ensure that the door seal is clean and sealing correctly
-
Check that the Temperature Control has not been set to maximum
-
Check that the fridge is not overloaded
The appliance is making a noise:
-
Refer to Normal Operating Sounds, section 3.3.
-
Ensure that the appliance has been installed correctly (see section 1).
Here For You
Here For You
After-sales assistance
If you continue to experience problems with your Fridge Freezer, please call the Montpellier customer service
helpline on: 01759 487839
Please have all your product details available, including the model number, serial number, date of purchase,
and your retailer’s details before registering a fault.
The service call cannot progress without this information.
Your 2 year Manufacturer’s guarantee
THIS DOES NOT AFFECT YOUR STATUTORY RIGHTS.
Your new Montpellier appliance carries a free guarantee which protects you against the cost of repairs during the
rst 24 months from date of purchase provided that:
Any claim is accompanied by evidence of the model reference, model serial number and proof of purchase, such
as a Sales Receipt, showing that the appliance was purchased within the 24 months prior to the date
of claim.
What is not covered under the Guarantee
•Any appliance not correctly installed and operated in accordance with the manufacturer’s instructions.
•Any appliance that is used for anything other than domestic purposes.
• Any defect caused by accident, misuse, unauthorised modification or inexpert repair.
•Cost of Call-out where a fault cannot be found with the appliance.
• Cost of Call-out for work covering routine maintenance, such as, but not exclusively, cleaning of filters or
defrosting.
•Cost of Call-out for work required to correct the alignment of doors following door reversal procedures
carried out by you.
•Use of the appliance by anyone other than the Householder.
•Use in any commercial environment.
•Consumable items, such as, but not exclusively, fuses in plugs, bulbs and breakable items which require
routine replacement.
•Repair costs incurred that have not been authorised by Montpellier and/or carried out by a non-approved
Montpellier engineer.
•Montpellier Appliances do not accept claims for consequential loss, rusting, corroding, delivery damage
or scratches.
YOUR GUARANTEE IS VALID ONLY IN THE UK.
To register your appliance simply complete the card in your appliance pack and return it with a stamp axed or
alternatively you can register online at www.montpellier-appliances.com/support
SERVICE HELP-LINE
Should your appliance develop a fault, please call the Montpellier customer service helpline on: 01759 487839
Please remember to have all your product details available, including the model number, serial number, date of
purchase and your retailer’s details before registering a fault.
The symbol on the product or on its packaging indicates that this product may not be treated as household waste. Instead it shall
be handed over to the applicable collection point for the recycling of electrical and electronic equipment. By ensuring this product
is disposed of correctly, you will help prevent potential negative consequences for the environment and human health, which could
otherwise be caused by inappropriate waste handling of this product. For more detailed information about recycling of this product,
please contact your local city oce, your household waste disposal service or the shop where you purchased the product.
www.montpellier-appliances.com
Montpellier Domestic Appliances Ltd.
Unit 1, Tewkesbury Retail Park, Northway Lane,
Tewkesbury, Gloucestershire GL20 8JU
52281241

Other montpellier Refrigerator manuals

montpellier MRF48W-1/BK User manual

montpellier

montpellier MRF48W-1/BK User manual

montpellier MRF54W User manual

montpellier

montpellier MRF54W User manual

montpellier MITL325 User manual

montpellier

montpellier MITL325 User manual

montpellier M520WDX User manual

montpellier

montpellier M520WDX User manual

montpellier MAB345C User manual

montpellier

montpellier MAB345C User manual

montpellier MLM308BG User manual

montpellier

montpellier MLM308BG User manual

montpellier MXD83X User manual

montpellier

montpellier MXD83X User manual

montpellier MS166W User manual

montpellier

montpellier MS166W User manual

montpellier MAB2030PB User manual

montpellier

montpellier MAB2030PB User manual

montpellier MFF183DW User manual

montpellier

montpellier MFF183DW User manual

montpellier MFF186ALX User manual

montpellier

montpellier MFF186ALX User manual

montpellier MICL122 User manual

montpellier

montpellier MICL122 User manual

montpellier MAB365R User manual

montpellier

montpellier MAB365R User manual

montpellier MITL294 User manual

montpellier

montpellier MITL294 User manual

montpellier MAB551C User manual

montpellier

montpellier MAB551C User manual

montpellier MFF185DW User manual

montpellier

montpellier MFF185DW User manual

montpellier MAB550C User manual

montpellier

montpellier MAB550C User manual

montpellier MAB341K User manual

montpellier

montpellier MAB341K User manual

montpellier MS171W/K User manual

montpellier

montpellier MS171W/K User manual

montpellier MITL85 User manual

montpellier

montpellier MITL85 User manual

montpellier MS165W User manual

montpellier

montpellier MS165W User manual

montpellier MLA48W-1 User manual

montpellier

montpellier MLA48W-1 User manual

montpellier MBUL101 User manual

montpellier

montpellier MBUL101 User manual

montpellier MIFF700 Manual

montpellier

montpellier MIFF700 Manual

Popular Refrigerator manuals by other brands

Sharp SJ-L2350E3I-EU user manual

Sharp

Sharp SJ-L2350E3I-EU user manual

Gram KS 220 Instructions for use

Gram

Gram KS 220 Instructions for use

Hanseatic BCD 310CA2W user manual

Hanseatic

Hanseatic BCD 310CA2W user manual

Panasonic NR-E431GT-N3 operating instructions

Panasonic

Panasonic NR-E431GT-N3 operating instructions

AEG SKS81000F0 user manual

AEG

AEG SKS81000F0 user manual

KitchenAid KSSO48FTX00 parts list

KitchenAid

KitchenAid KSSO48FTX00 parts list

BOMANN KS 193 user manual

BOMANN

BOMANN KS 193 user manual

Gram COMPACT 220 Series user manual

Gram

Gram COMPACT 220 Series user manual

THOMSON THM 70 IX operating instructions

THOMSON

THOMSON THM 70 IX operating instructions

Hoover BHBF 172 UKT/N user manual

Hoover

Hoover BHBF 172 UKT/N user manual

Miele K 32222 i Operating and installation instructions

Miele

Miele K 32222 i Operating and installation instructions

Haier HR-195 Operation instructions

Haier

Haier HR-195 Operation instructions

Hotpoint Ariston EBYH 18xxx F operating instructions

Hotpoint Ariston

Hotpoint Ariston EBYH 18xxx F operating instructions

Beko CSA31000S Instructions for use

Beko

Beko CSA31000S Instructions for use

Fagor 3FIC-5440 instruction manual

Fagor

Fagor 3FIC-5440 instruction manual

Siemens KG..N.. Instructions for use

Siemens

Siemens KG..N.. Instructions for use

LabRepCo LABS?35LL instruction manual

LabRepCo

LabRepCo LABS?35LL instruction manual

Philco PHK26TE Owner's instruction manual

Philco

Philco PHK26TE Owner's instruction manual

manuals.online logo
manuals.online logoBrands
  • About & Mission
  • Contact us
  • Privacy Policy
  • Terms and Conditions

Copyright 2025 Manuals.Online. All Rights Reserved.