Morphy Richards IB29401 User manual

DAB boom box
Compact disk player
FM/RDS/PLL/DAB radios
Programmable clock functions
Instructions
Model 29401
Conventions used in text
BUTTON Small capitals for the name of a button
Function/Mode Function or mode names in italics
9177 29401MUK DAB boom box 3 11/5/05 10:17 am Page 1

Components
1 Handle
2 Telescopic aerial
3 CD door
4 Open/Close button
5 Intro/RDS Search/auto tune button
6 Remain/RDS mode/select button
7 Rewind/down button
8 Play/pause button
9 Stop button
10 Fast forward/up button
11 Equaliser button
12 Extra bass button
13 Volume down button
14 Volume up button
15 Speaker
16 Function button
17 Sleep button
18 LCD display
19 Timer button
20 Memory/Clock adjust button
21 Standby/on button
22 Repeat/setup/preset button
23 Random/display/preset button
24 Infra red sensor
25 Mains input
26 Digital out jack
27 Earphone jack
2
1
2
3
4
5 6 7 8 9 10 11 12
24
13
14
15
16
17
181920
21
15
22
23
25
26
27
9177 29401MUK DAB boom box 3 11/5/05 10:17 am Page 2

Electrical requirements
Check the voltage on the rating plate of your DAB/FM Receiver
corresponds with your house electricity supply, which must be A.C.
(alternating current).
If the socket outlets in your home are not suitable for the plug supplied
with this appliance the plug should be removed and the appropriate one
fitted.
WARNING: The plug if severed from the mains lead it must be
destroyed, as a plug with a bared flexible cord is hazardous if
plugged into a live socket.
Should the fuse in the 13-amp plug require changing a 3-amp BS 1362
fuse must be fitted.
Power supply
The DAB/FM receiver will work on mains or can be battery operated for
portable use. When the mains connector is fitted then the batteries will be
overridden.
Mains supply
Insert the figureof eight connector on the mains lead supplied in the
mains connector. Insert the plug into a mains socket and switch the
socket on.
Installing batteries (not supplied)
1 Remove the battery compartment cover (located at the bottom of the
unit).
2 Insert 8 x D batteries and connect to the terminals (ensure batteries are
inserted correctly). Replace the battery compartment cover.
IMPORTANT: If the unit is not to be used for a prolonged period, remove
the batteries to avoid battery leakage. In the interests of environmental
safety,dispose of batteries safely.
3
2
1
3
4
5
6
7
8
9
10 11
12
13
14
15
16
17
18
19
20
21
22
Remote
1 Standby on
2 Over +10
3 Sleep
4 Timer
5 RDS mode/remain/select
6 Mode
7 Equaliser
8 Extra bass
9 Down skip/rewind
10 Play/pause
11 Stop
12 DAB
13 CD
14 FM
15 Volume up
16 Volume down
17 Memo/Clock adjust
18 RDS-search/Intro/autotune
19 MUP/Repeat/Setup
20 MDN/Random/Display
21 Mute
22 Up skip/fast forward
9177 29401MUK DAB boom box 3 11/5/05 10:17 am Page 3

Easy set-up guide
1 Fully extend the telescopic aerial.
2 Insert the mains connector or insert eight ‘D’ size batteries into the
battery compartment.
3 Push STANDBY/ON.The display will light up and show:
4 Press FUNCTION to cycle between DAB,CD and FM/RDS modes.
5 Adjust the volume control to a suitable level.
6 Press STANDBY/ON to turn the radio off.
What is DAB digital radio?
DAB radio is a totally new way of transmission. It uses digital signals
rather than the analogue signals that FM and MW wavebands transmit on.
This enables near digital quality audio and enables more stations to be
broadcast using a narrow waveband. DAB can also transmit additional
data with the audio channels.
The stations broadcast on a single frequency network, called an ensemble
or multiplex. These can contain many different stations and are on 1
frequency. Each multiplex is transmitted on a set frequency range and are
broadcast in the frequency band III (174 – 240MHz), which is sub-divided
into 41 blocks labelled 5A to 13F. Each can contain 1 multiplex.
Secondary services and additional data are available in each multiplex.
The number of multiplexes that you will receive will vary upon the
geographical location.
So instead of knowing the frequency, you just need to select the station
name, making it much easier to tune to your favourite station.
Turning on the boom box
In standby the display shows the date and time, press STANDBY/ON to turn
the boom box on.
CD (compact disc) operation
1 Select CD mode by pressing FUNCTION,open the CD door and load the
CD onto the spindle, close the door. The number of tracks on the CD
will be displayed along with the total play length. Use UP/DOWN to select
the starting track then press PLAY/PAUSE to start playing the CD.
2 Press VOLUME UP or VOLUME DOWN to adjust to desired level.
3 Press REW or FFWD to move to next or previous track.
4 Press and hold REW or FFWD to quickly advance through music.
5 Press STOP to stop CD play.
• If the disc compartment is empty,or the disc cannot be played, ‘no
disc’ shows continuously on the display.
• Do not store CDs in damp areas. Do not expose CDs to high
temperatures.
4
01 : 0 1
01 - 0 1 - 0 4
Morphy Richards
Please wait
DAB/FM receiver
W e l c o m e t o
d i g i t a l r a d i o
0 1 : 0 1 0 1 - 0 1 - 04
T r 7 3 3 : 2 7
X . B A S S F L A T
0 1 : 0 1 0 1 - 0 1 - 04
R A N
T r 7 3 3 : 2 7
X . B A S S F L A T
0 1 : 01 01-01-04
Tr 7 33 : 27
X . BASS FLAT
01 : 0 1
01 - 0 1 - 0 4
9177 29401MUK DAB boom box 3 11/5/05 10:17 am Page 4

Repeat play
The repeat feature allows you to play one track, or a complete disc
repeatedly.
1 Press REPEAT once, repeat indicator will show two arrows, this will
repeat the entire disc.
2Press REPEAT again, repeat indicator will show an arrow with a ‘1’, the
current track will repeat.
3Press REPEAT athird time, repeat indicator will disappear to cancel the
repeat feature.
Random play
Press RANDOM/DISPLAY to randomly play tracks. ‘RAN’ will appear on the
display.
Press RANDOM/DISPLAY again to cancel.
Review play
Press REMAIN to review CD play time.
Press Display Action
Once Each To view track time elapsed
Twice Each remain To view remaining track time
Three times Total remain To view remaining CD time
Four times Total To view CD time elapsed
Intro playback
The intro feature plays only the first 10 seconds of each track on the disc.
This feature is useful when you are trying to find a particular song but you
cannot remember the title.
• In CD mode, load your disc in the player as usual and press INTRO,
‘INT’ will be shown. The intro feature starts playing.
Program play
Load a disc in the CD player.
1 Press MEMO to enter the memory mode, use REW /FFWD or enter track
number on remote to select the first track to be programmed.
2 Press MEMORY again, the P-01, P-02, … P-60 are the program memory
locations.
3 Press PLAY/PAUSE to play the programmed sequence of track.
4 Press STOP to stop program play, ‘MEM’ indicator will continue to
illuminate.
5 Press STOP twice to cancel memory function.
Reviewing a memory
1 Toscroll through the programmed tracks whilst in stop mode, press
MEMORY repeatedly.
Changing a program
1 Press MEMORY repeatedly to scroll through the programmed tracks, or
to go to the end of the program.
2 Use the REW or FFWD buttons to select the new track to be
programmed.
3 Press MEMORY to enter the selected track in memory, repeat step 2 and
step 3 to change more tracks.
Memory repeat play
Start program play (refer to ‘Program play’ for more details) by pressing
REPEAT to select program repeat play. All of the programmed tracks will
play repeatedly, the program play and repeat play indicators will illuminate.
5
W e l c o m e t o
digital radio
0 1 : 0 1 0 1 - 0 1 - 04
T r 7 3 3 : 2 7
X . B A S S F L A T
0 1 : 0 1 0 1 - 0 1 - 04
R A N
T r 7 3 3 : 2 7
X . B A S S F L A T
0 1 : 01 01-01-04
Tr 7 33 : 27
X . BASS FLAT
Third:
T
REMAIN time
T
Press REMAIN
Fourth:
To review TOTAL time To shown all disc play time
0 1 : 0 1 0 1 - 0 1 - 04
ME M
T r 7 3 3 : 2 7
X . B A S S F L A T
0 1 : 0 1 0 1 - 0 1 - 04
INT
T r 7 3 3 : 2 7
X . B A S S F L A T
Press REMAIN
Third:
To review TOTAL
REMAIN time
To shown all disc remain time
Press REMAIN
Fourth:
To review TOTAL time To shown all disc play time
0 1 : 0 1 0 1 - 0 1 - 04
ME M
T r 7 3 3 : 2 7
X . B A S S F L A T
0 1 : 0 1 0 1 - 0 1 - 04
INT
T r 7 3 3 : 2 7
X . B A S S F L A T
0 1 : 0 1 0 1 - 0 1 - 04
T r 7 3 3 : 2 7
X . B A S S F L A T
0 1 : 0 1 0 1 - 0 1 - 04
R A N
T r 7 3 3 : 2 7
X . B A S S F L A T
0 1 : 01 01-01-04
Tr 7 33 : 27
X . BASS FLAT
9177 29401MUK DAB boom box 3 11/5/05 10:17 am Page 5

FM radio operation
1 Press FUNCTION to change to FM mode, the display will show the
frequency.
2 Press UP or DOWN, step by step, the frequency will search up or down
until it finds a station.
3 Hold UP or DOWN buttons for 2 seconds; the frequency will
automatically search upwards or downwards until it finds a station. If
the station is using RDS (Radio Data System), the frequency will
change to the station name and ‘RDS’’ will appear on the display. Press
‘RDS mode’ to select RDS data.
4 Press STANDBY/ON to turn off. When the unit is turned back on again, the
last station listened to on either FM or DAB will start playing
automatically.
Using the station memories
1 Press UP or DOWN to tune to the station you want to store.
2 Press MEMORY,then CH and 00 will flash.
3 Press PRESET (UP) or PRESET (DN) until the channel number for the desired
memory location (CH1 - CH10) appears, the memory number appears
on the display or enter preset number.
4 Press MEMORY once more to store the station.
Selecting memorised stations
1 Select FM mode.
2 Press PRESET (UP) or PRESET (DOWN) to select your desired station.
3 The display shows the frequency, the number of the present station
CH1 - CH10 and you hear the programmed station.
RDS features
RDS features are only available on FM band and when valid RDS data has
been received.
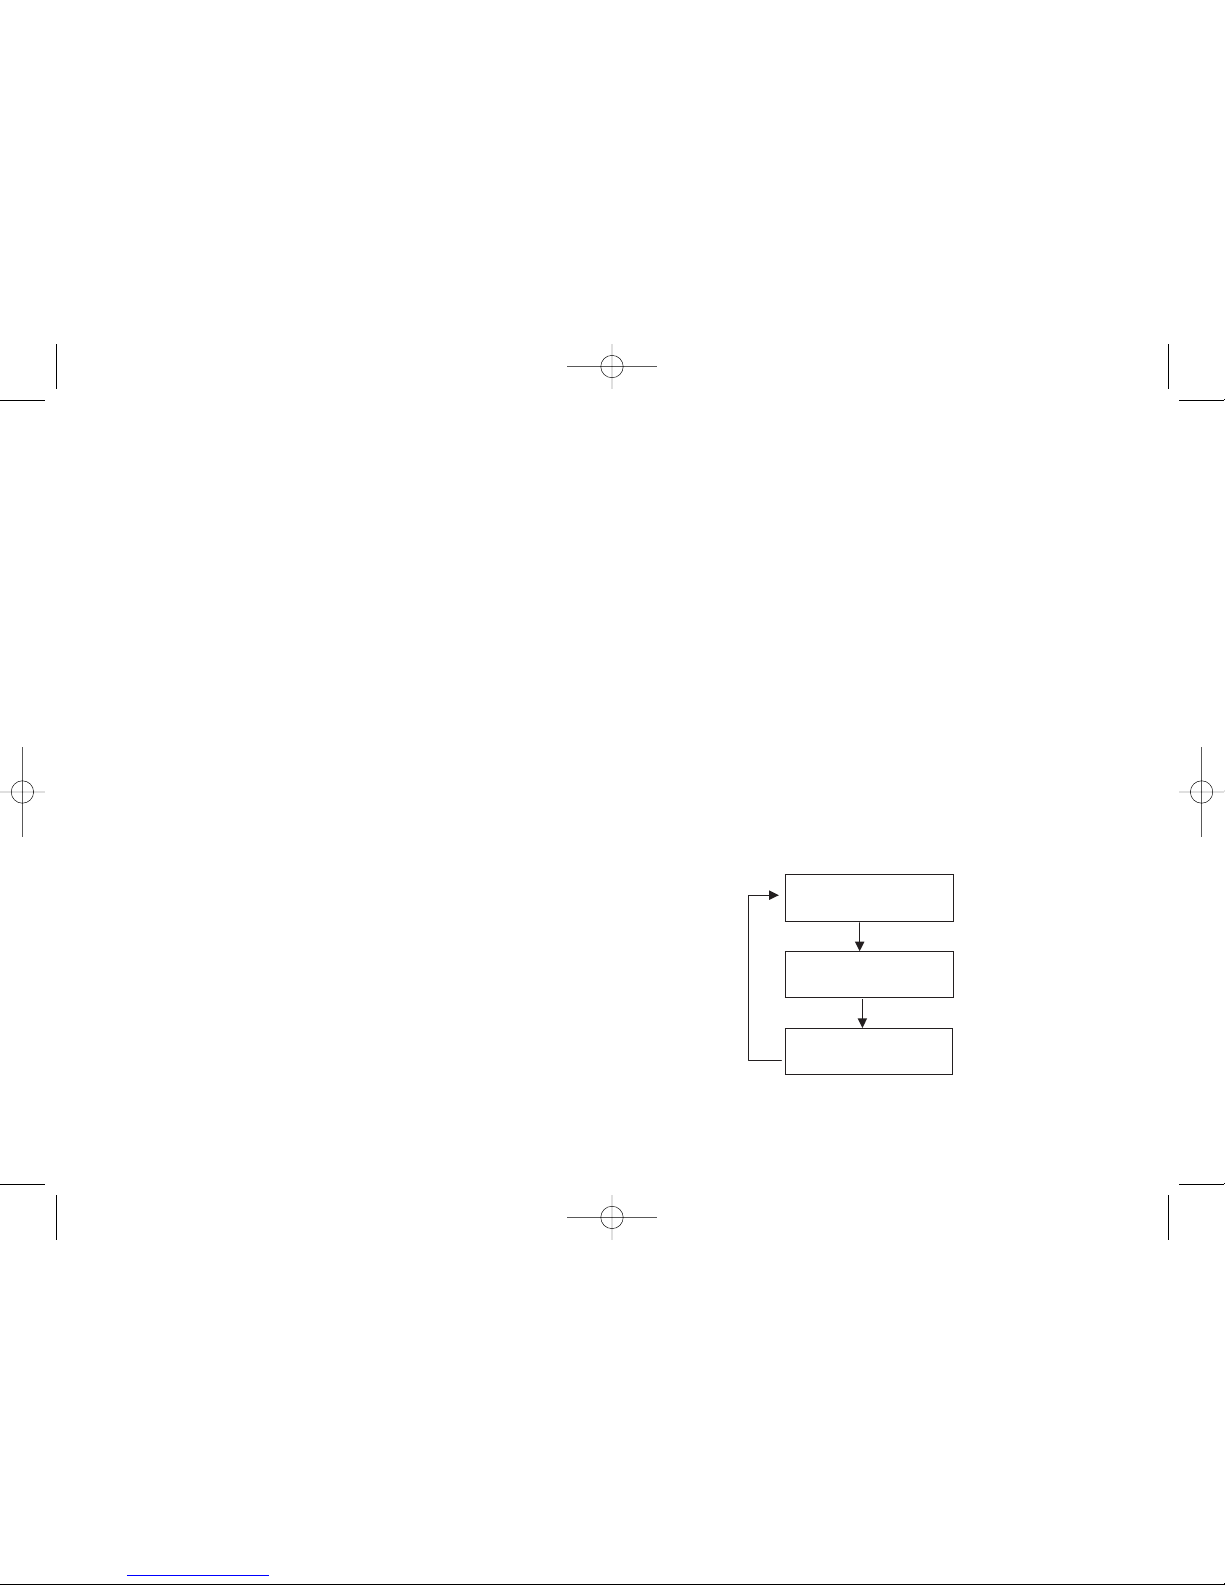
1 Press RDS SEARCH /AUTO TUNE to enter RDS search mode to select the
program type (PTY) you want to search for. If the current station has
RDS information, the program type will be shown otherwise ‘NEWS’
will be shown. Program type will change in the following sequence:
‘NEWS,AFFAIRS,INFO, SPORT, EDUCATE, DRAMA, CULTURE,
SCIENCE, VARIED, POP M, ROCK M, EASY M, LIGHT M, CLASSICS,
OTHER M, WEATHER, FINANCE, CHILDREN, SOCIAL, RELIGION,
PHONE IN, TRAVEL, LEISURE, JAZZ, COUNTRY, NATION M, OLDIES,
FOLK M, DOCUMENT,TEST,ALARM’.
2 To search through RDS options, hold UP or DOWN to start searching in
the forward/reverse direction.
3 When a station with the required program type is found, searching will
stop. The display will show current PS, PTY, TEXT.
4 If the required program type cannot be found after passing one loop,
searching will stop and display will show ‘NO MATCH’.
5 Press RDS MODE to toggle PS (Programme Service), PTY (Programme
Type) or Text (RDS Text).
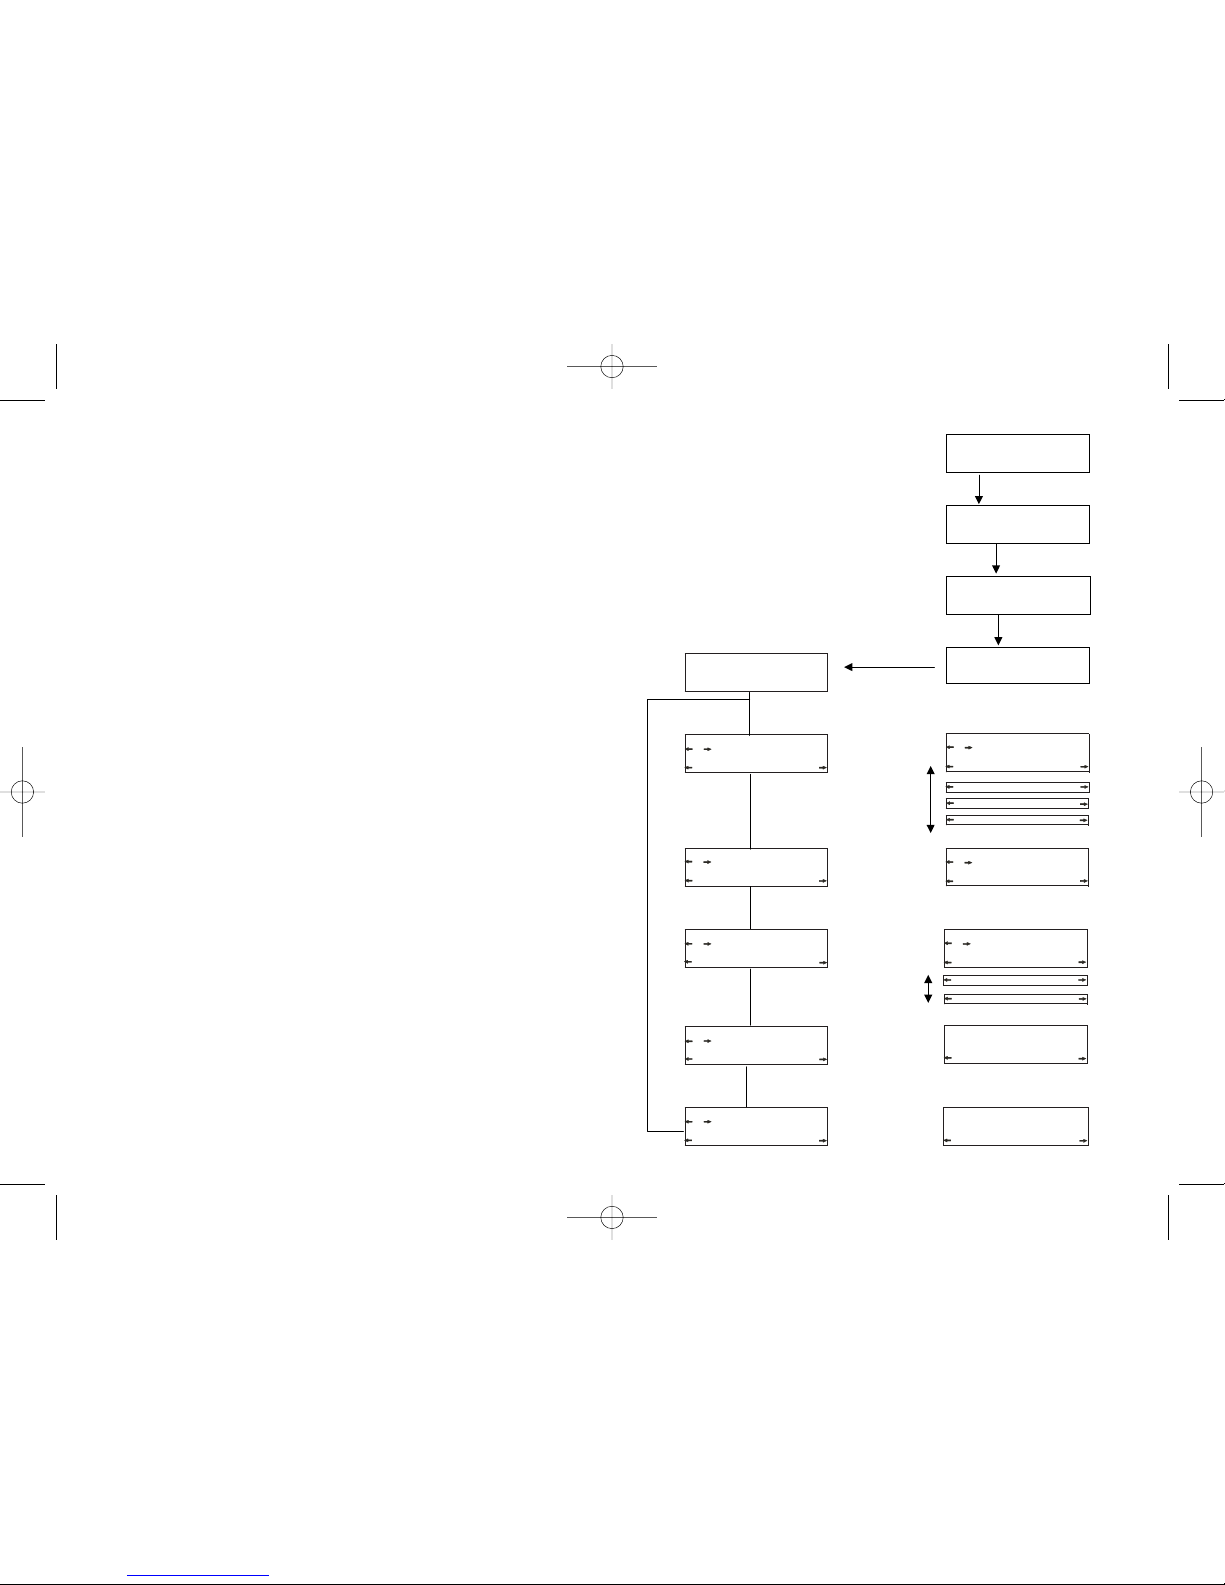
DAB radio operation
Initial DAB station search
Press FUNCTION to select DAB mode.
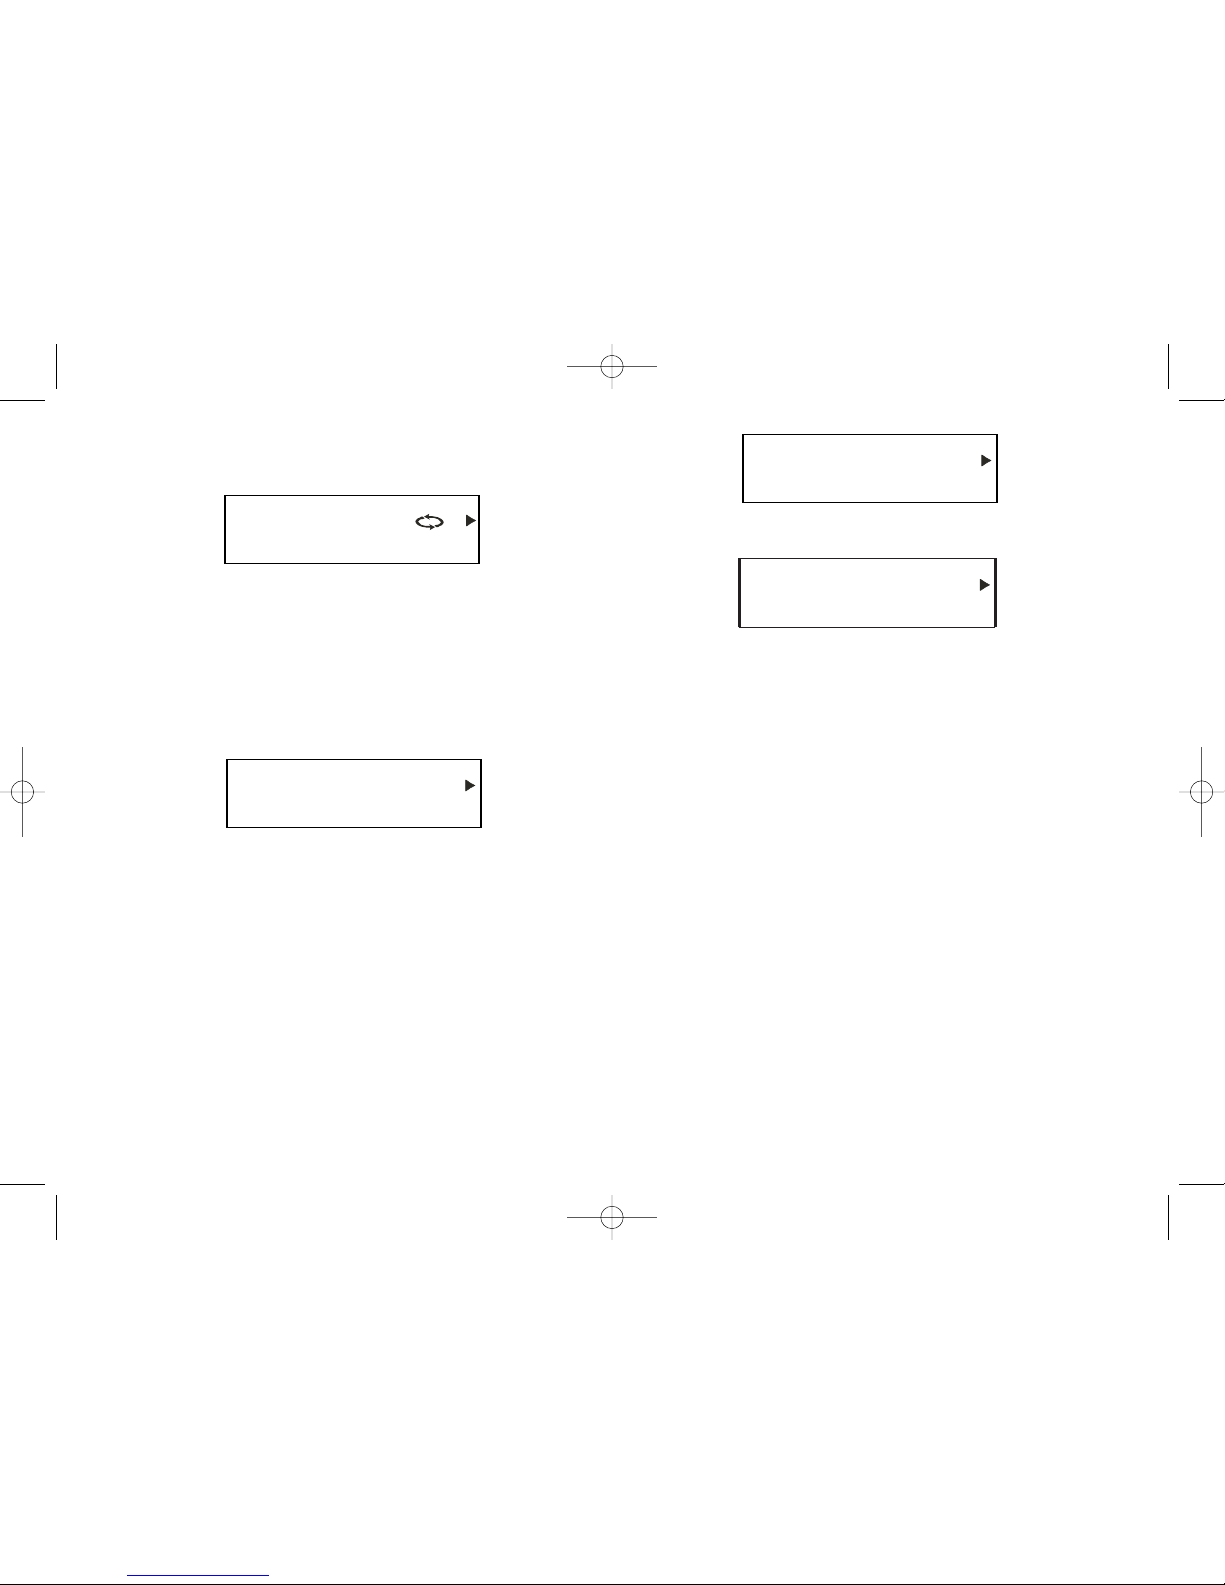
After two seconds, the system will scan for DAB stations. The clock radio
will commence the station search process. During the search process the
display indicates the progress and stations found, for example:
The symbols on the first line of the display are a bar graph that indicates
the progress of the scan. The number of services (X) discovered in the
current scanning frequency is displayed and station name (ZZZZ) of that
frequency is displayed on line 4. Line 2 shows the progress bar of
scanning.
It is possible to manually search for stations. If there is no stations found
check that adequate DAB coverage exists in your area. If no service is
found after scanning, entry menu will be shown.
Once the search has completed the DAB radio will tune to the first station
6
W e l c o m e t o
D i g i t a l R a d i o
?????????? X
S C A N N I N G. . . . .
Z Z Z Z
S T A T I ON N O T
A V A I L A B L E
W e l c o m e t o
D i g i t a l R a d i o
?????????? X
S C A N N I N G. . . . .
Z Z Z Z
S T A T I ON N O T
A V A I L A B L E
W e l c o m e t o
D i g i t a l R a d i o
?????????? X
S C A N N I N G. . . . .
Z Z Z Z
S T A T I ON N O T
A V A I L A B L E
9177 29401MUK DAB boom box 3 11/5/05 10:17 am Page 6

7
in the list. Stations are listed in numerical then alphabetical order.
The station list is retained in memory so the next time you turn to DAB
mode, the station search does not take place.
Changing DAB stations
Press either UP or DOWN to scroll through the available stations. When the
station you require is displayed press the SELECT.The radio will now tune
to that station.
Scanning for DAB stations
Due to the nature of DAB radio, additional stations and services regularly
become available. If you wish to see if there is any new DAB station
introduced in your area, you can initiate a search.
Press AUTO TUNE to activate a local search for stations on band 3 in the
UK.
This will take approximately 10 seconds. If you are using your DAB
boombox outside UK, then a wider search can be initiated by pressing
and holding down the AUTO TUNE (SCAN on the remote control) for
approximately two seconds. In this case a full scan is performed which will
take approximately 20 seconds.
Station display symbols
You can see some symbols displayed alongside the station names:
¤Indicates that the station is one of your ten most favourites stations
and can be used when selecting the station order.
?Displayed beforethe station name if the station is not available or not
active.
>> Chevrons displayed after the station name indicate that this is a
primary station with secondary services.
<< Chevrons displayed before the station name indicate that this is a
secondary station.
Setting DAB presets
You can preset up to ten DAB stations as follows.
Tune to the station you with to preset, press MEMORY then hold down the
preset number you wish to use to store the station on the remote until
‘preset stored’ is displayed.
If you wish storeastation but want to see what is stored in a preset
beforesaving to it:
1 Tune to the station you wish to preset.
2 Press MEMORY.
• Once you have saved presets these will be displayed instead of the
‘Empty preset’ message.
3 Use the UP or DOWN buttons to select the desired preset number you
wish to use for this station.
4 Hold MEMORY for 2 seconds, release then press again to store preset.
5 To recall a DAB station press the appropriate number button on the
remote control or press MEMORY then scroll to desired preset.
Re-setting the DAB preset station
DAB presets cannot be deleted individually but they can be overwritten.
For example, if you wish to change a preset from one station to another,
tune to the new station and press and follow instructions for setting
presets.
Changing the DAB station information
It is possible to change the information that is displayed on the second
line of the display when listening to a DAB station.
Thereare several types of information available as listed below with
examples to the right. Tochange the information displayed press DISPLAY.
1 Press DISPLAY to cyclically select the desired broadcast data on the
bottom line: Mode 1 (Default idle screen), Mode 2 (Signal error, service
name, ensemble name, bit rate), Mode 3 (service name, ensemble
frequency), Mode 1 (Default idle screen)……
•Date and time is up to the service providers to broadcast the time and
date relatively frequently. This will be updated every minute.
Mode 1
12 : 43 16 -10 -04
Class ic FM
fm.Com phone i n
X.BASS SLASSIC
Mode 3
S i gna l er r o r 0
Classic FM
DigItal Network
160Kbps St e reo
Mode 2
12 : 43 16 -10 -04
Classic FM
11D 222. 06MHz
X . BASS SLASS I C
9177 29401MUK DAB boom box 3 11/5/05 10:17 am Page 7

Auto tune
In DAB mode, press AUTO TUNE to scan the DAB band and auto tune the
DAB stations, the number at the right on the upper line indicates the
number of services available. The lower line shows the current scanning
status.
Auto fully tune
If you cannot find some DAB channels, long press AUTO TUNE for three
seconds to scan the DAB band and auto tune the DAB stations. This
function will perform all DAB channels scan.
Set up
Pressing SETUP will enter the set up menu as follows.
Station order
This function enables you to define how the stations are arranged when
scrolling the stations list.
To select an option press SETUP,‘Station order’ will be displayed.
Press SELECT and use the SKIP buttons to display the desired option. There
arefive options available as described below.
Favourite station (Fav station)
The DAB tuner monitors the stations that you listen to and will build a list
of the ten most listened to stations. When this option is selected the
station list is re-ordered so that these stations appear at the top of the list.
When you scroll through the list you will see that your favourite stations
will have a heart shaped symbol.
Alphanumeric
This is the default setting. The stations are arranged in numerical then
alphabetical order.
Active stations
This option will re-order the list with those stations that can be received in
your area at the top of the list and those that cannot at the bottom of the
list.
Prune stations
This option will remove any stations that have no service in your area from
the list.
Presets
This option will re-order the list so that your preset stations appear first.
Press SELECT.
8
Press SETUP
1 2 : 4 3 1 6 - 1 0 - 0 4
P l a n t Ro c k
t h e R o c k s p e c i a l
X . B A S S C L A S S I C
o r S E L E C T
S t a t i o n o r d e r
or SELECT
A l phanume r i c
F a v s t a t i o n
A
l phanumer i c
A
c t i v e s t a t i o n
P r u n e s t a t i o n s
o r S E L E C T
M a n u a l t u n e
or SELECT
5 A 1 7 4 . 9 2 MHz
or SELECT
DRC 1
DRC 0
o r S E L E C T
D R C v a l u e
DRC 1
DRC ½
o r S E L E C T
L a n g u a g e
1 2 : 4 3 1 6 - 1 0 - 0 4
Pl ant Rock
En gl i s h
Engl i sh
o r S E L E C T
V 1 . 9 . 1 - 1
S w v e r s i on
1 2 : 4 3 1 6 - 1 0 - 0 4
Pl a nt Rock
V1 . 6
S W V e r s i o n
12 : 4 3 1 6 - 1 0 - 0 4
Pl ant Rock
t h e R o c k s p e c i a l
X . B A S S C L A S S I C
Push AUTO TUNE button
A u t o t u n e
Qu i c k s c a n
???????????? 4
Sc anni ng
Pr od. Test M1
N o w t u r n i n g . . .
Press
SKIP
Press
SKIP
Press
SKIP
Press
SKIP
PI
K
Ss
s
e
r
P
Press SELECT
SKIP
then
SELECT
Press SELECT
Press SELECT
SKIP
then
SELECT
Press SELECT
Press SELECT
Press then SELECT
9177 29401MUK DAB boom box 3 11/5/05 10:17 am Page 8

Manual tune
You can manually tune to a specific channel/frequency and add this to the
station list.
This function can be used to assist the positioning the antenna to obtain
the optimum reception for a specific channel/frequency.
1 Press SETUP.Station order will be displayed.
2 Press SKIP (on the remote) or UP/ DOWN to display ‘Manual tune’.
3 Press SELECT.
4 Use UP/ DOWN to select the channel/frequency.
5 Press SELECT.Arectangle will be displayed on first line of the display.
The position of this rectangle indicates the signal strength, i.e. the
further towards the right the greater the signal strength.
6 Adjust the position of the antenna to obtain the optimum signal
strength.
7 Press SELECT to return to normal service.
Other features
Time and date
Auto synchronization with DAB signal
When the LCD display shows —:—:— in standby and the radio is switched
on in DAB mode, the clock will show the correct time and date obtained
from the DAB signal.
Manual synchronization with DAB signal
Switch on in DAB mode, long press TIMER to enable the clock
synchronisation function (the LCD will display clock sync)and the correct
time and date will be displayed.
Auto synchronization with FM (RDS) signal
When the LCD display shows —:—:— in standby and the radio is switched
on in FM (RDS) mode, the clock will show the correct time and date
obtained from the FM (RDS) signal.
Manual synchronization with FM (RDS) signal
Switch on in FM mode, long press TIMER to enable the clock
synchronisation function (the LCD will display clock sync)and the correct
time and date will be displayed. This will only work if the RDS signal is
being broadcast.
Manual adjustment
1 Press CLK/ADJ in standby mode (press twice if back light on).
2 The hour digits will flash, adjust the hour whilst the clock display is
flashing by pressing REW or FFWD.Press CLK/ADJ to confirm the hour
digits.
3 The minute digits flash. Adjust the minutes whilst the clock display is
flashing by pressing REW or FFWD.The minutes don’t carry over to hours
when the minutes change from 59 to 00. Press CLK/ADJ to confirm the
minute digits.
4 Adjust the day/month/year following the above steps.
• If the time has been manually set the boom box will not update the
time from the FM or DAB signal unless manual sync is used.
Sleep
1 Select CD,DAB or FM mode.
2Press and hold SLEEP to select the sleep timer period. The sleep timer
period will show ‘90,80, …,10, OFF,90,…’
3 When the required sleep period is reached, release the button, the
sleep period will hold on the display for two seconds and then display
will return to show ‘SLEEP ON’.
4 After the preset time has elapsed the unit will switch off automatically.
T
Ti
im
me
er
r
This radio has a built-in timer function that will allow the user to set the
radio to turn on, off and change mode automatically.
For example the user could program the radio to turn on at 2:00 PM, play
a CD then turn off at 2:15 PM.
1Press TIMER to toggle the timer indicator to enable/cancel mode.
2 Press MODE (on remote) to cyclically select the Clock/Timer display
mode (the time out for Clock/Timer function is 8 seconds).
• Ensure volume is set to correct level and that the station selected will
be 'on air' at the time selected.
To alter clock/timer settings
1 Press MODE, this will display the clock, to adjust the time/date press
CLK-ADJ.
2 Press MODE again to set the timer options. 9
0 1 : 0 1 0 1 - 0 1 - 0 4
S L E E P ON
X . B A S S F L A T
9177 29401MUK DAB boom box 3 11/5/05 10:17 am Page 9

3 First set the on time by pressing CLK-ADJ and using UP or DOWN.
4 Then press MODE to set the off time (as above).
5 Press MODE again to select source e.g. CD etc…
• This will also work in standby mode.
Extra bass
Press EX.BASS to toggle the X-Bass On/Off mode to increase the amount of
bass response, display will show ‘X.BASS’. If the X-Bass is on, press EX-
BASS again to cancel X-Bass.
Equaliser
1 Press EQ repeatedly to cyclically select the preset equalizer mode:
‘FLAT, ROCK, CLASSIC, POP, JAZZ’.
2 The initial setting of the equalizer mode is flat.
Dynamic range control (DRC)
DRC adds or removes a degree of compression to compensate for the
differences in the dynamic range between radio stations. For example, a
station broadcasting popular music may have a high level of compression
applied since the emphasis is on a constant high listening level, whereas a
station broadcasting classical music will have little or no compression as
the listener requires all of the highs and lows in the music to define the
detail. There are three levels of compression:
• DRC 0: No compression applied.
• DRC 1: Maximum compression applied (this is the default).
• DRC 1/2: Medium compression applied.
1Press SETUP. Station order will be displayed.
2 Press one of the UP/DOWN buttons until DRC value is displayed.
3Press SELECT. The current DRC level will be displayed on line 3.
4 Press the SCROLL buttons to select between the three values on line 4
of the display.
5 When the required value is displayed press SELECT.
Software version
This is provided as a reference when servicing is required.
Press INFO. Station order will be displayed.
Press one of the SCROLL buttons until ‘Sw version’ is displayed. The
version number will appear in line 3.
External connectors
Ensure that the radio and any external devices are turned off before
connecting.
You can connect earphones to the radio for private listening or connect
the radio to an external amplifier for greater sound.
Plug the earphone plug into the earphone connector. Ensure that the
volume is not too loud. Use earphones with a 3.5mm plug.
Connect the line out on the radio to the auxiliary input on your hi-fi or
external amplifier or speaker kit using a suitable cable. If your hi-fi has twin
phone sockets, then you will need to purchase a 3.5mm plug to twin
phone plug cable from your local hi-fi shop.
The SPDIF socket is for connecting to other equipment enabled with this
interface (DAB and CD output only).
Care and maintenance
Handling compact discs
•Do not touch the signal surfaces. Hold by the edges, or by one edge
and the hole.
• Do not affix label or adhesive tape to the label surfaces. Also, do not
scratch or damage the label.
• Discs rotate at high speeds inside the player. Do not use damaged
(cracked or warped) discs.
Cleaning compact discs
•Dirty discs can cause poor sound quality. Always keep discs clean by
wiping them gently with a soft cloth from the inner edge toward the
outer perimeter.
• If a disc becomes dirty, wet a soft cloth in water, wring it out well, wipe
the dirt away gently, and then remove any water drops with a dry cloth.
• Do not use record cleaning sprays or anti-static agents on discs. Also,
never clean discs with benzene, thinner, or other volatile solvents which
may cause damage to the disc surface.
10
9177 29401MUK DAB boom box 3 11/5/05 10:17 am Page 10

CD lens care
• When your CD lens gets dirty it can also cause the unit to output poor
sound quality. To clean the lens you will need to purchase a CD lens
cleaner which can maintain the output sound quality. For instructions
on cleaning the CD lens, refer to the ones accompanying the lens care.
Cleaning the exterior
• Prior to cleaning the exterior, be sure to unplug the power cord from
the AC power outlet. Wipe the exterior with a soft, clean, and slightly
water-dampened cloth.
Precautions
• Never open the cabinet under any circumstances. Any repairs or
internal adjustments should be made only by a trained technician.
• Warning: Never operate this product with the cabinet removed.
• The CD player of this unit uses a laser to read the music on the disc.
The laser mechanism corresponds to the cartridge and stylus of a
record player. Although this product incorporates a laser pick-up lens,
it is completely safe when operated according to directions.
• Discs rotate at high speed inside the player. Do not use damaged,
warped or cracked discs.
Do not touch the pick-up lens which is located inside the disc
compartment. Also, to keep dust from collecting on the pick-up lens, do
not leave the compartment door open for an extended period of time.
Specifications
AC power supply: 230V 50Hz
Battery: 8 x D size (not provided)
Compliant with ETS 300 401
Capable of decoding all DAB transmission modes 1 – 4
Speakers: 2 x 4” speakers – full stereo output
Frequency range: DAB band III (174 – 240MHz)
FM (87.5 – 108MHz)
Earphone socket: 3.5mm diameter stereo output
SPDIF optical output
LCD display: 16 characters, 4 line negative with blue backlight
Ventilation warning
The normal ventilation of the product shall not be impeded for intended
use.
Warning labels
WARNING: to reduce the risk of electric shock, do not expose this
appliance to rain or moisture.
No naked flame sources, such as lighted candles, should be placed on the
apparatus.
CAUTION: Danger of explosion if battery is incorrectly replaced. Replace
only with the same or equivalent type.
Electrostatic discharge
In case of malfunction due to electrostatic discharge just reset the boom
box (reconnection of power may be required) to resume normal operation.
11
From the centre to
the edge
CORRECT INCORRECT
9177 29401MUK DAB boom box 3 11/5/05 10:17 am Page 11

Helpline
Monday-Thursday 8.30-5.00 / Friday 8.30-4.00
UK 0870 060 2614
Republic of Ireland 1800 409119
Replacement parts
0870 167 6645
Guarantee
Morphy Richards products are manufactured to internationally accepted
quality standards. In addition to your statutory rights, Morphy Richards
guarantee your product to be free from manufacturing and component
defects for a period of TWO YEARS from date of purchase.
If your product proves to be defective within 28 days of purchase, your
Morphy Richards dealer from whom the product was purchased will be
pleased to replace it free of charge.
Should your product develop a defect within the guarantee period but
after the replacement period, please return the product to the following
address, together with the proof of purchase, brief details of the
symptoms and your own name and address.
After Sales Division, Morphy Richards Limited, Talbot Road, Mexborough,
South Yorkshire, S64 8AJ
Your post office will provide a certificate of posting. The product will be
repaired and returned to you promptly.
Morphy Richards products are intended for household use only.
Morphy Richards has a policy of continuous improvement in product
quality and design.
The company, therefore reserves the right to change the specification of
its models at any time.
Morphy Richards Ltd., Mexborough, South Yorkshire, S64 8AJ
www.morphyrichards.com
29401MUK Rev 1 5/05
9177 29401MUK DAB boom box 3 11/5/05 10:17 am Page 12
This manual suits for next models
1
Table of contents
Other Morphy Richards Portable Stereo System manuals