Morphy Richards AD29405 User manual

Audio multi media recording portable
stereo
Please read and keep these instructions
wwwwww..mmoorrpphhyyrriicchhaarrddssaauuddiioo..ccoomm
AD29405 MUK Rev 2
For replacement parts, help with using your Morphy Richards, problems
and lots more, contact us by phone or through our website.
UUKK
HHeellpplliinnee::
00887700
006600
22661144
IIrreellaanndd
11880000
440099111199

INDEX
IINNSSTTAALLLLAATTIIOONN
NAME OF CONTORLS (MAIN UNIT) 4
ELECTRICAL REQUIREMENTS 5
POWER SUPPLY 5
INSTALLING BATTERIES (NOT SUPPLIED) 5
EASY SET UP GUIDE 6
CCDDOOPPEERRAATTIIOONN
NORMAL PLAY 6
REPEAT PLAY 6
INTRO PLAY (FOR REMOTE CONTROL ONLY) 6
RANDOM PLAY 7
PROGRAM PLAY (CDS) 7
BROWSER MODE OPERATION (MP3 DISC ONLY) 7
UUSSBBOOPPEERRAATTIIOONN
NORMAL PLAY 7
BROWSER MODE OPERATION 7
DELETE MUSIC FILE 7
DELETE ALL 8
REPEAT PLAY 8
CCAARRDDOOPPEERRAATTIIOONN
NORMAL PLAY 8
INTRO PLAY (ACTIVE BY CONTROL ONLY) 8
RANDOM PLAY 8
DELETE MUSIC FILE 9
DELETE ALL 9
FORMAT CARD 9
TTUUNNEERROOPPEERRAATTIIOONN
TUNING A FM STATION 9
USING THE STATION MEMORIES 9
SELECTING MEMORY STATION 9
RECORD FUNCTION 10
AAUUXXIINNOOPPEERRAATTIIOONN
X BASS 10
wwwwww..mmoorrpphhyyrriicchhaarrddssaauuddiioo..ccoomm

33
EQ 10
SETTING CUSTOM CUSTOM EQ 10
SLEEP FUNCTION 10
VIEW THE SLEEP TIME 10
CANCEL THE SLEEP FUNCTION 10
CLOCK SETTING 11
SETTING THE CLOCK 11
RECORD FUNCTION 11
TIMER FUNCTION 11
SETTING TIMER 11
RECORD TIMER 11
RECORD FILE STRUCTURE AND BIT RATE TABLE 12
ID3 12
TIPS FOR SUPPORTING FAMOUS MP3 PLAYERS 12
MENU STRUCTURE TABLE 13
HANDLING COMPACT DISC 14
STORAGE 14
CLEANING A DISC 14
MAINTANCE 14
CLEANING THE EXTERIOR 14
PRECAUTIONS 14
VENTILATION WARNING 14
WARNING LABLES 14
TECHNICAL SPECIFICATIONS 15
GUARANTEE 16
UUKKHHeellpplliinnee0088770000660022661144IIrreellaannddHHeellpplliinnee11880000440099111199

44
1
2
3
4
87651011
12 13 25
1414 151617181920
21
22
23
24
9
Name of controls
(main unit)
11CARRY HANDLE
22TELESCOPIC AERIAL
33CD DOOR
44OPEN/CLOSE BUTTON
55FUNCTION BUTTON
66PROG & MEM/DELETE
BUTTON
77REW BUTTON
88PLAY/PAUSE/ST/MEMO
BUTTON
99STOP/BAND BUTTON
1100FFWD BUTTON
1111MENU BUTTON
1122REC/TIMER BUTTON
1133SD CARD SOCKET
1144SPEAKER
1155VOLUME DOWN
1166VOLUME UP
1177LCD DISPLAY
1188RANDOM/MEM DOWN
BUTTON
1199REPEAT/MEM UP BUTTON
2200STANDBY/ON BUTTON
2211USB SOCKET
2222EARPHONE JACK
2233AUX IN JACK
2244AC INPUT
2255IR SENSOR INDICATOR
wwwwww..mmoorrpphhyyrriicchhaarrddssaauuddiioo..ccoomm

3355
UUKKHHeellpplliinnee0088770000660022661144IIrreellaannddHHeellpplliinnee11880000440099111199
ELECTRICAL
REQUIREMENTS
Check that the voltage on the
rating plate of your appliance
corresponds with your house
electricity supply which must be
A.C. (Alternating current).
WWAARRNNIINNGG::TThheepplluugg
rreemmoovveeddffrroommtthheemmaaiinnss
lleeaadd,,iiffsseevveerreedd,,mmuussttbbee
ddeessttrrooyyeeddaassaapplluuggwwiitthhaa
bbaarreeddfflleexxiibblleeccoorrddiiss
hhaazzaarrddoouussiiffeennggaaggeeddiinnttooaa
lliivveessoocckkeettoouuttlleett..
BBaarreeddfflleexxiibblleeccoorrddiiss
hhaazzaarrddoouussiiffeennggaaggeeddiinnttooaa
lliivveessoocckkeettoouuttlleett..
Should the fuse in the 13 amp
plug require changing a 3 amp
BS1362 fuse must be fitted.
The PORTABLE CD.MP3 RADIO
will work on mains or can be
battery operated for portable
use. When the mains connector
is fitted then the batteries will be
overridden.
Power supply
Insert the figure of eight
connector on the mains
supplied in the mains connector.
Insert the plug into the mains
socket and switch the socket
on.
Installing batteries
(not supplied)
11Remove the battery
compartment cover (located at
the bottom of the unit).
22Insert 8x D batteries and
connect to the terminals (ensure
batteries are inserted correctly).
Replace the battery
compartment cover.
If the unit is not to used for a
prolonged period, remove the
batteries to avoid battery
leakage. In the interests of
environmental safety, dispose of
batteries safely.
123
456
789
Mute
0
-/--
Menu
Into/
Stereo
Repeat/
Present+
Sleep
Timer
X-Bass Delete
EQ
Random/
Present-
REC
Band
Program/
MEM
Vol+
Vol -
VOL Up
Skip DOWN
Power Mute
Delete
Band
INTRO/Stereo
Menu
Repeat/PRESET
+
Skip UP
Play/Pause
REC
Random/PRESET
FUNCTION
TIMER
Sleep
X-Bass
EQ
Program/Memory
VOL Down
Stop
-

6644
wwwwww..mmoorrpphhyyrriicchhaarrddssaauuddiioo..ccoomm
Easy set up guide
11Fully extend the telescopic
aerial.
22Insert the mains connector or
eight ‘D’ size batteries into the
battery compartment.
33Press STANDBY/ON to turn on
the unit. The display will light up
and ‘HELLO’ will show on the
display.
44Press FUNCTION to select the
desired function.
55Adjust the volume by pressing
VOLUME UP or VOLUME DOWN
to a suitable level.
66To turn the unit off, press
STANDBY/ON.
CD OPERATION
Normal play
Press ON/STANDBY button to
turn on the unit.
11Make sure the unit is in CD
mode by pressing FUNCTION.
22Open the CD door and load the
CD onto the pivot, then close
the door.
33Press PLAY/PAUSE to play CD,
the CD track and play time will
show on the display.
44To select a particular track,
press and hold REW or FFWD.
55To quickly advance through
music, press REW or FFWD.
66To stop CD play back, press the
STOP button.
NOTE:
• If the CD door is open, OPEN
appears on the LCD.
• If the disc compartment is
empty, or the disc cannot be
played, ‘no disc’ is displayed
showing continuously on the
LCD.
• Do not store CDs in damp
areas. Do not expose CDs to
high temperatures.
• You should avoid leaving the CD
door open, dust is liable to
impair performance of the laser
optical unit.
Repeat play
The repeat feature allows you to
play one track, a complete disc
or a directory.
11To play one track repeatedly,
press REPEAT once. Repeat
one icon will appear on the
display.
22To display all tracks repeatedly,
press REPEAT twice. Repeat all
icons ALL will appear on the
display.
33To play one directory repeatedly,
press REPEAT 3 times. Repeat
directory icon DIR will appear
on the display. (for MP3, WWA
data disc only).
44To cancel the repeat function,
press the REPEAT button until
the repeat icon disappears.
Intro play
(for remote control only)
• Intro Play is for introduction
playback of every track for the
first 10 seconds.
• Press INTRO on the remote to
start intro play STOP mode.
• Press INTRO on the remote to
toggle between INTRO play and
normal play during PLAY/PAUSE
mode.
• INTRO is shown on second line
of the display when intro mode
is active.

77
55UUKKHHeellpplliinnee0088770000660022661144IIrreellaannddHHeellpplliinnee11880000440099111199
Random play
Random play is for playing the
CD with shuffle option.
Press RANDOM to toggle
between random play mode and
normal play mode. The
RANDOM icon is shown on the
second line of display if
RANDOM is selected.
Program play (CDs)
Load a disc in the CD player
11Press PROG to enter the
Program mode at non-browser
model, ‘PROG’ appear on the
LCD.
22Press FFWD or REW to select
the first track to be
programmed.
33Press PROG again, the ‘P-01’,
‘P-02’,....program function holds
up to 32 tracks in the memory
A.
44Press the PLAY/PAUSE to play
the programmed sequence of
tracks.
55Press STOP three times to
cancel the program function.
NOTE: If you record from the CD
when program play mode
(reference the record function),
the record CD will record the
same as the program order).
Browser mode
operation (MP3 disc only)
11To enter browser mode, press
the STOP button while playing
the MP3.
22BROWSER and a will be
displayed on the screen
indicating that the machine is in
track select mode.
33press the FFWD/REW buttons
to advance to your desired
track.
44Press the STOP button again
back to the DIRECTORY mode a
symbol will be displayed.
55Press the FFWD/REW buttons
to advance to your desired
directory.
66Press the PLAY/PAUSE button
to play the desired
track/directory.
USB OPERATION
Normal play
11Press FUNCTION button until
the ‘USB’ icon is selected.
22Insert your USB device into the
slot.
33‘READING’ is displayed on the
LCD for a few seconds, the
searching time depends on the
memory size, then the display
will show the TOTAL NUMBER
of tracks.
44Press FFWD/REW to select your
desired track.
55Press PLAY/PAUSE to play.
66Press VOLUME up or VOLUME
down control to a suitable level.
77Press STOP to stop the
playback.
NOTE: If no device is
connected, ‘NO USB’ is
displayed.
Browser mode
operation
Same as browser mode in MP3
mode. Page 7.
Delete music file.
11In USB mode, the USB device is
connected.
22Press FFWD/REW to search for
the track that is to be deleted.
33Press MEM/DELETE, ‘DELETE’
appears on the LCD.
44Press FFWD/REW to select
‘YES’ or ‘NO’.
55Press PLAY/PAUSE to confirm
the action. ‘DELETING’ appears
on the LCD. This track is then
deleted.
A

88wwwwww..mmoorrpphhyyrriicchhaarrddssaauuddiioo..ccoomm
Also, press MEM/DELETE twice
to delete the current track when
you are listening this track.
Delete all
11When in USB mode, press PLAY
then press and hold
MEM/DELETE for over 2
seconds, ‘DELETE ALL’ is
displayed on the LCD, then
press PLAY/PAUSE to confirm,
press STOP to go back.
22This function will delete WMA or
MP3 file only.
Repeat play
Repeat feature allows you to
play one track, a complete disc
or a directory.
11To play one tack repeatedly,
press REPEAT once. Repeat
one icon will appear on the
display.
22To play all tracks repeatedly,
press REPEAT twice. The repeat
all icon ALL will appear on
the display.
33To play one directory repeatedly,
press REPEAT a third time. The
repeat directory icon DIR will
appear on the display.
44To cancel the repeat function,
press REPEAT a fourth time and
the repeat icon disappears.
CARD OPERATION
Normal play
11Press FUNCTION button until
the ‘CARD’ icon is selected.
22Insert your CARD device into
the slot.
33‘READING’ is displayed on the
LCD for a few seconds, the
searching time depends on the
memory size, then the display
will now show the TOTAL
NUMBER of tracks.
55Press PLAY/PAUSE to play.
66Press VOLUME up or VOLUME
down to control to a suitable
level.
77Press STOP to stop the
playback.
NOTE: IF no device is
connected, ‘NO CARD’ is
displayed.
Intro play
(activate by remote control only)
Intro play is for introduction
playback of every track for the
first 10 seconds in the
sequence.
Press INTRO on the remote
control to start intro play in
STOP mode.
Press INTRO on the remote to
toggle between INTRO play and
normal play during PLAY/PAUSE
mode.
INTRO is shown on second line
of the display when intro mode
is active.
Random play
Random play is for playing the
USB/CARD/CD with a shuffle
option.
Press RANDOM to toggle
between random play mode and
normal play mode. RANDOM
icon is shown on the display if
RANDOM is selected.
11Press the FUNCTION button
until the card mode is selected.
22Insert SD/MMC card in the SD
card socket.
33‘READING’ is displayed on the
LCD for a few seconds, the
searching time depends on the
memory size, then the display
will show the TOTAL NUMBER
of tracks.
44Press PLAY/PAUSE to play.
55Press VOLUME up or VOLUME
down control to a suitable level.
66Press STOP to stop play track.
NOTE: IF no SD CARD is
inserted, NO CARD is displayed.

99
UUKKHHeellpplliinnee0088770000660022661144IIrreellaannddHHeellpplliinnee11880000440099111199
Delete music file
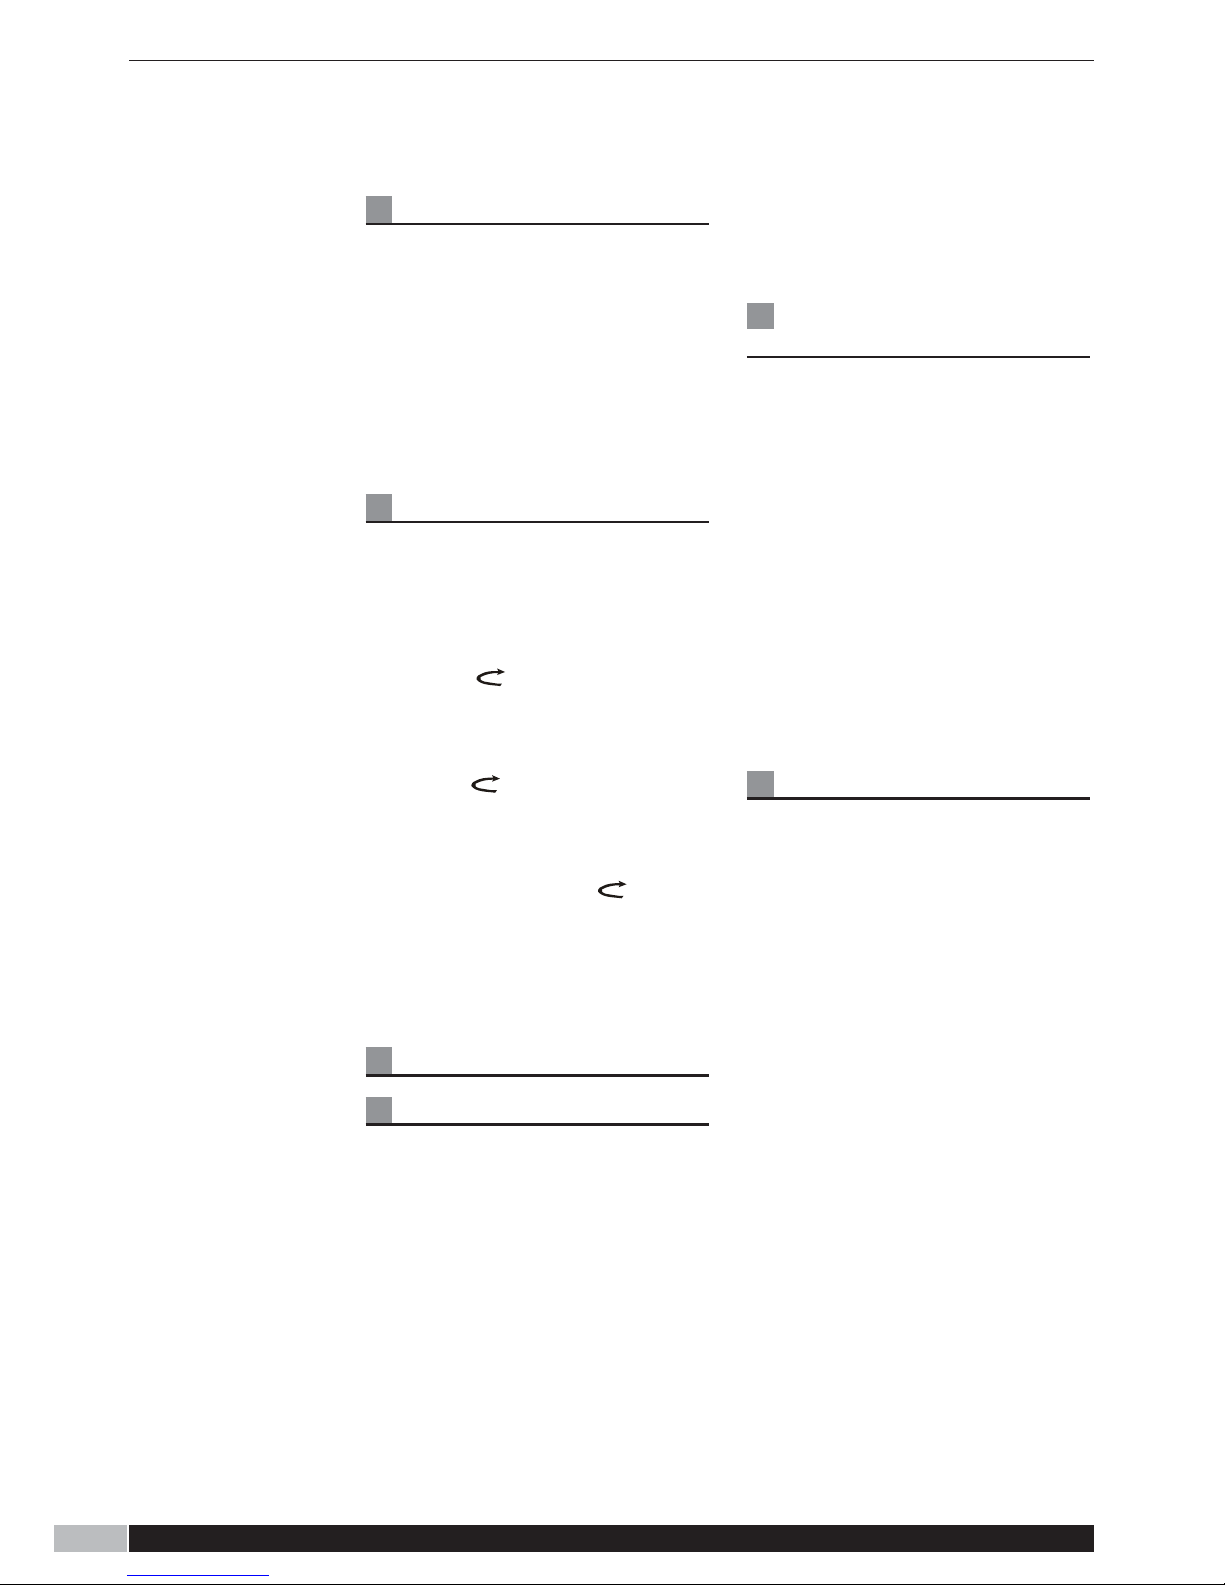
11In SD CARD mode, the SD
CARD is inserted, and SD CARD
is unlocked B.
22Press FFWD/REW to search for
the track in which you want to
delete.
33Press MEM/DELETE , ‘DELETE’
appears on the LCD (If the LCD
displays LOCKED, this means
the SD card is locked and can
not be deleted, please slide the
lock switch at the top and
unlock the SD, then try again).
44Press PLAY/PAUSE to confirm
the action. DELETING appears
on the LCD.
Press MEM/DELETE twice to
delete the current track when
you listening this track.
Delete all
11When in card mode, press PLAY
then press and hold
MEM/DELETE for over 2
seconds, ‘DELETE ALL’ is
displayed on the LCD, press
FFWD to select ‘YES or NO’,
then press PLAY/PAUSE to
confirm
22This function will delete WMA or
MP3 file only.
Format Card
11Be sure the card is unlocked.
22In SD card mode, press MENU,
FORMAT’YES’ or ‘NO’, when
yes is selected ‘YES’,
‘EXECUTE’ appears on LCD for
a few seconds and then
‘COMPLETE’ appears.
(Reference Table 3, page 13)
33The card is now formatted, and
‘NO SONG’ is displayed.
NOTE:
• This format function only for SD
card.
• REPEAT PLAY, INTRO, and
RANDOM function is same as
USB and CD modes.
TUNER OPERATION
Tuning a FM station
11Select FM mode by pressing the
FUNCTION button.
22Press STOP/BAND switch to
change band between MW and
FM.
33Press FFWD or REW step by
step, until a station is found. Or
hold FFWD or REW for 2
seconds to automatically search
upwards or downwards until a
station is found.
44Press VOLUME UP or VOLUME
DOWN control to a suitable
level.
55Press PLAY/PAUSE to switch
between STEREO and MONO. If
STEREO is selected, an ‘ST’
icon is displayed on the LCD.
• For best FM reception, fully
extended the telescopic
antenna.
• The radio has a built-in AM
antenna. For the best reception,
adjust your radio position.
Using the station
memories
11Tune the station to your desire
and store.
22Press MEM, the preset number
flashes.
33Press PRESET UP or PRESET
DOWN until the number for your
desired memory station (CH 1-
CH20 for FM and CH1 - 10 for
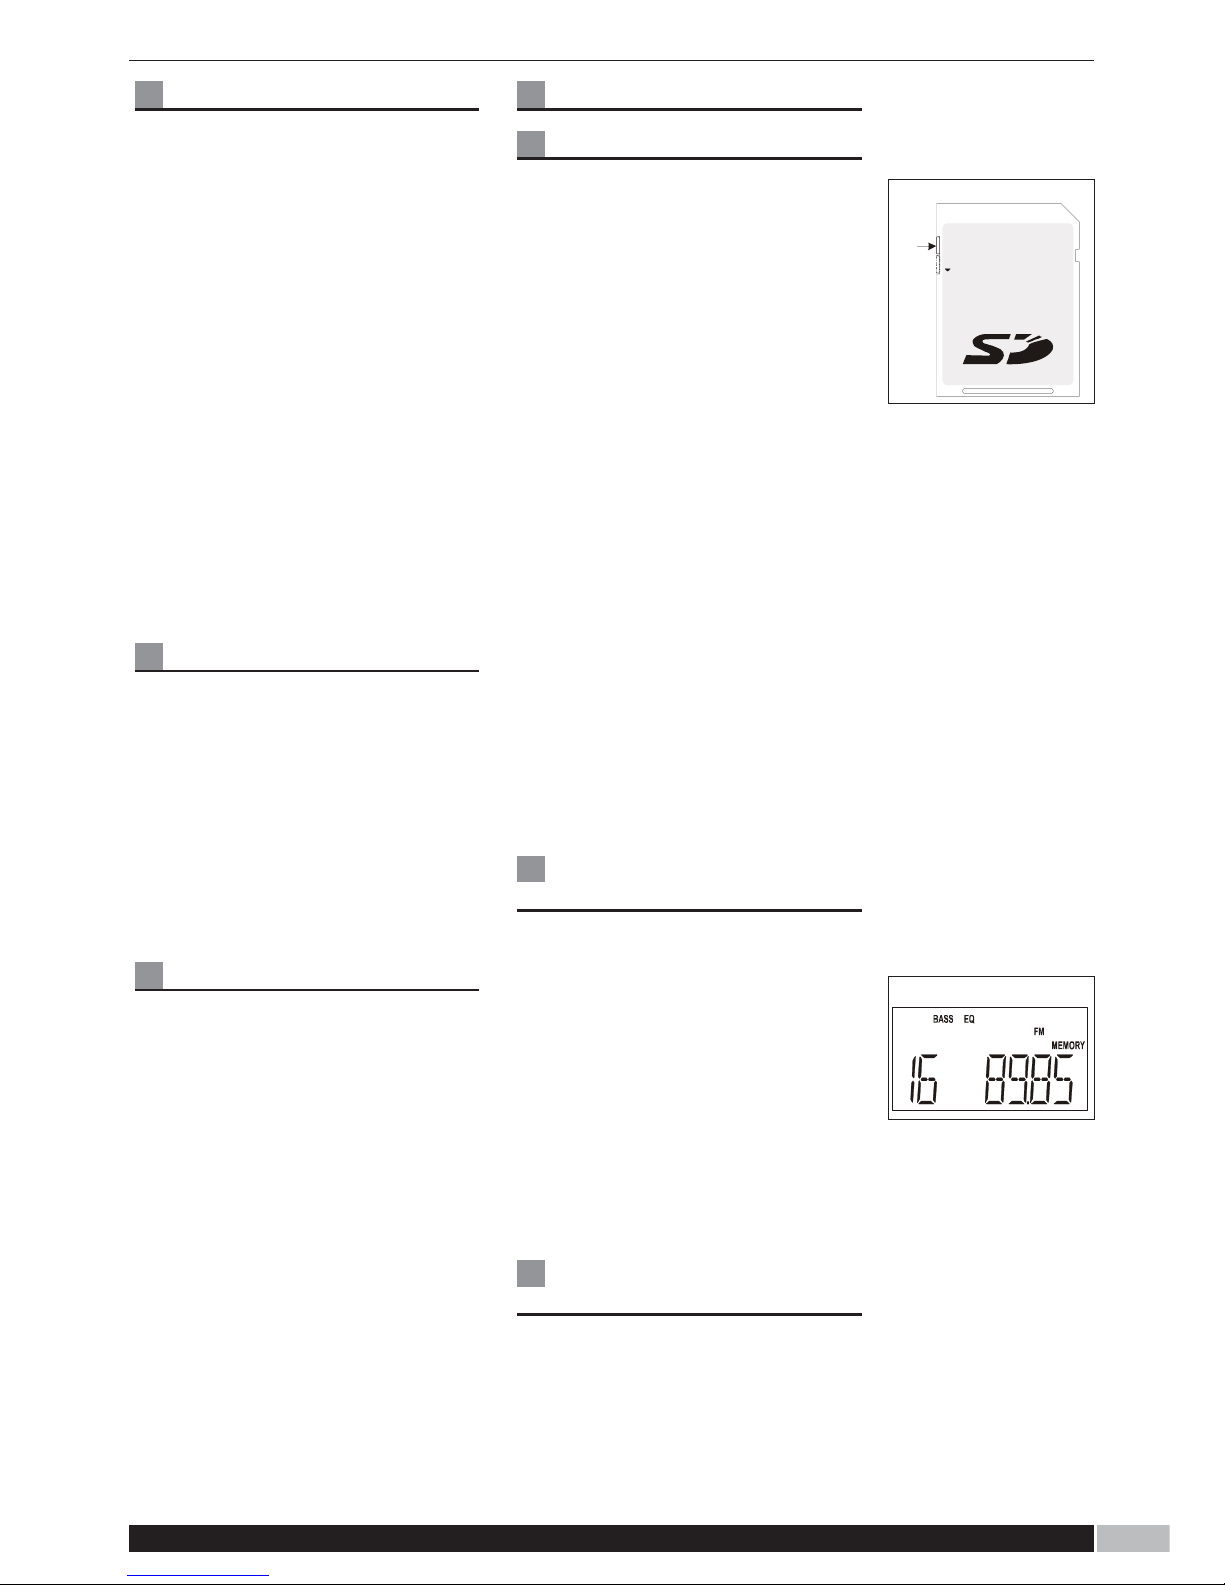
MW) appears C.
44Press MEM once more to store
the station.
Selecting memory
station
11Press PRESET UP or PRESET
DOWN to select your desired
station.
22The display shows the frequency
and the number of the preset
station CH1 - CH20.
Lock
Unlock
B
MHz
C

1100wwwwww..mmoorrpphhyyrriicchhaarrddssaauuddiioo..ccoomm
Record function
Reference the RECORD
FUNCTION as below.
AUX IN OPERATION
The portable stereo can be
connected another sound
source.
11Press FUNCTION button, until
‘AUX IN’ appears on the display.
22Connect the plug to the AUX IN
socket on the left side of the
radio.
33Press VOL+/VOL- to adjust the
desired sound level.
NOTE: When using timer record
function for AUX IN, please
make sure the sound source is
available.
X.BASS
Press X-BASS button on the
remote control to toggle the X-
BASS On/Off mode to increase
to amount of bass response.
‘BASS’ will show on the LCD if
X-BASS is on.
EQ
Press EQ button on the remote
control repeatedly to select a
preset equaliser modes you
wish: JAZZ - ROCK - CLASSIC
- POP - FLAT - CUSTOM - JAZZ
...., an EQ icon appears on the
LCD. The initial setting of the
equaliser mode is flat.
Setting custom EQ
11Press the MENU button.
22Press the FFWD/REW buttons
until EQ is displayed then press
the PLAY/PAUSE button.
33Press the FFWD/REW buttons
until ‘CUSTOM’ is displayed
then press the PLAY/PAUSE
button. ‘User BASS’ is now
displayed on screen.
44Press the PLAY/PAUSE button
to adjust the BASS level by
using the FFWD/REW buttons
and then press PLAY/PAUSE
button to confirm.
55Press MENU button return the
previous menu.
66Press FFWD/REW buttons until
‘USER TREB’ is displayed.
77Press PLAY/PAUSE button to
adjust the TREBLE level using
the FFWD/REW button and then
press PLAY/PAUSE button to
confirm.
88Keep pressing the MENU button
until the display returns to the
desired location or press the
STOP button to exit menu
mode.
Sleep function
11When in USB, CARD, FM, AUX
or CD mode.
22Repeatedly press SLEEP on the
remote to select the period of
the sleep required. The sleep
time will show:
- ‘SLEEP OFF’ -
33SLEEP will appear on the LCD.
The sleep period will hold on the
display for 2 seconds and then
the display will return to the
normal state.
44When the sleep time is reached,
the system will turn off
automatically.
View the sleep time
When sleep on, press SLEEP on
the remote until the SLEEP icon
disappears from the LCD.
Cancel the sleep
function
Repeatedly press SLEEP on the
remote until the SLEEP icon
disappears from the LCD.
120 90 60 45 30 15 05 off

1111
UUKKHHeellpplliinnee0088770000660022661100IIrreellaannddHHeellpplliinnee11880000440099111199
CLOCK SETTING
To view the time in standby
mode when the unit is plugged
in, press any key except
STANDBY/ON, the back light
will then light up for 5 seconds,
displaying the time.
Setting the clock
11Press MENU, then press
FFWD/REW, until CLOCK is
displayed on thee LCD.
22Press PLAY/PAUSE, the hour
digits will flash, press
FFWD/REW to adjust the hour.
33Press PLAY/PAUSE to confirm
the hour digits then the minutes
digits will flash, press
FFWD/REW to adjust the
minute digits. The minutes do
not carry over to the hours when
the minutes change from 59 to
00. Refer to table 2
NOTE: When AC power fails, the
clock will reset to the default
setting.
Record function
11Press MENU, RECORD will be
displayed, then press
PLAY/PAUSE enter, press
FFWD/REW to selected
RECORD source: REC CARD or
REC USB. Refer to table 3.
22Make sure the USB or SD CARD
is connected.
33For example. To record the track
006 of the CD to a SD card.
44Turn on the system (CD or FM
or AUX IN). Turn on the CD and
select 006, press PLAY/PAUSE
to play this track, then press
REC, RECORDING is displayed
for 2 seconds, then appears
REC CARD for REC CARD for 2
seconds, then return to normal
CD Mode, REC and CARD while
flash, this is recording.
55Press STOP to stop recording.
TIMER FUNCTION
Setting timer
11Then press FFWD/RWD until
‘TIMER’ display on the LCD.
22Press PLAY/PAUSE to go to
enter timer mode setting, ‘ON
TIME’ will show on the LCD.
33Press PLAY/PAUSE to enter,
then press FFWD/REW to adjust
the minute when the minute
digits are flashing.
44Press PLAY/PAUSE to confirm
the hour, then press FFWD/REW
to adjust the minute when the
minute digits are flashing. The
minutes do not carry over the
hours when the minutes change
from 59 to 00.
55Press PLAY/PAUSE to confirm
the time when the unit will come
on, ‘ON TIME’, then repeat
process point 4 and 5 to set the
time of ‘TIME OFF’.
66Then set the SOURCE of timer
(DISC,SD,USB, TUNER, AUX)
using the FFWD/REW buttons.
77Then set the VOLUME of timer
using the FFWD/REW buttons.
88Press the MENU buttons until
the display returns back to the
main display.
99Press TIMER button on the
remote control or REC/TIMER
button on the unit when the
system is in the standby mode.
Record timer
11Press MENU, then select
‘RECORD’ by PRESSING
FFWD/REW and confirm with
PLAY/PAUSE button. Then
select either ‘REC CARD’ or
‘REC USB’ by pressing
FFWD/REW and confirm by
PLAY/PAUSE button.
22Set the TIMER using the same
method as in the TIMER function
section.
33Press PLAY/PAUSE and enter
the TIMER SOURCE, use the
FFWD/RWD buttons to select
the ‘PRE REC’ by pressing
D

wwwwww..mmoorrpphhyyrriicchhaarrddssaauuddiioo..ccoomm
PLAY/PAUSE, radio is now
displayed.
44Press FFWD/RWD to select
between ‘RADIO’ or ‘AUX’,
press PLAY/PAUSE to select.
55The display will now show
‘PRE01’, use the FFWD/RWD
buttons to set this number to
the desired memory stored FM
station. (Note only FM station
can be recorded).
66Keep pressing the MENU button
until ‘TIMER’ is displayed.
77Set the timer volume using the
same method as in the timer
function.
88Press TIMER on the remote
control, then press the
ON/STANDBY button.
99The display will stay on the
TIMER start time is reached.
Recorded file
structure and bit rate
table
NOTE:
• When the timer function is set,
all buttons are locked except
TIMER, MUTE, VOL +/- MUTE
buttons.
• In the starting time, the portable
stereo will advance 5 minutes to
turn on for searching storage
device,and the portable stereo
will increase the volume 0 to
pre-set volume level within 10
seconds.
• Timer record only for FM and
AUX record to USB storage
device or memory card.
• You can not copy music files
between USB and SD card
alternately.
ID3
The system default setting is
ID3 ON, support up to ID3 V2.0
If the system set to ID3 ON, and
the unit is playing MP3, the
music info is displayed.
If the system set to ID3 OFF,
LCD will show track no. and
play time.
Tips for supporting
famous MP3 players
Due to the legal issue, we can
not edit the structure of the
following MP3 players. Please
follow below after ripping.
Creative ZEN series
11Enable the removable disk
function before plug into the
unit (Menu-Extras-Removable
disk).
22After ripping, plug the Creative
to the PC and move the ripped
file into Creative MP3 structure
by its software.
Sony series
11After ripping, plug the Sony
MP3 player to the PC.
22Move the ripped file into Sony
MP3 structure by SonicStage.
iPod series
11After ripping, plug the IPod MP3
player to the PC.
22Move the ripped file into the
iPod MP3 structure by iTune.
1122
FM mode AUX IN mode CD mode
File directory FM00001 AUX00001 CD00001
File name FM00001.mp3
FM00002.mp3
AUX00001.mp3
AUX00002.mp3
CD00001.mp3
CD00002.mp3
Bit rate 96kbps 128kbps 128kbps

1133
UUKKHHeellpplliinnee0088770000660022661144IIrreellaannddHHeellpplliinnee11880000440099111199
Note:
Column: Press FFWD/REW to select different state.
Row: Press PLAY/PAUSE to confirm or enter the next state.
Press STOP to exit to normal state in any state.
MENU RECORD
CLOCK
TIMER
REC to USB
Adjust the time on Same as CLOCK
00:12 00:12
ON TIME
OFF TIME
SOURCE PRE REC RADIO PRE 01
PRE 20
AUX
DISC
USB
CARD
TUNER
AUX
JAZZ
ROCK
CLASSIC
POP
FLAT
CUSTOM
ON
OFF
+10
+10
OFF
ON
BASS -10
TREBLE -10
VOLUME
EQ
BASS
ID3
FORMAT
REC to SD
Press MENU to return to the previous state.
MMeennuussttrruuccttuurreettaabbllee

11441122
wwwwww..mmoorrpphhyyrriicchhaarrddssaauuddiioo..ccoomm
Compact disc
Always use compact discs
bearing the mark shown
Handling discs
• Removing the disc from its
storage case and load it.
• Do not touch the reflective
record surface.
• Do not stick paper or write
anything on the surface.
• Do not bend the disc.
Storage
• Store the disc in its case.
• Do not expose discs to direct
sunlight or high temperatures,
high humidity or dusty places.
Cleaning a disc
• Should the disc become soiled,
wipe off dust, dirt and
fingerprints with a soft cloth.
• The disc should be cleaned from
the centre to the edge.
• Never use benzene, thinners,
record cleaner fluid or anti static
spray.
• Be sure to close the CD door so
the lens is not contaminated by
dust.
• Do not touch the lens.
Maintenance
Do not expose your system to
extreme of temperatures. The
product should be kept in a
warm environment free from
dust and damp. For external
cleaning use only a soft, clean,
damp cloth. Use of detergents
may damage the finish.
Cleaning the exterior
• Prior to cleaning the exterior, be
sure t unplug the power cord
from the AC power outlet. Wipe
the exterior with a soft, clean,
and slightly water-dampened
cloth.
Precautions
• Never open the cabinet under
any circumstances. Any repairs
or internal adjustments should
be made only by a trained
technician.
• Warning: Never operate this
product with the cable removed.
• The CD player of this unit uses a
laser to read the music on the
disc. The laser mechanism
corresponds to the cartridge
and stylus of a recorder player.
Although this product
incorporates a laser pick - up
lens , it is completely safe when
operated according to
directions.
• Discs rotate at high speed inside
player. Do not use damaged,
warped or cracked discs.
• Do not touch the pick-up lens
which located inside the disc
compartment. Also, to keep dust
from collecting on the pick-up
lens, do not leave the
compartment door open for an
extended period of time.
Ventilation warning
The normal ventilation of the
product shall not be impeded for
intended use.
Warning labels
WARNING: To reproduce the risk
of an electric shock, do not
expose this application to rain or
moisture.
ATTENTION: To
reduce the risk of
an electric
shock, do not
remove the
cover. There are no user
serviceable parts inside the unit.
Refer any servicing to qualified
personnel.

11551133
Lightning flash will
arrowhead symbol within the
triangle is a warning sign
alerting the user of ‘dangerous
voltage’ inside the unit.
The exclamation point within
the triangle is a warning sign
alerting the user of important
instructions accompanying the
product.
To prevent fire or shock hazard
do not expose this apparatus to
dripping or splashing.
Technical
Specification
AC power supply:
Battery
Remote control battery:
Speakers:
Max output power:
Radio:
MP3 Bitrate (Playback):
WMA Bitrate (Playback):
MP3 Bitrate (Encoding):
Compatible disc:
Earphne socket:
Electrical discharge
In case of malfuncion due to
electrical discharge just reset
the micro system (reconnection
of power may be required) to
resume normal operation.
230 V-50HZ
8 x ‘D’ size (not supplied)
1 x CR2025
2 x 4” speakers, full range
2 x 5W (Max THD 10%)
FM 87.5MHz - 108 MHz
MW 522kHz - 1620kHz
8 - 320kbps and VBR
32 - 320 kbps
CD/AUX - 128 kbps,
Radio - 96kbps
CD / CD-R / CD-RW
3.5mm diameter stereo output
UUKKHHeellpplliinnee0088770000660022661144IIrreellaannddHHeellpplliinnee11880000440099111199
The system is for indoor use only.
WWAARRNNIINNGG::TThhiissuunniittuusseessaallaasseerrbbeeaamm..TToopprreevveennttaannaacccciiddeenntt
ooccccuurrrriinnggtthheeuunniittsshhoouullddoonnllyybbeeooppeenneeddbbyyaaqquuaalliiffiieedd
eennggiinneeeerr..IIfftthheeddoooorriinntteerrlloocckkssbbeeccoommeeddeeffeeccttiivveetthheellaasseerrmmaayy
ccaauusseeiinnvviissiibblleerraaddiiaattiioonn..
Avoid exposure to the beam.

1166
wwwwww..mmoorrpphhyyrriicchhaarrddssaauuddiioo..ccoomm
Morphy Richards products are intended for household use only.
Morphy Richards has a policy of continuous improvement in product quality and
design. The company, therefore reserves the right to change the specification of its
models at any time.
The After Sales Division
Morphy Richards Ltd
Mexborough, South Yorkshire,
England, S64 8AJ
Helpline (office hours)
UK 0870 060 2614
Republic of Ireland 1800 409119
For
details
of
other
products
in
the
Morphy
Richards
range
please
see
our
website
.
.
.
AD29405 Rev 2 MUK 08/06
For electrical products
sold within the European
Community. At the end of
the electrical products
useful life it should not be
disposed of with
household waste.
Please recycle where
facilities exist. Check with
your Local Authority or
retailer for recycling advice
in your country.
Guarantee
Morphy Richards products are
manufactured to internationally
accepted quality standards. In
addition to your statutory rights.
Morphy Richards guarantee our
product to be free from
manufacturing and component
defects for a period of TWO
YEARS from date of purchase.
If your product proves to be
defective within 28 days of
purchase, your Morphy Richards
dealer from whom the product
was purchased will be pleased
to replace it free of charge.
Should your product develop a
defect within the guarantee
period but after the replacement
period, please return the
product to the following
address, together with the proof
of purchase, brief details of the
symptoms and your own name
and address.
Your post office will provide a
certificate of posting. The
product will be repaired and
returned to you promptly.
If you need any further advice,
please call our Helpline (Mon-Fri)
or Morphy Richards website.
This manual suits for next models
1
Table of contents
Other Morphy Richards Portable Stereo System manuals