MOTA Pro live-4000 User manual

Pro live™-4000
Owner’s Manual
Please read this manual carefully before flying! It has
information you need to know for safe and efficient
flight. Please keep this manual in a safe place.
For Owner’s Manual updates, warranty information, and support,
please visit: https://www.mota.com/pro-live-4000/

Drones are sophisticated precision devices capable of complex aerial maneuvers.
Please read these safety instructions before using your drone. Failure to operate
your drone safely could degrade its perfomance and cause harm to people, animals,
or property.
Please do not fly:
- Near or around obstacles such as birds or pets, aircraft, helicopters, other drones,
antennas or overhead lines, or airborne toys like kites.
-In or near airports or restricted areas.
-In adverse conditions such as strong winds, rain, hail, snow or sleet.
-If you are impaired, tired, or distracted
Please do:
-Know and comply with laws and regulations respecting drone use in your area.
-Keep hands away from rotors when drone is switched on.
-Fly within controller range.
Fly Safely!

Table of Contents
In the Box
Controller Overview
Monitor
Switching between Mode 1 and Mode 2
Shooting Video
Taking Photos
Controller Operation
Channel Selection
Before First Flight
Propeller Attachment
Fender Bracket Attachment
Drone Battery
Installation
Charging
Antenna Assembly
Preflight (Mode 2)
Link the Drone and Controller
Unlock the Motors
Flight (Mode 2)
Flight Precautions
Operational Range
Drone Calibration
Troubleshooting
4
5
5
5
6
6
7
7
8
8
9
9
9
10
10
11
11
11
11
12
12
13
13

4
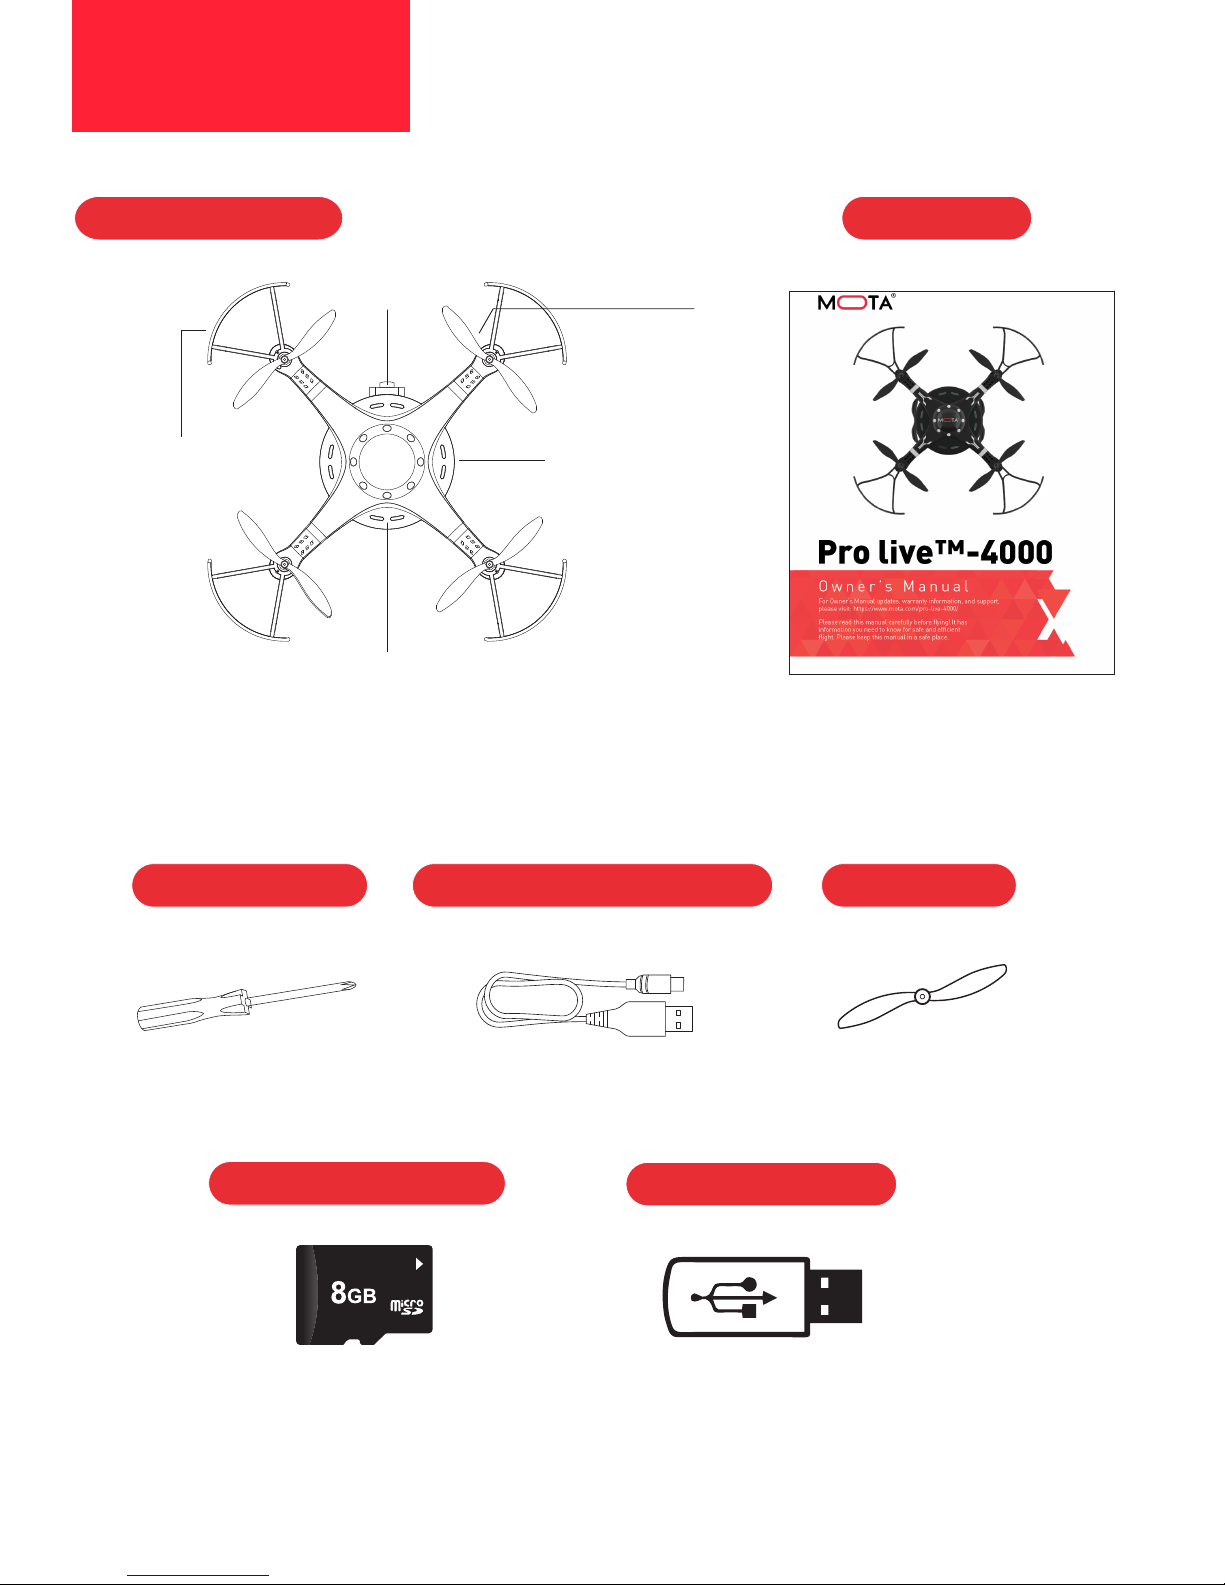
In the box
Propeller
Main Body
Main Wing
Fender Bracket
Controller Link / Barometer Status Indicators
Camera
Pro Live-4000
USB Charging Cable
Manual
Screwdriver
SD Card Card Reader

5
Controller
Overview
Switching between Mode 1 and Mode 2
The controller is set by default to Mode 2.
To switch to Mode 1; with power OFF, press the Mode Selection to Mode 1 and turn on the
power at the same time; the drone will automatically switch to Mode 1.
Flight Status Indicator
Monitor ON/OFF Switch
Frequency Selection
Monitor Tilt Adjustment Knob
One-Touch Landing
One-Touch Take-Off
Mode Selection Mode 2
Picture/Video
Frequency-Selection
Throttle Flight Stick
(Ascend & Descend)
Rotate (Left and Right)
Directional Flight Stick
Forward & Backward /
Left & Right Fly Stick
Power
Monitor

6
1) Signal Strength
2) Channel
3) Monitor Power Status
4) Briefly press the picture/video button to start recording. The video camera icon will be
replaced with a red orb confirming that recording is underway.
Monitor
Specifications
Size: 4.3 in.
Resolution: 480 X 272
Storage: MicroSD Card; maximum capacity 32GB
Video Signal Range: About 50 m.*
Shooting Video
Taking Photos
Wi-Fi Receiver: 5.8 GHz 8 Channel
Working Temperature: 0-40˚ F
Storage Temperature: -20-60˚ F
*Video signal range will vary depending on battery charge, battery condition, environmental
conditions, altitude, and flight parameters.
Frequency Selection
5) Press and hold the picture/video button to take a photo. A red orb will appear briefly in
the middle of the camera icon confirming that a photo has been stored.
6) SD Card Status: With the SD card inserted and recognized, the icon will be
displayed. If there is no SD card inserted, or if an inserted SD card is not being recognized,
the icon will not be displayed.
7) Controller Power Status
Controller
Overview

7
1. lnstall 4 “AAA” alkaline batteries in the monitor’s battery compartment. Please check that the
batteries’ positive and negative terminals are oriented correctly.
2. lnstall 4 “AA” alkaline batteries in the controller’s battery compartment. Please check that the
batteries’ positive and negative terminals are oriented correctly.
3. With the drone’s battery installed, slide the Power switch on the side of the monitor to ON. The
monitor will illuminate.
4 Slide the Power switch on the front of the controller to ON. The controller will beep twice and
the monitor will display real-time video from the drone.
Channel Selection
The Pro Live-4000’s controller features 8 selectable channels for optimum 5.8 GHz video signal
strength. The controller is set to channel 1 at the factory and will default to that channel each
time it is powered on.
If the video image becomes distorted due to environmental conditions such as interference from
other devices, you may select another channel:
First, slide the Power switch on the side of the monitor to ON.
Second, slide the Power switch on the front of the controller to ON.
To select a channel first do so on the monitor, secondly on the controller:
Channel
2
3
4
5
6
Monitor Controller
Briefly press the Frequency
Selection button once.
Briefly press the Frequency Selection button
once. The controller will beep
twice.
Briefly press the Frequency Selection button
twice. The controller will beep
three times.
Briefly press the Frequency Selection button
three times. The controller will beep
four times.
Briefly press the Frequency Selection button
four times. The controller will beep
five times.
Briefly press the Frequency Selection button
five times. The controller will beep
six times.
Briefly press the Frequency
Selection button twice.
Briefly press the Frequency
Selection button three times.
Briefly press the Frequency
Selection button four times.
Briefly press the Frequency
Selection button five times.
Controller
Operation

8
Channel
7
8
Return
to Channel 1
Monitor Controller
Briefly press the Frequency
Selection button six times.
Briefly press the Frequency Selection button
six times. The controller will beep
seven times.
Briefly press the Frequency Selection button
seven times. The controller will beep
eight times.
Briefly press the Frequency Selection button
eight times. The controller will beep
once.
Briefly press the Frequency
Selection button seven times.
Briefly press the Frequency
Selection button eight times.
Or power the monitor and
controller OFF, then ON, to
select Channel 1 again.
Notes:
• Allow 2 to 3 seconds between channel selections.
• If selection is unsuccessful, power both the controller and monitor OFF, then ON.
Before First Flight
Propeller Attachment
Controller
Operation
Screw on the propellers and indicated above,
in the direction of the marked arrowhead.
Once the propeller is attached, seal it with its
protective cap as shown above.
Note: Propellers are matched to a specific motor. Check the placement of the
propellers as shown in the diagram:
A
B
A
Figure Nose
Tail
B

9
Press
Push in direction of arrow
USB Charging Connector Power Switch
Open the battery protective cover
of transmitter. Install 4PCS “AA” alkaline battery
(without battery).
Lock the protective cover of the
battery.
Before First Flight
Fender Bracket Attachment
Installation
Put the fender bracket into the card slot of
the drone as shown above.
Insert the middle positioning post of the
fender bracket with the screw bits and
secure it with the screws of the fender
bracket as shown above.
Drone
Battery

10
(Attach of 5.8G Video Module) (Remove the 5.8G Video Module)
Drone
Battery
For maximum video signal strength, remove the antenna from the video module housing as
shown in the image below.
Insert the antenna into the housing when transporting the drone.
Charging
Remove the battery from the drone and connect one end to a USB charger. Plug the USB charger into
a USB port. A flashing green light means the unit is charging. A solid green light indicates that that
the battery is fully charged.
Caution: The battery’s cables must be correctly oriented, as shown.
Antenna
Assembly

11
Preflight
(Mode 2)
Forward
Backward
Rotate Nose
Left
Rotate Nose
Right
Ascend
Descend
Unlocking
Locking
Forward
Backward
Rotate Nose
Left
Rotate Nose
Right
Ascend
Descend
Unlocking
Locking
Verify you are at least 1 m. from the drone.
The motors must be unlocked before flight.
Place the drone on level ground and switch it and the controller ON. When you hear a
‘beep’ and the drone’s lights start blinking, the drone and controller are linked.
Once the drone and controller are linked, pull the Throttle Flight Stick back to the left-
bottom corner, and then pull the Directional Flight Stick to the right-bottom corner. The
motors are unlocked once they began rotating slowly. The drone is now ready for flight.
Push the Throttle Flight Stick up.
Pull it gently to the middle of its
range to halt ascent.
Pull the Throttle Flight Stick down.
Pull it gently to the middle of its
range to halt descent.
Slowly push the Throttle Flight Stick
to the left.
Slowly push the Throttle Flight Stick
to the right
Push the Directional Flight Stick up.
The drone’s nose will slope downward
slightly and the drone will fly forward.
Pull the Directional Flight Stick down.
The drone’s nose will slope downward
slightly and the drone will fly backward.
Pull the Throttle Flight Stick back to the left-bottom corner, and then pull the Directional
Flight Stick to the right-bottom corner. The motors will stop rotating.
Nose
Drone
Tail
Link the Drone and Controller
Unlock the Motors
Flight
(Mode 2)

12
Flight
Precautions
Flight
(Mode 2)
Take-o
Landing
Left Sideward Flying Right Sideward Flying
Link the drone with its controller, then
press the One-Touch Take-off button. The
drone will ascend to about 1.5 m. above
ground level.
Press the One-Touch Landing button. The
drone will land from its current position.
Operational Range
The maximum range for the drone is between 30-60 m.* If you fly the drone beyond
the operating range, it will switch to Auto Return mode and land at its take-off point.
* Range will vary depending on controller and drone battery charge, battery condition,
environmental conditions, altitude, and flight parameters.
• Keep the drone 1 m. above ground level during flight.
• Do not let go of the throttle or the drone may descend abruptly
and impact the ground.
• Do not fly in strong winds, rain, snow or other adverse
environmental conditions.

13
Drone
Calibration
The drone must be periodically calibrated to ensure stable flight.
1. Ensure the drone is on level ground.
2. First pair the drone and the controller, then proceed to push both flight sticks
toward the bottom right as shown in the image below. Once the red indicator light
begins flashing you’ll have successfully calibrated your drone.
If the drone drifts even after calibration, place it on level ground and put several pieces
of paper underneath the drone in the direction the drone drifts. The required thickness
of the paper stack will depend on severity of drift. Then recalibrate.
When calibrating the drone
make sure it’s on level ground.
Pull the two Flight Sticks to
the right-bottom corner at the
same time.
Troubleshooting
PROBLEM SOLUTION
Controller and drone won’t link.
The propellers rotate slowly
or not at all.
The drone shakes in flight.
One of the motors will not rotate.
Don’t move any control while linking.
Check battery status of both the drone and
controller and replace if necessary.
Check that propellers are correctly seated,are
not damaged, that they rotate evenly by hand,
that motors are firmly seated.
There could be one of three problems:
1) The motor may be damaged.
2) The motor is not bonded to its power wiring.
3) The controller may be damaged.

14 Copyright (©) 2016, Mota Group, Inc.
Table of contents
Other MOTA Quadcopter manuals