manuals.online logo
Brands
  1. Home
  2. •
  3. Brands
  4. •
  5. Motorola
  6. •
  7. Two-way Radio
  8. •
  9. Motorola APX Series User manual

Motorola APX Series User manual

APXTM TWO-WAY RADIOS
INTERACTIVE ENDUSERTOOLKIT(IEUTK)
APX 4500
O2 CONTROL HEAD
APX 4500 O2 CH
2NEXT >< PREVCONTENTS
O2 Control Head
RADIO PARTS AND CONTROLS
* These radio controls/buttons are programmable.
Emergency
Button*
Menu Select
Buttons
Channel Up & Down
Buttons
Dimmer
Button Multi-function
Knob*
Power Button
Home
Button* Bluetooth
Indicator
LED
Indicators
Accessory Port
(Microphone)
APX 4500 O2 CH
3NEXT >< PREVCONTENTS
Keypad Microphone
RADIO PARTS AND CONTROLS
Push-to-Talk
(PTT) Button
Note: The microphone is not part of a radio. It is an optional accessory.
* These radio controls/buttons are programmable.
Not Used At
This Time
Keypad
Home Button
Cancel Button
Okay/Select
Button
Voice
Announcement
Not Used
Not Used
Navigation
Button
Push-to-Talk
(PTT) Button
APX 4500 O2 CH
4NEXT >< PREVCONTENTS
Turning on/off the Radio
PREPARING YOUR RADIO FOR USE
Press the Power Button briefly to power on the radio.
After a short time, the red, yellow and green LEDs light up.
The display then shows Zone and channel text, and menu
items display on the screen.
The backlight will turn on to the last selected dim level.
Note:
Pressing the Power Button before the LED lights up will
be ignored.
If your radio does not power up, contact your dealer.
To turn off the radio, press the Power Button after the LEDs
light up.
Power Button
APX 4500 O2 CH
5NEXT >< PREVCONTENTS
Adjusting the Volume
PREPARING YOUR RADIO FOR USE
To increase the volume, rotate the Multi-function Knob
(MFK) clockwise.
The display shows volume bars and volume level when you
change the volume.
To decrease the volume, rotate the Multi-function Knob
counterclockwise.
Multi-function Knob (MFK)
APX 4500 O2 CH
6NEXT >< PREVCONTENTS
Accessing the Preprogrammed Functions
IDENTIFYING RADIO CONTROLS
You can access various radio functions through one of the following ways:
• A short or long press of the relevant programmable buttons.
OR
• Use the Menu Select Buttons ( ).
Using the Menu Select Buttons
The Menu Select Buttons allow to access the menu entries of features.
Note: Check with your dealer or system administrator for the list of features activated in your radio.
Your radio may be preprogrammed differently from the following example, but the steps for selecting a zone may appear as
shown below:
• Press the Menu Select button ( ) directly below Zone.
APX 4500 O2 CH
7NEXT >< PREVCONTENTS
IDENTIFYING RADIO CONTROLS
Using the Navigation Buttons
Home Button
The button returns you to the Home (default) screen. In most cases, this is the current mode.
For selected radio features, the button is also used to save user-edited radio settings or information before returning you to
the Home screen.
Note: Some features do not require you to press to go to the Home screen. Refer to the individual feature sections in this
manual for further details on saving user-edited radio settings or information.
Dimmer Button
Use this button to adjust the brightness of the display.
Long press to toggle between day and night mode.
Up and Down Buttons
By default, the and buttons are used as up and down arrow input. These buttons are programmable.
They can be programmed to navigate through zones, channels and to increase and decrease the volume of the radio.
4-Way Navigation Button (on keypad mic)
Use this button to scroll up , down , left or right .
Press and release one of the button to scroll from one entry to the next one.
Press and hold one of the button to have the radio toggles through the list automatically (release the button to stop).
APX 4500 O2 CH
8NEXT >< PREVCONTENTS
IDENTIFYING RADIO CONTROLS
Multi-function Knob (MFK)
The MFK button on your radio is programmable to the
following features :
Mode Change –Press the MFK once and turn
clockwise to scroll the channel list.
Volume Change –Turn the MFK clockwise or
counterclockwise to adjust the volume level of the speaker.
The volume level can be adjusted in 16 steps or 32 steps. A
fast turn of the MFK adjusts the volume level in 16 steps with
large
increments in volume level. A slow turn of the MFK adjusts
the volume level in 32 steps with small increments in volume
level.
The display shows the volume level and bars to indicate the
current level. The level of last selected volume when your
radio
powers down remains the same when the radio powers up.
The main display shows the icon of the secondary feature.
The main display does not show the icon of primary feature.
Your radio by default is set to use the primary feature. Short
press the MFK to toggle it to work on either the secondary or
primary feature.
The concentric ring LED on the multi-function knob will blink
in green when the knob is set to secondary feature.
The secondary feature has an inactivity timer. This timer
starts when the secondary feature is idle. The radio returns to
primary
feature when the timer expires.
If the MFK is set to operate only one feature, it is
recommended that it be set to Volume Change.
Consult your dealer or system administrator for the best
option available for MFK.
Multi-function Knob (MFK)
APX 4500 O2 CH
9NEXT >< PREVCONTENTS
Push-To-Talk (PTT) Button
IDENTIFYING RADIO CONTROLS
The PTT button on the side of the radio serves two basic
purposes:
• While a call is in progress, the PTT button allows the radio
to transmit to other radios in the call.
Press and hold down PTT button to talk. Release the PTT
button to listen.
The microphone is activated when the PTT button is
pressed.
• While a call is not in progress, the PTT button is used to
make a new call. Channel
Announcement
PTT
APX 4500 O2 CH
10 NEXT >< PREVCONTENTS
LED Indicator
IDENTIFYING STATUS INDICATORS
The LED indicator shows the operational status of your radio.
LEDs Red
Yellow
Green
APX 4500 O2 CH
11 NEXT >< PREVCONTENTS
IDENTIFYING STATUS INDICATORS
Solid red –Radio is transmitting.
Blinking red –Radio is transmitting at low battery condition.
Rapidly blinking red –Radio has failed the self test upon powering up or encountered a fatal error.
Solid yellow (Conventional Only) –Channel is busy.
Blinking yellow –Radio is receiving a secured transmission.
Solid green –Radio is powering up, or is on a non-priority channel while in the Scan List Programming mode.
Blinking green –Radio is receiving an individual or telephone call, or is on a Priority-Two channel while in the Scan List
Programming mode.
Rapidly blinking green –Radio is on a Priority-One channel while in the Scan List Programming mode.
APX 4500 O2 CH
12 NEXT >< PREVCONTENTS
Orange Emergency Alerts
Red Critical Alerts
Green CallAlerts
IDENTIFYING STATUS INDICATORS
APX 4500 O2 CH
13 NEXT >< PREVCONTENTS
Multi-function Knob - Concentric Ring LED
IDENTIFYING STATUS INDICATORS
The concentric ring LED blinks green when the MFK is using the secondary feature. See Multi-function Knob (MFK) to
understand the functionality of MFK.
If Intelligent Lighting is activated, the concentric ring LED will not blink green when the MFK is in the secondary mode.
The LED turns into solid color of orange, red or green depending on the status of Intelligent Lighting.
Concentric Ring LED Multi-function Knob (MFK)
Emergency Alerts Critical Alerts Call Alerts
APX 4500 O2 CH
14 NEXT >< PREVCONTENTS
Selecting a Zone
GENERAL RADIO OPERATION
A zone is a group of channels.
Procedure:
[Multi-Function Knob]
If zone is set as the primary mode,
1Turn the MFK until the display shows the desired zone.
2 Press the PTT button to transmit on the displayed zone.
If zone is not set as the primary mode, press the MFK once
and repeat step 1.
OR
[Menu]
1 to Zone.
2 Press the Menu Select button directly below Zone.
3 to the required zone.
OR
Rotate the MFK to the desired zone.
4Press the Menu Select button directly below Sel to confirm
the displayed zone.
5 Press the PTT button to transmit on the displayed zone.
APX 4500 O2 CH
15 NEXT >< PREVCONTENTS
OR
[Menu]
1 to Chan.
2 Press the Menu Select button directly below Chan.
3 to the required channel.
OR
Rotate the MFK to the desired channel.
4 Press the Menu Select button directly below Sel to confirm
the selected channel.
5 Press the PTT button to transmit on the displayed channel.
Selecting a Radio Channel
GENERAL RADIO OPERATION
A channel is a group of radio characteristics, such as
transmit/receive frequency pairs.
Procedure:
[Multi-Function Knob]
If channel is set as the primary mode,
1Turn the MFK until the display shows the desired channel.
2 Press the PTT button to transmit on the displayed channel.
If channel is not set as the primary mode, press the MFK
once and repeat step 1.
APX 4500 O2 CH
16 NEXT >< PREVCONTENTS
Scan Lists
ADVANCED FEATURES
Scan lists are created and assigned to individual channels/groups.
Your radio scans for voice activity by cycling through the channel/group sequence specified in the scan list for the current
channel/group.
Your radio supports different types of Scan Lists:
• Trunking Priority Monitor Scan List
• Conventional Scan List
• Talkgroup Scan List
SCAN
APX 4500 O2 CH
17 NEXT >< PREVCONTENTS
Menu Select Buttons
Scan Lists
Viewing a Scan List
ADVANCED FEATURES
Procedure:
1 to Scan.
2 Press/Hold the Menu Select button directly below SCAN.
3to Switch Zones
4to view the members on the list.
5 Press to exit the current display and return to the
Home screen.
Sel Del Rcl
Edit Scan
Zone A
ASTRO MDC
APX 4500 O2 CH
18 NEXT >< PREVCONTENTS
Scan Lists
Editing the Scan List
ADVANCED FEATURES
This feature lets you change scan list members and priorities.
Procedure:
1 to Scan.
2 Press the Menu Select button directly below ScnL.
The display shows the lists that can be changed.
3 to the entry you want to edit.
4 Press the Menu Select button directly below Sel to add
and/ or change the priority of the currently displayed
channel in the scan list.
OR
Press the Menu Select button directly below Del to delete
the currently displayed channel from the scan list.
OR
Press the Menu Select button directly below Rcl to view
the next member of the scan list.
5 to select more channels to be added or
deleted.
OR
Use the MFK to select additional channels to be added or
deleted.
OR
Use the keypad to go directly to additional channels to be
added or deleted.
6Press to exit scan list programming and return to the
Home screen.
APX 4500 O2 CH
19 NEXT >< PREVCONTENTS
Scan Lists
Changing the Scan List Status
ADVANCED FEATURES
Procedure:
1 Long press the preprogrammed Scan side button.
2to the member you want to edit.
3Press the button or press the Menu Select button
directly below Sel once to add the currently displayed
channel to the scan list.
OR
Press the button or press the Menu Select button
directly below Sel, one or more times to change the scan
list status icon of the currently displayed channel.
4 to select more channels to be added or
deleted.
OR
Use the MFK to select additional channels to be added or
deleted.
OR
Use the keypad to go directly to additional channels to be
added or deleted.
5Press to exit scan list programming and return to the
Home screen.
APX 4500 O2 CH
20 NEXT >< PREVCONTENTS
Scan Lists
Viewing and Changing the Priority Status
ADVANCED FEATURES
Procedure
1 Below the Sel, Del, and Rcl screen, press the Menu
Select button directly below Sel to view and/or change the
priority status of the currently displayed channel.
OR
Below the Sel, Del, and Rcl screen, press the button
or press the Menu Select button directly below Sel, one or
more times to view and/or change the scan list status icon
of the currently displayed channel.
A Scan icon indicates that the current channel is in the
scan list as a non-priority channel.
The LED lights up solid green.
OR
A Priority-Two Channel Scan icon indicates that the current
channel is in the scan list as the Priority-Two channel.
The LED blinks green.
OR
A Priority-One Channel Scan icon indicates that the current
channel is in the scan list as the Priority-One channel.
The LED rapidly blinks green.
You hear all traffic on the Priority- One channel, regardless
of traffic on non-priority channels.
OR
No icon indicates that the current channel is deleted from
the scan list.

Other manuals for APX Series

3

This manual suits for next models

2

Other Motorola Two-way Radio manuals

Motorola APX 8000XE Reference guide

Motorola

Motorola APX 8000XE Reference guide

Motorola APX4000 XH User manual

Motorola

Motorola APX4000 XH User manual

Motorola KEM-ML34301 User manual

Motorola

Motorola KEM-ML34301 User manual

Motorola CP150 User manual

Motorola

Motorola CP150 User manual

Motorola XPR 6300 User manual

Motorola

Motorola XPR 6300 User manual

Motorola MH Series User manual

Motorola

Motorola MH Series User manual

Motorola RDU4100+ User manual

Motorola

Motorola RDU4100+ User manual

Motorola APX 6000 2 User manual

Motorola

Motorola APX 6000 2 User manual

Motorola TALKABOUT T380 User manual

Motorola

Motorola TALKABOUT T380 User manual

Motorola APX 6000Li User manual

Motorola

Motorola APX 6000Li User manual

Motorola APX 6000Li User manual

Motorola

Motorola APX 6000Li User manual

Motorola EP350 Series User manual

Motorola

Motorola EP350 Series User manual

Motorola RMU2080 User manual

Motorola

Motorola RMU2080 User manual
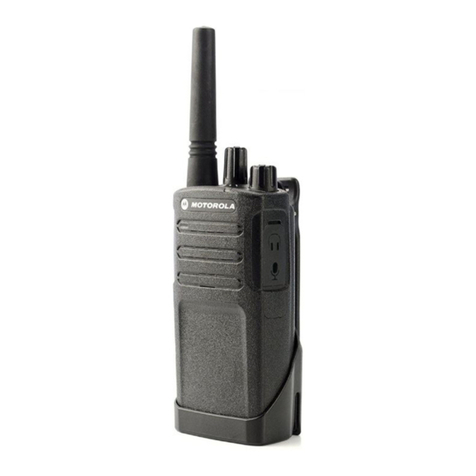
Motorola GM300 Series User manual

Motorola

Motorola GM300 Series User manual

Motorola FR50 User manual

Motorola

Motorola FR50 User manual

Motorola TLKR T40 User manual

Motorola

Motorola TLKR T40 User manual

Motorola APX NEXT User manual

Motorola

Motorola APX NEXT User manual

Motorola RDU4100 User manual

Motorola

Motorola RDU4100 User manual

Motorola Talkabout T5622 User manual

Motorola

Motorola Talkabout T5622 User manual

Motorola EP350 MX User manual

Motorola

Motorola EP350 MX User manual

Motorola TalkAbout T5900 Series User manual

Motorola

Motorola TalkAbout T5900 Series User manual

Motorola T200 User manual

Motorola

Motorola T200 User manual

Motorola APX 6000 User manual

Motorola

Motorola APX 6000 User manual

Motorola DTR600 User manual

Motorola

Motorola DTR600 User manual

Popular Two-way Radio manuals by other brands

Kenwood TK-2170 SERIES Service manual supplement

Kenwood

Kenwood TK-2170 SERIES Service manual supplement

stabo xm 3003 e operating instructions

stabo

stabo xm 3003 e operating instructions

Vertex Standard VX-131 Series Service manual

Vertex Standard

Vertex Standard VX-131 Series Service manual

Midland LXT460 Series brochure

Midland

Midland LXT460 Series brochure

Kailing Electronic KD-C51 user manual

Kailing Electronic

Kailing Electronic KD-C51 user manual

Motorola solutions Curve Series Quick reference guide

Motorola solutions

Motorola solutions Curve Series Quick reference guide

Radioddity GD-73 Series user manual

Radioddity

Radioddity GD-73 Series user manual

Oricom UHF380 operating instructions

Oricom

Oricom UHF380 operating instructions

Audiovox FR-314 owner's manual

Audiovox

Audiovox FR-314 owner's manual

Maxon S5E PMR446 user manual

Maxon

Maxon S5E PMR446 user manual

Sony ICB-U655 Service manual

Sony

Sony ICB-U655 Service manual

Olympia 1120 operating instructions

Olympia

Olympia 1120 operating instructions

Uniden GMR5089-2CKHS owner's manual

Uniden

Uniden GMR5089-2CKHS owner's manual

Garmin RINO 110 - Hiking GPS Receiver Owner's manual and reference guide

Garmin

Garmin RINO 110 - Hiking GPS Receiver Owner's manual and reference guide

Kenwood NEXEDGE NX-320 operating instructions

Kenwood

Kenwood NEXEDGE NX-320 operating instructions

Cobra microTALK PR100 owner's manual

Cobra

Cobra microTALK PR100 owner's manual

Retevis RT639 user manual

Retevis

Retevis RT639 user manual

Patriot PATRIOT SST "FOUR SERIES" owner's manual

Patriot

Patriot PATRIOT SST "FOUR SERIES" owner's manual

manuals.online logo
manuals.online logoBrands
  • About & Mission
  • Contact us
  • Privacy Policy
  • Terms and Conditions

Copyright 2025 Manuals.Online. All Rights Reserved.