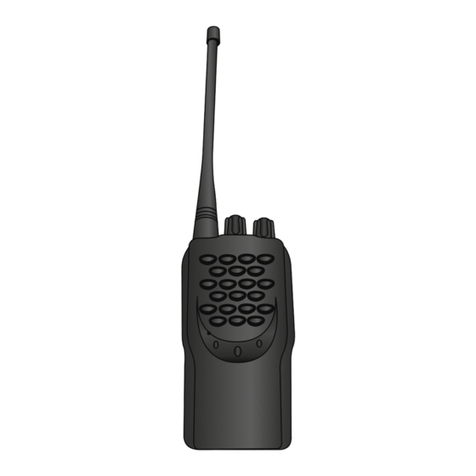
Mountain Lab Gear RD1 User manual

RD1
MADE IN CHINA
mountainlabgear.com
Distributed by: Mountain Sports Distribution
802 9 street N, Golden, British Columbia, Canada V0A1H2
Email: [email protected]
Facebook: facebook.com/MntnLab
2 - WAY RADIO
U s e r Manual

32
PTT
(Push-To-Talk)
Button
LED Flashlight
Button
Micro-USB Jack
Control and Function
Antenna
Microphone
LED Fashlight
Microphone
Speaker
(Call) Button
(Volume/Channel Down)
Button
(Volume/Channel
Up) Button
(Monitor) Button (NOAA/Lock) Button
(Menu/Power) Button
Package Contents (1) OR
• 1 x Belt Clip
• 1 x Micro-USB Charging Cable
• 1 x AC Adapter
• 3 x 1000mAh AA NiMH
Rechargeable Batteries
• 1 x RD1 User Manual
• 1 x Microphone
• 1 x Microphone Cover
Features and Specifications
22 FRS Channels
38 CTCSS Codes
VOX Function
10 Selectable Call Tone Alerts
Backlit LCD Display
Earphone Jack for Optional Headset
Roger Beep
Room Monitor
Battery Charger
Battery Level Meter
Channel Monitor
Channel Scan
Dual Watch
Keypad Lock
LED Flashlight
Battery Low Alert
• 1 x RD1 Two Way Radio
Package Contents (2)
• 2 x Belt Clip
• 2 x Micro-USB Charging Cable
• 2 x AC Adapter
• 6 x 1000mAh AA NiMH
Rechargeable Batteries
• 1 x RD1 User Manual
• 2 x Microphone
• 2 x Microphone Cover
• 2 x RD1 Two Way Radio
Thank you for your purchase of this Mountain Lab Gear 2WR Radio.
It has been designed to oer simple, reliable and eective
communication with maximum range.

4
YOUR NEW RADIO
The two-way radios operate on FRS frequencies, and can be
used in any country where FRS frequencies are authorized,
subject to applicable regulations.
Turning Your Radio On And O
To turn on the radio press and hold the POWER ON/OFF button
until a channel number appears and the radio beeps. Press and
hold POWER ON/OFF button until the display goes blank to turn o.
Monitor Function
It is good etiquette to monitor the channel activity before any
transmission to ensure that you do not interrupt other users already
on the channel. Press and hold "Mon" to check for current channel
activity. If there is nothing except static, the channel is clear for use.
The Battery Meter
TALKING AND LISTENING
Read this manual carefully before use.
Your radio has 22 channels. If you wish to talk to each other in a
group, all radios must be set to the same channel and interference
eliminator code (CTCSS). If you experience interference and need
to change channel, ensure that you change the channel and code
of all radios in your group.
Display
1
2
3
4
5
6
9
8
7
10
11
1. Room Monitor
2. Battery Level Meter
3. Channel Indicator
4. Scan Indicator
5. Dual Watch Indicator
6. Volume Level Indicator
8. Sub-code Indicator
7. NOAA Indicator
9. Keypad Lock Indicator
10. Transamit/Receive
Indicator
11. VOX Indicator
5
The battery meter located in the display indicates the remaining
battery level. When the battery is low, the final bar in the Battery
Low icon will blink and an audible tone will sound twice before the
radio shuts o. At this point, the batteries must be recharged.

Time-out Timer
The Time-out Timer feature helps extend battery life by preventing
accidental transmission. The radio will emit a continuous warning
tone after “PTT” button is pressed for 3 minutes and will stop
transmitting.
Keypad Lock
Scan
• For maximum clarity, hold radio 5 to 7 centimeters from mouth.
• Press and hold “PTT” and speak into the microphone. LED
indicator light glows continuously when transmitting.
• To receive messages, release “PTT”.
Volume
Channel
• Press “MENU” button and the channel number will begin to
flash.
• Use “UP” or “DOWN“ button to change channel.
• Press “PTT” button to set a new channel.
Interference Eliminator Code
• Press “MENU” button until the code number begins to flash.
• Use “UP” or “DOWN“ button to change the code.
• Press “PTT” to set new code.
You can specify a dierent code for each channel.
• To set a channel and code combination, press “MENU” button
and then press “UP” or “DOWN“ button to select the channel.
• Press “MENU” button again and then press “UP” or “DOWN “
button to select a code.
• Press “PTT” to exit the menu and to save the channel and code
combination.
To set another channel and code combination, repeat these steps.
67
Press "UP" button to increase or "DOWN" button to decrease
the volume. The volume level icon "U" is displayed. Select
volume level 1-8.
Interference eliminator codes help minimize interference from other
user groups on the same channel by providing a private code.
The Keypad Lock disables the “MENU”, “UP” and “DOWN“ buttons.
It also disables the scan function, but still allows you to use the “MON”
button to monitor the channel.
Press and hold the “LOCK” button for three seconds to lock or unlock
the keypad. When the radio is locked, the lock icon is displayed.
By scanning, you can monitor channels and codes for transmissions
and lock in on the one that is in use. This can be used to find someone
in your group who has accidentally changed channels and is
transmitting during your scan.
• To start scanning, briefly press and release the “MON” button.
• If you activate scan while your code is set to 0, then the radio will
check for any activity on each channel, regardless of the code in
use on that channel.
• If you activate scan while the code is set on 1 to 121, then the
radio will check for any activity on each channel, except the code
0 in use on that channel.
• While the radio is scanning, Scan Icon will display and the radio
will scroll through the channels.
• When activity is detected on a channel, the radio will stop
scanning and you will hear whatever transmissions are detected.

a. Press the Menu/Power button to enter the new setting and
proceed to other functions.
b. Press “PTT” button to save the setting and return to Stanby
mode.
To set VOX sensitivity
2. Press the “UP” or “DOWN” button to change the setting.
3. Choose one of the following:
a. Press the MENU button to enter the new setting and
proceed to other functions.
b. Press “PTT” button to save the setting and return to Standby mode.
Call Tone
Press “ ” button to transmit your call tone, alerting users on
the same channel and code that you are about to talk. Your radio
has 10 call tones to choose from.
To Set the Call Tone
• With the radio on, press “MENU” button until "C" appears in the
display.
• Current call tone setting will begin to flash.
• Press “UP” or “DOWN” to change and hear call tones while the
setting number is flashing.
• Press “PTT” to set new call tone.
Room Monitor
Enables your radio to detect voice/noises (according to the
sensitivity level set) and transmit back to the listening radio
• The radio’s display will show the channel and code on which
activity was detected.
• If you want to respond to the transmission, press “PTT” button
within 5 seconds and you can respond.
• The radio will resume scanning after 5 seconds of inactivity on the
channel.
• To stop scanning, briefly press and release “MON” button.
Advanced Scan
If scan stops on a channel that you don’t want to listen to, briefly
press “UP” or “DOWN“ button to resume scanning for the next active
channel.
Hands Free Use (VOX)
VOX allows you to transmit "hands-free" by talking while using VOX
accessories connected to the radio (not included).
Note: Turn your radio o before you place the accessory on your
head or in your ear.
How To Use The VOX Feature
In VOX mode, your radio can be used “hands-free,” automatically
transmitting when you speak. You can set the VOX sensitivity level
to fit the volume of your voice and avoid transmissions triggered by
background noise.
To turn VOX mode on or o
1. Press the MENU button until the VOX icon flashes on the
display. The current On or O setting is displayed.
2. Press the “UP” or “DOWN” button to turn VOX On or O.
3. Choose one of the following:
89
1. Press the Menu/Power button until the VOX sensitivity icon "L"
flashes, and the current sensitivity level is displayed (01-05).

3.Choose one of the following:
a. Press the Menu/Power button to return to Standby mode.
b. Press “PTT” button to save the setting and return to Standby
mode.
Dual watch receiver [dual scan]
without pushing the “PTT” button. The radio with Room Monitor enabled
is not capable of receiving any transmissions.
To turn Room Monitor ON/OFF
1. Press “MENU” button until the Room “Monitor” icon blinks.
2. Press the "UP" or "DOWN" button to turn the room monitor On or O.
3. Choose one of the following:
a. Press the “MENU” button to enter the new setting and
proceed to other functions.
b. Press “PTT” button to save the setting and return to Stanby
mode.
Note:
To set Room Monitor sensitivity
2. Press the “UP” or “DOWN” button to change the setting.
3. Choose one of the following:
a. Press the Menu/Power button to enter the new setting and
proceed to other functions.
b. Press “PTT” button to save the setting and return to Standby mode.
To turn Key Tone & Roger Beep On or O
10 11
When the voice or noise in the monitored room continues
for more than 60 seconds, the monitoring radio will
discontinue monitoring for 5 seconds, then resume.
1. Press the "MENU" button until the Room Monitor sensitivity icon
"b" flashes and the current sensitivity level is displayed.
1. Press the "MENU" button until “P” (the Key Tone & Roger Beep) icon
flashes on the display. The current On or O setting is displayed.
2. Press the “UP” or “DOWN” button to turn Key Tone & Roger Beep On or O.
With Dual Watch mode enabled, the radio listens for transmissions on two
separate channels—the main (home) channel, and the channel set in Dual
Watch mode. The Dual Watch mode enabled is indicated by the "2CH" icon.
When there is no signal in either the main channel or Dual Watch channel in
Standby mode, the main channel will be indicated by the display. When the
main channel is active, the display will not change. When the Dual Watch
channel is active, the display will show the Dual Watch channel. After 5
seconds of no activity on the Dual Watch channel, the display will revert to the
main channel.
To set Dual Watch Mode
1. Press "MENU" button until the "2CH" icon is displayed.
2. Press the "UP" or "DOWN" button to select the channel you wish to monitor in
addition to the main channel. The interference eliminator code (sub-code) is
dictated by that channel's sub-code as selected in the main channel
selection, and cannot be changed here.
3. Choose one of the following:
a. Press the "MENU" button to enter the new setting and proceed to other
functions.
b. Press “PTT” button to save the setting and return to Standby mode.

12 13
NOAA (WX) Operation
WEATHER CHANNEL FREQUENCIES:
Turning Weather Channel Reception On and O
1. Press the "WX" button to turn weather reception on.
2. Press the "WX" or "PTT" button to turn the weather reception o and then
back on.
Setting the Weather Channel
Your radio receives weather frequencies:
1. After turning weather reception on, press the “MENU” button, the current
channel flashes.
2. Press “UP” or “DOWN” button to select the appropriate channel with good
reception in your area.
3. Press "WX" button to save the weather channel setting.
Setting the Weather Alert
Your radio can be set to respond to Weather Radio emergency messages.
A special alarm tone sounds an alert and turns on the weather receiver to
give you immediate weather and emergency information.
1. After turning weather reception on, press “MENU” button twice, On/O
displays.
2. Press “UP” or “DOWN” button to select On/O. If you activate Weather Alert
and return to two-way mode, "WX" ALERT icon will display.
3. Press "WX" button to save the Weather Alert setting.
4. Press "PTT" button to return to two-way mode.
As with two-way radio reception, weather channel reception depends on
how close you are to a transmitter and whether you are indoors or
outdoors. Because weather channels are transmitted without codes, they
may contain static or noise. Weather Alert will not function while actively
transmitting or receiving in two-way mode.
Code Frea(Hz) Code Frea(Hz) Code Frea(Hz) Code Frea(Hz)
CTCSS FREQUENCY (38 groups)
1
2
3
4
5
6
7
8
9
10
11
12
13
14
15
16
17
18
19
20
67.0
71.9
74.4
77.0
79.7
82.5
85.4
88.5
91.5
94.8
97.4
100.0
103.5
107.2
110.9
114.8
118.8
123.0
127.3
131.8
21
22
23
24
25
26
27
28
29
30
136.5
141.3
146.2
151.4
156.7
162.2
167.9
173.8
179.9
186.2
31
32
33
34
35
36
37
38
192.8
203.5
210.7
218.1
225.7
233.6
241.8
250.3
WX Frea(MHz) WX Frea(MHz) WX Frea(MHz) WX Frea(MHz)
1
2
3
4
5
6
162.550
162.400
162.475
162.425
162.450
162.500
7
8
9
162.525
161.650
161.775
10
11
161.750
162.000
Reset function
To reset the radio to default settings, first ensure that the radio is turned o, then
simultaneously press and hold the "MENU" and "LOCK" buttons until the radio turns on.

4) DO NOT use any portable radio that has a damaged antenna.
If a damaged antenna comes into contact with your skin, a minor
burn can result.
Batteries
All batteries can cause property damage and/or bodily injury such
as burns if a conductive material touches exposed terminals. The
conductive material may complete an electrical circuit (short circuit)
and become hot.
• Exercise care when removing NiMH or AA batteries. Do not use
sharp or conductive tools to remove these batteries.
• Do not discard your battery in a fire.
• Do not replace the battery in any area labeled “Hazardous
Atmosphere”.Any sparks created in a potentially explosive
atmosphere can cause explosion or fire.
• Do not disassemble, crush, puncture, shred or otherwise attempt
to change the form of your battery.
• Do not dry a wet battery or damp battery with an appliance or
heat source, such as a hair dryer or microwave oven.
• If the radio battery contact area has been submerged in water,
dry and clean the battery contacts before attaching the battery
to the radio.
• Do not attempt to charge alkaline batteries.
Warnings
Product safety and RF Exposure for two way radio:
14 15
Before using this two way radio, please read the manual
which contains important operating instructions for safe
usage, RF EnergyAwareness, control information and
operational instructions for compliance with RF Energy
Exposure limits in applicable national and international
standards, and also read the operational instructions for
safe use.
Test position and configuration Head SAR was performed with the
device configured in the positions according to IEEE1528, and face
up SAR was performed with the device 25mm from the phantom.
Body SAR was performed with the belt clip on the device 0 mm
from the phantom. Body SAR was also performed with the headset
attached and without.
Antennas
2) For safe operation, the antenna for the product shall be least
25mm away from your face when speaking.
CAUTION
WARNING
WARNING
1) The antenna is unique to this product. Please do not attempt to alter or replace.
3) Attempting to alter or replace the antenna will aect performance
and void the warranty.
• Exercise care in handling any charged battery, particularly when
placing it inside a pocket or enclosed container with metal objects.

16 17
Battery Charger Safety Instructions
1. Turn the radio o when charging the battery.
2. Do not expose the charger to outside environment. Chargers
should only be used indoors.
3. Do not operate or disassemble the charger. Do not use a charger
that has been dropped or damaged in any way.
4. Never alter the AC cord or plug provided with the unit. If the plug
will not fit the outlet, have the proper outlet installed by a qualified
electrician.An improper condition can result in a risk of electric
shock.
5. To reduce the risk of damage to the cord or plug, pull the plug
rather than the cord when disconnecting the charger from theAC
receptacle.
6. To reduce the risk of electric shock, unplug the charger from the
outlet before attempting any maintenance or cleaning.
7. Use of an attachment not recommended or sold by Mountain Lab Gear
may result in a risk of fire, electric shock or personal injury.
8. Make sure the cord is located so it will not be stepped on, tripped
over or subjected to damage or stress.
9. An extension cord should not be used unless absolutely necessary.
Use of an improper extension cord could result in a risk of a fire
and/or electric shock. If an extension cord must be used, make
sure that:
• The pins on the plug of the extension cord are the same number,
size and shape as those on the plug of the charger.
• The extension cord is properly wired and in good condition.
10. The supply cord of theAC adaptor cannot be replaced. If the
cord is damaged, call customer service.
CAUTION
The information listed below provides the user with the information
needed to make him or her aware of RF exposure, and what to do
to as-sure that this radio operates with the FCC RF exposure limits
of this radio.
Electromagnetic Interference/Compatibility
Note: Nearly every electronic device is susceptible to electromag-
netic interference (EMI) if inadequately shielded, designed
or otherwise configured for electromagnetic compatibility.
During transmissions, this radio generates RF
energy that can possibly cause interference with other
devices or systems.
Facilities
To avoid electromagnetic interference and/or compatibility conflicts,
turn o your radio in any facility where posted notices instruct you
to do so. Hospitals or health care facilities may be using equipment
that is sensitive to external RF energy.
Aircraft
When instructed to do so, turn o your radio when onboard an
aircraft. Any use of a radio must be in accordance with applicable
regulations per airline crew instructions.
Medical Devices – Pacemakers, Defibrillators or other Implanted Medical Devices
WARNING

For Vehicle with Air Bags
Refer to the vehicle manufacturer’s manual prior to installation of
electronic equipment to avoid interference with air bag wiring. Do
not place a portable radio in the area over an air bag or in the air
bag deployment area. Air bags inflate with great force. If a portable
radio is placed in the air bag deployment area and the air bag
inflates, the radio may be propelled with great force and cause
serious injury to occupants of the vehicle.
Potentially Explosive Atmosphere
Turn o your radio prior to entering any area with a potentially
explosive atmosphere. Only radio types that are especially
qualified should be used in such areas as “Intrinsically Safe”. Do
not remove, install or charge batteries in such areas. Sparks in a
potentially explosive atmosphere can cause an explosion or fire
resulting in bodily injury or even death.
Note: The areas with potentially explosive atmosphere referred
to above include fueling areas such as below decks on
boats, fuel or chemical transfer or storage facilities, areas
where the air contains chemicals or particles (such as
grain, dust or metal powders) and any other area where
you would normally be advised to turn o your vehicle
engine. Areas with potentially explosive atmospheres are
often – but not always posted.
Persons with pacemakers, implantable cardioverter
defibrillators (ICDs) or other active implantable
medical devices (AIMD) should:
• Consult with their physicians regarding the potential risk of
interference from radio frequency transmitters, such as portable
radios (poorly shielded medical devices may be more susceptible
to interference).
• Turn the radio OFF immediately if there is any reason to suspect
that interference is taking place.
• Do not carry the radio in a chest pocket or near the implantation
site, and carry or use the radio on the opposite side of their body
from the implantable device to minimize the potential for
interference.
Hearing Aids
Some digital wireless radios may interfere with some hearing aids
In the event of such interference, you may want to consult your
hearing aid manufacturer to discuss alternatives.
Other Medical Devices
If you use any other personal medical device, consult the
manufacturer of your device to determine if it is adequately
shielded from RF energy. Your physician may be able to assist
you in obtaining this information.
Use of Communication Devices While Driving
Always check the laws and regulations on the use of radios in
the areas where you drive.
• Give full attention to driving and to the road.
• Use hands-free operation, if available.
• Pull o the road and park before making or answering a call, if
driving conditions or regulations so require.
18 19

Technical specifications and warnings (US)
Technical specifications (US)
Technical Parameters (US)
Operating frequency: 462~467MHz
Output Power: ≤2.0W
Channels: 22 FRS
Modulation type: F3E
Power source: AA Alkaline 4.5V DC /
NiMH battery 3.6V DC 1000mAh
Channel and frequency correspondence list (US)
Note :Above channels are FRS license free channels
Blasting Caps and Areas
To avoid possible interference with blasting operations, turn o
your radio when you are near electrical blasting caps, in a
blasting area, or in areas posted “Turn o two-way radios”. Obey
all signs and instructions.
Warning: CHOKING HAZARD – Small Parts. Not for children
under 3 years.
Attention! RISQUE D’ÉTOUFFEMENT – Contient de petits
éléments. Ne convient pas aux enfants de moins de 3 ans
Advertencia: PELIGRO DE ASFIXIA – Contiene piezas
pequeñas. No conveniente para niños menores de 3 años.
Achtung: ERSTICKUNGSGEFAHR – Kleinteile. Nicht für
Kinder unter 3 Jahren geeignet.
Waarschuwing: VERSTIKKINGSGEVAAR – Bevat kleine
onderdelen. Niet geschikt voor kinderen jonger dan 3 jaar.
Attenzione: RISCHIO DI SOFFOCAMENTO – Contiene pezzi
di piccole dimensioni. Non adatto a bambini di età inferiore a
3 anni.
Aviso: RISCO DEASFIXIA – Peças pequenas. Produto não
recomendado para crianças com menos de 3 anos.
20 21
1
2
3
4
5
6
7
8
9
10
11
462.5625
462.5875
462.6125
462.6375
462.6625
462.6875
462.7125
467.5625
467.5875
467.6125
467.6375
2.0
2.0
2.0
2.0
2.0
2.0
2.0
0.5
0.5
0.5
0.5
Channel Frequencies
(MHz)
Power
-Watts
12
13
14
15
16
17
18
19
20
21
22
467.6625
467.6875
467.7125
462.5500
462.5750
462.6000
462.6250
462.6500
462.6750
462.7000
462.7250
0.5
0.5
0.5
2.0
2.0
2.0
2.0
2.0
2.0
2.0
2.0
Channel Frequencies
(MHz)
Power
-Watts

SAFETY INFORMATION
Your wireless hand-held portable transceiver contains a low
power transmitter. This product sends out radio frequency (RF)
signals when the Push-to-Talk (PTT) button is pressed. The
device is authorized to operate at a duty factor not to exceed 50%
In August 1996, the Federal Communications Commissions (FCC)
adopted RF exposure guidelines with safety levels for hand-held
wireless devices.
To control your exposure and ensure compliance with the general
population or uncontrolled environment exposure limits, transmit
no more than 50% of the time. The radio generates measurable
RF energy exposure only when transmitting.
Any Changes or modifications not expressly approved by the
party responsible for compliance could void the user’s authority
to operate the equipment and should not be made. To comply
with FCC requirements, transmitter adjustments should be
made only by or under the supervision of a person certified as
technically qualified to perform transmitter maintenance and
repairs in the private land mobile and fixed services as certified
by an organization representative of the user of those services.
Replacement of any transmitter component (crystal, semiconductor,
etc) not authorized by the FCC equipment authorization for this
Warnings (US)
Your Retevis radio is designed to comply with the following national
and international standards and guidelines regarding exposure of
human beings to radio frequency electromagnetic energy:
- United States Federal Communications Commission, Code of
Federal Regulations: 47 CFR part 2.1093
- IEEE Std. 1528:2013 and KDB447498, Evaluating Compliance
with FCC Guidelines for Human Exposure to Radio Frequency
Electromagnetic Fields.
- American National Standards Institute (ANSI)/Institute of Electrical
& Electronic Engineers (IEEE) C95. 1-2005
- Institute of Electrical and Electronic Engineers (IEEE) C95.3-2002
- International Electrotechnical Commission IEC62209-2:2010
This product is compliance to FCC RF Exposure requirements and
refers to FCC website
https://apps.fcc.gov/oetcf/eas/reports/GenericSearch.cfm
search for FCC ID: 2AAR8RETEVISRD1 to gain further information
include SAR Values.
22 23
CAUTION
WARNING
WARNING
WARNING

radio could violate FCC rules.
Note: Use of this radio outside the country where it was intend
to be distributed is subject to government regulations and
may be prohibited.
Body-Worn Operation
24
WARNING
Technical specifications and warnings (Canada)
Technical Parameters (Canada)
Operating frequency: 462~467MHz
Output Power: ≤2.0W
Channels: 22 FRS/GMRS:
Modulation type: F3E
Power source: AA Alkaline 4.5V DC /
NiMH battery 3.6V DC 1000mAh
Channel and frequency correspondence list (Canada)
Note: Above channels are FRS/GMRS license free channels
25
1
2
3
4
5
6
7
8
9
10
11
462.5625
462.5875
462.6125
462.6375
462.6625
462.6875
462.7125
467.5625
467.5875
467.6125
467.6375
2.0
2.0
2.0
2.0
2.0
2.0
2.0
0.5
0.5
0.5
0.5
Channel Frequencies
(MHz)
Power
-Watts
12
13
14
15
16
17
18
19
20
21
22
467.6625
467.6875
467.7125
462.5500
462.5750
462.6000
462.6250
462.6500
462.6750
462.7000
462.7250
0.5
0.5
0.5
2.0
2.0
2.0
2.0
2.0
2.0
2.0
2.0
Channel Frequencies
(MHz)
Power
-Watts
To maintain compliance with FCC’s RF exposure guidelines, for body-worn
operation, this radio has been tested and meets the FCC RF exposure
guidelines when used with accessories supplied or designated for this
product. Use of other accessories may not ensure compliance with FCC RF
exposure guidelines.
If you wear the radio on your body when transmitting always use an
approved belt clip, holster, case, or body harness for this product.
When not using an approved accessory, always ensure that the radio and its
antenna are at least 1 inch (2.5cm) from your body when transmitting.

- Ministry of Health (Canada) Safety Code 6 & Industry Canada
RSS-102.
- International Commission on Non-lonizing Radiation Protection
(ICNIRP).e.
- International Electrotechnical Commission IEC62209-2:2010
IC Radiation Exposure Statement
This EUT is compliance with SAR for controlled exposure limits
in IC RSS-102 and had been tested in accordance with the
measurement methods and procedures specified in IEEE 1528
and IEC 62209, this equipment should be installed and operated
with minimum distance 1 cm between the radiator and your body.
This device and its antenna(s) must not be co-located or operating
in conjunction with any other antenna or transmitter.
Warnings (Canada)
This device complies with Industry Canada licence-exempt RSS
standard(s). Operation is subject to the following two conditions
(1) This device may not cause interference, and
(2) This device must accept any interference, including interference
that may cause undesired operation of the device.
Compliance with RF Exposure Standards
This radio is designed to comply with the following national
and international standards and guidelines regarding exposure of
human beings to radio frequency electromagnetic energy:
- American National Standards Institute (ANSI)/Institute of Electrical
& Electronic Engineers (IEEE) C95. 1.
- IEEE Std. 1528:2013 and KDB447498, Evaluating Compliance
with FCC Guidelines for Human Exposure to Radio Frequency
Electromagnetic Fields.
26 27
CAUTION
CAUTION
WARNING
Please refer to the following websites and Guidance documents
for more information on what RF energy exposure is and how to
control your exposure to assure compliance with established RF
exposure limits: RSS-102, Safety Code 6 and www.who.int/en/.
CAUTION

RADIO BIDIRECTIONNELLE
RD1
Guide d'utilisation
29

31
30
Merci d’avoir fait l’achat de cette radio bidirectionnelle Mountain Lab Gear.
Elle a été conçue pour permettre une communication simple, fiable et eicace
avec une portée maximale.
L'ensemble comprend (1) ou
Caractéristiques et spécifications
L'ensemble comprend (2)
1 x Radio Bidirectionnelle RD1
1 x Attache pour ceinture
1 x Câble de chargement
Micro-USB
1 x Adaptateur AC
3 x Piles rechargeables
1000mAh AA NiMH
1 x Mode d’emploi RD1
1 x Microphone
22 Canaux FRS
38 Codes CTCSS
Fonctionnalité VOX
Choix de 10 tonalités d’appel
Écran LCD retro-éclairé
Port pour connexion d’un
casque d’écoute facultatif
Bip Roger
Moniteur de l’achalandage
Chargeur à piles
NOAA
Indicateur du niveau des piles
Moniteur de canaux
Scanner de canaux
Double surveillance
Verrouillage de l’écran
Lampe LED
Avertissement de piles faibles
2 x Radio Bidirectionnelle RD1
2 x Attache pour ceinture
2 x Câble de chargement
Micro-USB
2 x Adaptateur AC
6 x Piles rechargeables
1000mAh AA NiMH
1 x Mode d’emploi RD1
2 x Microphone
Touche APP
(appuyez pour parler)
Touche Lampe LED
Port micro-USB
Contrôle et fonctionnalité
Antenne
Microphone
Lampe LED
Port pour casque d’écoute
Haut-parleur
Touche d’appel
Touche NOAA/verrouillage
DOWN Touche diminution Volume/Canaux
UP Touche d’augmentation
Volume/Canaux
Touche moniteur (NOAA/Lock) Button
Touche MENU

VOTRE NOUVELLE RADIO
Mise en marche de votre radio
Fonctionnalité de monitorage
Indicateur de pile
PARLER ET ÉCOUTER
Aichage
1
2
3
4
5
6
9
8
7
10
11
32 33
L’indicateur de pile vous informe du niveau de charge des piles.
Lorsque les piles sont faibles, la dernière barre de l’icône va
clignoter et un avertissement sonore se fera entendre 2 fois avant
que la radio ne s’éteigne. Vos piles devront être rechargées.
Lisez ce mode d’emploi attentivement avant d’utiliser la radio.
La radio a 22 canaux. Si vous souhaitez communiquer avec d’autres
personnes du même groupe, toutes les radios doivent être réglées
sur le même canal et code d’élimination des interférences (CTSCC).
Si vous avez tout de même des interférences et devez changer de
canal, assurez-vous de changer le canal et le code de toutes les
radios dans votre groupe.
1. Moniteur de
l’environnement
2. Niveau de pile
3. Canal
4. Scan
5. Double surveillance
6. Volume
7. NOAA
8. Sous-code
9. Verrouillage des touches
10. Transmission/Réception
11. VOX
Ces radios bidirectionnelles utilisent les fréquences FRS et
peuvent être utilisées dans tous les pays où les fréquences
FRS sont permises, et selon les réglementations en place.
Pour allumer votre radio, maintenez enfoncée la touche MENU
jusqu’à ce qu’un numéro de canal apparaisse et que la radio
émette un bip. Maintenez enfoncée la touche MENU jusqu’à ce
que l’écran soit vide pour éteindre votre radio.
Il est préférable de surveiller l’achalandage sur un canal avant
de commencer à transmettre afin de vous assurer de ne pas
interrompre d’autres usagers utilisant ce canal. Maintenez
enfoncée la touche MON afin d’analyser l’achalandage actuel
sur ce canal. Si, en retour, vous n’entendez rien d’autre que de
la statique, c’est que le canal est libre.

Minuterie
Verrouillage des touches
Scan
Volume
Canaux
Code d’élimination des interférences (CTCSS)
34 35
Appuyez sur la touche UP pour augmenter le volume ou
DOWN pour le diminuer. Le niveau du volume est aiché sur
l’écran. Choisissez un niveau entre 1 et 8.
La fonction Minuterie permet de prolonger l’autonomie des
piles en évitant les transmissions accidentelles. Après que la
touche APP ait été relâchée, la radio émettra un avertissement
continu pendant 3 minutes et cessera de transmettre.
Le verrouillage désactive les touches MENU, UP et DOWN. Cela
désactive également la fonction de scan est également, mais vous
pouvez tout de même utiliser la touche MON pour surveiller le canal.
Maintenez la touche LOCK enfoncée pendant 3 secondes afin de
verrouiller ou déverrouiller les touches. Lorsque la radio est verrouillée,
l’icône de verrou sera aichée.
En scannant, vous pouvez vérifier s’il y a des transmissions sur les
canaux et les codes et ainsi choisir ceux que vous conviennent. Plus
important encore, vous pouvez ainsi chercher quelqu’un appartenant à
votre groupe qui aurait accidentellement changé de canal si celui-ci
parle pendant votre scan.
• Pour commencer à scanner, appuyez brièvement sur la touche MON. Si
vous activez le scan alors que votre code est sur 0, la radio
recherchera toute activité sur tous les canaux, peu importe le code
utilisé.
• Si vous activez le scan alors que le code est de 1 à 38, la radio
recherchera toute activité sur tous les canaux, sauf pour le code 0.
• Lorsque la radio scanne, l’icône Scan sera aiché et les canaux
défileront.
• Lorsqu’une activité est détectée sur un canal, la radio arrêtera de
scanner et vous entendrez ce qui est transmis.
• Pour une plus grande clarté, tenez la radio à 5 ou 7 cm de votre bouche.
• Maintenez la touche APP enfoncée et parlez dans le microphone. L’indicateur
LED s’éclairera lorsque vous transmettrez.
• Pour recevoir des messages, relâchez la touche APP.
• Appuyez sur la touche MENU et le numéro du canal clignotera.
• Utilisez les touches UP et DOWN pour changer de canal.
• Appuyez sur APP lorsque vous êtes sur le canal de votre choix.
Les codes d’élimination des interférences aident à minimiser les interférences
provenant d’autres groupes sur le même canal en vous orant un choix de
code.
• Appuyez sur la touche MENU jusqu’à ce que le numéro de code clignote.
• Utilisez les touches UP et DOWN pour changer de code.
• Appuyez sur APP lorsque vous êtes sur le code de votre choix.
Vous pouvez choisir un code diérent pour chaque canal.
• Pour établir une combinaison entre un canal et un code, appuyez sur la
touche MENU et utilisez les touches UP et DOWN pour changer de canal.
• Appuyez sur la touche MENU à nouveau et utilisez les touches UP et DOWN
pour changer de code.
• Appuyez sur APP pour sortir du MENU et sauvegarder la combinaison
canal/code établie.
Pour établie une autre combinaison canal/code, répétez ces étapes.

Appuyez sur la touche “ ” pour transmettre votre tonalité d’appel,
avertissant ainsi les usagers sur le même canal et code que vous allez
parler. Votre radio a 10 diérentes tonalités d’appel parmi lesquels vous
pouvez choisir.
Pour choisir une tonalité d’appel
• Lorsque la radio est allumée, appuyez sur la touche MENU jusqu’à ce
qu’un « C » apparaisse.
• La tonalité présentement utilisée clignotera.
• Appuyez sur UP et DOWN afin de changer et écouter les diérentes
tonalités.
• Appuyez sur APP pour sélectionner la nouvelle tonalité.
Permet à votre radio de détecter les voix/bruits (selon le niveau de sensibilité) et
de transmettre aux radios à l’écoute sans avoir à appuyer sur la touche APP. La
radio moniteur ne peut pas recevoir de transmission lorsqu’elle utilise ce mode.
Pour ajuster la sensibilité de VOX
Tonalité d’appel
Moniteur d’environnement
Faire continuer le scan
Mains libres (VOX)
Utilisation de la fonctionnalité VOX
Activer/désactiver la fonction VOX
36 37
• L’écran aichera le canal et le code sur lesquels l’activité a été détectée.
• Si vous voulez répondre à la transmission, appuyez sur la touche APP
dans les 5 secondes.
• La radio recommencera à scanner après 5 secondes d’inactivité sur le
canal.
• Pour cesser le scan, appuyez brièvement sur la touche MON.
a. Appuyez sur MENU pour entrer le nouveau réglage et passer à une autre
fonction.
b. Appuyez sur la touche APP pour enregistrer le réglage et retourner au
mode veille.
1. Appuyez sur la touche MENU jusqu’à ce que l’icône « L » de sensibilité VOX
clignote et que le niveau de sensibilité soit aiché (01-05).
2. Appuyez sur UP ou DOWN pour changer les réglages.
3. Choisissez l’une des options suivantes :
a. Appuyez sur MENU pour entrer le nouveau réglage et passer à une
autre fonction.
b. Appuyez sur la touche APP pour enregistrer le réglage et retourner
au mode veille.
Si le scan s’arrête sur un canal auquel vous ne voulez pas écouter,
appuyez brièvement sur les touches UP ou DOWN afin de remettre le scan
en marche.
VOX vous permet de transmettre tout en ayant les mains libres en utilisant
des accessoires VOX (non-inclus) connectés à votre radio.
Note : Éteignez la radio avant de mettre les accessoires sur votre tête ou
vos oreilles.
Dans le mode VOX, votre radio peut être utilisé sans avoir à appuyer sur la
touche APP, tout simplement en transmettant automatiquement lorsque
vous parlez. Vous pouvez ajuster le niveau de sensibilité du VOX afin qu’il
corresponde au volume de votre voix et ainsi d’éviter les transmissions
accidentelles de bruits ambiants.
1. Appuyez sur la touche MENU jusqu’à ce que l’icône VOX clignote. « On »
sera aiché sur VOX est activé. « O » sera aiché si VOX est désactivé.
2. Appuyez sur UP ou DOWN pour activer ou désactiver VOX.
3. Choisissez l’une des options suivantes :

Double surveillance [dual scan]
Pour activer/désactiver la fonction moniteur d’environnement
Pour ajuster la sensibilité du moniteur d’environnement
Pour activer/désactiver la tonalité des touches et le bip Roger
38 39
1. Appuyez sur la touche MENU jusqu’à ce que l’icône « P » clignote. Il
sera aiché si la fonction est activée (ON) ou désactivée (OFF).
2. Appuyez sur UP ou DOWN pour activer ou désactiver la tonalité des
touches et le bip Roger.
3. Choisissez l’une des options suivantes :
a. Appuyez sur MENU pour entrer le nouveau réglage et passer à
une autre fonction.
b. Appuyez sur la touche APP pour enregistrer le réglage et
retourner au mode veille.
En mode Dual Scan, la radio recherche toute activité sur deux canaux séparés –
le principal et le secondaire, celui en double surveillance. L’activation du mode
double surveillance est indiquée par l’icône « 2CH ». Lorsqu’il n’y a aucun signal
dans aucun des deux canaux, le canal principal sera aiché sur l’écran. Lorsque
le canal principal est actif, l’aichage ne changera pas. Lorsque le canal
secondaire est actif, l’aichage changera pour le canal secondaire. Après 5
secondes d’inactivité sur le canal secondaire, l’aichage reviendra au canal
principal.
Pour activer la double surveillance
1. Appuyez sur la touche MENU jusqu’à ce que l’icône « 2CH » s’aiche.
2. Appuyez sur UP ou DOWN afin de sélectionner le canal secondaire que vous
voulez surveiller. Le code d’élimination des interférences sera le dernier utilisé.
Il n’est pas possible de le changer sous cette fonctionnalité.
3. Choisissez l’une des options suivantes :
a. Appuyez sur MENU pour entrer le nouveau réglage et passer à une autre
fonction.
b. Appuyez sur la touche APP pour enregistrer le réglage et retourner au
mode veille.
1. Appuyez sur la touche MENU jusqu’à ce que le logo du moniteur de
l’environnement clignote.
2. Appuyez sur UP ou DOWN pour activer (ON) ou désactiver (OFF) le
moniteur de l’environnement.
3. Choisissez l’une des options suivantes :
a. Appuyez sur MENU pour entrer le nouveau réglage et passer à une
autre fonction.
b. Appuyez sur la touche APP pour enregistrer le réglage et retourner
au mode veille.
Note : Lorsque la voix ou le bruit dans la pièce surveillée continue pour plus
de 60 secondes, la radio cessera de transmettre pour 5 secondes
puis reprendra.
1. Appuyez sur la touche MENU jusqu’à ce que l’icône « b » de la sensibilité
du moniteur de l’environnement clignote et que le niveau de sensibilité
soit aiché.
2. Appuyez sur UP ou DOWN pour changer les réglages.
3. Choisissez l’une des options suivantes :
a. Appuyez sur MENU pour entrer le nouveau réglage et passer à une
autre fonction.
b. Appuyez sur la touche APP pour enregistrer le réglage et retourner
au mode veille.
Table of contents
Languages:
Other Mountain Lab Gear Two-way Radio manuals

