Mountain BASE CAMP User manual
QUICK START GUIDE
BASE CAMP™

TABLE OF CONTENTS
1. MAIN PAGE
2. SETTINGS PAGE
3. EVEREST KEYBOARD
Thank you for choosing Mountain to help
you to Reach your Summit! In this guide,
we’ll introduce you to Base Camp™,
enabling you to customize your Mountain
exactly to your liking.

GENERAL
Base Camp’s user-centric design was
specically created to be as easy and
straight forward as possible. It ows from
left to right, so that every conguration
you’d like to make starts on the left
hand side and walks through submenus
to the right. The image below shows the
recording of a macro in 5 easy steps that
include:
1. Choosing the Macro menu,
2. Creating a new Macro,
3. Selection of the devices to be recorded,
4. Recording
5. Playback settings and saving.
1 2 3 4 5
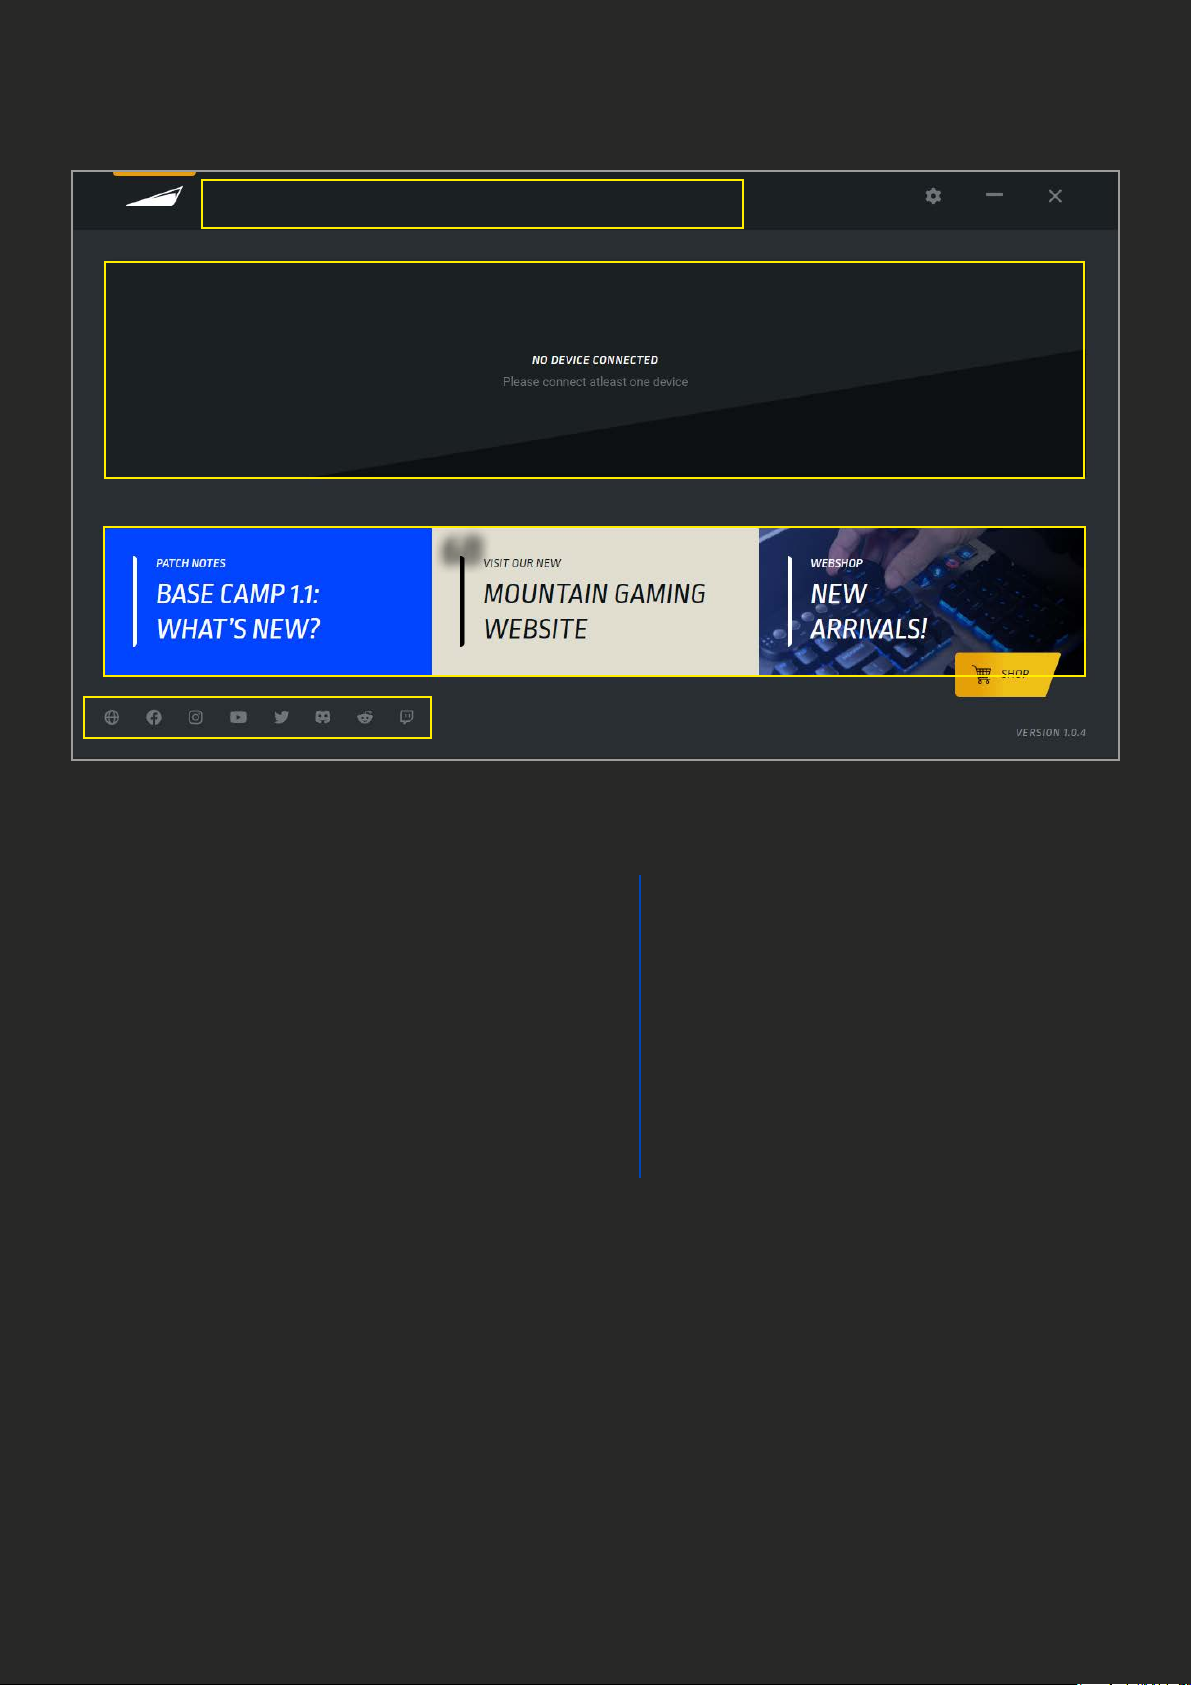
1. MAIN PAGE
1. Main menu button (Mountain logo), this
button can be clicked at any time to return
to the home screen
Note: the yellow highlight above the Mountain
logo as shown in above screenshot highlights
the currently active page.
2. Current Base Camp Software version,
updates can be performed through settings
menu (see paragraph 2)
3. Selecting the Mountain product you wish
to congure
4. Software Settings button (see this guide
paragraph 2)
5. Press – to minimize Base Camp and send
it to system tray, X to close it
6. These buttons will lead you to:
a. Our support page including
manuals, FAQ, guides and contact
information.
b. Our website https://mountain.gg
c. Our store
https://mountainggshop.com that
carries not only Mountain
products but carefully
selected accessories
and upgrades for all your keyboard
needs
7. Links to our social channels
13B
3A
6A 6B 6C
2
7
45

2. SOFTWARE SETTINGS
1. Version will show you the currently
installed version of Base Camp
2. Manually check for updates of Base
Camp (rmware update for each product is
on product settings)
3. Check this box to have Base Camp launch
automatically each time you start your
computer
4. Check this box to allow for Base Camp
to periodically ping our server for software
updates. If not checked, you will not
receive automatic updates
1
2
3
4
5
7
6
5. Change the language of Base Camp
6. Links to our social channels
7. Buttons with links to our support pages
and material
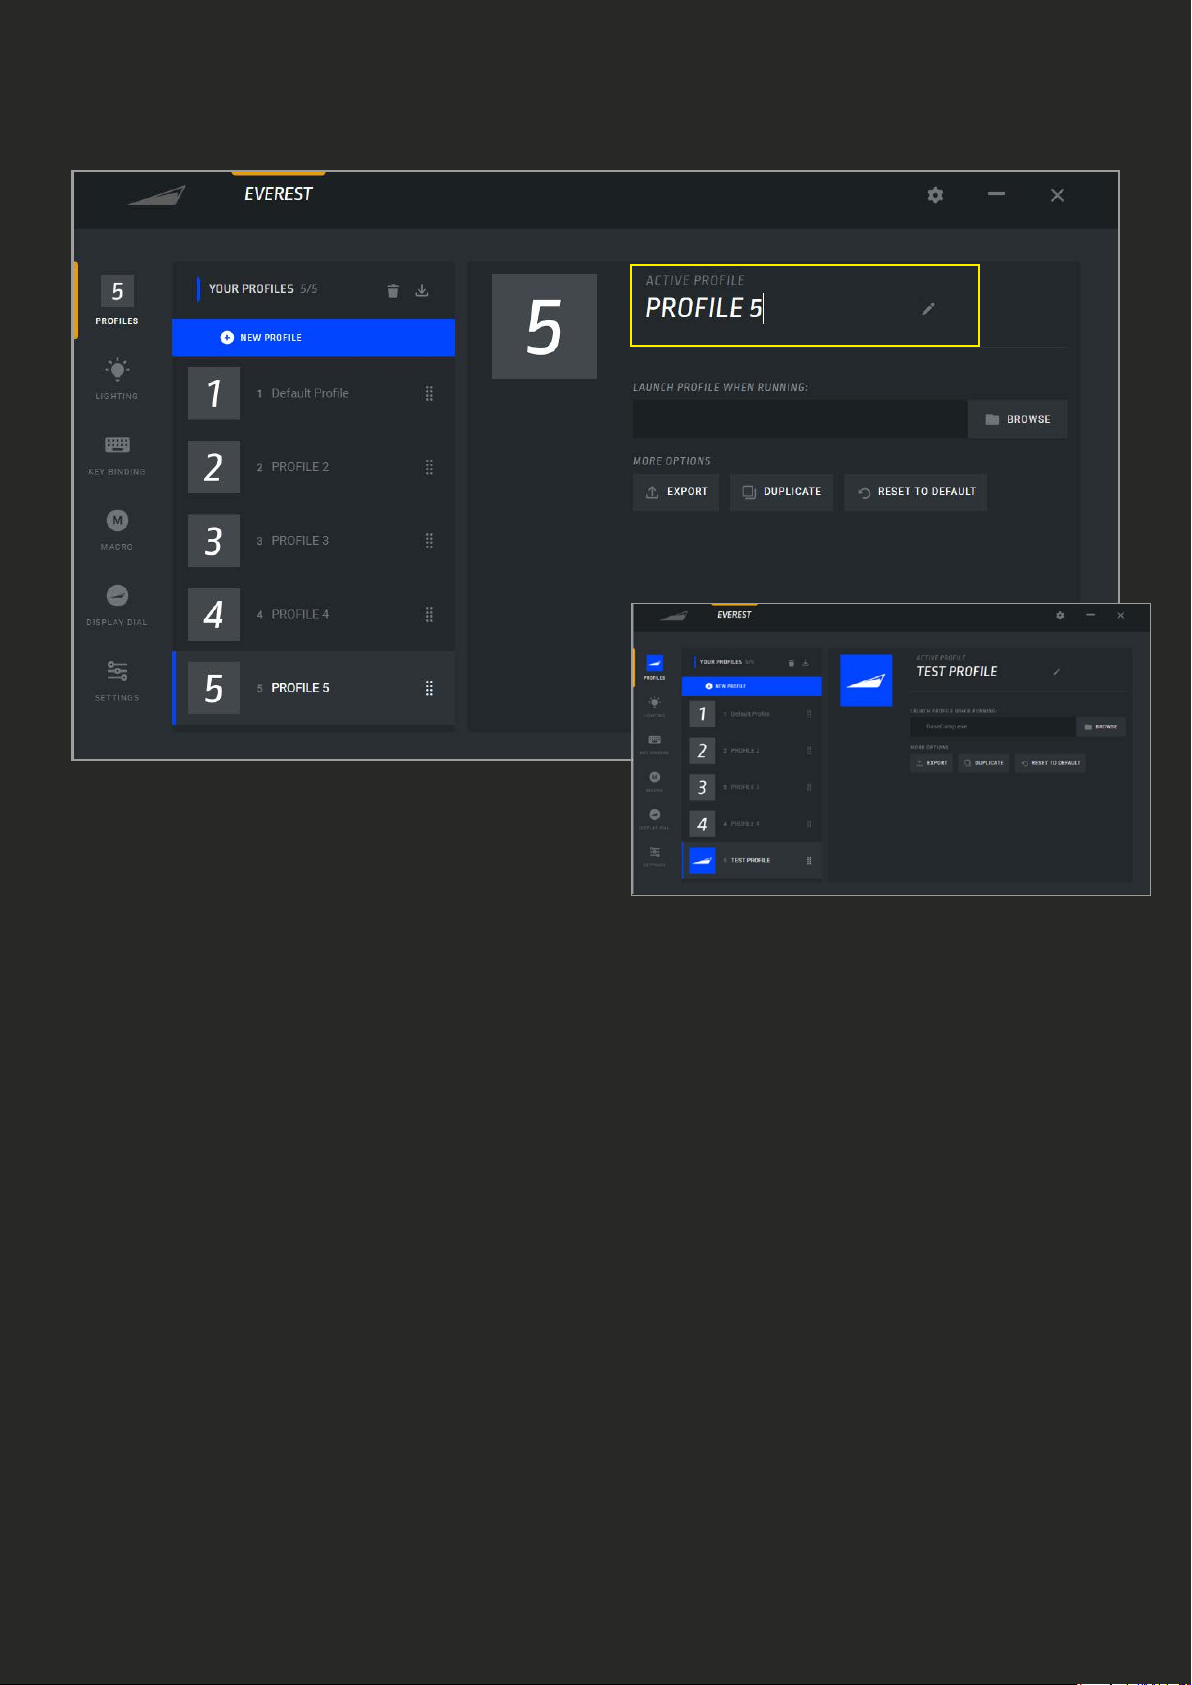
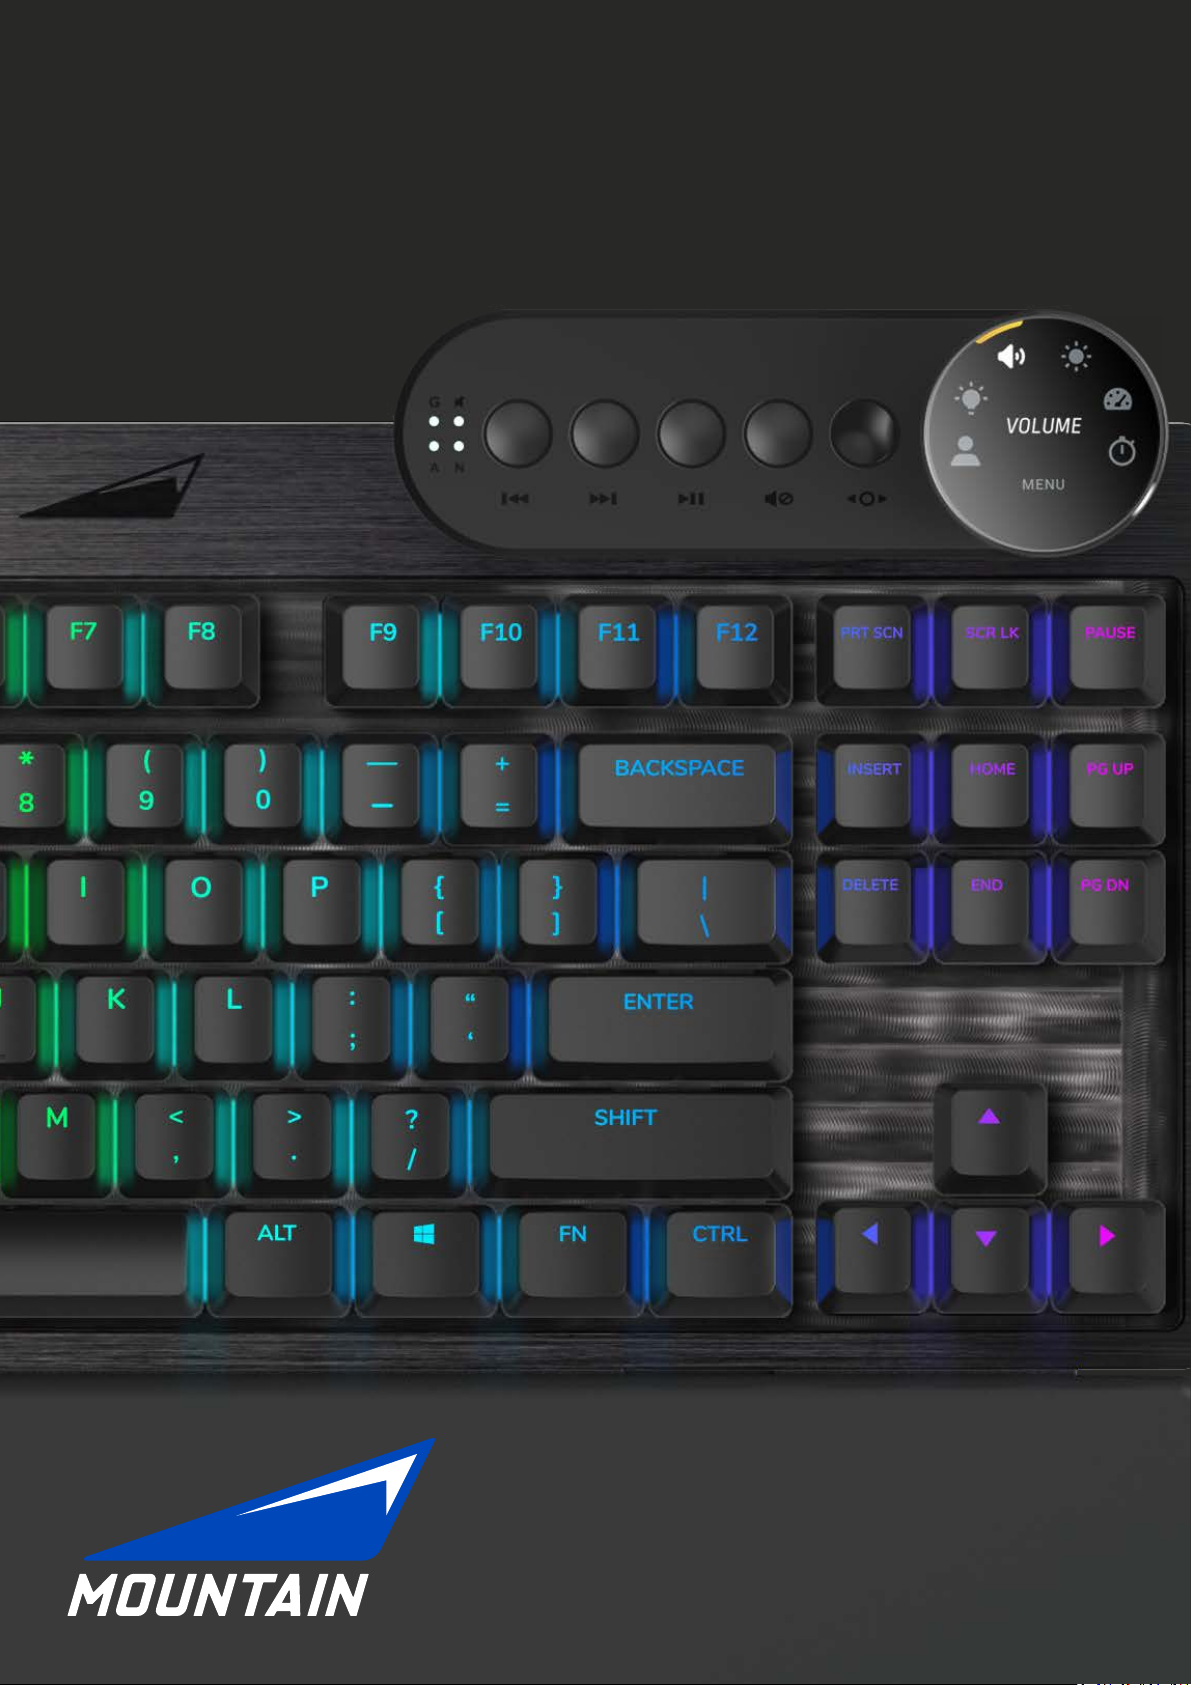
3. KEYBOARD EVEREST
1. Currently active sub-menu. If set, the
prole button shows the user-selected
image
2. By default, prole 1 is active. More
proles can be added by pressing the “New
Prole” button. Up to 5 proles can be
created per product
3. Delete selected prole
4. Import previously exported proles or
proles shared by the community
5. Proles will by default be named “Prole
X” with X being ascending numbers, you
can enter a custom name here
6. To change the picture on the prole click
this button to select a default image or
upload your own image (s)
7. To switch to this prole automatically
whenever a certain application or game is
launched, use this button to browse to this
application or game
8. Export will allow you to save the prole
to a le on your system, as a backup or to
share with the community
9. Duplicate creates an exact copy of the
selected prole
10. Reset to default will set everything
in this current prole back to default,
including lighting, key bindings and any
custom settings
A. PROFILE
1
2
3 4 6
8910
7
5
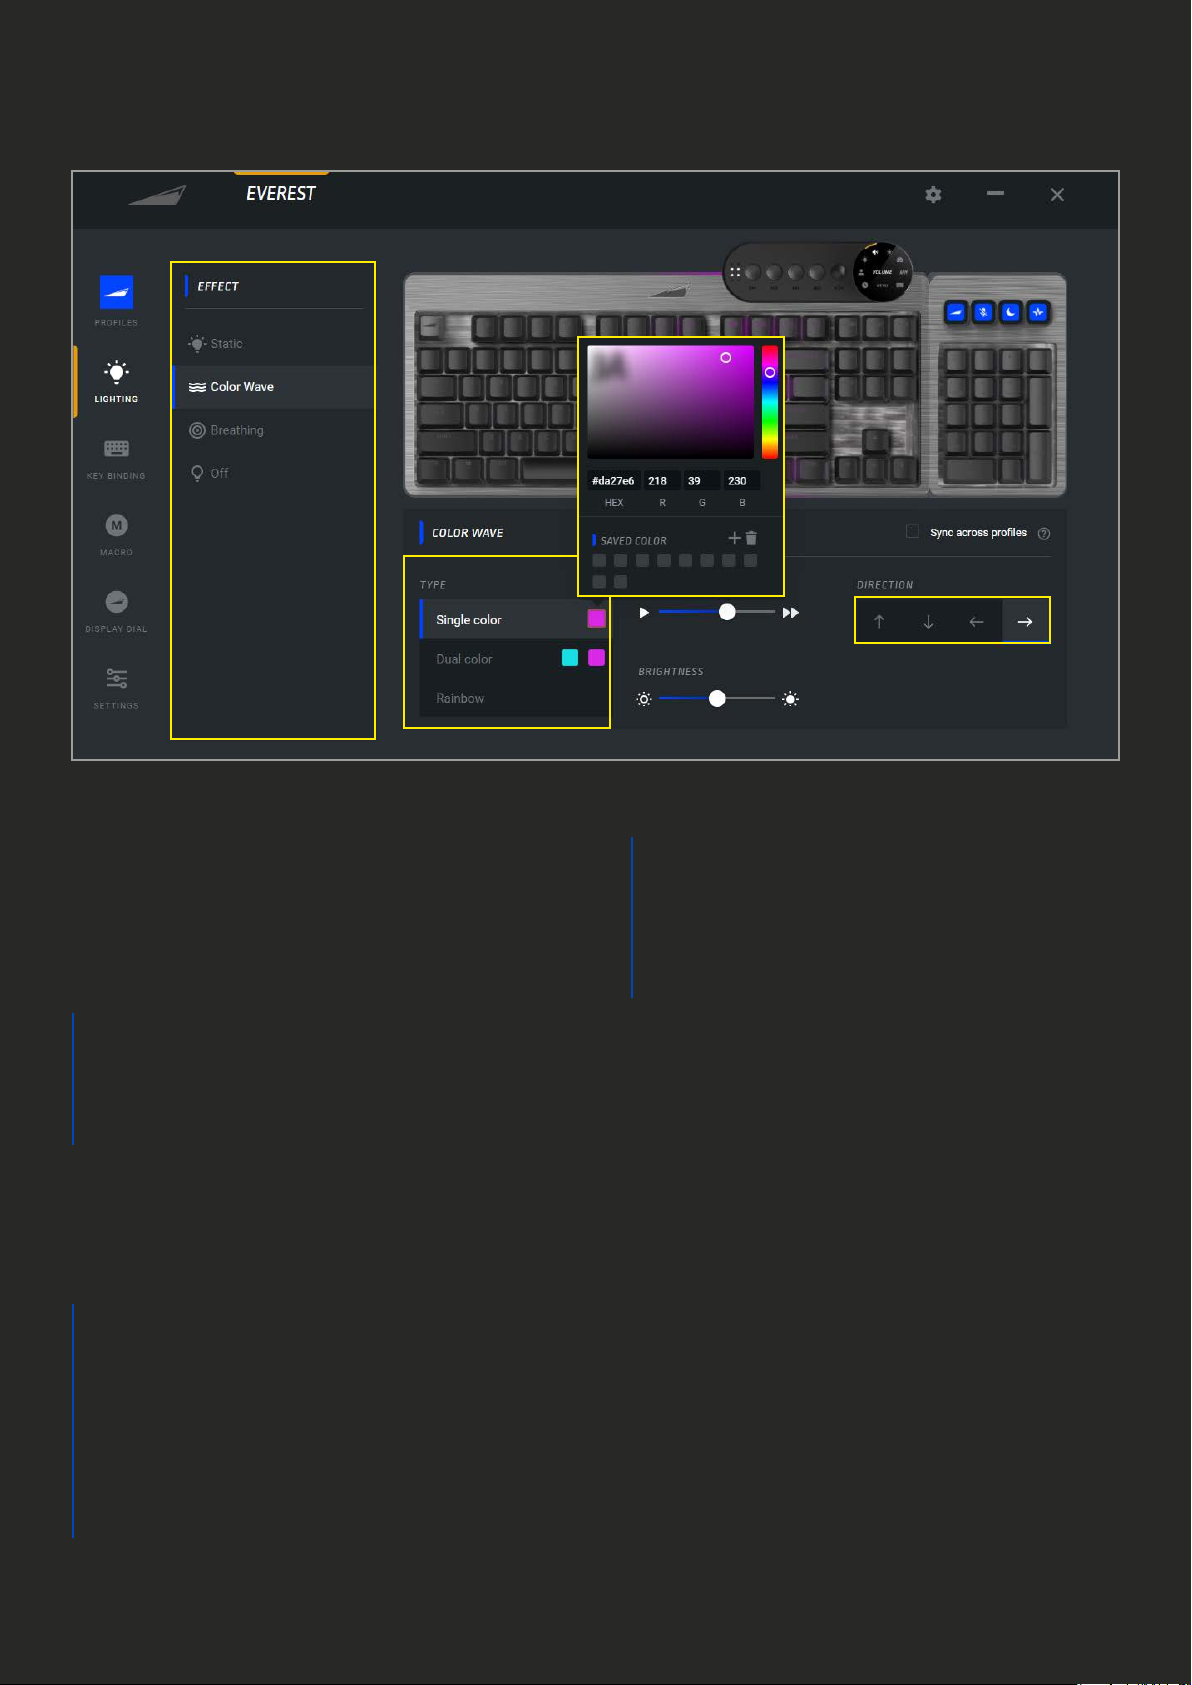
B. LIGHTING
1. The available list of backlight eects,
this varies per product and eects may be
added or removed by rmware updates.
2. Dierent eects can have various types
available, this will vary per eect:
a. Single color
b. Dual color
c. Rainbow (full RGB 16.7m color
spectrum)
3. The color picker will open once the color
square is pressed on the requested type.
The specic color of choice can be selected
through dierent means:
a. Point and click on the color
square and bar
b. HEX code
c. RGB code
Note: RGB and HEX codes are
automatically generated by point and
click and vice versa
d. You can save your favorite
custom colors by pressing the
+ icon and delete them via
the trashcan icon. Your saved
colors will remain on the bottom
of the color picker window
4. For selected active eects, such as
breathing and color wave, you can select
the animation speed in 5 steps from slower
to faster
5. Brightness of all eects can be adjusted
in 5 levels from 0% to 100%
1
2
3B
3D
3C
6
4
5
7
3A
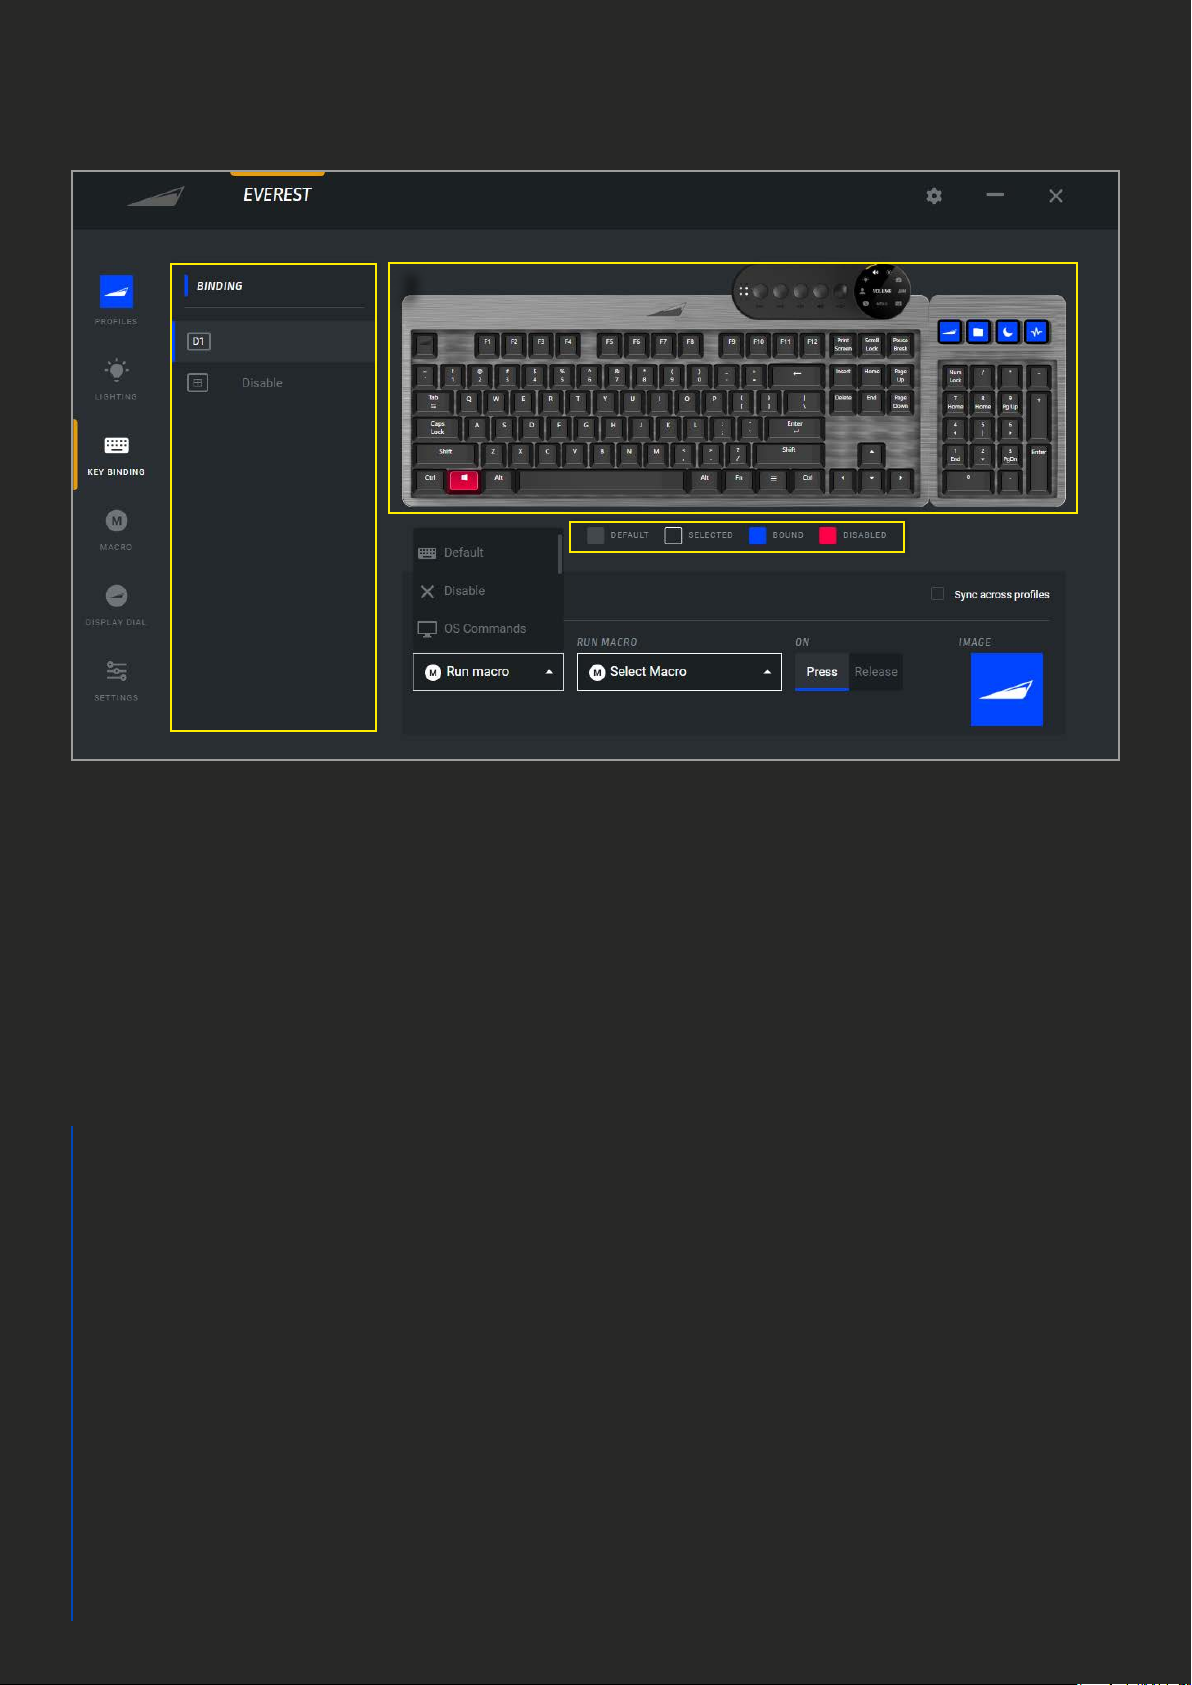
C. KEY BINDING
1. Binding shows a list of all custom key
bindings
2. Legends to indicate keys that are in
their default state (grey), selected (white
border), bound (blue) or disabled (red)
3. To select a key for rebinding, click on the
key in the keyboard image
4. Pick a function for the selected key:
a. Default
b. Disable
c. OS Commands such as task
manager, browser, calculator etc.
d. Run program: Launch any
application (EXE) on your system
e. Run Macro: Run a Macro created
in the Macro section of Base Camp
f. Media: Play, pause, forward,
backward, mute, etc.
g. Keyboard shortcuts: CTRL / ALT
/ SHIFT / WIN + keystroke
h. Mouse buttons: Left mouse
button, scroll, etc.
5. Menu to apply the desired function, such
as OS Command → Task Manger
6. Choose if you wish to have the key to
perform its selected function either on
pressing or releasing
7. In addition to the features above, the 4
display keys can either be used with default
images or custom images of your choosing.
Click the Image box to select or upload an
image with up to 72x72 pixels
8. The sync button will apply your key
binding conguration to all proles
13
2
8
74 5 6

D. MACRO
1. Macro Library shows a list of all macros
2. Pressing the “+ New Macro” button will
start the sequence to create a new macro,
guided by Base Camp’s macro wizard
3. Enter a name for your macro
4. Choose which device inputs should be
recorded
5. Delay is the time between key strokes,
this can be set in 3 dierent modes:
a. Record delay: Records the
exact delay of your inputs during
recording
b. Custom delay: Enter a custom
value that will be applied to all
inputs during recording
c. No delay: No noticeable delay
(0.1ms) on all inputs during recording
6. Press start to begin recording. Perform
the inputs you wish to record. Click stop
recording when the desired input sequence
is complete
7. The green and red arrows indicate press
and release of keys, this visualization can
be grouped or separated with this slider
8. The trashcan symbol next to an input
deletes the respective action, not the entire
macro
9. Playback gives you dierent options of
macro execution:
a. Play once: Play the macro only once
when the macro button is pressed
b. Hold: Play the macro for as long as
the macro button is pressed
c. Repeat: Play the macro when the
button is pressed until the button is
pressed again
10. Check which key the macro is assigned
to. By default, a new macro remains
unassigned until it’s being assigned to a
button in the Key Binding menu
11. Click here to save your macro. It’s now
listed under Macro Library and ready to be
assigned to a key of your choosing under
Key Binding
Note: Macros are cross-product compatible
2
1
3
4
5
8
611
10
9
7
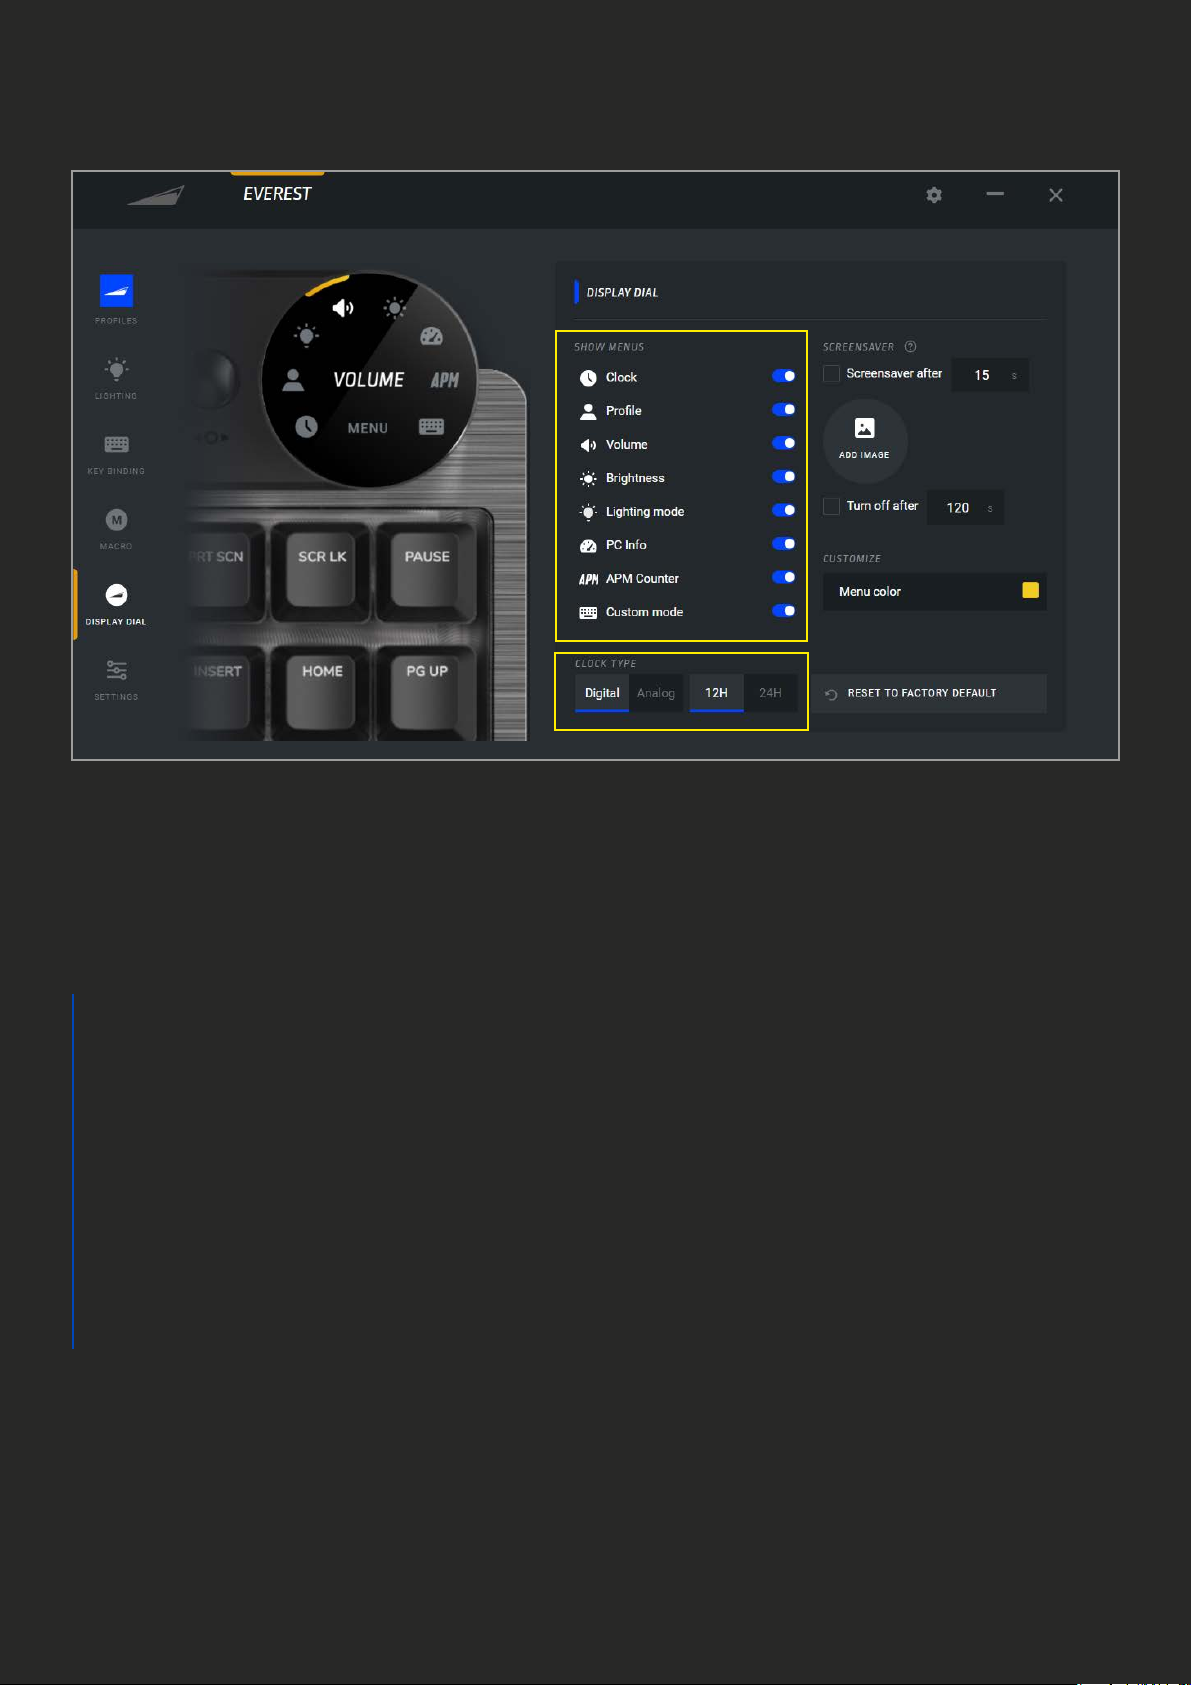
DISPLAY DIAL
1. The list of available menus. Disable
the menus to remove hide them on your
Display Dial
2. “Screensaver” is an imagine that will
display after a certain time of inactivity
a. The default Mountain logo can be
replaced by a custom image in
either bmp, jpg or png
format. “Screensaver after”
needs to be checked in order for
the image to show
b. Idle time to pass before the image
appears on Display Dial
c. In addition to screensaver, the
display can be turned o entirely
after the chosen time in seconds. This
may enhance the lifespan of your
display
3. The menu highlight color can be changed
to any color of your choosing
4. The Display Dial’s clock feature can be
set to digital or analog watch faces. The
digital display can be set to either 12H or
24H mode
5. Reset will return all dial settings back to
factory default
1
45
3
2C
2A
2B

E. SETTINGS
1. Read out your device rmware and
manually search for updates
2. Game Mode (FN+Pause) disables the
Windows key by default. Other hotkeys that
could accidently minimize your game can
be disabled as well
3. The sync button will apply your settings
to all proles
4. For Everest Max the indicator LEDs
(Caps Lock, Scroll Lock, Num Lock and
Game Mode) are built into the media dock.
If you don’t have a Media Dock connected,
you can check this box to have the LEDs on
the keys themselves turn on/o to indicate
if the respective button is activated
5. Select your keyboard’s layout
6. Reset will return all settings back to
factory default
16
5
4
2
3
Table of contents


