manuals.online logo
Brands
  1. Home
  2. •
  3. Brands
  4. •
  5. Mounting Solutions
  6. •
  7. Rack & Stand
  8. •
  9. Mounting Solutions CMT-H User manual

Mounting Solutions CMT-H User manual

Installation Guide
CMT-H
www.mnmounting.com
[email protected]om
2 Merezhna str., Bila Tserkva,
Kyiv region, 09100, Ukraine
Installation Guide for CMT-H
Overhead Mounting Systems.
The CMT-H is a heavy-duty speaker ceiling mount with rotation and tilt
functionality.
SAFETY INSTRUCTIONS
1. Only entrust loudspeaker mounting equipment to experienced professionals. Also strictly follow the provided safety
instructions. Improperly installed mounting equipment may result in property damage, personal injury and/or liability
for the installing contractor.
2. Always use safety cables! This will prevent equipment from falling during/after setup and while exploiting.
3. Always check if the wall surface is structurally strong enough to support load. Make sure the wall and/or ceiling
structure allows to hold the weight of the speaker including its bracket.
4. Only use appropriate fasteners.
5. Always make sure to securely use and tighten/lock all mounting bolts provided. Loose bolts may become unscrewed
over time due to vibration which could potentially create a safety hazard when not tightened securely.
Installation Guide
CMT-H
www.mnmounting.com
[email protected]om
2 Merezhna str., Bila Tserkva,
Kyiv region, 09100, Ukraine
2. Screw the speaker plate to the rear
(4) holes of the loudspeaker by using all
(4) bolts.
Installation Instructions:
2
3
3. Install the ceiling mount bracket
(screw) onto the distance tubes that
was pre-installed.
1. First, release the upper bolt which securing the speaker plate to the bracket.
Now remove the speaker plate from the ceiling mount bracket.
1
Installation Guide
CMT-H
www.mnmounting.com
[email protected]om
2 Merezhna str., Bila Tserkva,
Kyiv region, 09100, Ukraine
FIX
FIX
5.1 First position.
Rotate the ceiling mount bracket
in the distance tubes to the desired
speaker position and secure the screw.
Adjust the tilt angles of the
loudspeaker as required and tighten
the xing bolts to lock in the position of
the loudspeaker.
4
5.1
5.2 Second position.
Rotate the ceiling mount bracket
in the distance tubes to the desired
speaker position and secure the screw.
Adjust the tilt angles of the
loudspeaker as required and tighten
the xing bolts to lock in the position of
the loudspeaker.
4
5.2
4.1 First position if you need an
attachment angle from 0° to 45°.
Slide the speaker plate along with
the loudspeaker onto the lower bolt of
the tilt mechanism. Press down on the
top of the loudspeaker until it stops
and then tighten the upper bolt of the
speaker plate.
4
4.1
4.2 Second position if you need an
attachment angle from 45° to 90°. Move
the screw to the second position on the
ceiling mount bracket.
Slide the speaker plate along with
the loudspeaker onto the lower bolt of
the tilt mechanism. Press down on the
top of the loudspeaker until it stops
and then tighten the upper bolt of the
speaker plate.
4
4.2

Other Mounting Solutions Rack & Stand manuals

Mounting Solutions SR-600/24U User manual

Mounting Solutions

Mounting Solutions SR-600/24U User manual

Mounting Solutions CMT-H3 Series User manual

Mounting Solutions

Mounting Solutions CMT-H3 Series User manual

Mounting Solutions PES 1400 User manual

Mounting Solutions

Mounting Solutions PES 1400 User manual

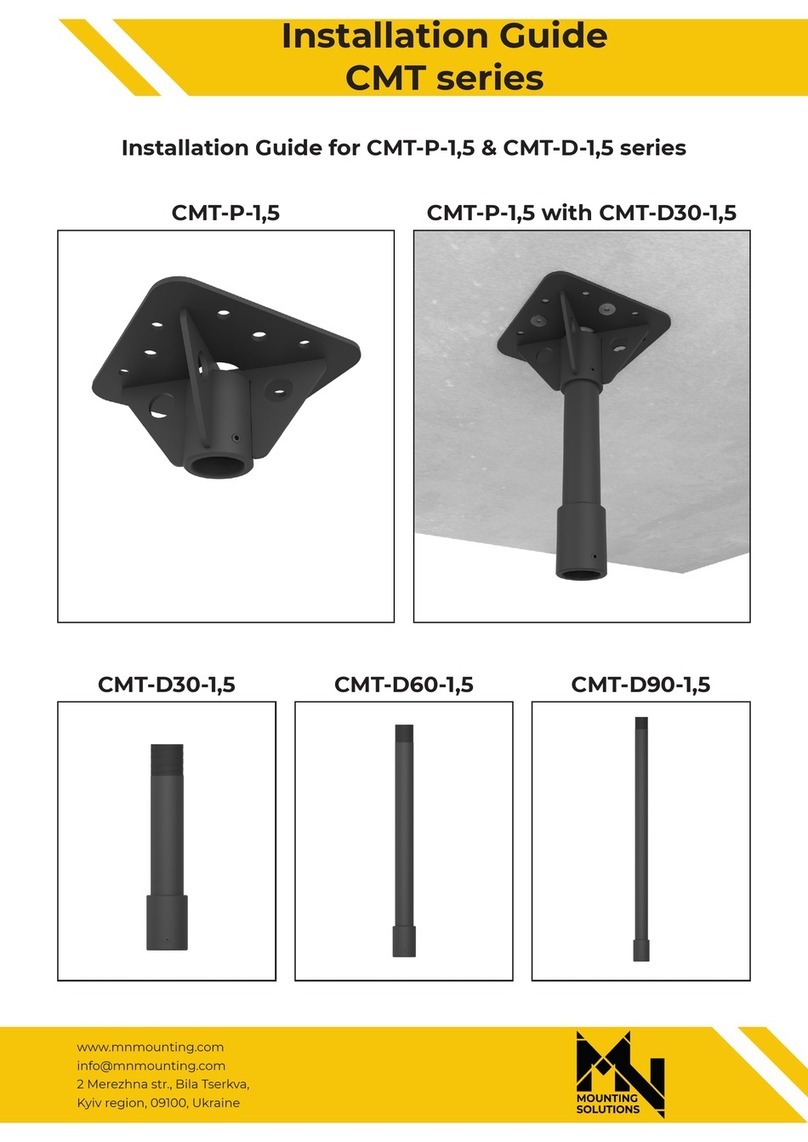
Mounting Solutions CMT Series User manual

Mounting Solutions

Mounting Solutions CMT Series User manual

Mounting Solutions SR-800/48U User manual

Mounting Solutions

Mounting Solutions SR-800/48U User manual

Mounting Solutions SRD-600/12U User manual
Mounting Solutions

Mounting Solutions SRD-600/12U User manual

Mounting Solutions SR-1000/42U User manual

Mounting Solutions

Mounting Solutions SR-1000/42U User manual

Mounting Solutions WRM-320 User manual

Mounting Solutions

Mounting Solutions WRM-320 User manual

Mounting Solutions CMT-H3 Series User manual

Mounting Solutions

Mounting Solutions CMT-H3 Series User manual

Mounting Solutions WRM-300 User manual

Mounting Solutions

Mounting Solutions WRM-300 User manual

Mounting Solutions SRD-800/U12 User manual

Mounting Solutions

Mounting Solutions SRD-800/U12 User manual

Popular Rack & Stand manuals by other brands

Hellermann Tyton Bench mount kit CPK Assembly instructions

Hellermann Tyton

Hellermann Tyton Bench mount kit CPK Assembly instructions

New Star Neomounts FPMA-D550DD3BLACK instruction manual

New Star

New Star Neomounts FPMA-D550DD3BLACK instruction manual

Tripp Lite SRWO12US owner's manual

Tripp Lite

Tripp Lite SRWO12US owner's manual

Delta U6400 instructions

Delta

Delta U6400 instructions

Pittway System Sensor B501BH Installation and maintenance instructions

Pittway

Pittway System Sensor B501BH Installation and maintenance instructions

Ibera IB-ST20 user manual

Ibera

Ibera IB-ST20 user manual

Suncast TTTOWRACKHD quick start guide

Suncast

Suncast TTTOWRACKHD quick start guide

GW Instek GRA-436 Assembly manual

GW Instek

GW Instek GRA-436 Assembly manual

ARISIT ONE PPMM2-AL installation manual

ARISIT

ARISIT ONE PPMM2-AL installation manual

DS18 BRO-CLPX/BK owner's manual

DS18

DS18 BRO-CLPX/BK owner's manual

Samsung WMN3000C Series Product highlights

Samsung

Samsung WMN3000C Series Product highlights

ARDESTO IH-TS-01 instruction manual

ARDESTO

ARDESTO IH-TS-01 instruction manual

arkitect ASTVMA16S instruction manual

arkitect

arkitect ASTVMA16S instruction manual

Suptek ML5074-3 installation manual

Suptek

Suptek ML5074-3 installation manual

Pyle PPLS209 user manual

Pyle

Pyle PPLS209 user manual

Grandstream Networks GXV335X WM Quick installation guide

Grandstream Networks

Grandstream Networks GXV335X WM Quick installation guide

Dynex DX-SWM2B Mounting instructions

Dynex

Dynex DX-SWM2B Mounting instructions

Bison SHCLKBKTBB instruction manual

Bison

Bison SHCLKBKTBB instruction manual

manuals.online logo
manuals.online logoBrands
  • About & Mission
  • Contact us
  • Privacy Policy
  • Terms and Conditions

Copyright 2025 Manuals.Online. All Rights Reserved.