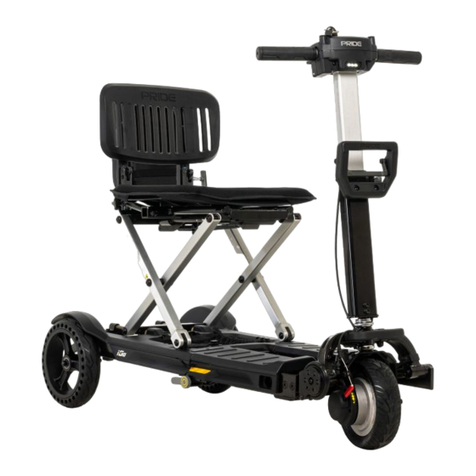
movinglife ATTO User manual

DO NOT USE THIS DOCUMENT AS OWNER’S MANUAL
EVALUATION MANUAL
SHORT VERSION OF OWNERS MANUAL
FOR EVALUATION PURPOSES
movinglife.com

WELCOME! 1
DO NOT USE THIS DOCUMENT AS OWNER’S MANUAL
WELCOME TO ATTO

2 WELCOME!
DO NOT USE THIS DOCUMENT AS OWNER’S MANUAL
WELCOME!
This is a short version of ATTO user manual and intended for potential users who are interested to evaluate how
ATTO is used and what is required from them in order to use ATTO.
The Table of content on the following page is showing real content and number of pages of the full Owner’s manual
provided in hardcopy to ATTO users.
THIS DOCUMENT LACK MOST SAFETY AND REGULATORY PARTS OF THE ORIGINAL OWNER’S MANUAL.
Please contact us with any question and we will be happy to assist you.
Use the following link to speak with product specialist:
www.movinglife.com/call-invite

TABLE OF CONTENT 3
DO NOT USE THIS DOCUMENT AS OWNER’S MANUAL
TABLE OF CONTENT

4 PREFACE
DO NOT USE THIS DOCUMENT AS OWNER’S MANUAL
PREFACE
Trademarks
ATTO is a registered trademarks of Moving Life Ltd.
Other company and brand, product and service names
are for identification purposes only and may be
trademarks or registered trademarks of their
respective holders. Data is subject to change without
notice.
This product is covered by Moving Life Ltd. patents
pending.
Indications for Use
The Moving Life ATTO Mobility Scooter is an indoor
scooter that provides transportation for a disabled or
elderly person.
Intended Users
A motorized three-wheeled vehicle is a battery-
powered device intended for medical purposes that is
used for outside transportation by disabled persons.
ATTO is intended for people with an injury, physical
disability, or medical condition which means that they
are unable to walk or have difficulty in walking.
Intended users should assess eyesight, reaction time,
balance and posture, ability to sit for long periods of
time, concentration and ability to get on and off the
mobility scooter. Intended users should be able to
judge distances, recognize obstacles and hazards, and
be able to see pedestrians and other road users.
The intended user of ATTO is the occupant who will
be driving it and who may be assisted by an assistant
for non-driving operations such as opening and
closing the mobility scooter.

ATTONOMY 5
DO NOT USE THIS DOCUMENT AS OWNER’S MANUAL
ATTONOMY

6 ATTONOMY
DO NOT USE THIS DOCUMENT AS OWNER’S MANUAL
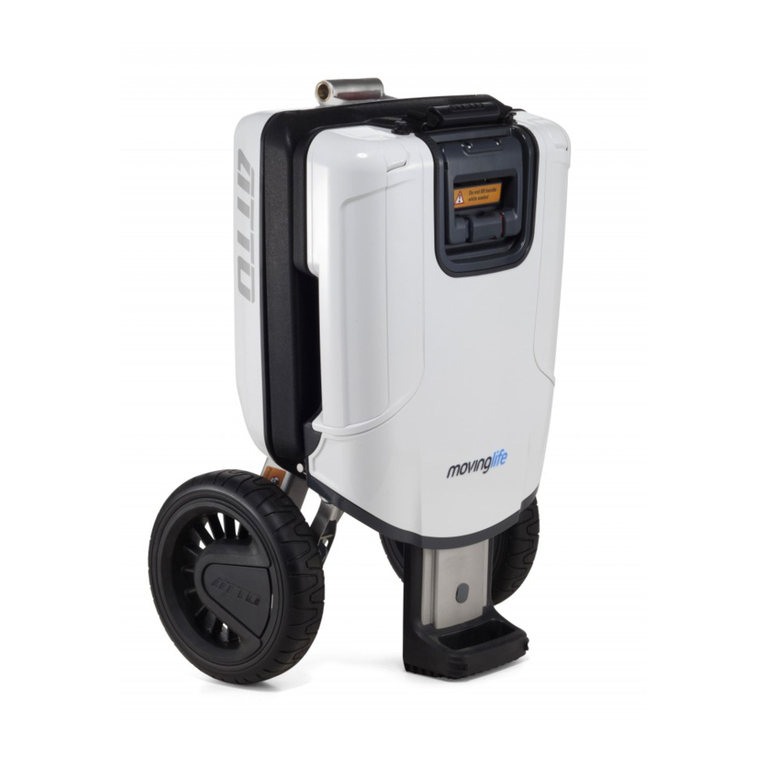
Figure 1 ATTO in trolley mode
Figure 2 ATTO in driving mode

ATTONOMY 7
DO NOT USE THIS DOCUMENT AS OWNER’S MANUAL
Figure 3 –More ATTO parts

8 OPERATING ATTO
DO NOT USE THIS DOCUMENT AS OWNER’S MANUAL
OPERATING ATTO
ATTO is very easy to operate; it requires no special skills
and can be learned by following the steps described in
the following pages and by practice.
The first step is reading through this chapter of the
Owner's Manual and understanding the sequence of
steps required for opening and closing (folding) the
scooter. Once completed, use the manual to guide you
while you practice each step. It may be difficult at first
but will be very easy once you have practice it several
times.
To help you learn we have created a simple video you
can watch under the videos section of our website:
www.movinglife.com/videos
Opening
1. Make sure your ATTO is on flat ground before
opening. Make sure you have clearance of 2 meters
(7 feet) from the side of the back wheels.
2. Release the adjustment lever of the handle bar and
bring the handle bar to an upright position, then
bring the lever back to its secured position (see
Figure 4).
Figure 4
3. Press the central release button until it clicks and
remains pressed (see Figure 5).

OPERATING ATTO 9
DO NOT USE THIS DOCUMENT AS OWNER’S MANUAL
Figure 5
4. Press the rod button and tilt it away from the main
ATTO body (see Figure 6).
Figure 6
5. Hold ATTO with two hands (see Figure 7).
Figure 7
6. Tilt ATTO toward the rod until the front wheel
touches the ground (see Figure 8).
Figure 8

10 OPERATING ATTO
DO NOT USE THIS DOCUMENT AS OWNER’S MANUAL
7. Using the main handle, pull the main body away
from the rod, thus rolling the back wheels away
from the front wheel (see Figure 9).
Figure 9
8. Gently move the handle down until ATTO is flat as
shown in Figure 9 (see Figure 10).
Figure 10
9. Place handle in the designated recess until it clicks
and locks in place (see Figure 11).
Figure 11
10. Lock the rod in upright position by pushing the
front lever down until it clicks and locks in place
(see Figure 12). . In case the front lever require too
much force to operate, you should apply horizontal
pressure on the main handle towards the front of
the scooter. This will release the pressure on the
front lever and will make it easier to open.

OPERATING ATTO 11
DO NOT USE THIS DOCUMENT AS OWNER’S MANUAL
Figure 12
11. Place one hand on the tiller and with the other
hand release the secure lever of the back handle
and bring the handle to upright position at 90
degrees (see Figure 13).
Figure 13

12 OPERATING ATTO
DO NOT USE THIS DOCUMENT AS OWNER’S MANUAL
Using the handle, pull the back of the chair backwards
until it clicks and locks in place (see Figure 14).
Figure 14
12. Continue using the handle for pulling up the chair
until it clicks and locks in place (see Figure 15).
Figure 15
13. Open both sides of the handle bar (see Figure 17).
Figure 16
Adjusting for maximum comfort
Several adjustments can be made for maximum
comfort. Some adjustments can be made by the user,
while other adjustments must only be made by a
certified technician. The adjustments that can be made
by the user are detailed in this section.

OPERATING ATTO 13
DO NOT USE THIS DOCUMENT AS OWNER’S MANUAL
Figure 17 Comfort adjustments
Adjusting Driving Console height
Use the rod lever to adjust the height of the handle bar
at your convenience. Bring the lever back to the secure
position once you are done (see Figure 17).
Figure 18 Driving Console height lever
Adjusting Driving Console angle
ATTO’s Driving Console can be adjusted to your comfort
in a variety of angels. To adjust the Driving Console you
should first be seated on your mobility scooter:

14 OPERATING ATTO
DO NOT USE THIS DOCUMENT AS OWNER’S MANUAL
1. Hold the Driving Console in one hand and release
the adjusting lever using the other hand (see Figure
19).
2. Adjust the Driving Console angel so you can reach
and hold it comfortably with a clear view of the
display area.
3. Tighten the adjustment lever when you are done.
Figure 19 Driving Console tilt lever
Seat height adjustment
Although ATTO's seat is thin and stylish, it was designed
to provide comfort and safety and can be adjusted
according to user's preferences. The seat mechanism
can be locked at one of three fixed heights. To adjust
seat height please follow the following steps, no tools
needed:
1. ATTO has to be in opened position in order to
adjust seat height. Lift the seat to upright position,
locate the seat height adjustment cover at the seat
base right under the seat pivots and remove it (see
Figure 20).
2. Figure 20 Seat height cover
3. Under the cover you will find a metal bracket that
has to be removed. Hold the bracket between your
fingers and lift it out. Remember the bracket

OPERATING ATTO 15
DO NOT USE THIS DOCUMENT AS OWNER’S MANUAL
position to make it easier to put it back in place
again.
4. Once the bracket has been removed you should be
able to remove the bulky metal pin (located in one
of the three adjustment holes) holding the seat in
its place. Remove the pin while holding the seat
with your other hand (see Figure 21).
5. Figure 21 Seat height adjustment holes
6. Now you can adjust the seat to any of the three
holes height and reinsert the pin to hold it in place.
7. Reinsert the metal bracket and the cover.
Tiller angle adjustment
The Steering Rod (tiller) angle can be adjusted in one of
two positions according to user comfort. The default
position will be adequate for most users, larger users
may want the Steering Rod further away from their
body for more space. In order to adjust the angle you
need a 4 mm Allen wrench (hex key).
1. ATTO has to be in the opened position in order to
adjust the tiller angle. Once opened, locate and
release the two Alan (hex) screws shown in Figure
22 while holding the tiller in upright position (you
need to hold the tiller to prevent it from falling
while releasing the screws).
2. Move the tiller into the desired position and tighten
the two screws back again using a thread locker
(such as Loctite).

16 OPERATING ATTO
DO NOT USE THIS DOCUMENT AS OWNER’S MANUAL
Figure 22 Steering Rod angle adjustment screws
Driving Console
The Driving Console (your scooter's dashboard)
contains all the controls and display needed for
operating your mobility scooter while driving.
Figure 23 Driving Console overview
ON/OFF and speed control buttons
Figure 24 On/Off and speed control
A. The On/Off button is located at the center of
the Driving Console below the display panel. To
turn ATTO on press and hold the button until
ATTO starts.
B. The two buttons on the sides of the ON/OFF
switch marked with "+" and "–" are your speed
limit control. Along with the number shown on
the display panel, they allow you to set the
maximum speed ATTO will develop at full
throttle. While ATTO is not moving, Click the

OPERATING ATTO 17
DO NOT USE THIS DOCUMENT AS OWNER’S MANUAL
"+" button to increase the speed and the "-"
button to decrease the speed.
Display panel
Figure 25 Display Panel
Battery meter –When ATTO power is ON the battery
meter indicates the approximate battery charge level.
As with all Li-ion batteries, the charge level indication is
accurate only when the battery is fully charged. All
other indications are approximate and intended to give
you a rough idea of the battery charge level. Please
refer to the "Specification" chapter in this Owner's
Manual for more information on your battery range.
Direction mode –ATTO can drive both forward and
backward. The current driving direction is shown on the
display panel by an arrow pointing forward or
backward, depending on user's selection. To switch the
driving direction press on the direction button located
near the left hand grip.
Throttle
Figure 26 Driving Throttle
The throttle is used for driving and controlling the
driving speed. Place your thumb on the throttle lever
and press it down to accelerate. To decelerate, release
the throttle lever to your level of comfort. To bring the
scooter to a complete stop simply remove your thumb

18 OPERATING ATTO
DO NOT USE THIS DOCUMENT AS OWNER’S MANUAL
from the lever which will set the lever to its "off"
position, bringing the scooter to a halt after 1.2 meter.
Reverse and horn buttons
Figure 27 Reverse and horn buttons
A. ATTO is equipped with a driving direction
button. Press on the button to change the
driving direction. Once the driving direction has
changed, ATTO will sound a single beep when in
forward driving mode, and a double beep when
in reverse driving mode. In addition, a large
arrow on the display panel will indicate the
current driving mode. When ATTO is turned on
it is always in Forward driving mode.
B. Press the horn button to sound the horn.
Always use the horn when needed to prevent
accident or injury.
USB port
ATTO is equipped with a general USB charging port
providing up to 1.2A charging current. If an error
accorded, the port is disabled and the scooter will
operate as normal. The error will be reset after
restarting of the scooter’s controller (power off/on
cycle).
Display Dimming
Pressing the ‘+’ and ‘-‘ buttons simultaneously will
toggle the dimming option.
Bee sounds
Beeps caused by pressing buttons may be enabled or
disabled. To Enable, press the ‘+’ and ‘Horn’ buttons
simultaneously. To Mute the beeps, press the ‘-’ and
‘Horn’ buttons simultaneously (horn is always active).

OPERATING ATTO 19
DO NOT USE THIS DOCUMENT AS OWNER’S MANUAL
Handle bar grips
Figure 28 Handlebar grip
There are two grips on the handlebar, one on each side.
To change the grips from folded position to drive
position simply lift the grip around its pivot and it will
lock itself in the open position. To fold it back again
(only when you are about to fold ATTO), simply pull the
grip away from the handlebar and down to an angle of
nearly 90 degrees where it will automatically lock itself
in the new position.
Getting on ATTO
Verify that the scooter is turned off.
Verify that the scooter is fully opened and secured.
See the "Opening" section of this Owner's Manual.
Carefully place one foot on the approximate center
of the deck and seat yourself comfortably and
securely on the seat.
Getting off ATTO
Verify that the power is turned off.
Carefully place one foot on the ground, transfer
your weight to that leg, and slowly come to a
standing position.
Step away from the scooter.
Driving
Turning ATTO on
Press and hold the “On” button to turn ATTO on. All
lights will come on momentarily and then the following
information will be indicated:
Other manuals for ATTO
4
Table of contents
Other movinglife Scooter manuals

