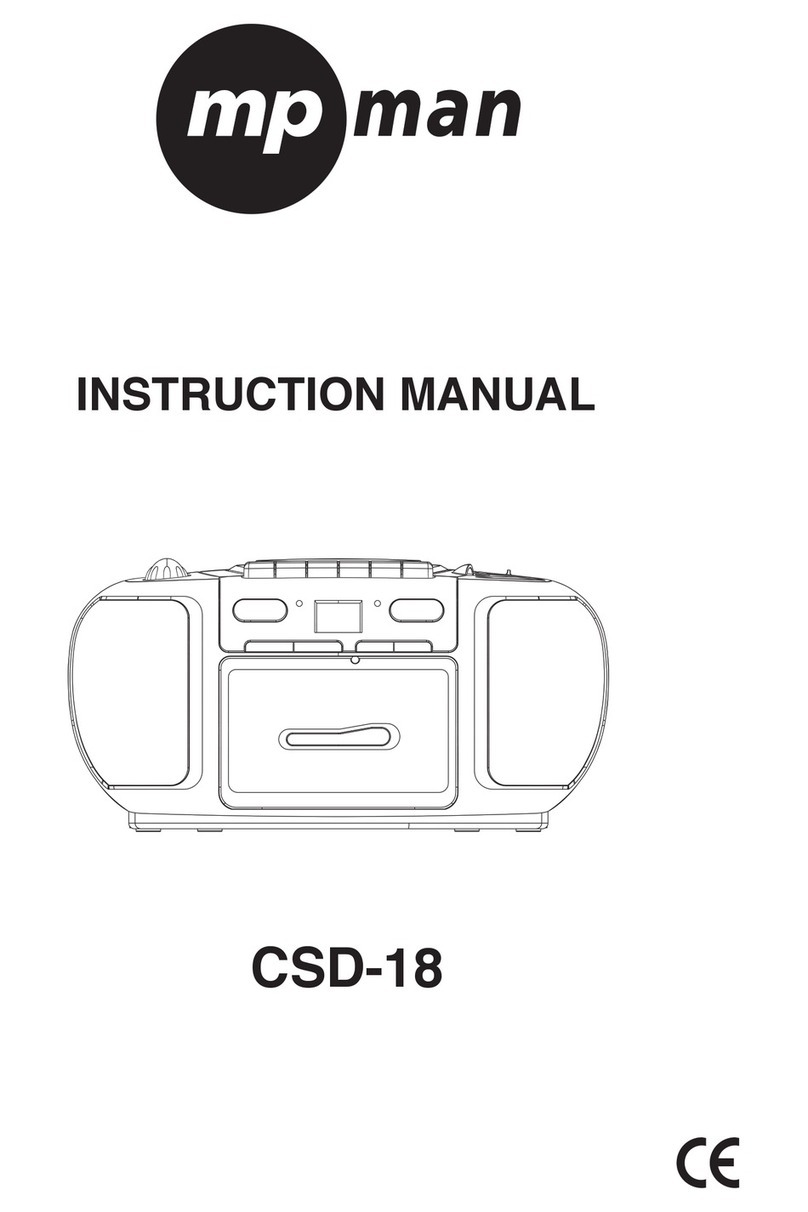
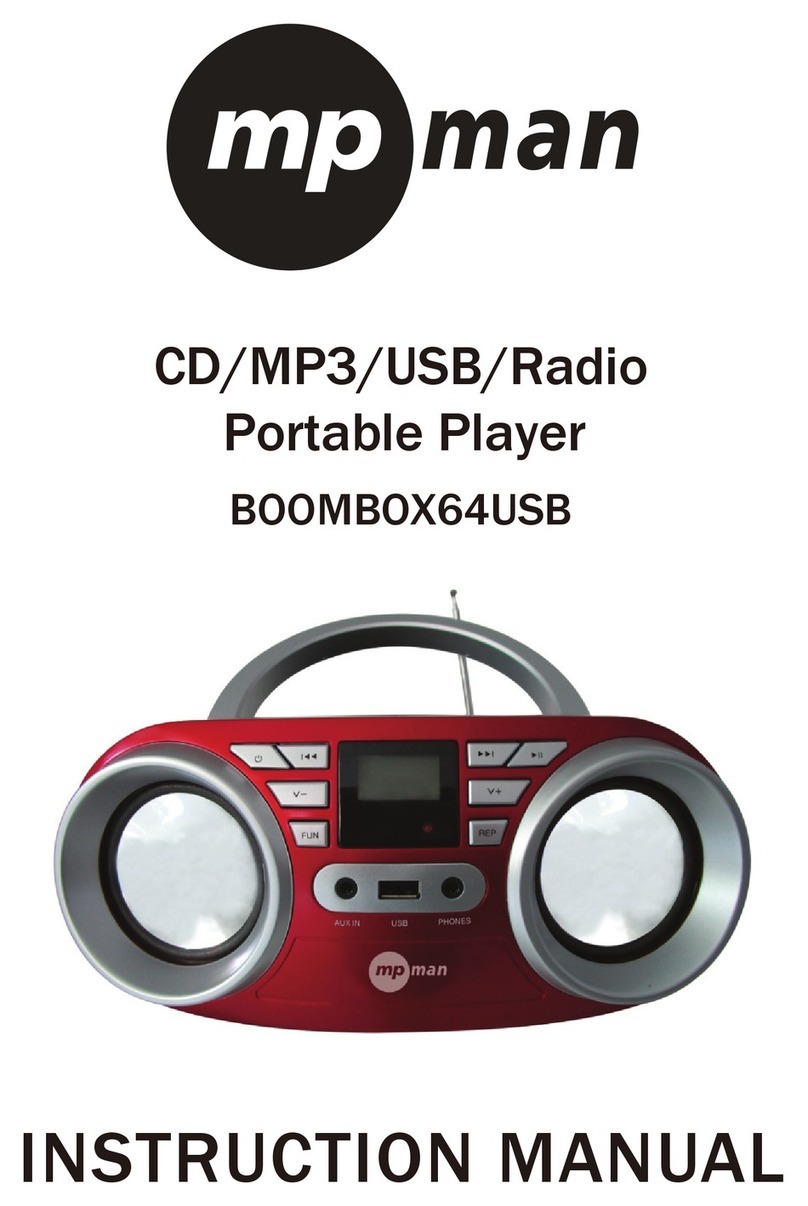
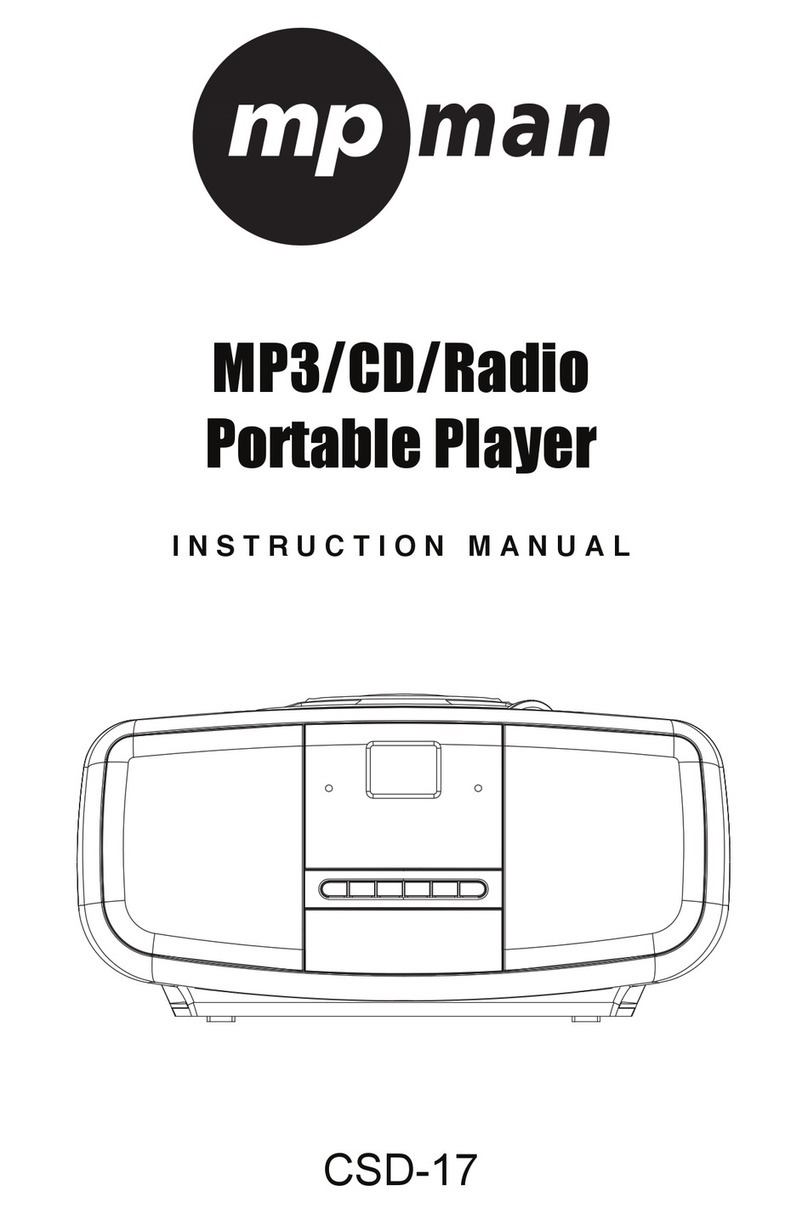
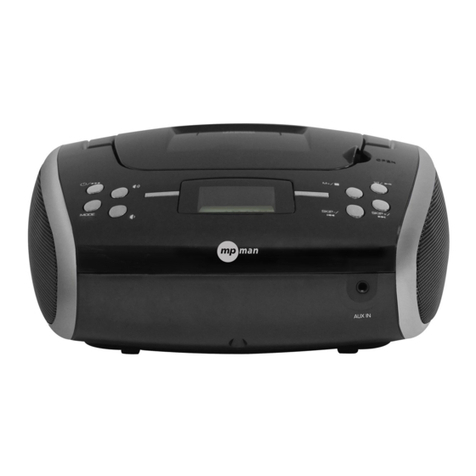
MP-Man CSU484PLL User manual

INSTRUCTION MANUAL
CD/MP3 PLAYER WITH FM RADIO
AND USB READER
MODEL: CSU484PLL
Please read and follow these instructions before using your unit.

GB-1
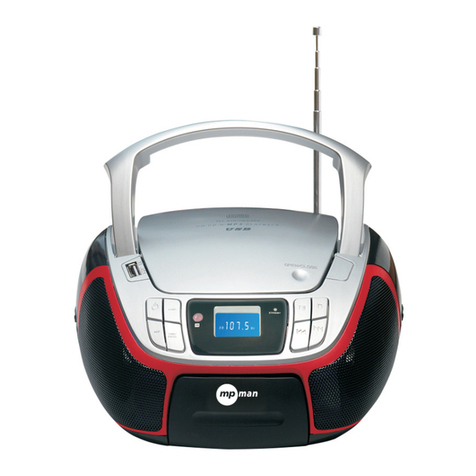
OVERVIEW OF THE PLAYER
123
4567
8
9
10
11 12
13
14 15 16 14
17
18 19
LOCATION OF CONTROLS
1. FM TELESCOPIC ANTENNA
2. FOLDING HANDLE
3. CD DOOR
4. USB PORT
5. STANDBY BUTTON
6. FUNCTION BUTTON
7. STOP/M-/ALBUM BUTTON
8. MODE/MEM BUTTON
9. PLAY/M+/10+ BUTTON
10. CD DOOR OPEN AREA
11. SKIP-/TUN- BUTTON
12. SKIP+/TUN+ BUTTON
13. BATTERY COMPARTMENT
14. SPEAKERS
15. LCD DISPLAY
16. STANDBY INDICATOR
17. DC IN JACK
18. AUX IN JACK
19. VOLUME CONTROL

GB-2
POWER SUPPLY
BATTERY OPERATION
1. Remove the battery compartment cover gently.
2. Install 6 x 'C' size batteries (UM-2 or equivalent) while observing the correct polarities.
3. Replace the battery compartment cover.
NOTE:
yThe AC/DC adapter must be detached from the DC IN jack of the player.
yLeaking batteries may damage the battery cabinet and the player as a whole, so they
should be removed from the cabinet when becoming flat or when the player is not to be
played on batteries for some time.
DC INPUT OPERATION
Plug the supplied adapter to the DC IN jack on the unit and to the main power.
NOTE: If not any audio signal inputs to the unit in about 20 minutes, the unit will enter to standby
mode automatically (except at radio mode).
FM RADIO
TUNING THE FM RADIO
1. The standby indicator will light once connect the main unit to the main power. Press the
STANDBY button to turn the unit on (the standby indicator will be off).
2. Press the FUNCTION button repeatedly to switch the unit to the RADIO mode.
3. To launch the auto-searching, press and hold the SKIP-/TUN- button or SKIP+/TUN+ button
several seconds and then release it.
4. Press the SKIP-/TUN- button or SKIP+/TUN+ button to tune the radio stations manually.
5. Adjust the volume level to a comfortable listening level.
6. Press the STANDBY button to turn off the unit.
NOTE:
yWhen FM (stereo) station is received, the FM stereo icon will be displayed on the screen.
yThe FM TELESCOPIC ANTENNA is directional. When you are receiving an FM broadcast,
fully extend the TELESCOPIC ANTENNA and rotate it for the best reception.
STORING YOUR FAVORITE RADIO STATION
1. Tune to your favorite station first; press and hold the MODE/MEM button for storing the current
station until memory cell number flashes on the screen.
2. Use the STOP/M-/ALBUM button or the PLAY/M+/10+ button to select the corresponding
memory cell among P01-P20 for storing the station.
3. Confirm your selection by pressing the MODE/MEM button.
4. During radio playback, press the STOP/M-/ALBUM button or the PLAY/M+/10+ button
repeatedly to recall the preset stations.

GB-3
HANDLING AND MAINTENANCE OF A DISC
Follow the instructions below to handle and maintain your disc in order
that long time and trouble free performance can possibly be obtained:
yEnsure not to caress the rain bow side of the disc; handle the disc by
the edge.
yLong time exposure to sunshine, high temperatures and humidity will
damage the disc. And keep storage area clean.
yAvoid sticking labels on both sides of a disc. Writing with pointed
articles on the disc should be strictly avoided.
yClean the disc wiping the centre and then working out to the edge
with a dry & soft cloth or a disc brush. Avoid any cleansing lotion or
chemical eradicator.
yStore them in their cases when they are not to be used.
LOAD A DISC
1. Open the CD door by the Door open area.
2. Load a disc on the disc tray with the label side facing up.
3. Close the CD door.
PLAY A DISC (CD/MP3)
1. Press the STANDBY button to turn the unit on (the standby indicator will be off).
2. Press the FUNCTION button repeatedly to switch to CD mode.
3. Follow the steps above to load a disc.
4. The player begins reading disc immediately.
5. When the disc is successfully read, the total number of the track shows in the LCD and
playback follows with the first track.
6. Press the PLAY/M+/10+ button once to halt music playback, the elapsed time flashes to
indicate the player in Pause mode; press the STOP/M-/ALBUM button to cease music
playback, the LCD shows the total number of the track again.
EXTERNAL MEMORY MEDIA OPERATION (USB)
1. Press the STANDBY button to turn the unit on (the standby indicator will be off).
2. Insert an USB to the USB port.
3. Press the FUNCTION button repeatedly to switch to USB mode.
4. When the inserted USB is detected and read, the total number of the track shows in the LCD
and playback follows with the first track.
5. Press the PLAY/M+/10+ button to pause or resume the playback.
6. Press the STOP/M-/ALBUM button to cease the playback.
SKIP TRACKS AND SEARCH FOR A SPECIFIC POINT TO PLAY (CD/MP3/USB)
1. Press once the SKIP+/TUN+ button in music play to skip to the next track; press once the
SKIP-/TUN- button in music play to go back to beginning of the current track, press the button
twice continuously to skip to the previous track.
2. Press and hold the PLAY/M+/10+ once in play to skip to the track 10 tracks ahead, twice to
skip to the track 20 tracks ahead. You can reach the last track of the disc using this button.
3. Press and hold the SKIP+/TUN+ button or the SKIP-/TUN- button in music play to search at
quick rate for a specific point to play.
4. During playback, Press and hold STOP/M-/ALBUM button until the album number “F_” shows
on the screen; press SKIP/SEARCH BACK/TUN- button or SKIP/SEARCH FWD/TUN+ button
to select your desired folder; when the your desired folder number shows on the LCD, release
HANDLE DISC ONLY AS SHOWN
CLEAN FROM CENTER TO EDGE
DO NOT STORE NEAR HEAT

GB-4
the button and wait several seconds, the unit will play the first track of the selected folder.
(MP3/USB ONLY)
REPEAT PLAYBACK (CD/MP3/USB)
During playback, press the MODE/MEM button to repeat play a single track; press the button
twice to repeat play all tracks; press the button three times to enter the introduction play mode;
press the button four times to enter the random play mode; press the button five times to exit.
PROGRAMMED PLAY (CD/MP3 DISC/USB)
1. At stop mode, press the MODE/MEM button once, the program’s icon shows with a program
sequence indication "P01" first, then a track number flickers on the LCD with the program’s
icon;
2. Select the first track to be programmed using the SKIP+/TUN+ button or the SKIP-/TUN-
button, and then press the MODE/MEM button again to store and advance to the next
programming step (When there are several folders on the MP3 disc or USB, it is necessary to
program folders first and then the tracks. The method of the folders programming is the same
as the tracks programming.).
3. Repeat the above steps to program more tracks. A maximum of 20 tracks for CD and 99 tracks
for MP3/USB can be programmed in memory in a preferred order. When the memory is full, the
screen will show “FUL” for indicating.
4. Press the PLAY/M+/10+ button to begin programmed play in the preferred order after you are
done with programming. The player stops automatically after all programmed tracks are
played.
5. You may press the STOP/M-/ALBUM button to terminate programmed playback. In program
stop mode, press the PLAY/M+/10+ button to begin the programmed playback with the
programming order identical with the previous one done; press the STOP/M-/ALBUM button
again to clear the programming.
AUX IN
1. Connect the Aux in jack on the unit to audio source, for example, MP3 player with an audio
cable.
2. Power on the unit following the corresponding instructions.
3. Press the FUNCTION button repeatedly to switch to AUX mode.
4. Use the native controls on the connected audio device to begin playing music through the
connected unit.
IMPORTANT SAFETY INSTRUCTIONS
y
The apparatus shall not be exposed to dripping or splashing and that no objects filled with
liquids, such as vases, shall be placed on the apparatus.
y
When the AC/DC adapter is used as the disconnect device, the disconnect device shall remain
readily operable. To be completely disconnected the power input, the AC/DC adapter shall be
disconnected from the mains completely.
y
No naked flame sources, such as lighted candles, should be placed on the apparatus.
y
Minimum distances 2.0cm around the apparatus for sufficient ventilation. The ventilation should
not be impeded by covering the ventilation openings with items, such as newspapers,
table-cloths, curtains, etc.
y
The use of apparatus is in tropical and/or moderate climates.
y
Attention should be drawn to the environmental aspects of battery disposal.
y
CAUTION: Danger of explosion if battery is incorrectly replaced. Replace only with the same or
equivalent type.
GB-5
y
Battery shall not be exposed to excessive heat such as sunshine, fire or the like.
y
The marking plate is located at the bottom of the apparatus.
SPECIFICATION
GENERAL
Power ..................................................... DC 9V 1A (from the external adapter)
9V UM-2/"C" x 6pcs (batteries)
Power consumption ................................. 9W
Dimensions .............................................. Approx. 290mm (L) x 241mm (W) x 125mm (H)
Operation temperature............................. +5°C ~ + 35°C
RECEIVER SECTION
Receiving bands....................................... FM ST.
Tuning range/sensitivity ........................... FM 87.5 - 108 MHz
CD PLAYER SECTION
Playback system ...................................... Compact Disc Digital Audio System
AUDIO SECTION
Output power............................................ 1.2W x 2 (RMS)
Speaker impedance ................................. 8 ohms
Specifications are subject to change without notice.
This is to certify that the CD/MP3 PLAYER is in conformity with
Council directive 2004/108/EC (EMC Directive)
Applicable standards:
EN55013:2001+A1:2003+A2:2006
EN61000-3-2:2006+A1:2009+A2:2009
EN61000-3-2:2008
EN55020:2007
For more information please visit our website
www.mpmaneurope.com

MODE D’EMPLOI
LECTEUR CD/MP3 AVEC RADIO FM
ET LECTEUR USB
MODÈLE : CSU484PLL
Veuillez lire et suivre ces instructions avant d’utiliser votre appareil.

FR-1
VUE D’ENSEMBLE DU LECTEUR
123
4567
8
9
10
11 12
13
14 15 16 14
17
18 19
EMPLACEMENT DES COMMANDES
1. ANTENNE FM TÉLÉSCOPIQUE
2. POIGNÉE PLIANTE
3. TRAPPE À CD
4. PORT USB
5. BOUTON VEILLE
6. BOUTON FONCTION
7. BOUTON STOP/M-/ALBUM
8. BOUTON MODE/MÉMOIRE
9. BOUTON LECTURE/M+/10+
10. OUVERTURE DE LA TRAPPE À CD
11. BOUTON SAUT-/RÉGL-
12. BOUTON SAUT+/RÉGL+
13. COMPARTIMENT À PILES
14. HAUT-PARLEURS
15. ÉCRAN LCD
16. INDICATEUR VEILLE
17. PRISE D’ENTRÉE SECTEUR CC
18. PRISE D’ENTRÉE AUX
19. RÉGLAGE DU VOLUME

FR-2
ALIMENTATION
FONCTIONNEMENT PAR PILES
1. Retirez doucement la trappe du compartiment à piles.
2. Installez 6 piles de taille « C » (UM-2 ou équivalent) en respectant les polarités correctes.
3. Remettez la trappe du compartiment à piles.
REMARQUE :
yL’adaptateur secteur CA/CC doit être débranché de la prise d’entrée secteur CC du
lecteur.
yLes piles présentant des fuites peuvent endommager le compartiment à piles et le lecteur
dans son ensemble, elles doivent donc être retirées du compartiment quand elles
deviennent faibles ou quand le lecteur ne fonctionne sur piles pendant une certaine durée.
FONCTIONNEMENT DE L’ENTRÉE SECTEUR CC
Branchez l’adaptateur fourni à la prise d’entrée secteur CC de l’appareil puis au secteur.
REMARQUE : si l’appareil ne capte aucun signal audio pendant environ 20 minutes, il entre
automatiquement en mode veille (sauf en mode radio).
RADIO FM
RÉGLER LA RADIO FM
1. L’indicateur veille s’allume une fois que l’unité principale est branchée au secteur. Appuyez sur
le bouton VEILLE pour mettre en marche l’appareil (l’indicateur veille s’éteint).
2. Appuyez plusieurs fois sur le bouton FONCTION pour passer l’appareil en mode RADIO.
3. Pour lancer la recherche automatique, maintenez le bouton SAUT-/RÉGL- ou le bouton
SAUT+/RÉGL+ enfoncé plusieurs secondes puis relâchez-le.
4. Appuyez sur le bouton SAUT-/RÉGL- ou le bouton SAUT+/RÉGL+ pour régler manuellement
les stations de la radio.
5. Réglez le volume à un niveau d’écoute confortable.
6. Appuyez sur le bouton VEILLE pour éteindre l’appareil.
REMARQUE :
yEn cas de réception d’une station FM (stéréo), l’icône FM stéréo s’affiche à l’écran.
yL’ANTENNE FM TÉLÉSCOPIQUE est directionnelle. Quand vous recevez une émission FM,
dépliez complètement l’ANTENNE TÉLÉSCOPIQUE et orientez-la pour une réception
optimale.
ENREGISTRER VOTRE STATION DE RADIO PRÉFÉRÉE
1. Réglez d’abord votre station préférée. Maintenez le bouton MODE/MÉMOIRE enfoncé pour
enregistrer la station en cours jusqu’à ce que le numéro de mémoire clignote à l’écran.
2. Utilisez le bouton STOP/M-/ALBUM ou le bouton LECTURE/M+/10+ pour sélectionner la
mémoire correspondante entre P01 et P20 pour enregistrer la station.
3. Confirmez votre sélection en appuyant le bouton MODE/MÉMOIRE.
4. Pendant l’écoute de la radio, appuyez plusieurs fois sur le bouton STOP/M-/ALBUM ou le
bouton LECTURE/M+/10+ pour rappeler les stations mémorisées.

FR-3
MANIPULATION ET ENTRETIEN D’UN DISQUE
Suivez les instructions ci-dessous pour manipuler et entretenir votre
disque afin de pouvoir obtenir un fonctionnement durable et sans
problème :
yAssurez-vous de ne pas toucher la face arc-en-ciel du disque,
manipulez le disque par le bord.
yUne exposition prolongée à la lumière du soleil, aux températures
élevées et à l’humidité endommagent le disque. Maintenez
également l’espace de stockage propre.
yÉvitez de coller des étiquettes sur les deux faces d’un disque. Écrire
sur le disque avec un objet pointu doit être strictement évité.
yNettoyez le disque en essuyant le centre puis en vous déplaçant vers
le bord avec un chiffon sec et doux ou une brosse pour disque.
Évitez les lotions nettoyantes et les éliminateurs chimiques.
yRangez-les dans leurs étuis quand ils ne sont pas utilisés.
CHARGER UN DISQUE
1. Ouvrez la trappe à CD avec l’ouverture de la trappe.
2. Chargez un disque sur le plateau avec l’étiquette orientée vers le haut.
3. Fermez la trappe à CD.
LIRE UN DISQUE (CD/MP3)
1. Appuyez sur le bouton VEILLE pour mettre en marche l’appareil (l’indicateur veille s’éteint).
2. Appuyez plusieurs fois sur le bouton FONCTION pour passer en mode CD.
3. Suivez les étapes ci-dessus pour charger un disque.
4. Le lecteur commence immédiatement à lire le disque.
5. Si le disque est lu avec succès, le nombre total de pistes s’affiche sur l’écran et la lecture
démarre avec la première piste.
6. Appuyez une fois sur le bouton LECTURE/M+/10+ pour interrompre la lecture de la musique,
le temps écoulé clignote pour indiquer que le lecteur est en mode Pause. Appuyez sur le
bouton STOP/M-/ALBUM pour arrêter la lecture de la musique, l’écran LCD indique à nouveau
le nombre total de pistes.
FONCTIONNEMENT DU SUPPORT DE MÉMOIRE EXTERNE (USB)
1. Appuyez sur le bouton VEILLE pour mettre en marche l’appareil (l’indicateur veille s’éteint).
2. Insérez un périphérique USB sur le port USB.
3. Appuyez plusieurs fois sur le bouton FONCTION pour passer en mode USB.
4. Quand le périphérique USB est détecté et lu, le nombre total de pistes s’affiche sur l’écran
LCD et la lecture démarre avec la première piste.
5. Appuyez sur le bouton LECTURE/M+/10+ pour interrompre ou reprendre la lecture.
6. Appuyez sur le bouton STOP/M-/ALBUM pour arrêter la lecture.
SAUTER LES PISTES ET RECHERCHER UN POINT DE LECTURE SPÉCIFIQUE
(CD/MP3/USB)
1. Appuyez une fois sur le bouton SAUT+/RÉGL+ lors de la lecture de la musique pour passer à
la piste suivante. Appuyez une fois sur le bouton SAUT-/RÉGL- lors de la lecture de la
musique pour revenir au début de la piste en cours, appuyez deux fois en continu sur le
bouton pour passer à la piste précédente.
2. Maintenez le bouton LECTURE/M+/10+ enfoncé une fois lors de la lecture pour passer à la
piste située 10 pistes en avant, deux fois pour passer à la piste située 20 pistes en avant. Vous
pouvez atteindre la dernière piste du disque en utilisant ce bouton.
MANIPULER LE DISQUE
UNIQUEMENT COMME INDIQUÉ
NETTOYER DU CENTRE VERS
LE BORD
NE PAS RANGER À PROXIMITÉ
DE LA CHALEUR

FR-4
3. Maintenez le bouton SAUT+/RÉGL+ ou le bouton SAUT-/RÉGL- enfoncé lors de la lecture de
la musique pour rechercher rapidement un point de lecture spécifique.
4. Lors de la lecture, maintenez le bouton STOP/M-/ALBUM enfoncé jusqu’à ce que le numéro
d’album « F_ » s’affiche sur l’écran; appuyez sur le bouton SAUT/RECHERCHE
ARRIÈRE/RÉGL- ou le bouton SAUT/RECHERCHE AVANT/RÉGL+ pour sélectionner le
dossier de votre choix. Quand le numéro du dossier de votre choix s’affiche sur l’écran LCD,
relâchez le bouton et attendez plusieurs secondes, l’appareil lit la première piste du dossier
sélectionné. (MP3/USB UNIQUEMENT)
RÉPÉTER LA LECTURE (CD/MP3/USB)
Lors de la lecture, appuyez sur le bouton MODE/MÉMOIRE pour répéter la lecture d’une piste
unique. Appuyez deux fois sur le bouton pour répéter la lecture de toutes les pistes. Appuyez
trois fois sur le bouton pour entrer dans le mode lecture introduction. Appuyez quatre fois sur le
bouton pour entrer dans le mode lecture aléatoire. Appuyez cinq fois sur le bouton pour quitter.
LECTURE PROGRAMMÉE (DISQUE CD/MP3/USB)
1. En mode stop, appuyez une fois sur le bouton MODE/MÉMOIRE, l’icône du programme
indique d’abord une indication de séquence de programme « P01 », puis un numéro de piste
clignote sur l’écran LCD avec l’icône du programme.
2. Sélectionnez la première piste à programmer en utilisant le bouton SAUT+/RÉGL+ ou le
bouton SAUT-/RÉGL- puis appuyez à nouveau sur le bouton MODE/MÉMOIRE pour
enregistrer et avancer à l’étape suivante de programmation (S’il y a plusieurs dossiers sur le
disque MP3 ou le périphérique USB, il est nécessaire de programmer d’abord les dossiers
puis les pistes. La méthode de programmation des dossiers est la même que pour la
programmation des pistes).
3. Répétez les étapes ci-dessus pour programmer d’autres pistes. Un maximum de 20 pistes par
CD et de 99 pistes par périphérique MP3/USB peuvent être programmées en mémoire par
ordre de préférence. Si la mémoire est pleine, l’écran indique « FUL » (plein).
4. Appuyez sur le bouton LECTURE/M+/10+ pour démarrer la lecture programmée par ordre de
préférence après avoir effectué la programmation. Le lecteur s’arrête automatiquement après
que toutes les pistes programmées aient été lues.
5 Vous pouvez appuyer sur le bouton STOP/M-/ALBUM pour terminer la lecture programmée. En
mode programme arrêté, appuyez sur le bouton LECTURE/M+/10+ pour démarrer la lecture
programmée dans l’ordre de programmation identique à la lecture précédente; appuyez à
nouveau sur le bouton STOP/M-/ALBUM pour effacer la programmation.
ENTRÉE AUX
1. Raccordez la prise d’entrée Aux de l’appareil à une source audio, par exemple un lecteur MP3
avec un câble audio.
2. Mettez en marche l’appareil en suivant les instructions correspondantes.
3. Appuyez plusieurs fois sur le bouton FONCTION pour passer en mode AUX.
4. Utilisez les commandes du périphérique audio raccordé pour commencer la lecture de la
musique via le périphérique raccordé.
CONSIGNES DE SÉCURITÉ IMPORTANTES
y
L’appareil ne doit pas être exposé aux gouttes ou aux éclaboussures. Aucun objet rempli de
liquide, tel qu’un vase, ne doit être placé sur l’appareil.
y
Si l’adaptateur secteur CA/CC est utilisé en tant que dispositif de coupure d’alimentation, le
dispositif de coupure d’alimentation doit rester facilement accessible. Pour couper
complètement l’alimentation électrique, l’adaptateur secteur CA/CC soit être complètement
débranché du secteur.

FR-5
y
Aucune source de flamme nue, telle qu’une bougie allumée, ne doit être placée sur l’appareil.
y
Distance minimale de 2,0 cm autour de l’appareil pour une ventilation suffisante. La ventilation
ne doit pas être gênée en couvrant les orifices de ventilation avec des objets tels que des
journaux, des nappes, des rideaux, etc.
y
Cet appareil doit être utilisé dans un climat tropical et/ou modéré.
y
Une attention doit être portée aux aspects environnementaux de la mise au rebut des piles.
y
ATTENTION : Danger d’explosion si les piles ne sont pas remplacées correctement.
Remplacez-les uniquement par un type identique ou équivalent.
y
Les piles ne doivent pas être exposées à une chaleur excessive telle que la lumière du soleil, le
feu ou équivalent.
y
La plaque signalétique se situe en bas de l’appareil.
SPÉCIFICATIONS
GÉNÉRALES
Alimentation ............................................ CC 9 V 1 A (à partir de l’adaptateur externe)
9 V 6 piles UM-2/« C »
Consommation électrique ........................ 9 W
Dimensions .............................................. Environ 290 mm (L) x 241 mm (l) x 125 mm (H)
Température de fonctionnement .............. +5 °C à + 35 °C
RÉCEPTEUR
Bandes reçues ......................................... FM ST.
Gamme de fréquence/sensibilité ............. FM 87.5 - 108 MHz
LECTEUR CD
Système de lecture .................................. Système audio numérique Compact Disc
AUDIO
Puissance de sortie.................................. 1,2 W x 2 (RMS)
Impédance des haut-parleurs .................. 8 ohms
Les spécifications peuvent être modifiées sans préavis.
Ceci certifie que le LECTEUR CD/MP3 est conforme à
la directive du Conseil 2004/108/CE (Directive CEM)
Normes applicables :
EN55013:2001+A1:2003+A2:2006
EN61000-3-2:2006+A1:2009+A2:2009
EN61000-3-2:2008
EN55020:2007
Pour plus d’informations, veuillez visiter notre site Internet
www.mpmaneurope.com

GEBRAUCHSANWEISUNG
CD/MP3-PLAYER MIT UKW-RADIO
UND USB-ANSCHLUSS
MODELL: CSU484PLL
Bitte lesen und befolgen Sie diese Anweisungen, bevor Sie das Gerät benutzen.

DE-1
ÜBERSICHT ÜBER DEN PLAYER
123
4567
8
9
10
11 12
13
14 15 16 14
17
18 19
POSITIONIERUNG DER BEDIENELEMENTE
1. UKW-TELESKOPANTENNE
2. KLAPPGRIFF
3. CD-FACH
4. USB-ANSCHLUSS
5. STANDBY-TASTE
6. FUNKTIONS-TASTE
7. STOP/M-/ALBUM-TASTE
8. MODUS/MEM-Taste
9. PLAY/M+/10+ TASTE
10. ENTRIEGELUNGSTASTE CD-FACH
11. SKIP-/TUN- TASTE
12. SKIP+/TUN+ TASTE
13. BATTERIEFACH
14. LAUTSPRECHER
15. LCD-DISPLAY
16. STANDBY-ANZEIGE
17. STROMEINGANG-BUCHSE
18. AUX-IN-BUCHSE
19. LAUTSTÄRKEREGELUNG

DE-2
ELEKTRIZITÄTSVERSORGUNG
AKKUBETRIEB
1. Entfernen Sie die Abdeckung des Batteriefachs vorsichtig.
2. Legen Sie 6 x "C"-Batterien (UM-2 oder gleichwertig) ein unter Beachtung der richtigen
Polarität.
3. Setzen Sie die Abdeckung des Batteriefachs wieder ein.
HINWEIS:
•Der Stromadapter muss aus der Stromeingangs-Buchse des Players genommen werden.
•Auslaufende Batterien können das Batteriefach und den Player als Ganzes beschädigen.
Sie sollten aus dem Batteriefach entfernt werden, wenn die Leistung nachlässt oder wenn
der Player nicht für einen längeren Zeitraum von Batterien betrieben wird.
STROMBETRIEB
Stecken Sie das mitgelieferte Netzteil an die Strombuchse am Gerät und an das Stromnetz an.
HINWEIS: Wenn kein Eingang von Tonsignalen erfolgt, wird das Gerät nach etwa 20 Minuten
automatisch in den Standby-Modus (außer bei Radio-Modus) versetzt.
UKW-RADIO
SENDEREINSTELLUNG DES UKW-RADIOS
1. Die Standby-Anzeige leuchtet auf, sobald das Hauptgerät an das Stromnetz angeschlossen ist.
Drücken Sie die Taste STANDBY, um das Gerät einzuschalten (die Standby-Anzeige wird
ausgeschaltet).
2. Drücken Sie die Taste FUNKTION wiederholt, um das Gerät in den RADIO-Modus zu schalten.
3. Um die automatische Sendersuche zu starten, drücken und halten Sie die Taste SKIP-/TUN-
oder SKIP+/TUN+ für einige Sekunden und lassen Sie dann los.
4. Drücken Sie die Taste SKIP-/TUN- oder SKIP+/TUN+, um die Radiosender manuell
einzustellen.
5. Stellen Sie die Lautstärke auf die gewünschte Lautstärke ein.
6. Drücken Sie die Taste STANDBY, um das Gerät auszuschalten.
HINWEIS:
•Wenn ein UKW-(Stereo)Sender empfangen wird, wird das UKW-Stereosymbol auf dem
Bildschirm angezeigt.
•Die UKW-TELESKOPANTENNE ist ausrichtbar. Wenn Sie eine UKW-Sendung empfangen,
ziehen Sie die Teleskopantenne vollständig aus und drehen Sie sie für den besten Empfang.
SPEICHERN DER LIEBLINGS-RADIOSENDER
1. Stellen Sie ihren Lieblingssender ein, drücken und halten Sie die MODUS/MEM-Taste zum
Speichern des aktuellen Senders bis die Nummer der Speicherzelle auf dem Bildschirm
aufblinkt.
2. Verwenden Sie die STOP/M-/ALBUM-Taste oder die Taste PLAY/M+/10+, um die
entsprechende Speicherzelle unter P01-P20 zum Speichern der Station auszuwählen.
3. Bestätigen Sie Ihre Auswahl durch Drücken der MODUS/MEM-Taste.
4. Während der Radio-Wiedergabe, drücken Sie die STOP/M-/ALBUM-Taste oder die Taste
PLAY/M+/10+ wiederholt, um die gespeicherten Sender aufzurufen.

DE-3
Handhabung und Wartung von CD’s
Folgen Sie den untenstehenden Anweisungen zur Behandlung und
Pflege ihrer CD‘s damit eine lange und störungsfreie Verwendung
erreicht werden kann:
•Stellen Sie sicher, dass Sie die Unterseite (Regenbogen-Seite) der
CD pflegen. Fassen Sie die CD am Rand an.
•Lange Sonneneinstrahlung, hohe Temperaturen und Feuchtigkeit
werden die CD beschädigen. Halten Sie die Lagerfläche sauber.
•Vermeiden Sie das Aufkleben von Etiketten auf beiden Seiten der
CD. Schreiben Sie niemals mit spitzen Gegenstände auf die CD.
•Reinigen Sie die CD, indem Sie von der Mitte bis an den Rand mit
einem trockenen und weichen Tuch oder einer CD-Bürste wischen.
Vermeiden Sie jedwede Reinigungsmilch oder chemische
Reinigungsmittel.
•Lagern Sie die CD‘s in CD-Hüllen, wenn sie nicht verwendet
werden.
Einlegen einer CD
1. Öffnen Sie das CD-Fach mit der Entriegelungstaste des CD-Fachs.
2. Legen Sie eine CD in die Lade ein mit der beschrifteten Seite nach oben.
3. Schließen Sie das CD-Fach.
CD-Wiedergabe (CD/MP3)
1. Drücken Sie die Taste STANDBY, um das Gerät einzuschalten (die Standby-Anzeige wird
ausgeschaltet).
2. Drücken Sie die Taste FUNKTION wiederholt, um in den CD-Modus zu wechseln.
3. Befolgen Sie die oben genannten Schritte, um eine CD einzulegen.
4. Der CD-Player beginnt sofort mit dem Lesen.
5. Wenn die CD erfolgreich gelesen wird, wird die Gesamtanzahl der Titel in der LCD-Anzeige
aufgelistet und die Wiedergabe erfolgt mit dem ersten Titel.
6. Drücken Sie die Taste PLAY/M+/10+ einmal, um die Musikwiedergabe zu pausieren, die
verstrichene Zeit blinkt auf, um anzuzeigen, dass der Player sich im Pause-Modus befindet.
Drücken Sie die STOP/M-/ALBUM-Taste, um die Musikwiedergabe zu beenden, das Display
zeigt wieder die Gesamtanzahl der Titel an.
WIEDERGABE EXTERNER SPEICHERMEDIEN (USB)
1. Drücken Sie die Taste STANDBY, um das Gerät einzuschalten (die Standby-Anzeige wird
ausgeschaltet).
2. Schließen Sie ein USB-Gerät an den USB-Anschluss an.
3. Drücken Sie die Taste FUNKTION wiederholt, um in den USB-Modus zu wechseln.
4. Wenn das eingesteckte USB-Gerät erkannt und gelesen wird, wird die Gesamtanzahl der
Tracks in der LCD-Anzeige angezeigt und die Wiedergabe startet mit dem ersten Titel.
5. Drücken Sie die Taste PLAY/M+/10+ zum Unterbrechen oder Fortsetzen der Wiedergabe.
6. Drücken Sie die STOP/M-/ALBUM -Taste, um die Wiedergabe zu beenden.
ÜBERSPRINGEN VON TITELN UND DIE SUCHE NACH EINER BESTIMMTEN STELLE
(CD/MP3/USB)
1. Drücken Sie einmal die Taste SKIP+/TUN+ während der Musikwiedergabe, um zum nächsten
Titel zu springen. Drücken Sie einmal auf die Taste SKIP-/TUN-, um wieder zum Anfang des
aktuellen Titels zu springen, drücken Sie die Taste zweimal hintereinander, um zum vorherigen
Titel zu springen.
2. Drücken und halten Sie während der Musikwiedergabe die Taste PLAY/M+/10+ einmal, um auf
zum nächsten Titel vorwärts zu springen, zweimal, um 20 Titel zu überspringen. Mit dieser
Taste gelangen Sie an die hinteren Titel von CD’s.
Handhaben Sie die CD nur wie
dargestellt
Putzen Sie von der Mitte zum Rand
Keine Lagerung in der Nähe von
Hitzequellen

DE-4
3. Drücken und halten Sie die Taste SKIP+/TUN+ oder die Taste SKIP-/TUN- während der
Musikwiedergabe, um auf Schnellsuchlauf zu schalten, um eine bestimmte Stelle im Titel zu
suchen.
4. Während der Wiedergabe drücken und halten Sie die STOP/M-/ALBUM-Taste gedrückt, bis
das Album "F_" auf dem Bildschirm angezeigt wird. Drücken Sie die Taste SKIP/SEARCH
BACK/TUN- oder SKIP/SEARCH FWD/TUN+, um den gewünschten Ordner auszuwählen.
Wenn die gewünschten Ordnernummer auf der LCD-Anzeige erscheint, lassen Sie die Taste
los und warten Sie einige Sekunden. Das Gerät wird den ersten Titel des gewählten Ordners
abspielen (MP3/USB ONLY).
WIEDERHOLUNG DER WIEDERGABE (CD/MP3/USB)
Während der Wiedergabe drücken Sie die MODUS/MEM-Taste einmal, um die Wiedergabe
eines einzelnen Titels zu wiederholen, drücken Sie diese Taste zweimal, um die Wiederholung
der Wiedergabe aller Titel einzustellen, drücken Sie die Taste dreimal, um den
Einführungsmodus einzugeben, drücken Sie die Taste viermal, um den
Zufallswiedergabe-Modus einzustellen, drücken Sie die Taste fünfmal, um zu beenden.
Programmierte Wiedergabe ( CD/MP3 DISC / USB)
1. Im Stop-Modus, drücken Sie die MODUS/MEM-Taste einmal, erscheint das Symbol des
Programms mit einer Programmablaufs-Anzeige "P01", dann blinkt eine Titelnummer auf der
LCD-Anzeige mit dem Programm-Symbol auf.
2. Wählen Sie den ersten Titel zur Programmierung mit der Taste SKIP+/TUN+ oder der Taste
SKIP-/TUN- aus, drücken Sie dann die MODUS /MEM-Taste erneut, um es zu speichern und
zum nächsten Programmierschritt zu gelangen (Wenn mehrere Ordner auf der MP3-CD oder
dem USB-Gerät vorhanden sind, ist es erforderlich, zuerst die Ordner und dann die Titel zu
programmieren. Das Verfahren zur Programmierung der Ordner ist das gleiche, wie die
Programmierung der Titel).
3. Wiederholen Sie die obigen Schritte, um weitere Titel zu programmieren. Es können maximal
20 Titel für CD’s und 99 Titel für MP3/USB‘s in einer bevorzugten Reihenfolge im Speicher
programmiert werden. Wenn der Speicher voll ist, erscheint auf dem Bildschirm "FUL".
4. Drücken Sie die Taste PLAY/M+/10+, nachdem Sie mit der Programmierung fertig sind, um die
programmierte Wiedergabe in der bevorzugten Reihenfolge zu beginnen. Der Player stoppt
automatisch, nachdem alle programmierten Titel abgespielt wurden.
5. Sie können die Taste STOP/M-/ALBUM-Taste drücken, um die programmierte Wiedergabe zu
beenden. Im Programm-Stop-Modus, drücken Sie die Taste PLAY/M+/10+, um die
programmierte Wiedergabe mit der Programmierungsreihenfolge identisch mit der vorherigen
Reihenfolge zu beginnen, drücken Sie die STOP/M-/ALBUM-Taste erneut, um die
Programmierung zu löschen.
AUX-IN
1. Verbinden Sie die AUX-IN-Buchse am Gerät mit der Audioquelle, z.B. MP3-Player mit einem
Audiokabel.
2. Schalten Sie das Gerät ein, entsprechend der Anweisungen.
3. Drücken Sie die Taste FUNKTION wiederholt, um in den AUX-Modus zu wechseln.
4. Verwenden Sie die nativen Steuerelemente auf dem angeschlossenen Audiogerät, um das
Abspielen der Musik über das angeschlossene Gerät zu beginnen.
WICHTIGE SICHERHEITSHINWEISE
•Das Gerät darf nicht Tropf- oder Spritzwasser ausgesetzt werden und es dürfen keine Objekte
mit Flüssigkeiten, wie z.B. Vasen, auf das Gerät gestellt werden.
•Wenn der Stromadapter als Abschaltvorrichtung verwendet wird, muss die Abschaltvorrichtung
frei zugänglich bleiben. Um das Gerät mit der Leistungsaufnahme vollständig vom Netz zu
nehmen, muss der Stromadapter komplett vom Stromnetz getrennt werden.

DE-5
•Es dürfen keine offenen Flammen, wie z.B. brennende Kerzen, auf das Gerät gestellt werden.
•Mindestabstände von 2cm sind rund um das Gerät für ausreichende Belüftung einzuhalten.
Die Belüftung darf nicht durch Abdecken der Belüftungsöffnungen mit Gegenständen wie
Zeitungen, Tischdecken, Vorhängen, usw. behindert werden.
•Die Verwendung des Geräts ist für tropische und/oder gemäßigte Klimazonen vorgesehen.
•Die Entsorgung der Batterien sollte nach Umweltschutzaspekten erfolgen.
•ACHTUNG: Es besteht Explosionsgefahr, wenn Batterien falsch ausgetauscht werden. Der
Austausch der Batterien darf nur mit demselben oder einem gleichwertigen Typ erfolgen.
•Die Batterie sollte keiner übermäßigen Hitze wie Sonnenschein, Feuer oder dergleichen
ausgesetzt werden.
•Das Typenschild ist an der Unterseite des Geräts angebracht.
TECHNISCHE ANGABEN
ALLGEMEIN
Stromversorgung .................................... 9V 1A (aus dem externen Adapter)
9V UM-2/"C" x 6St. (Batterien)
Leistungsaufnahme ................................ 9W
Abmessungen ........................................ ca. 290mm (L) x 241mm (B) x 125mm (H)
Betriebstemperatur ................................. +5° C ~ +35° C
RECEIVER
Empfangen ............................................. UKW STEREO
Empfangsbereich/Empfindlichkeit .......... UKW 87,5 - 108 MHz
CD PLAYER
Wiedergabesystem. ............................... Digital-Audio-Compact-Disc-System
AUDIO
Ausgangsleistung ................................... 1,2 W x 2 (Effektivwert)
Lautsprecher-Impedanz ......................... 8 Ohm
Die Spezifikationen können ohne vorherige Ankündigung abgeändert werden.
Hiermit wird bescheinigt, dass der CD/MP3-PLAYER in Übereinstimmung steht mit
der Richtlinie des Rates 2004/108/EG (EMV-Richtlinie).
Geltende Normen:
EN55013: 2001 + A1: 2003 + A2: 2006
EN61000-3-2: 2006 + A1: 2009 + A2: 2009
EN61000-3-2: 2008
EN55020: 2007
Für weitere Informationen besuchen Sie bitte unsere Website unter:
www.mpmaneurope.com

MANUALE DI ISTRUZIONI
LETTORE CD/MP3 CON RADIO FM
E LETTORE USB
MODELLO: CSU484PLL
Si prega di leggere e di seguire queste istruzioni prima di utilizzare il dispositivo.

IT-1
PRESENTAZIONE DEL DISPOSITIVO
123
4567
8
9
10
11 12
13
14 15 16 14
17
18 19
POSIZIONE DEI COMANDI
1. ANTENNA FM TELESCOPICA
2. MANICO RECLINABILE
3. SPORTELLO CD
4. PORTA USB
5. TASTO STANDBY
6. TASTO FUNZIONE
7. TASTO STOP/M-/ALBUM
8. TASTO MODO/MEM
9. TASTO PLAY/M+/10+
10. AREA SI APERTURA SPORTELLO CD
11. TASTO SKIP-/TUN-
12. TASTO SKIP+/TUN+
13. SCOMPARTO BATTERIE
14. ALTOPARLANTI
15. DISPLAY LCD
16. INDICATORE STANDBY
17. SPINOTTO CC IN
18. SPINOTTO AUX IN
19. CONTROLLO VOLUME
Table of contents
Languages:
Other MP-Man CD Player manuals

MP-Man
MP-Man CSD135PLL User manual

MP-Man
MP-Man CS-U52 User manual

MP-Man
MP-Man CSU 55 User manual

MP-Man
MP-Man CSU58 User manual

MP-Man
MP-Man CSU 36 User manual

MP-Man
MP-Man XRM-15 User manual

MP-Man
MP-Man CSD 18 User manual

MP-Man
MP-Man BOOMBOX64USB User manual

MP-Man
MP-Man CSD 15 User manual

MP-Man
MP-Man Boom Box 60USB User manual