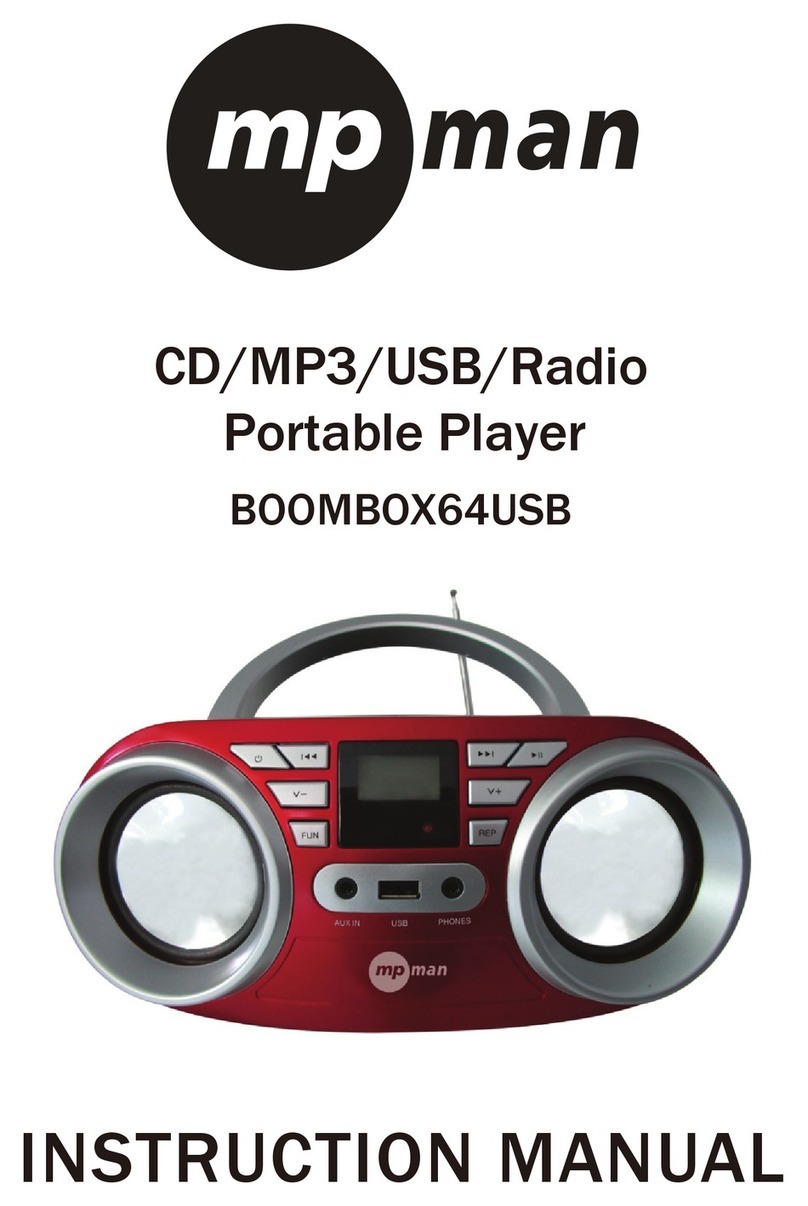
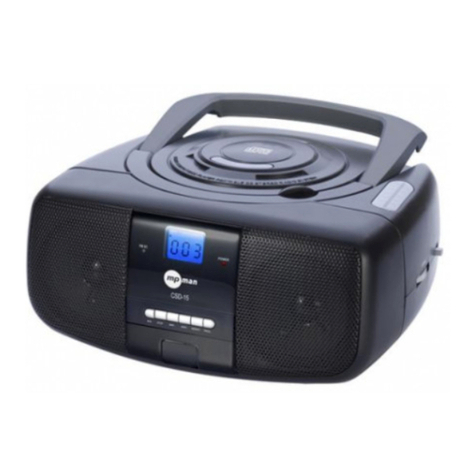
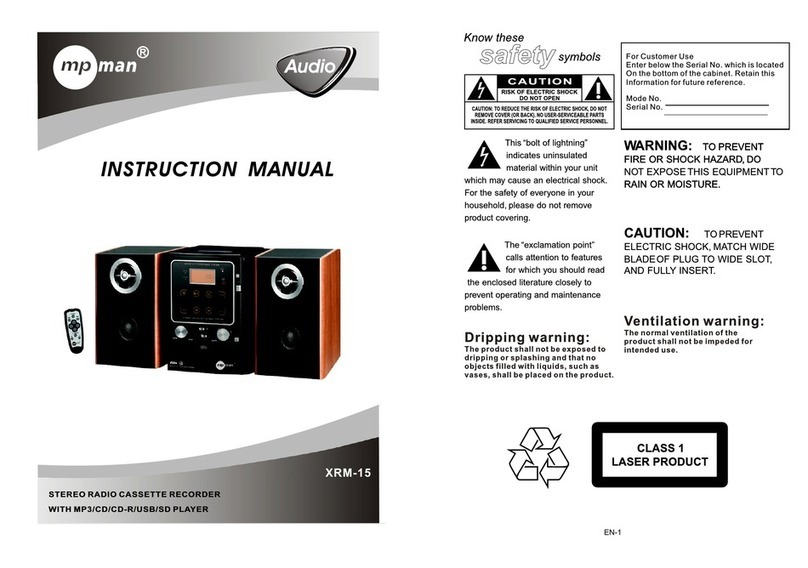
MP-Man CSD 18 User manual

CSD-18
INSTRUCTION MANUAL

WARNING
E-1
TO PREVENT FIRE OR SHOCK HAZARD DO NOT EXPOSE THIS APPLIANCE TO RAIN OR MOISTURE.
WARNING : SHOCK HAZARD-DO NOT OPEN
RISK OF ELECTRIC SHOCK
DO NOT OPEN
CAUTION
LIGHTING FLASH WITH ARROWHEAD SYMBOL -
within an equilateral triangle, is intended to alert the
user to the presence of uninsulated dangerous
voltage within the products enclosure that may be of
sufficient magnitude to constitude a risk of electric
shock to persons.
EXCLAMATION POINT - within an equilateral triangle,
is used to indicate that a specific component shall be
replaced only by the component specified in that
documentation for safety reason.
The following label has been affixed to the unit, listing the proper procedure for working with the laser beam:
CLASS 1 LASER PRODUCT LABEL -
This label is attached to the place as illustrated to inform that the
apparatus contains a laser component.
WARNING LABEL INFORMING OF RADIATION -
CLASS 1 LASER PRODUCT
KLASS 1 LASER APPARAT
LUOKEN 1 LAISERLAITE
KLASSE 1 LASER PRODUKT
This label is placed inside the unit. As shown in the illustration. To
warn against further measures on the unit. The equipment contains
a laser radiating laser rays according to the limit of laser product of
class 1.

SAFETY INSTRUCTIONS
E-2
1. READ INSTRUCTIONS - All the safety and operating instructions should be read before the appliance is operated.
2. REMAIN INSTRUCTIONS - The safety and operating instruction should be retained for future reference.
3. HEED WARNINGS - All warnings on the appliance and in the operating instructions should be adhered to.
4. FOLLOW INSTRUCTIONS - All operating instructions should be followed.
5. WATER AND MOISTURE - The appliance should not be used near water, for example, near a bathtub, washbowl,
kitchen sink, laundrytub, swimming pool or in a wet basement.
6. VENTILATION - The appliance should be situated so that its location or position does not interfere with its proper
ventilation. For situated on bed, sofa, rug or similar surface that may block the ventilation openings, placed in a
built-in installation, such as a bookcase or cabinet that may impede the flow of air through the ventilation openings.
7. HEAT - The appliance should be situated away from heat sources such as radiators, stoves, or other appliances
(including amplifiers) that produce heat.
8. POWER SOURCE - The appliance should be connected to power supply only of the type described in the
operating instructions or as marked on the appliance.
9. GROUNDING - Precautions should be taken to ensure that the grounding means of an appliance is not defeated.
10. POWER CORD PROTECTION - Power supply cords should be routed so that they are not likely to be walked
on or pinched by items placed upon or against them.
11. POWER LINES - An outdoor antenna should be located away from power lines.
12. OBJECT and LIQUID ENTRY - Care should be taken so that objects do not fall and liquids are not spilled into
the enclosure through openings.
13. DAMAGE REQUIRING SERVICE - The appliance should be serviced by qualified service personnel when:
a. The power-supply cord or plug has been damaged.
b. Objects have fallen into, or liquid has been spilled into the appliance enclosure.
c. The appliance has been exposed to rain.
d. The appliance has been dropped, or the enclosure damaged.
e. The appliance does not appear to operate performance.
14. SERVICING - The user should not attempt to service the appliance beyond that described in the user operating
instructions. All other servicing should be referred to qualified service personnel.
Notes:
a. Dirty or scratched CD may cause a skipping problem. Clean or replace the CD.
b. If an error display or malfunction occurs, disconncet the AC cord and remove all the batteries. Then turn the power
back on.
BEFORE OPERATION
Notes: CONCERNING COMPACT DISCS.
Since dirty, damaged or warped discs may damage the appliance, care should be taken of the followings items:
a. Usable compact discs. Use only compact disc with the mark shown below.
b. CD compact disc only with digital audio signals.
BATTERY POWER
Insert 6 x “C” size batteries into the battery compartment. Be sure that the batteries are inserted
correctly to avoid damage to the appliance. Always remove the batteries when appliance will not be
used for a long period of time, as this will cause leakage to the batteries and subsequently damage
to your set.
Notes:
- Use batteries of the same type. Never use different types of batteries together.
- To use the appliance with batteries, disconnect the AC power cord from it.
POWER SOURCES
E-3
AC POWER
You can power your portable system by plugging the detachable AC power cord into the AC inlet at
the back of the unit and into a wall AC power outlet. Check that the rated voltage of your appliance
matches your local voltage. Make sure that the AC power cord is fully inserted into the appliance.
Insert 6 x “C” size batteries
into the battery compartment
to AC IN to a wall outlet

LOCATION OF CONTROL
E-4
DIAL PIONTER
PLAY / PAUSE
SKIP +
SKIP -
STOP
MODE
ALBUM
BAND SELECTOR
FUNCTION
SELECTOR
VOLUME
CONTROL
CD DOOR
FM ANTENNA
TUNING
CONTROL
OPEN / CLOSE
CASSETTE DOOR
TAPE BUTTONS - PAUSE, STOP / EJECT, FAST FORWARD, REWIND, PLAY, RECORD
LCD DISPLAY
FM STEREO INDICATORPOWER INDICATOR

GENERAL OPERATION
1. Set the “FUNCTION” selector to “RADIO” mode.
2. Select desired band by using the “BAND” selector.
3. Adjust radio frequency to your desired station by using the “TUNING” control.
4. Adjust the “VOLUME” control to the desired level.
FM / FM-STEREO RECEPTION
- Set the “BAND” selector to FM mode for MONO reception.
- Set the “BAND” selector to FM ST. mode for FM STEREO reception. The Stereo indicator light up
to show FM ST. mode.
RADIO OPERATION
E-5
FOR BETTER RECEPTION
- Reorient the antenna for better FM reception.
- Reorient the appliance to get better AM reception.

TAPE OPERATION
E-6
GENERAL OPERATION
PAUSE Press to stop playing tape operation temporarily.
Press again to resume tape operation.
STOP / EJECT Press to stop tape operations.
Press again to open the cassette door after the tape spools stop turning.
FAST FORWARD & Press to start rapid tape winding either forward or reverse direction.
REWIND
PLAY Press to start playing tape.
RECORD Press it together with “PLAY” button to start recording.
PLAYBACK
1. Set the “FUNCTION” selector to “TAPE” mode.
2. Press the “STOP / EJECT” button to open the cassette door and insert your tape.
3. Close the cassette door.
4. Press the “PLAY” button to start playing tape.
5. Adjust the “VOLUME” control to the desired level.
6. Press the “PAUSE” button when you want to stop playing tape operation temporarily.
7. Press the “STOP / EJECT” button when finished.
RECORDING
1. Press the “STOP / EJECT” button to open the cassette door and insert a blank tape.
2. Select the source you want to record.
To record from radio - Set the “FUNCTION” selector to “RADIO” mode and adjust the desired station.
To record from CD / MP3 - Place a disc on the CD compartment. Set the “FUNCTION” selector to
“CD / MP3” mode and select the desired track.
3. Press the “RECORD” button together with the “PLAY” button to start recording.
4. Press the “STOP / EJECT” button when finished.

You may select a desired folder by pressing “ALBUM” button (For MP3 only).
6. Adjust the “VOLUME” control to the desired level.
CD / MP3 OPERATION
E-7
GENERAL OPERATION
PLAY / PAUSE Press to start playing CD / MP3 disc.
Press again to stop playing CD / MP3 operation temporarily.
Press again to resume playback.
SKIP + & Press to go to the next track or back to the previous track.
SKIP - Press and hold while playing until you find the point of the sound.
STOP Press to stop all CD / MP3 operation.
PLAYBACK
1. Set the “FUNCTION” selector to “CD / MP3” mode.
2. Open the CD door and place a CD / MP3 disc with the label up on the CD compartment.
3. Close the CD door.
4. Focus search is performed if disc is inside. Total number of track is read and appear on the display.
5. Press the “PLAY / PAUSE” button to start playing CD / MP3 disc.
7. Press the “PLAY / PAUSE” button again when you want to stop playback temporarily.
8. Press the “STOP” button when finished.

You can help protect the environment!
Please remember to respect the local regulations: hand in the non-working electrical
equipments to an appropriate waste disposal center.
MODE
Press the “MODE” button during playing CD / MP3 disc,
each press switch the mode function as follows:
1 - REPEAT 1
2 - REPEAT ALBUM ( *MP3 ONLY )
3 - REPEAT ALL
4 - RANDOM
5 - NORMAL PLAYBACK
REPEAT 1
REP REP
ALBUM REP
ALL
REPEAT
ALBUM
REPEAT
ALL
NORMAL
PLAYBACK
RAND
RANDOM
CD / MP3 OPERATION
E-8
PROGRAM
Up to 20 tracks can be programmed for disc play in any order.
Be sure to press the “STOP” button before use.
1. Press the “MODE” button, the display will show “P01” and flashing.
2. Select a desired track by using the “SKIP +” or “SKIP -” button. ( You may select a desired album
by pressing “ALBUM” button. )
3. Press the “MODE” button again to confirm desire track into program.
4. Repeat step 2 and 3 to enter additional memories into the program.
5. When all the desired tracks have programmed, press the “PLAY / PAUSE” button to play the disc
in the order you have programmed.
6. Press the “STOP” button twice to terminate program playback.

CSD-18
MODE DʼEMPLOI

AVERTISSEMENT
FR-1
POUR DIMINUER LES RISQUES D’INCENDIE OU D´ÉLECTROCUTION, N’EXPOSEZ PAS CET APPAREIL À
LA PLUIE OU À L'HUMIDITÉ.
WARNING : SHOCK HAZARD-DO NOT OPEN
RISK OF ELECTRIC SHOCK
DO NOT OPEN
CAUTION
L’étiquette suivante a été apposée sur l’appareil. Elle décrit la procédure adéquate pour travailler
avec le faisceau laser :
CLASS 1 LASER PRODUCT LABEL – (ÉTIQUETTE DE
PRODUIT LASER CLASSE 1)
Cette étiquette est apposée sur l’appareil afin d’informer de la
présence d’un composant laser
ÉTIQUETTE D’AVERTISSEMENT SUR LE RAYONNEMENT -
CLASS 1 LASER PRODUCT
KLASS 1 LASER APPARAT
LUOKEN 1 LAISERLAITE
KLASSE 1 LASER PRODUKT
L'étiquette est placée à l'intérieur de l'appareil comme illustré
ici. Avertissement concernant les mesures supplémentaires sur
l'appareil. L’appareil contient un laser émettant des rayons
lasers dans le respect de la limite du produit laser de classe 1.
LE SYMBOLE REPRÉSENTANT UN ÉCLAIR MUNI
D'UNE FLÈCHE VERS LE BAS – dans un triangle
équilatéral, a pour fonction d’avertir l’utilisateur de la
présence d’une tension dangereuse non isolée dans
le boîtier du produit qui peut être suffisamment
importante pour électrocuter une personne.
POINT D’EXCLAMATION – dans un triangle
équilatéral, indique qu’un composant spécifique
ne pourra être remplacé que par le composant
spécifié dans la documentation et ce, pour des
raisons de sécurité.

MESURES DE SÉCURITÉ
FR-2
1. LISEZ LES INSTRUCTIONS – Toutes les mesures de sécurité et instructions d’utilisation doivent être lues avant de
faire fonctionner l’appareil.
2. CONSERVEZ LES INSTRUCTIONS – les mesures de sécurité et les instructions devront être conservées en vue
d’une consultation ultérieure.
3. TENEZ COMPTE DES AVERTISSEMENTS - .Tous les avertissements et instructions d’utilisation relatifs à
l’appareil devront être respectés.
4. SUIVEZ LES INSTRUCTIONS – Toutes les instructions d’utilisation devront être suivies.
5. EAU ET HUMIDITÉ – L’appareil ne doit pas être utilisé près d’une source d’eau, (par exemple, près d’une baignoire,
d’un lavabo, d’un évier de cuisine, d’une cuve de lessivage, d’une piscine ou dans une cave humide).
6. VENTILATION – L’appareil devra être disposé de sorte que sa position n’interfère pas avec son système de
ventilation. N'obstruez pas les ouvertures de ventilation en plaçant l'appareil sur un lit, un canapé, un tapis ou toute
autre surface similaire. Ce produit ne doit pas non plus être placé dans une installation intégrée, comme une
bibliothèque ou un meuble qui empêcherait une bonne ventilation.
7. CHALEUR - N'installez pas l'appareil à proximité de sources de chaleur, telles qu'un radiateur, une grille de diffusion
de chaleur, un poêle ou tout autre appareil (y compris des amplificateurs) générant de la chaleur.
8. SOURCE D’ALIMENTATION – L’appareil ne doit être relié qu’au type de source d’alimentation décrit dans les
instructions d’utilisation ou mentionné sur l’appareil.
9. MISE À LA TERRE – des précautions doivent être prises afin d’assurer que les systèmes de mise à la terre de
l’appareil ne sont pas défectueux.
10. PROTECTION DU CORDON D’ALIMENTATION – Les cordons d’alimentation doivent être agencés de manière à
ne pas être piétinés ou coincés par des objets placés sur ou contre ceux-ci.
11. LIGNE D’ÉNERGIE ÉLECTRIQUE – Si vous utilisez une antenne extérieure, veillez à la maintenir à une distance
suffisante des lignes électriques.
12. INTRUSION D’OBJET ET DE LIQUIDE – Prenez soin à ce qu'aucun objet ou liquide ne s'introduise dans le boîtier
via les ouvertures.
13. AVERTISSEMENT CONCERNANT LES DÉCHARGES ÉLECTROSTATIQUES - .un problème au niveau du
fonctionnement de l'affichage ou encore l'inactivité des commandes peut être dû à une décharge électrostatique.
Mettez l’appareil hors tension et débranchez-le. Rebranchez-le après quelques secondes.
14. DÉGÂTS NÉCESSITANT UNE RÉVISION – L’appareil devra être révisé par un technicien qualifié lorsque :
a. Le cordon d'alimentation ou la fiche est endommagé(e).
b. Des objets ou des liquides ont été projetés dans le boîtier de l’appareil.
c. L’appareil a été exposé à la pluie.
c. L’appareil a subi une chute ou le boîtier est endommagé.
e. L’appareil ne semble pas fonctionner normalement.
15. DÉPANNAGE – L’utilisateur ne doit en aucun cas essayer de réparer l’appareil. Il s'en tiendra à ce qui est décrit
dans les instructions d’utilisation. Pour toute réparation, veuillez vous adresser à un technicien qualifié.
Remarques :
a. Un CD sale ou rayé peut entraîner des problèmes de saut de plage. Nettoyez le CD ou remplacez-le.
b. En cas de disfonctionnement ou de message d’erreur, débranchez le cordon d’alimentation de l’appareil et enlevez
toutes les piles puis rebranchez-le.
AVANT L’UTILISATION
Remarques : CONCERNANT LES DISQUES COMPACT
Puisqu’un CD sale ou rayé peut endommager l’appareil, soyez attentif aux éléments suivants :
a. Disques compact utilisables. N’utilisez que les CD portant la marque mentionnée ci-dessous.
b. N’utilisez que des signaux audio numériques.

BATTERIE
Remarques :
SOURCES D’ALIMENTATION
FR-3
ALIMENTATION CA
Insérez 6 piles de type C dans le compartiment prévu à cet effet ou branchez l’appareil à une prise
de courant.
Vous pouvez alimenter votre lecteur portable en branchant le cordon d’alimentation CA détachable
(situé à l’arrière de l’appareil) dans une prise murale. Vérifiez que la tension nominale de votre
appareil correspond à la tension du secteur local. Assurez vous que le cordon d'alimentation est
correctement connecté à l’appareil.
Insérez 6 piles de type C dans le compartiment prévu à cet effet. Assurez-vous que les piles
sont placées correctement pour éviter d'endommager l'appareil. Retirez toujours les piles
lorsque l’appareil n’est pas utilisé pendant une longue période car cela risque d’entraîner une
fuite des piles et donc d’endommager votre appareil.
- Utilisez des piles du même type. N’utilisez jamais des piles différentes en même temps.
- Pour utiliser l’appareil à l’aide de piles, déconnectez le cordon d'alimentation CA de l’appareil.

EMPLACEMENT DES BOUTONS
FR-4
SÉLECTEUR
BOUTON PLAY /
PAUSE
BOUTON SKIP +
(SAUT)
BOUTON SKIP –
(SAUT)
BOUTON STOP
BOUTON MODE
BOUTON ALBUM
SÉLECTEUR DE
BANDE
SÉLECTEUR DE
FONCTION
RÉGLAGE DU
VOLUME
CLAPET DU
LECTEUR CD
ANTENNE FM
BOUTON
TUNING
OUVRIR / FERMER
TIROIR À CASETTE
TOUCHES DU RADIOCASSETTE - PAUSE, STOP/EJECT, FAST FORWARD, REWIND, PLAY, RECORD
ÉCRAN LCD
FM STEREO INDICATORVOYANT D’ALIMENTATION

FONCTIONNEMENT GÉNÉRAL
1. Placez le sélecteur de FONCTION en mode « RADIO ».
2. Sélectionnez la bande de votre choix en utilisant le sélecteur de bande.
3. Sélectionnez une fréquence radio en fonction de la station désirée à l’aide de la touche « TUNING »
(Syntoniseur).
4. Réglez le volume à l'aide de la molette « VOLUME ».
RÉCEPTION FM / FM-STEREO
- Placez le sélecteur de bande en mode FM pour une réception MONO.
- Placez le sélecteur de bande en mode FM ST pour une réception FM STEREO. Le témoin Stéréo s’allume
lorsque le mode FM ST est activé.
FONCTIONNEMENT DE LA RADIO
FR-5
POUR UNE MEILLEURE RÉCEPTION
- Réorientez l’antenne afin d’obtenir une meilleure
réception FM.
- Réorientez l’appareil afin d’obtenir une meilleure
réception AM.

FONCTIONNEMENT DU LECTEUR DE CASSETTES
FR-6
FONCTIONNEMENT GÉNÉRAL
Touche PAUSE Appuyez sur cette touche pour arrêter temporairement la lecture
de la cassette.
Touche STOP / EJECT Appuyez sur cette touche pour arrêter la lecture de la cassette.
Appuyez à nouveau sur cette touche pour ouvrir le compartiment à
cassette après l’arrêt complet de la lecture.
Touche FAST FORWARD & Appuyez sur cette touche pour effectuer une avance rapide ou un
rembobinage.
Touche REWIND
Touche PLAY Appuyez sur cette touche pour lancer la lecture de la cassette.
Touche RECORD Appuyez sur cette touche en même temps que sur la touche « PLAY »
pour lancer un enregistrement.
PLAYBACK
1. Placez le sélecteur de FONCTION en mode « TAPE ».
2. Appuyez sur la touche « STOP / EJECT » pour ouvrir le compartiment et insérez la cassette.
3. Fermez le compartiment à cassette.
4. Appuyez sur la touche « PLAY » pour commencer la lecture.
5. Réglez le volume à l'aide de la molette « VOLUME ».
6. Appuyez sur la touche « PAUSE » lorsque vous souhaitez arrêter temporairement la lecture.
7. Appuyez sur la touche « STOP / EJECT » lorsque la lecture est terminée.
ENREGISTREMENT
Appuyez sur la touche « STOP / EJECT » pour ouvrir le compartiment et insérez une cassette
vierge.
Sélectionnez la source que vous souhaitez enregistrer.
Pour enregistrer à partir de la radio, appuyez sur la touche « FUNCTION » pour sélectionner le mode
« TUNER » et déterminez la station de votre choix.
Pour enregistrer à partir d’un disque CD / MP3, placez un disque dans le compartiment prévu à cet
effet. Placez le sélecteur de fonction en mode « CD / MP3 » et sélectionnez la piste souhaitée.
Appuyez sur la touche « RECORD » en même temps que sur la touche « PLAY » pour lancer un
enregistrement.
Appuyez sur la touche « STOP / EJECT » lorsque la lecture est terminée.
1.
2.
3.
4.

6. Réglez le volume à l'aide de la molette « VOLUME ».
FONCTIONNEMENT DU CD / MP3
FR-7
FONCTIONNEMENT GÉNÉRAL
Touche PLAY/PAUSE Appuyez sur cette touche pour lire le disque CD / MP3.
Appuyez à nouveau sur cette même touche pour arrêter temporairement
la lecture du disque CD/MP3.
Appuyez à nouveau pour reprendre la lecture.
.
Touche SKIP + & Appuyez sur cette touche pour passer à la plage suivante ou précédente.
Touche SKIP - Appuyez sur la touche et maintenez-la enfoncée jusqu’à atteindre le
moment choisi de la plage.
STOP Appuyez sur cette touche pour arrêter la lecture du disque CD / MP3..
PLAYBACK
3. Fermez le clapet du lecteur CD.
5. Appuyez sur la touche PLAY/PAUSE pour lire le disque CD / MP3.
Vous pouvez sélectionner le dossier de votre choix en cliquant sur la touche « ALBUM » (pour les MP3
uniquement).
7. Appuyez sur la touche « PLAY / PAUSE » lorsque vous souhaitez arrêter temporairement la lecture.
8. Appuyez sur la touche « STOP » lorsque la lecture est terminée.
1. Placez le sélecteur de fonction en mode « CD / MP3 ».
2. Ouvrez le Clapet du lecteur et placez un disque CD / MP3 avec l’étiquette vers le haut dans le
compartiment CD.
4. Une recherche de focalisation est effectuée si le disque est à l’intérieur du lecteur. Le nombre total
de pistes est lue et apparaît à l’écran.

Aidez-nous à protéger l’environnement !
Veillez à respecter les réglementations locales : rapportez les équipements électriques
défectueux dans un centre de réception des déchets approprié.
MODE
Appuyez sur le bouton « MODE » pendant la lecture du disque CD / MP3,
Vous changez de mode à chaque fois que vous appuyez sur ce bouton. Les modes se succèdent
comme suit :
1 - REPEAT 1 (Répéter 1)
2 - REPEAT ALBUM ( *MP3 ONLY ) (Répéter l’album - *MP3 seulement)
3 - REPEAT ALL (Répéter tout)
4 – RANDOM (Lecture aléatoire)
5 - NORMAL PLAYBACK (Lecture normale)
REPEAT 1
REP REP
ALBUM REP
ALL
REPEAT REPEAT
ALBUM
NORMAL
PLAYBACK
RAND
RANDOM
FONCTIONNEMENT DU CD / MP3
FR-8
www. mpmaneurope.com
PROGRAMME
Vous pouvez programmer la lecture de 20 plages d’un disque dans l’ordre que vous souhaitez.
Appuyez avant tout sur la touche « STOP ».
1. Appuyez sur la touche « MODE », L’écran affiche « P01 » et clignote.
2. Sélectionnez la plage souhaitée en utilisant les touches « SKIP + » ou « SKIP - ». (Vous pouvez sélectionner
le dossier de votre choix en cliquant sur le bouton « ALBUM »).
3. Appuyez à nouveau sur la touche « MODE » pour mémoriser votre choix de plage.
4. Répétez les étapes 2 et 3 afin de mémoriser d’autres plages.
5. Lorsque toutes les plages souhaitées sont programmées, appuyez sur la touche « PLAY / PAUSE » pour
lire le disque dans l’ordre choisi lors de la programmation.
6. Appuyez deux fois sur la touche « STOP » pour mettre un terme à la lecture programmée.

CSD-18
BEDIENUNGSANLEITUNG

WARNUNG
DE-1
UM BRAND ODER STROMSCHLAG ZU VERMEIDEN, DARF DIESES GERÄT KEINEM REGEN ODER
SONSTIGER FEUCHTIGKEIT AUSGESETZT WERDEN.
WARNING : SHOCK HAZARD-DO NOT OPEN
RISK OF ELECTRIC SHOCK
DO NOT OPEN
CAUTION
VORSICHT
STROMSCHLAGGEFAHR
NICHT ÖFFNEN
WARNUNG:
STROMSCHLAGGEFAHR
NICHT ÖFFNEN
Die folgende Beschriftung ist auf dem Gerät angebracht und verweist auf das korrekte Verfahren beim Arbeiten
mit Lasterstrahl:
CLASS 1 LASER PRODUCT
KLASS 1 LASER APPARAT
LUOKEN 1 LAISERLAITE
KLASSE 1 LASER PRODUKT
BLITZ-PFEIL-SYMBOL – in einem gleichschenkligen
Dreieck: Weist den Benutzer auf gefährliche, nicht isolierte
Spannung im Gerätegehäuse hin, die hoch genug sein kann, um
einen Stromschlag bei Personen zu verursachen.
AUSRUFEZEICHEN – in einem gleichschenkligen
Dreieck: Weist darauf hin, dass ein bestimmtes Bauteil aus
Sicherheitsgründen nur durch das in der Dokumentation
angegebene Bauteil ersetzt werden darf.
AUFKLEBER KLASSE 1 LASERPRODUKT -
Dieser Aufkleber ist an der abgebildeten Stelle angebracht, um darauf
hinzuweisen, dass sich in dem Gerät ein Laserbauteil befindet.
WARNAUFKLEBER FÜR STRAHLUNG -
Dieser Aufkleber ist im Inneren des Gerätes angebracht. Wie in der
Abbildung gezeigt. Warnt gegen bestimmte Maßnahmen am Gerät. Das
Gerät enthält eine Vorrichtung, die Laserstrahlen gemäß den Grenzwerten
eines Laserprodukts der Klasse 1 abgibt.
Table of contents
Languages:
Other MP-Man CD Player manuals

MP-Man
MP-Man CSD 15 User manual

MP-Man
MP-Man CSU58 User manual

MP-Man
MP-Man CSU 38 User manual

MP-Man
MP-Man CSU 36 User manual

MP-Man
MP-Man Boom Box 60USB User manual

MP-Man
MP-Man CSU484PLL User manual

MP-Man
MP-Man XRM-15 User manual

MP-Man
MP-Man CSD 17 User manual

MP-Man
MP-Man BOOMBOX64USB User manual

MP-Man
MP-Man CSD135PLL User manual