MSI StarCam Clip User manual
Overview
Snapshot Button
LED Button Built-in
Microphone
LensLens
Lens
Super ClaritySuper Clarity
DeluxeDeluxe
Super Clarity
Deluxe
Night VisionNight Vision
Three infraredThree infrared
lightlight
Night Vision
Three infrared
light
Built-in Plug &Built-in Plug &
talk USBtalk USB
MicrophoneMicrophone
Built-in Plug &
talk USB
Microphone
Clip & Snap/Clip & Snap/
HardwareHardware
SnapShotSnapShot
Clip & Snap/
Hardware
SnapShot
Versatile Versatile
ClampClamp
Versatile
Clamp
LensLens
Lens
Super Clarity
Super Clarity
DeluxeDeluxe
Super Clarity
Deluxe
Night VisionNight Vision
Three infraredThr ee infrared
lightlight
Night Vision
Three infrared
light
Built-in Plug &Built-in Plug &
talk USBtalk USB
MicrophoneMicrophone
Built-in Plug &
talk USB
Microphone
Clip & Snap/Clip & Snap/
HardwareHardware
SnapShotSnapShot
Clip & Snap/
Hardware
SnapShot
Versatile Versatile
ClampClamp
Versatile
Clamp
• Capture 1.3 Mega Pixels Photos
• Deluxe GLASS Lens Clarity
• One-click Snapshot Button
• Built-in Plug-&-Talk USB Microphone
• Adjustable Focus Lens
• Versatile Clamp
• Capture 1.3 Mega Pixels Photos
• Deluxe GLASS Lens Clarity
• One-click Snapshot Button
StarCam Clip Web Camera works with your PC through USB
interface. Find the following items when unpacking:
1. StarCam Clip Web Camera
2. Software Pack CD
3. This Guide
Versatile Clamp Design:
The Versatile Clamp allows the StarCam Clip to attach to the
Notebook Panel or to stand on the top of
CRT monitor and sit on the desktop.
System Requirements
To install StarCam Clip, your computer system needs to meet the
following requirements:
1. Intel Pentium 4/III/II/Celeron, AMD K6/Athlon or compat
ible with USB connecter.
2. Operation System Supports: Windows XP/2000/ME/98SE
3. 64MB System Memory, 128MB recommended
4. VGA Support, minimum 640 x 480 resolution
5. A CD-ROM drive for software installation
6. Hard disk with 50MB free space or above
Specifications
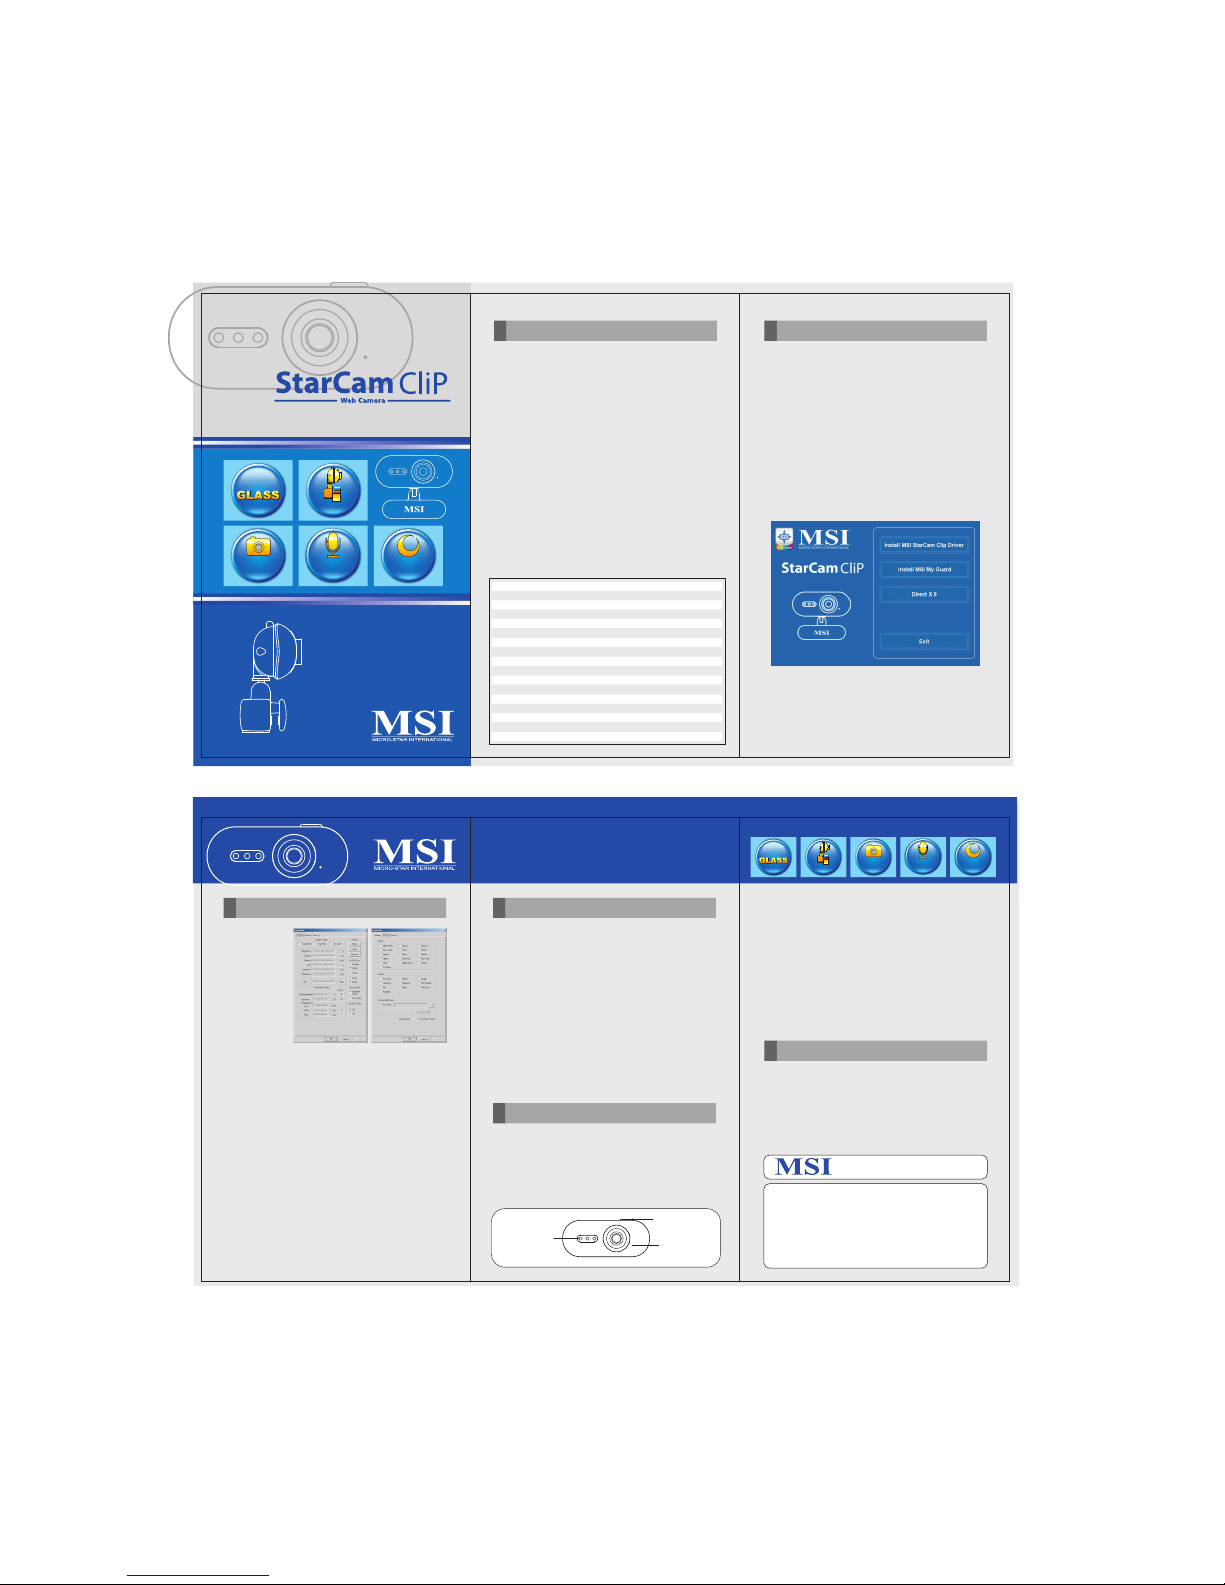
To install the driver of StarCam Clip, follow the instructions below:
1. Turn on the computer.
2. Insert the provided software CD into CD-ROM drive, and the
auto-run Setup program will be automatically activated.
3. Click ‘Install MSI StarCam Clip Driver’ and ‘Next’ to continue.
4. Follow the on-screen instructions to continue the installation.
5. Click ‘Finish’ to complete the installation and restart the
system.
6. Connect the MSI StarCam Clip to the USB port.
7. Once the MSI StarCam Clip is connected to the computer, the
system will detect the new USB device and configure the
device automatically.
8. To install the MSI My Guard program, simply click the ‘Install
MSI My Guard’ and follow the on-screen instructions to
continue the installation.
Installation
Adjusting the
Image Parameter
The StarCam Clip
allows you to
adjust the image
parameters in
accordance with
your personal
choice. To do so,
follow the steps
below:
1. Select [Start /
All Programs / MSI StarCam Clip / AMCap] to
activate the AMCAP. The video image will display. Check if
StarCam Clip works properly.
2. If the image is not shown on the AMCAP window, please select
[Option / Preview] on the toolbar of AMCAP window.
3. To adjust video option, please select [ Option / Video Capture
Filter ] to enter the Properties window.
4. Once the configuration is set, click Aply to see the result, or
click OK to confirm the configuration and return to the AMCAP
window.
5. If you are in the low illumination condition, you can select Low
Light to improve the quality of image.
6. If you would like to make special effect on the image in
Black-White color, please select the mode of Black-White.
7. Select [Option / Video Capture Pin] to enter the sub window.
- Set Frame Rate: the default setting is 15 PFS, set to 30 FPS
to smoothen the video capturing procedure.
- Color: available selections are RGB24 and I420.
Image Size: available selections are 160x120, 176x144,
320x240, 352x288, 640x480, 800x600(by software).
Basic Usage
• Built-in Plug-&-Talk USB Microphone
• Adjustable Focus Lens
• Versatile Clamp
To make Video Recording, follow the steps below:
1. Select [File / Set Capture File] to setup a recording file (.avi)
and then click OK to start recording.
2. To enable the audio function while recording, please select
[Capture / CaptureAudio]. Note that the Master Strem function
can be ignored.
3. To adjust the amount of images captured per second, please
select [Capture / SetFrame Rate] and then enter a desired
number.
4. To set up the recording ending timer, please select [Capture /
Set Time Limit] and then enter a desired number of second.
Once the recording timer arrives the time that is set, the
recording will stop automatically.
5. To stop recording during the recording is on going manually,
simply click the Esc icon.
6. To review the recorded file, simply click on the recorded AVI file.
To capture the still images, follow the steps below:
1. Select [Start / AllPrograms / MSI StarCam Clip / AMCap] to
activate the AMCAP (video camera window and check if
StarCam Clip works properly.
2. If there is no image shown on the AMCAP window, please select
[Option / Preview] on the toolbar of AMCAP window.
3. Press ‘SnapShot’ button to capture the still image.
4. save the captured image, select [File / Save as] to save the
image to a desired location, and then close the image capturing
window.
5. To capture another image, repeat the steps 3 and 4.
6. If you need the image captured in the diverse resolution, please
select [Option / Video Capture Filter] to enter the Properties
window, and the use of VGA snap size slider to select the proper
snap image size. The available selections are:
- 160x120 - 176x144
- 320x240 - 352x288
- 640x480 - 800x600 (still image)
- 1024x768 (still image) - 1280x960 (still image)
Using Microphone
To use the microphone function, follow the steps below:
1. Select [Start / Control Pannel / Sounds and Audio Devices] to
enter Sounds and Audio Devies Properties window. In this
window, select the Audio tag, and then select USB Camera in
the Sound recording drop menu.
2. Select [Start / All Programs / Accessories / Entertainment /
Sound Recorder] to start recording the sound through the
connected microphone.
Video Recording
Image Catpuring
Using Microphone
Special Feature
Infrared Light
StarCam Clip equipped with the Infrared Light function which
allows users to see a clear image through StarCam Clip in a
darkroom. To use Infrared Light function, please select
[Option / Video Capture Filter] to enter the Properties
window. In this window, you will find three options, Close
and Open, under Aux LED mode to control the Infrared Light
function.
GLASS
Color CMOS Sensor
VGA Format 640x480(300K)
Up to 30Fps(640x480); 30Fps(352x288)
Up to 800x600 (by software) 640x480,352x288...
Up to 1280x960 (by software)
3 cm ~ infinity
56 degrees
Auto
Auto
Auto
RGB24
Full Run: 2w typical
Windows XP/2000/ME/98SE
USB1.1 /2.0 Compatible
-45DB
0~2m high power
Lens Composition
Image Sensor
Pixel:
Frame Rate
Video Resolution
Still Image Resolution
Focus Distance
Field of View
Brightness
Exposure Control
White-Balance
Image Format
Power Consumption
Operating System
I/O Interface
USB Microphone
Infrared Light
* All trademarks used in this manual are the sole property of their respective owners.
StarCam is a trademark of International Business Machines Corporation.
Pentium is a registered trademark of Intel Corporation.
Windows is a registered trademark of Microsoft Corporation.
Note: The StarCam shown here may vary from the actual card.
For further information, please visit MSI website at www.msi.com.tw
Versatile ClampVersatile ClampVersatile Clamp
PPM6425
Other manuals for StarCam Clip
3
Other MSI Webcam manuals


