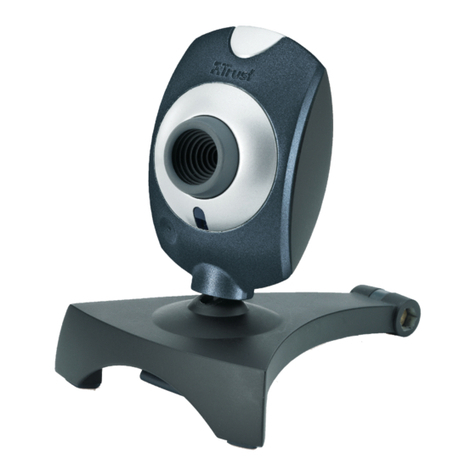
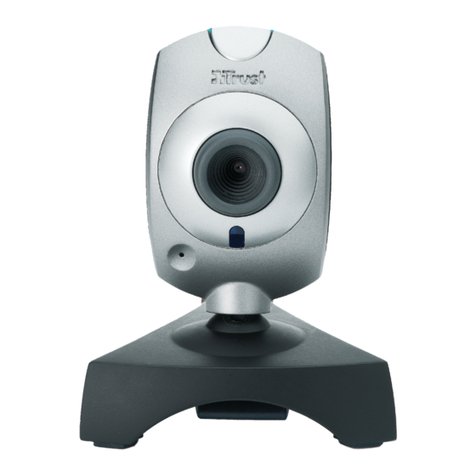
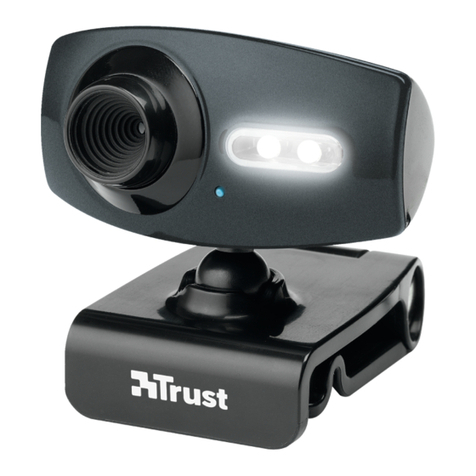
Trust 110T User manual

TRUST 110T SPACEC@M
Instructions when using for the first time Chapter
1. Uninstalling old drivers and devices (4.1)
2. Installing the driver and connecting (4.2)
UK
3. Installing the software (4.3)
4. Checking after the installation (5)
!
1 Introduction
This instruction manual is for users of the TRUST 110T SPACEC@M. Basic
knowledge of computers is necessary to install this product. Please contact one of
the Trust Customer Care Centers if you have any problems. The last page of this
installation manual contains more information about these Customer Care Centers.
knowledge of computers is necessary to install this product. Please contact one of
the Trust Customer Care Centers if you have any problems. The last page of this
installation manual contains more information about these Customer Care Centers.
The TRUST 110T SPACEC@M can be used to make short films, to take
photographs (snapshots) or as a webcam during video conferencing.
For video conferencing, you will have to connect a separate microphone to your
sound card.
The TRUST 110T SPACEC@M can be used to make short films, to take
photographs (snapshots) or as a webcam during video conferencing.
For video conferencing, you will have to connect a separate microphone to your
sound card.
2 Safety2 Safety
Carefully read the following instructions before use.Carefully read the following instructions before use.
- The TRUST 110T SPACEC@M does not require any special maintenance. Use a
slightly damp, soft cloth to clean the camera.
- The TRUST 110T SPACEC@M does not require any special maintenance. Use a
slightly damp, soft cloth to clean the camera.
- Do not use aggressive substances, such as white spirit, to clean the device. These
may harm the material.
- Do not use aggressive substances, such as white spirit, to clean the device. These
may harm the material.
- Do not submerge the device in liquid. This may be dangerous and will damage the
device. Do not use the device near water.
- Do not submerge the device in liquid. This may be dangerous and will damage the
device. Do not use the device near water.
- Make sure nothing is placed on the cable. Do not use this device where the cable
can become worn or damaged as a result of people walking over it.
- Make sure nothing is placed on the cable. Do not use this device where the cable
can become worn or damaged as a result of people walking over it.
- Do not repair this device yourself. If you open this device, you may touch live
components.
- Do not repair this device yourself. If you open this device, you may touch live
components.
- Under the following circumstances, have the device repaired by qualified
personnel:
- The cable or plug is damaged or worn.
- The device has come into contact with rain, water or another liquid.
- Under the following circumstances, have the device repaired by qualified
personnel:
- The cable or plug is damaged or worn.
- The device has come into contact with rain, water or another liquid.
3 Camera functions3 Camera functions
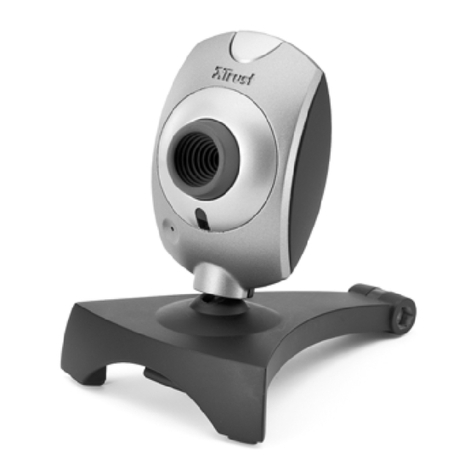
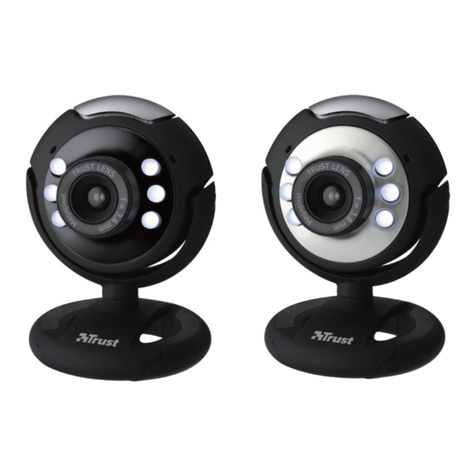
The table below corresponds to figure 1 on the foldout page.The table below corresponds to figure 1 on the foldout page.
FunctionFunction DescriptionDescription
1 Focus ring For sharpening the image.
2 Lens Records the image.
3 LED indicator Indicates that the camera is turned on.
Table 1: Camera functions
1
TRUST 110T SPACEC@M
4 Installation
The driver and software must be installed before you can connect the camera and
use it on your computer. See the following chapters for instructions on how to install
the driver and the software provided with the camera.
Note: With this driver, the camera only works on a system using Windows 98
or a later release. This camera does not work on an Apple Mac with
OS 8, 9 or Mac OSX.
Note: The latest driver can be downloaded from www.trust.com/13937.
Check whether a new driver is available and use this for the
installation.
Note: Make sure all other programs are closed during the installation.
Note: During installation in Windows XP, you may receive a message saying
that the driver has not been signed. This does not cause a problem for
the functionality. Continue with the installation.
Note: In the examples, the CD-ROM drive is indicated by “D:\”. This may be
different for your computer.
Note: Have your Windows CD-ROM available during the installation. You
may be requested to insert it into your CD-ROM drive.
4.1 Uninstalling old drivers and devices
The most common cause of faults during installation is the presence of a driver for a
similar, old device. The best solution is to first remove all drivers related to old
devices before installing the new driver.
1. Enter the Windows ‘Safe Mode’ (press F8 when starting Windows and then
select ‘Safe Mode’ from the menu which is displayed).
2. Click on ‘Start – Settings – Control Panel’ and double-click on the
‘Add/Remove Programs’ icon.
3. Find all the programs for similar, old devices and remove these by clicking on
the ‘Add/Remove’ button. When in the ‘Safe Mode’, it is possible for some
programs to appear twice. In that case, remove all the programs which appear
twice.
4. Restart the computer.
4.2 Installing the driver and connecting
Note: Install the camera before connecting it to your computer.
Note: When connecting the camera in Windows 2000 or Windows XP, it is
possible that your system may display a message saying that the
driver has not been signed. You can ignore this message, because it
does not affect the functionality of the driver. It only means that the
driver had not (yet) been fully certified by Microsoft at the time this
instruction manual was written. Click on 'Yes' to continue with the
installation.
1. Insert the CD-ROM into your CD-ROM drive. The Trust Software Installer will
start automatically. If the installation program does not start automatically,
start 'Setup.exe' on the CD-ROM. Figure 2 will appear. The Trust Software
Installer will appear in Windows 98, Windows ME, Windows 2000 and
Windows XP.
2. Click on 'Install 120/110T SPACEC@M' to start the installation. Figure 3 will
appear.
3. Click on ‘Next’ to start the installation. Follow the on-screen instructions.
4. Figure 4 will appear after the installation. Click on ‘Finish’ to complete the
installation.
2

TRUST 110T SPACEC@M
You have now completed the installation of the driver. Next, connect the camera.
5. Connect the USB cable to a free USB port on your computer. The camera will
turn on automatically and be detected by Windows.
Note: The installation will be completed automatically in Windows XP and
Windows ME. However, a number of steps must be carried out in
Windows 98. If using Windows 98, follow points 6 to 10 to complete
the installation.
UK
6. Figure 5 will appear after connecting the camera in Windows 98. Click on
'Next' to continue. Figure 6 will appear.
7. Select the option ‘Search for the best driver for your device (Recommended)’
and click on ‘Next’. Figure 7 will appear.
8. Select ‘Specify a location’ and enter the location where the driver is located:
[D:\Driver].
9. Click on ‘Next’ and follow the on-screen instructions.
10. At the end of the installation process, click on ‘Finish’ to complete the
installation.
You have now completed the installation of the camera. See the next chapter for
instructions on how to install the software provided with the camera.
4.3 Installing the software
The software programs provided with the camera (Photo Impression and Video
Impression) are installed in exactly the same way.
We have used the installation of Photo Impression as an example.
4.3.1 Photo Impression
1. Click on ‘Photo Impression’ in the Trust Software Installer (see figure 2).
2. In the window that appears, select the language that you wish to use to install
the program and click on ‘OK’.
3. Click on 'Yes' to accept the license agreement and continue with the
installation.
4. Follow the on-screen instructions.
5. Once the installation has been completed, click on ‘Finish’ to complete the
installation process and restart your computer.
You have now completed the installation of Photo Impression. Repeat the instructions
given above to install Video Impression.
4.3.2 Microsoft ® NetMeeting (Windows 98 / Windows ME /
Windows 2000)
NetMeeting is a program that is supplied with Windows 98 / Windows ME / Windows
2000. With this program, you can use the TRUST 110T SPACEC@M as a webcam.
NetMeeting is installed as follows.
1. Click on the ‘Start’ button in the bottom left-hand corner of your desktop.
Point to Programs -> Accessories -> Internet Tools and click on NetMeeting.
2. Click on 'Next' to continue.
3. Fill in your details, such as your Christian name, your surname, your e-mail
address, your country and a comment that you would like to be displayed in
the list. Click on ‘Next’
4. If you do not want to be displayed in the NetMeeting list, select 'Do not list my
name in the directory'. Click on ‘Next’ to continue with the installation. Follow
the on-screen instructions.
3

TRUST 110T SPACEC@M
5. You must select a camera during the installation. Select the TRUST 110T
SPACEC@M as the camera you wish to use for NetMeeting and click on
'Next' to continue.
6. Select 'Put a shortcut to NetMeeting on my desktop' if you wish to have a
shortcut to NetMeeting on your desktop.
Select 'Put a shortcut to NetMeeting on My Quick Launch bar' if you wish to
have a shortcut to NetMeeting on your Windows taskbar. You do not have to
select either option if you do not wish to.
7. Click on ‘Next’ to continue with the installation. Follow the on-screen
instructions to configure the audio and image settings.
8. At the end of the installation process, click on ‘Finish’ to complete the
installation of NetMeeting. NetMeeting will now start automatically.
If you are not able to properly test or configure your audio settings, check whether the
sound card and the devices satisfy the system requirements for NetMeeting and/or
whether these have been correctly connected and installed.
4.4 Installing Microsoft ® NetMeeting (Windows XP)
NetMeeting is installed as follows in Windows XP.
1. Click on the 'Start' button in the bottom left-hand corner of your taskbar.
2. Select 'Run'.
3. Type ‘conf’.
4. The NetMeeting Wizard will appear after approximately 30 seconds.
5. Follow the on-screen instructions to install the program.
4.5 Installing Windows Messenger (Windows XP)
Windows Messenger is already installed in the Windows XP operating system. You
can select Windows Messenger from the ‘Start’ menu to start the program. Follow the
on-screen instructions to enter your personal settings.
After the installation, you can check to see whether everything has been installed
correctly. See the next chapter for instructions on how to do this.
5 Checking after the installation
After installing the device and the programs, the following are installed on your
computer and can be checked.
‘Start – Settings – Control Panel’. Double-click on the ‘System’ icon and select the
‘Device Manager’ tab.
- Imaging Device – TRUST120/110T SPACEC@M
‘Start – Settings – Control Panel’ and then double-click on the ‘Add/Remove
Programs’ icon.
- 120/110T SpaceC@m
- ArcSoft PhotoImpression
- ArcSoft VideoImpression
Start - Programs - Trust - …
- Uninstall 120/110T SpaceC@m
Note: The information given above will vary when the installation has been
altered by the user (for example, not everything has been installed or
locations other than the default locations have been selected).
Note: Deviations may also occur as a result of using new drivers available on
the Internet.
Note: The location or name may vary in the ‘Control Panel’ for different
operating systems.
4

TRUST 110T SPACEC@M
6 Using the camera and the software
6.1 Photo Impression
UK
1. Click on the Photo Impression icon on your Windows desktop. Figure 8 will
appear.
2. Click on ‘Camera/Scanner’ (A). Figure 9 will appear.
B Camera model Select the camera model that you wish to use.
(TRUST 110T SPACEC@M)
C TWAIN settings Settings for saving recordings.
D TWAIN window Displays the camera’s memory.
E Video function For recording live video images.
Table 2: Photo Impression functions (figure 8)
3. Select ‘VGA USB Camera (2120)’ for B (see figure 9).
4. Click on the Camera/Scanner icon (D). The TWAIN window will now be
opened
Snap Shot Takes a photograph of the current (live) camera image.
Property Camera settings (brightness, contrast, etc.).
Format Image size (320x240 / 352x288 / 640x480).
Exit Closes the TWAIN window.
Table 3: TWAIN window functions
5. Click on ‘Snap Shot’ to take a photograph.
6. Click on ‘Transfer’ to transfer the photograph to Photo Impression.
The photograph will now appear with the other photographs in figure 6.
7. The photograph can now be selected and edited. Select the photograph by
clicking on it and then clicking on ‘OK’.
8. The recording will now appear in figure 5.
You can now edit the photograph using Photo Impression.
See this program’s Help function (question mark in the top right-hand corner of the
window) for more information on how to edit the photograph.
This explains all the possibilities available for editing photographs.
6.2 VideoImpression 1.6
Video Impression 1.6 can be used to make video recordings (without sound) with
your TRUST 110T SPACEC@M.
1. Click on the ArcSoft Video Impression icon on your Windows desktop. Figure
7 will appear.
2. Click on the ‘New’ icon (A). Figure 9 will appear.
3. Click on the ‘Capture’ icon (B). Figure 10 will appear.
4. Select ‘VGA USB Camera (2120)’ for C.
5. Click on button Dto view the camera’s settings. Figure 11 will appear.
6. For ‘Color Space / Compression:’, select the RGB 24 format.
7. If desired, select the image format with ‘Output Size’.
5

TRUST 110T SPACEC@M
8. Click on 'Apply' and then on 'OK' to save the new settings. Figure 10 will
appear again.
9. Click on button Eto view a live video image. The live video image will be
visible in window I.
10. Click on button Fto start recording a video.
11. To stop recording a video, click on button Hor the Esc button on your
keyboard.
12. You can view the recording by clicking on button G.
13. The recording can be saved by clicking on the Diskette icon J.
You can select the location where you wish to save the recording.
This was a short description of Video Impression 1.6.
For more detailed information, see the program’s Help function.
You can view this by clicking on the program’s question mark icon.
The Help function contains information concerning all the program’s functions.
6.3 Using the camera as a webcam (NetMeeting)
Note: It is recommended to connect a separate microphone to your sound
card so that you can make optimal use of NetMeeting’s audio and
sound functions.
1. Make sure you have an Internet account installed and your speakers and
microphone are connected to your sound card before starting NetMeeting.
2. Start NetMeeting (Start -> Programs -> Accessories -> Internet Tools ->
NetMeeting)
3. Two windows will be opened, namely NetMeeting and your Dial-up
connection.
Note: The ‘Dial-up Connection’ window will NOT appear if you are already
connected to the Internet or if you connect to the Internet via an ADSL
or cable connection.
4. Fill in your user name and password and click on 'Connect' to connect to the
Internet.
5. Once a connection has been made with the Internet, only the NetMeeting
window will remain visible. The ‘Dial-up Connection’ window will disappear.
6. A number of settings should be made only once.
Click on ‘Tools -> Options…’ and click on the ‘Video’ tab
7. To prevent a mirror image of your camera, do not select
‘Show mirror image in preview video window’. Image settings, such as the
image size and quality, can also be changed in this window. Click on 'OK' to
save the new settings and return to the start window of NetMeeting. The
once-only settings have now been completed.
8. Click on 'View' in the NetMeeting window and select 'My Video (New
Window)'. An extra window ('My Video') will now be opened
9. Click on the ‘Play’ button ( ) to turn on your current video image. This
image will also be seen by the person you make a NetMeeting connection
with.
10. You are now ready to make a NetMeeting connection. Click on NetMeeting’s
telephone book icon. A new window will appear.
11. In the address bar, type an ‘ILS server name’ (for example, ils.worldonline.nl)
and click on ‘Enter’.
12. Double-click on a person in the list. A NetMeeting connection will be made.
6

TRUST 110T SPACEC@M
The person may not wish to make a connection with you, because this person may
be communicating with somebody else. If this is the case, select somebody else from
the list.
You can find other ILS server addresses on the Internet.
UK
For more information or solutions to problems, click on ‘Help’ in NetMeeting’s start
window. This contains a description of all the functions available with NetMeeting.
6.4 Webcam & Internet
The TRUST 110T SPACEC@M can also be used as a webcam, for example, on your
Internet page.
A number of informative sites about webcams are given below:
http://www.camarades.com
http://www.teveo.com
At these sites, you can download software that you can use to send live video images
over the Internet.
Please refer to the sites concerned for information on how to install and use the
software.
7 Specifications
Sensor type CMOS
Recording element (CCD) 1/4”
Focus Manual focus
Pixel resolution 100K (352 x 288)
Colour depth 24 bits
Distance 30 cm to infinity
Built-in microphone No
Minimum lighting 50 Lux
30 fps for the 160 x 120 image format
(QCIF).
Data transfer speed
25 fps for the 320 x 240 image format
(CIF).
TWAIN interface Yes
Windows compatible Windows 98 / Windows ME / Windows
2000 / Windows XP
MAC compatible No
Connection USB 1.0
Power Via the USB port
Dimensions (HxWxD): 68 x 85 x 84 (including stand).
Weight 108 grams
Table 4: Specifications
7

TRUST 110T SPACEC@M
!
1. Read the solutions given below.
2. Check for up-to-date FAQ’s, drivers and instruction
manuals on the Internet (www.trust.com/13937)manuals on the Internet (www.trust.com/13937)
ProblemProblem CauseCause Possible solutionPossible solution
The computer's USB
port does not work.
Try a different USB port or
connect the device to a different
computer.
The camera has not
been connected to a
USB port.
Connect the camera to a USB port
(see chapter 4).
Windows does not
detect a new
device after
connecting the
camera.
The camera has been
connected to a USB
hub which does not
have a power supply.
Connect the camera to a USB hub
which has a power supply or to a
USB port on your computer.
The computer
becomes jammed
when using the
USB connection.
The USB port has
shared an IRQ with
another device.
Check your computer’s USB
settings.
The camera has not
been connected to a
USB port.
Connect the camera to a USB
port.
The error message
‘Capture device
was not detected’
is displayed. The camera has been
connected to a USB
hub which does not
have a power supply.
Connect the camera to a USB hub
which has a power supply or to a
USB port on your computer.
The TRUST 110T
SPACEC@M is
marked with an
exclamation mark
‘!’ in the Device
Manager.
The camera has been
connected to a USB
hub which does not
have a power supply.
Connect the camera to a USB hub
which has a power supply or to a
USB port on your computer.
There is no
connection with
the computer.
There is a bad cable
connection.
Reconnect the cables (see
chapter 4).
The latest FAQ’s are
available on the
Internet.
Go to www.trust.com/13937 for
FAQ’s and other product
information.
The problem is not
listed here.
There is a USB
problem.
- Go to www.trust.com.
- Select COMPUTER
PRODUCTS.
- Select CUSTOMER CARE.
- Click on USB for
TROUBLESHOOTERS
Table 5: Troubleshooting
8
8 Troubleshooting
Method

TRUST 110T SPACEC@M
9 Warranty conditions
- Our products have a two-year manufacturer's warranty which is effective from the
date of purchase.
UK
- If there is a fault, return the product to your dealer and include an explanation of
the fault, the proof of purchase and all the accessories.
- During the warranty period, you will receive a similar model, if one is available. If
no similar product is available, your product will be repaired.
- Please contact our help desk for missing components, such as the instruction
manual, software or other components.
- The warranty becomes invalid if the product has been opened, if there is
mechanical damage, if the product has been misused, if alterations have been
made to the product, if the product has been repaired by a third party, in the case
of negligence or if the product has been used for a purpose other than that
originally intended.
- Excluded from the warranty:
• Damage caused by accidents or disasters, such as fire, flood, earthquakes,
war, vandalism or theft.
• Incompatibility with other hardware/software which is not stated in the minimum
system requirements.
• Accessories, such as batteries, fuses (if applicable).
- Under no circumstances will the manufacturer be held responsible for any
incidental or consequential damage, including the loss of income or other
commercial losses resulting from the use of this product.
9
Table of contents
Other Trust Webcam manuals

Trust
Trust WB-1200P User manual

Trust
Trust SpaceCam 380 User manual

Trust
Trust WB-3100P User manual

Trust
Trust 15562 User manual

Trust
Trust WB-5600R User manual

Trust
Trust 15227 User manual

Trust
Trust WB-3500T User manual

Trust
Trust SPACECAM 150 User manual

Trust
Trust WB-3250P User manual

Trust
Trust Webcam User manual

Trust
Trust WB-3400T User manual

Trust
Trust WB-1100G User manual

Trust
Trust WB-6200p User manual

Trust
Trust 14823 User manual

Trust
Trust Webcam User manual

Trust
Trust 17473 User manual

Trust
Trust 16530 User manual

Trust
Trust 12440 User manual

Trust
Trust 2MP Auto Focus webcam User manual

Trust
Trust WB-1400T User manual