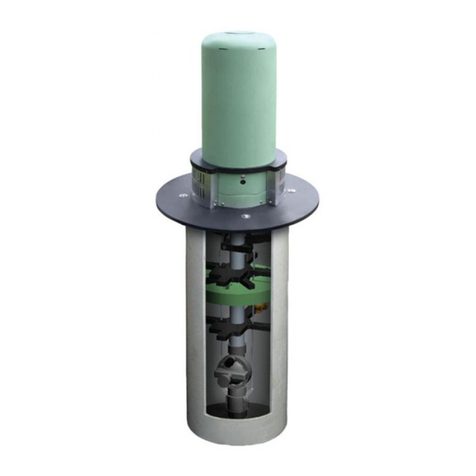
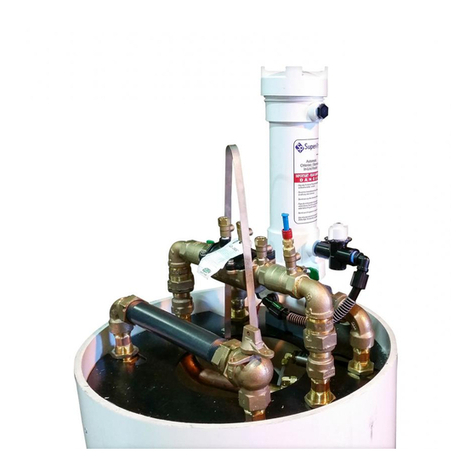
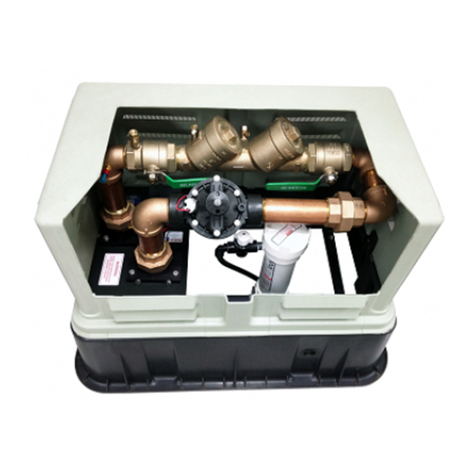
Mueller Hydro-Guard HG-6 Instruction Manual

TABLE OF CONTENTS PAGE
OPERATING INSTRUCTIONS MANUAL
WARNING:
1. Read and follow instructions carefully. Proper training and periodic review
regarding the use of this equipment is essential to prevent possible serious injury
and/or property damage. The instructions contained herein were developed for
using this equipment on ttings manufactured by Mueller Co. only, and may not be
applicable for any other use.
2. DO NOT exceed the pressure ratings of any components or equipment. Exceeding
the rated pressure may result in serious injury and/or property damage.
3. Safety goggles and other appropriate protective gear should be used. Failure to do
so could result in serious injury.
HG-6
Hydrant-Based
Flushing System
Installation Instructions 2
Programming Unit 3 - 6
Disassembly /
Reassembly Instructions 7
Troubleshooting 8
Options 9
Parts 10
Notes 11
F 12777 3/21
!

2
Stainless Steel
Housing
Adjustable Control
Valve
Latching
Solenoid
Bluetooth
Controller
Sample
Valve
15.88-18.625
Adjustable Height
Airgap Backflow
Prevention
Splash Plate
HG-6 FLUSHING SYSTEM
Installation Instructions
GENERAL
INSTALLATION
Please read and retain this
manual. It will be helpful for
future reference, training,
troubleshooting, and maintenance.
Site Evaluation
Each installation is unique and
will require a minimum of advance
planning. Prior toinstallation, the
drainage patterns for the intended
installation location should be
reviewed. The drainage pattern
must permit discharged water to
Overview
The Hydro-Guard HG-6 Hydrant-
Based Flushing System is a
portable and emergency use device
designed to flush water lines from
fire hydrants located anywhere in
the distribution network. These
devices require the hydrant to be
live when programmed for flushing.
The HG-6 has been engineered and
manufactured to provide outstanding
dependability and performance.
1. Remove the Hydro-Guard Unit
from its packaging and inspect
for possible damage during
shipping.
2. Using the pumper nozzle, flush
hydrant for several minutes to
ensure the water flow is free of
debris (i.e., rocks, etc.)
3. Confirm hydrant is turned off.
4. Gather 2" NTP connector and
hydrant wrench.
5. If necessary, loosen but do not
remove the four bolts on the
side of the Hydrant Flusher
in order to adjust connection
height, ensuring the device is
supporting its own weight. Once
proper height is determined,
tighten the four height
adjustment bolts.
6. Connect the Hydro-Guard Unit
by means of the 2" threaded
nipple and supplied hose
adapter.
7. Open the hydrant’s valve in
order to charge the hydrant.
flow away from the Hydro-Guard
Unit or to be absorbed by the
surrounding soil. The Unit’s ground-
level erosion controlling splash
plate is designed to disperse the
water energy from the discharging
water and reduce the risk of
erosion from around the base of
the fire hydrant. In order to prevent
undue pooling of the effluent water,
multiple nightly flushes are effective
in managing discharge volumes.
8. If the HG-6 has been shipped
with the Dechlorination System;
remove the security screws at
side of unit to access, remove the
dechlorination chamber, open, fill
with sodium sulfite or ascorbic
acid tablets, reinsert and replace
security screw.
9. Disinfect the Hydro-Guard
Automatic Flushing Device in
accordance with the utility’s policy.
Do not exceed the dosage and
contact times recommended
by the American Water Works
Association.
10. The Hydro-Guard Automatic
Flushing Device may now be
programmed and placed
into service.

3
HG-6 FLUSHING SYSTEM
Programming Unit
PROGRAMMING HYDRO-GUARD UNIT FOR OPERATION
1. Install the App:
From the App Store
or Google Play
Install the free K-RainBL App:
2. Install a 9 Volt Battery in
the Controller:
Unscrew the cap, remove the
seal and fasten the battery to the
correct terminals. Replace the
seal and cap and hand-tighten the
cap to ensure it seals.
NOTE: Before you launch the App, you
will need to enable locations services
on your phone/tablet in order for the
App to geolocate your device during
installation. On Android, location
services must be enabled in order
for the App to connect to the BL-KR
device.
3. Launch the application on your
Smartphone or Tablet.
4. Associate the controller with
your phone by tapping the
Add a Controller button.
5. The app will now ask what type
of Bluetooth device you would
like to add:
NOTE: The BL-KR V1.0 and
BL-KR V2.0 have identical hardware
and software configurations.
The only distinction is the outside
plastic housing.
Technical Data
• Operating temperature range of
32º to 120º F
• Operating Pressure: 7 to 200 psi
Note: Where sustained pressures
may exceed 120 psi the installation
of a pressure reducing valve (PRV) is
recommended.
Battery Life
• Will vary based on number
of cycles per year, operating
pressure, and temperature. We
recommend checking the battery
every 6 months, but in many
cases, you will get more life out
of them.
HG-6 REMOVABLE
(REQUIRES CONTROLLER)
Bluetooth Instructions
The BL-KR battery powered
irrigation module communicates
with the K-Rain BL Application on
a Smartphone or Tablet by using
Bluetooth SMART 4.0, (low energy)
on an iPhone with iOS version 7
minimum or an Android phone/tablet
with Marshmallow version 6.0
or higher.
Important:
For use only with 9V DC
Latching Solenoids. As some
solenoids will come from the
manufacturer with the plunger
already magnetically latched
open, some zones will default
to OPEN. Follow the start-up
procedure for systems with DC
Latching Solenoids. (Page 09)
For every change to the program
in the Mobile App, you must
exit back to the home screen
and tap the blue TRANSMIT
button (bottom right corner).
The Application aggregates
changes and transmits them
to the controller when you have
finished programming.
Programs A, B, and C are
independent programs, including
start times, run times, watering
days, and water budget.
!
!
!

4
Programming Unit
HG-6 FLUSHING SYSTEM
6. The App will now search for
devices in range.
7. Choose the Controller. The
serial numbers that populate
the device list can be found on
the label located on the back of
the controller housing with the
designation “Default name.” The
App will indicate that it is in the
process of connecting.
8. Once the device is connected, it
will appear on the home screen
when you launch the Application.
To add another controller,
tap the plus sign in the
upper right hand corner
of the home screen
NOTE:
You can associate up to 400 devices with the K-Rain BL-KR App. The number of devices is limited to the internal
memory on the Smartphone/Tablet.
Application Home Screen Device Home Screen

5
Programming Unit
HG-6 FLUSHING SYSTEM
Programming
The NODE has the capability to
hold 3 programs (A, B, C) and 4
start times per program. When
programming, flashing portion
of display can be changed by
pressing +or –keys. To change
something not flashing, press LEFT
or RIGHT ARROWS until desired
item is flashing.
Setting Date / Time
1. Press RETURN / ENTER key
until CLOCK icon is displayed.
2. All 4 digits will be displayed
representing the year. Use +or –
keys to change year. Press RIGHT
ARROW key to proceed to setting
month.
3. All 4 digits will be displayed
with two digits on left flashing
representing the MONTH.
Use +or –key to change month.
Press RIGHT ARROW key to
proceed to setting DAY.
4. Only two digits on right will be
flashing, representing the DAY.
Press +or –key to change day.
Press RIGHT ARROW key to
proceed to changing TIME.
5. The AM / PM / 24 time
setting is shown flashing.
Press +or –key to change to
AM, PM, or 24-hour time. Press
RIGHT ARROW key to proceed
to setting the HOUR.
6. All 4 numbers are shown with
two numbers on the left flashing,
representing the HOUR. Press
+or –key to change the hour.
Press RIGHT ARROW key to
proceed to setting MINUTES.
7. All 4 numbers are shown with
two numbers on right flashing,
representing MINUTES. Press
+or –key to change minutes.
(Pressing RIGHT ARROW key will
return to YEAR setting at step
#2.)
8. Press RETURN / ENTER key to
proceed to next programming
function, or allow controller to
return to idle mode.
HG-6 BUILT-IN: (INTEGRATED)
NODE Programming Instructions
Batteries
The NODE uses standard 9-volt
alkaline batteries to operate the
control valve and program the
controller. The controller can
operate with one or two batteries
installed. Under normal conditions,
potential life is 1 year for a
single battery.
Battery Installation
1. Unscrew rear body of the NODE
to gain access to battery
compartment.
2. Insert battery / batteries into
battery tray and connect the
battery connector to controller.
3. Make sure no water is inside
battery compartment.
4. Screw the NODE rear body back
onto front half.
NOTE: Make sure that seal marker
on rear half of the NODE lines up
with front half, ensuring a proper
seal is created. Also, The NODE has
non-volatile memory, which allows
battery replacement without losing
program information.
Idle Mode – Waking Up
Normally the NODE display showstime
and day, day of week, and battery life
indicator. During a short period of
inactivity the display will shut off to
retain battery power Pressing any
key will wake up the NODE to the
Idle Mode.
Run Mode
When controller is operating a
program, items shown on display will
include station number (always “1”),
program letter (A, B, or C), remaining
runtime, and a blinking Rotor icon.
Setting Flush Sequence
Start Times
1. Press RETURN / ENTER key until
CLOCK icon is displayed.
2. The START TIME will be
displayed flashing, along with the
program letter (A, B, or C) and
start time number (1, 2, 3, or 4)
in the upper left of the display.
Up to 4 different start times can
be set for each program.
3. Use +or –key to change
START TIME for program
displayed. Each press of key will
change start time in 15-minute
increments.
4. Press RIGHT ARROW key to
add an additional START TIME
to program displayed. The start
time number is shown in upper
left corner of display.
5. Press PRG key to add START
TIME to a different program.
6. Press RETURN / ENTER key to
proceed to next programming
function, or allow controller to
return to idle mode.
Setting Flush Duration Times
1. Press RETURN / ENTER key until
HOURGLASS icon is displayed.
RUN TIME will be displayed
flashing. Also shown is program
letter (A, B, or C) and active
station # (always #1– all other
stations not used) on lower left
side of display.
2. Press +or –key to change
station RUN TIME from 1 minute
to 6 hours.
3. Press PRG key to add a
RUN TIME to another program.
4. Press RETURN / ENTER key to
proceed to next programming
function, or allow controller to
return to idle mode.t
6
Programming Unit
HG-6 FLUSHING SYSTEM
NOTE:
– Pressing + or – key when running
in MANUAL FLUSH mode will modify
FLUSH TIME for that station.
– Pressing the button when a
station is running in manual
watering will stop flush on the
current station and advance to the
next station.
– Pressing the button when a
station is running in manual
watering will stop the flush on the
current station and revert to the
previous station.
Turn System Off
To turn off controller, press
RETURN / ENTER key button
until icon resembling water spray
and OFF is displayed on screen.
To return controller to auto
programming mode,
press RETURN / ENTER key.
The controller will immediately return
to auto programming mode and will
display time and battery
life indicator.
NODE Quick Check
This circuit diagnostic procedure
can quickly identify “shorts”
commonly caused by faulty
solenoids or when bare common
wire touches a bare station control
wire. To initiate NODE Quick
Check procedure:
1. From Idle Mode, press and
hold +, –, LEFT ARROW, and
RIGHT ARROW keys.
2. Display will show all segments.
Release keys.
3. Press +key to initiate NODE
Quick Check test.
4. Controller will then activate
flushing unit for 1 second to
verify operation.
Setting Flushing Days
1. Press RETURN / ENTER
key until CALENDAR icon is
displayed. The program letter
(A, B, or C) will be displayed.
Arrows point at specific days
of week in which flushing will
occur.
2. Press LEFT or RIGHT ARROW
to scroll through days.
3. Press +key to activate that day
for program displayed, or –key
to cancel watering for that day.
The arrow will show on flushing
days for active program.
4. Press PRG key to set days to
flush for a different program,
if desired.
5. Press RETURN / ENTER key to
proceed to next programming
function, or allow controller to
return to idle mode.
Manual Flushing
Manual flushing allows user to test
the Hydro-Guard unit or a program
for a specified run time.
Make sure controller is in Idle Mode.
1. Press and hold RIGHT ARROW
until HAND icon is displayed.
The station number (always #1)
will be displayed in lower left
side of display along with
RUN TIME.
2. Use the LEFT or
RIGHT ARROW to select #1
station if not already displayed,
and +or –key to set manual
flushing time.
3. To manually activate a program,
press PRG key. Program
letter (A, B, or C) will show on
screen. If a different program
is needed, press PRG key until
desired program
is displayed.
4. To stop MANUAL FLUSHING
cycle press –key until time is
reduced to zero.
5. Press RETURN / ENTER key to
proceed to next programming
function, or allow controller to
return to idle mode.
Battery Life Indicator
Remaining battery life can be
estimated from the battery life
indicator shown on display. The
NODE can operate using either a
single 9-volt battery or using two
9-volt batteries. Using two nine volt
batteries will yield approximately
twice the battery life of a single
9-volt battery. The battery life
indicator chart below shows an
estimate of remaining battery life.
Full: 100 - 60% remaining battery life
Med: 60 - 25% remaining battery life
Low: 25 - 0% remaining battery life
Replace battery immediately!
Resetting Controller
Resetting controller will erase
current program data and restart
controller. A reset does not,
however, delete a program saved to
permanent memory using the Easy
Retrieve Memory feature to save a
preferred program.
1. From Idle Mode, press and
hold –, RIGHT ARROW,
and PRG keys.
2. After two seconds screen will go
blank. Continue to hold keys.
3. 12:00 will flash on display.
Release keys.
4. The controller may show a
countdown from 10 to 1 on
display, and then 12:00 am will
be shown flashing when reset is
complete. The controller can now
be reprogrammed.

7
Disassembly/Reassembly Instructions
HG-6 FLUSHING SYSTEM
TOOLS NEEDED: 3/8" Socket, 7/16" Wrench, Philips screwdriver, A103 Security screwdriver.
HG-6 DISASSEMBLY AND REASSEMBLY INSTRUCTIONS
10. Loosen clamping bolt on bottom
of outside face clamp.
11. Slide clamp assembly away from
the unit’s 2" Flow Control Valve.
12. Unscrew valve from 2" brass pipe.
13. Remove six 3/8" bolts from
valve cover.
14. Pull the top part of the
valve away.
15. Check valve for any damages
or debris in the inlet and outlet
holes on valve.
16. Check diaphragm for any
damages and check for any
debris in the inlet and outlet
holes on inside of the valve
cover. When reinstalling valve
cover to base, all arrows must
point the same direction.
Reassembly
1. Screw valve onto 2" brass pipe.
2. Assemble sliding clamp assembly.
3. Slide clamp assembly toward the
unit’s 2" Flow Control Valve.
4. Assemble HG-6 housing by
installing the ten 1/4" bolts.
Don’t forget the corresponding
7/16" lock nuts inside the
housing.
Disassembly
1. If attached to a fire hydrant;
close hydrant’s water supply
and allow to drain.
2. Relieve any remaining water
pressure within Hydro-Guard®
unit by opening sample port.
3. Place HG-6 in area clear of
debris.
4. Remove the six security screws
from top cover.
5. Remove the four security
screws for the unit’s splash
pad assembly.
6. Remove the ten 1/4" bolts
from the HG-6 housing.
It’s necessary to hold
corresponding 7/16" lock nuts
from inside the housing.
7. Detach Latching Solenoid from
control valve.
8. Detach electrical conectors
connecting the wiring of the
controller (NODE or T-2) and the
Latching Solenoid.
9. Remove the four bolts from the
sliding clamp assembly prior to
removing the two inner clamps.
5. Attach Controller to
Latching Solenoid.
6. Install top cover with the six
security screws.
7. Install the six security screws
from cover assembly.
8. Reinstall diaphragm, following
inspection into valve’s top
section.
WARNING: Use caution to
avoid damaging plastic screen plug.
9. Reinstall screws in valve and
tighten
WARNING: Use caution when
tightening screws. Overtightening
can damage valve body.
WARNING: Ensure flow arrows
on top and bottom of valve body
are facing the same direction and
match the flow pattern of the
flushing device.
!
!
!
BATTERY REPLACEMENT
HG-6 Built-In Node Controller
1. Follow HG-6 Removable TBOS-II
Controller steps 1 – 3 (left) to
access on-board Programmer.
2. Connect fresh industrial grade
9-volt alkaline battery and
reinsert it with harness into
Programmer (an optional
battery harness is provided
for redundancy and extended
battery life).
3. Screw protective cap back
into place and hand tighten
securely.
1. Screw protective cap back
into place and hand tighten
securely.
2. Use Handheld Controller to
reset all programs and assure
flushing sequence is correct
prior to returning the HG-6 Unit
to service.
3. Reinstall Exterior Housing Cover
and restore water supply to
unit.
4. Confirm that desired flushing
sequences are correct prior
to returning the HG-6 Unit to
service.
5. Reinstall Exterior Housing Cover
and restore water supply to unit.

8
Troubleshooting
HG-6 FLUSHING SYSTEM
TROUBLESHOOTING THE PROGRAMMER
Battery Replacement
It is recommended that batteries
be changed every six (6) months
or when the low battery icon
appears (see Programming for
battery type).
If the LCD is not working, the
battery could be expired. If
the flashing battery symbol
appears, the battery power is
low. Replace the old battery
with a new battery.
If you need further assistance,
please contact us at
1.800.423.1323.
PROBLEM CAUSE SOLUTION
Controller does not flush
as desired
Water at main water supply is
shut off
Battery dead Replace battery
Controller improperly programmed Check program and clock settings
Controller set to OFF Set controller to desired program
Blank display
Water does not turn off Overlapping programming Review all programming and edit
any program that is in conflict with
desired off schedule
Clear all programming in memory
and reset
Programmer not communicating Check Programming
Run Manual On / Off with solenoid
removed from valve (hold finger
or object over solenoid plunger to
prevent plunger from dislodging
from solenoid body)
Check wiring for damage and
connectors to ensure proper
connection (red to red & black
to black)
Check main supply valve

9
Options
HG-6 FLUSHING SYSTEM
HYDRO-GUARD KEY FEATURES, OPTIONS AND UPGRADES
Integrated Sample Station
Increase your control of
chlorine or chloramines residual
maintenance through the
integrated sample station. The
built-in Sample Valve is located
inside the top lid of the HG-6
(this feature in an option on the
HG-6 / Basic). Make sure to
firmly grip the tubing and then
turn the ball valve, and collect
your sample. You may wish to
run a brief manual-mode flush
prior to the collection in order to
ensure water indicative of the
main-line water quality is being
sampled. Generally a two-minute
flush is sufficient. Track your
residual levels and alter
flushing frequency and/or
duration in order to maximize
water conservation.
From the integrated sample
stations to dechlorination
upgrades, your Hydro-Guard
Device offers an outstanding
return on investment.
The following is a brief
overview and introduction to
our options.
Dechlorination
The HG-6 Hydrant-Based
Flushing System has a built-
in Dechlorination chamber
located in the base of the unit.
By removing the Dechlorination
Chamber access door, locate
opposite of the inlet piping and
hydrant adapter, pull out the
chamber and load it with sodium
sulfite or ascorbic acid tablets.
Dechlorination takes place as a
portion of the discharged water
passes through this chamber. This
action creates a concentrated
dechlorination solution that then
mixes with the non-directly treated
portion of the discharged water.

10
Parts
HG-6 FLUSHING SYSTEM
1. Available option on HG-6 / Basic
2. Not available on HG-6 / Basic
3. Only available on HG-6 / Basic
Stainless Steel
Housing
Adjustable Control
Valve
Latching
Solenoid
Bluetooth
Controller
Sample
Valve
15.88-18.625
Adjustable Height
Airgap Backflow
Prevention
Splash Plate

11
Notes
HG-6 FLUSHING SYSTEM

MUELLER®| ECHOLOGICS®| HYDRO GATE®| HYDRO-GUARD®| HYMAX®| JONES®| KRAUSZ®
MI.NET®| MILLIKEN®| PRATT®| PRATT INDUSTRIAL®| SINGER®| U.S. PIPE VALVE AND HYDRANT
INTERNATIONAL – 1.423.490.9555 – www.mueller-international.com – international@muellercompany.com
Mueller refers to one or more of Mueller Water Products, Inc. a Delaware corporation (“MWP”), and its subsidiaries. MWP and each of its
subsidiaries are legally separate and independent entities when providing products and services. MWP does not provide products or services to
third parties. MWP and each of its subsidiaries are liable only for their own acts and omissions and not those of each other. MWP brands include Mueller®, Echologics®, Hydro Gate®,
Hydro-Guard®, HYMAX®, Jones®, Krausz®, Mi.Net®, Milliken®, Pratt®, Pratt Industrial®, Singer®, and U.S. Pipe Valve & Hydrant. Please see muellerwp.com/brands and krauszusa.com to learn more.
© 2021 Mueller Water Products, Inc. All Rights Reserved. The trademarks, logos and service marks displayed in this document are the property
of Mueller Water Products, Inc., its afliates or other third parties. Products marked with a section symbol (§) are subject to patents or patent
applications. For details, visit www.mwppat.com. These products are intended for use in potable water applications. Please contact your
Mueller Sales or Customer Service Representative concerning any other application(s).
Table of contents
Other Mueller Water System manuals

Mueller
Mueller Hydro-Guard HG-3 Instruction Manual

Mueller
Mueller Hydro-Guard HG-4 Instruction Manual

Mueller
Mueller Hydro-Guard HG-2 Instruction Manual

Mueller
Mueller HG-1 User manual

Mueller
Mueller Hydro-Guard HG-8 Cold Climate Instruction Manual

Mueller
Mueller HYDRO GUARD HG-11 Standard Mounting instructions
Popular Water System manuals by other brands

Barnstead|Thermolyne
Barnstead|Thermolyne D11911 Operation manual

flamco
flamco Airfix D Series Installation and operating instructions

Armstrong
Armstrong 3760 Midi Series Installation and operating instructions

Pfister
Pfister Marielle 34 Series instructions

KSB
KSB Ama-Drainer-Box operating manual

Viqua
Viqua VT1 owner's manual