manuals.online logo
Brands
  1. Home
  2. •
  3. Brands
  4. •
  5. Multi-Clean
  6. •
  7. Water Pump
  8. •
  9. Multi-Clean Bio-Pump AC 421810 User manual

Multi-Clean Bio-Pump AC 421810 User manual

Popular Water Pump manuals by other brands

Watershed Innovations HYDRAPUMP SMART FLEX Instructional manual

Watershed Innovations

Watershed Innovations HYDRAPUMP SMART FLEX Instructional manual

Graco Modu-Flo AL-5M instructions

Graco

Graco Modu-Flo AL-5M instructions

Messner MultiSystem MPF 3000 operating instructions

Messner

Messner MultiSystem MPF 3000 operating instructions

Xylem Bell & Gossett WEHT0311M Installation, operation and maintenance instructions

Xylem

Xylem Bell & Gossett WEHT0311M Installation, operation and maintenance instructions

WilTec 50739 Operation manual

WilTec

WilTec 50739 Operation manual

Franklin Electric Little Giant 555702 HRK-360S instruction sheet

Franklin Electric

Franklin Electric Little Giant 555702 HRK-360S instruction sheet

Ingersoll-Rand PD02P Series Operator's manual

Ingersoll-Rand

Ingersoll-Rand PD02P Series Operator's manual

VS ZJ Series Operating	 instruction

VS

VS ZJ Series Operating instruction

Flotec FPZS50RP owner's manual

Flotec

Flotec FPZS50RP owner's manual

SKF Lincoln FlowMaster II User and maintenance instructions

SKF

SKF Lincoln FlowMaster II User and maintenance instructions

Xylem Lowara LSB Series Installation, operation and maintenance instructions

Xylem

Xylem Lowara LSB Series Installation, operation and maintenance instructions

Water Duro Pumps DCJ500 Operating & installation instructions

Water

Water Duro Pumps DCJ500 Operating & installation instructions

Action P490 Operating instructions & parts manual

Action

Action P490 Operating instructions & parts manual

Flo King Permacore Reusable Carbon Bag Disassembly. & Cleaning Instructions

Flo King

Flo King Permacore Reusable Carbon Bag Disassembly. & Cleaning Instructions

ARO ARO PD15P-X Operator's manual

ARO

ARO ARO PD15P-X Operator's manual

Pumptec 112V Series Operating instructions and parts manual

Pumptec

Pumptec 112V Series Operating instructions and parts manual

Virax 262070 user manual

Virax

Virax 262070 user manual

Neptun NPHW 5500 operating instructions

Neptun

Neptun NPHW 5500 operating instructions

manuals.online logo
manuals.online logoBrands
  • About & Mission
  • Contact us
  • Privacy Policy
  • Terms and Conditions

Copyright 2025 Manuals.Online. All Rights Reserved.

19042016
Bio-Power Pump
Part Number 421810
Bio-Pump AC
Please use this equipment with care and observe all
warnings and cautions.
WEAR protective clothing and eyewear when dispensing
chemicals, emptying equipment or changing metering tips
ALWAYS observe safety and handling instructions.
ALWAYS direct discharge away from you or other persons.
ALWAYS dispense chemicals in accordance with instructions
on label and SDS.
Exercise CAUTION when maintaining your equipment.
KEEP equipment clean to maintain proper operation.
ALWAYS re-assemble equipment according to instruction
procedures. Be sure all components are fi rmly screwed or
latched into position.
Setup Instructions
1. Remove all parts from carton.
2. Mount base plate to wall.
3. Install squeeze tube, see below.
4. Attach power supply.
5. Program timer, see back page
6. Attach pump to base plate.
7. Route draw hoses to product and drain
see fi gure 5 for fl ow direction.
1. Pump housing
2. Timer boot
3. Pump
4. Squeeze tube
5. Timer cover
6. Base plate
7. Power supply
Squeeze Tube Installation
Install the squeeze tube by removing the pump cover by depressing the tab on the front of the unit. (1) Place one end of the squeeze
tube on the left side of the pump in the slot provided. (2) Wrap the squeeze tube around the rollers of the pump. (3) Then stretch the
squeeze tube so that the end of the tube goes into the slot provided. (4) Replace the cover on the pump.
12 34
4
5
7
6
1
3
2
Operation
Programming the Dispenser - Reset timer before programming.
When the unit is powered the fi rst time, the rechargeable display back up battery begins charging.
When fully charged it provides approximately 200 hours of reserve time before the display and
program may be lost. If the unit loses power, it will not lose the program for 200 hours, but it will
not run the pump from the rechargeable display back up battery and will not dispense chemical.
If the unit becomes unplugged from the wall for a short amount of time, plugging the unit back in
will not aff ect the programming done to the unit.
Note: If a mistake is made during the programming, simply push the reset button and start over.
Run Time
Minutes
1
3
5
6
10
20
Amount
3.5 oz (110ml)
10 oz (295ml)
17.5 oz(550ml)
20 oz (590ml)
35 oz (1100ml)
70 oz (2200ml)
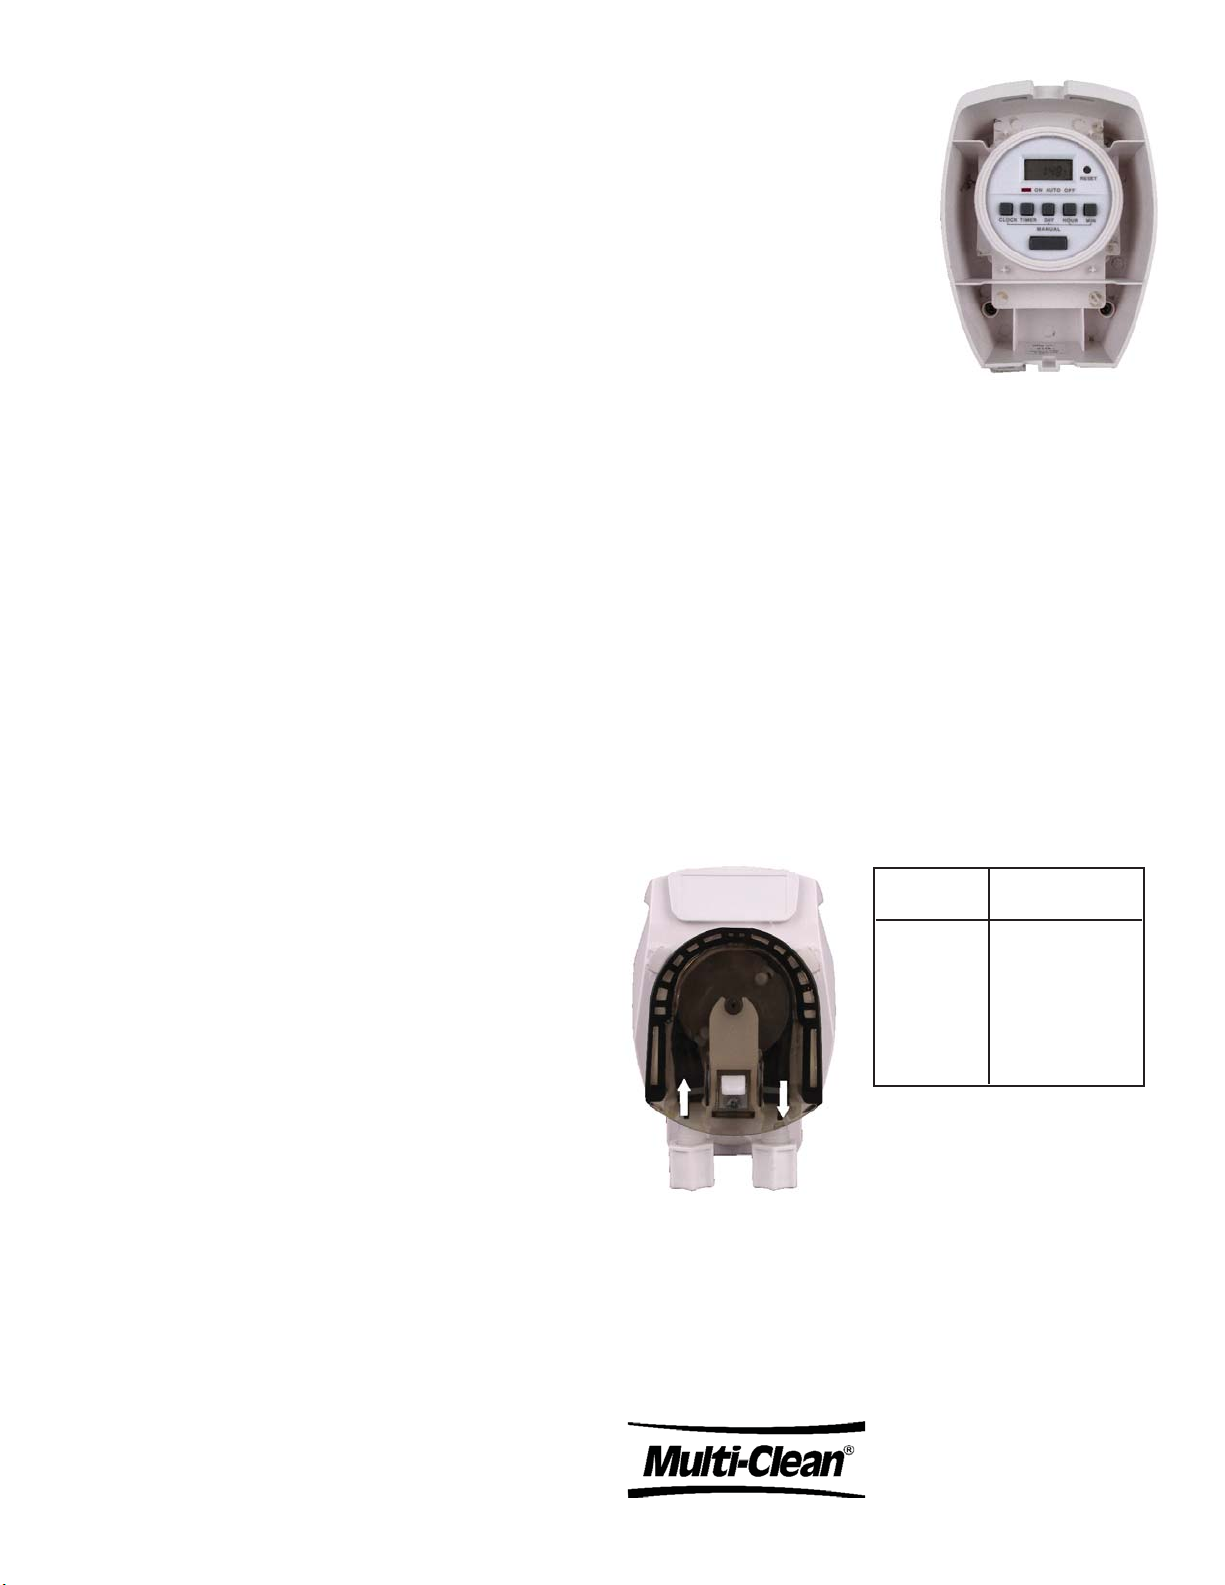
A. Set the Time and Day
When the unit arrives the display may be blank or may display
a time. Plug the unit into an outlet before programming.
NOTE: Make sure that the bar in the bottom of the display
is over the word OFF – if it isn’t, press the MANUAL button
until it is.
1. To set the time and day of the week, hold the CLOCK
button in and press the day, hour, and minute buttons until
the proper day, hour, and minute is achieved.
Note: The days will be across the top of the screen and will
advance as the button is hit. The time must be set to AM and
PM it is in the left top corner of the display. By holding in the
Day, Hour, or Minute button for three seconds the setting
will continue to advance until the button is released.
B. Programming the Dispensing Events: Up to 8
independent dispensing events can be programmed
1. Press and release the TIMER button to enter the
programming mode. The event number will be in the bottom
left corner.
Note: To program a full event, a pump start time and stop
time will have to be programmed.
NOTE: THE PUMP WILL RUN FOR 23 HOURS 59
MINUTES IF A START TIME IS SET BUT NOT A STOP
TIME.
a) Press the “DAY” button until all of the days are shown that
the fi rst event should be turned on.
b) Press the “HOUR” and “MINUTE” buttons until the time is
reached when the pump should turn on.
Note: AM or PM in top left corner of screen.
2. Press and release the TIMER button again to move to
programming the pump to turn off .
a) This program will be used to turn the pump off . Use the
pump’s output to determine how long the pump must run to
dispense the desired amount.
b) Press the “DAY” button until the days match the days
programmed in the pump on portion of the programming.
c) Press the “HOUR” and “MINUTE” buttons until the desired
run time is reached.
3. To program another event, press TIMER button again for
Programs 2 through 8 and follow Programming Steps 1 and
2 above. Every ON function needs a corresponding OFF
function in order to turn the pump off .
4. When fi nished programming, push the CLOCK button
again to return to time of day (normal) display.
C. Priming the Pump
1. To prime the pump, press the
MANUAL button – the bar at the
bottom of the display will move
from right to left from OFF to AUTO to ON. When it reaches
ON, the pump will run until the MANUAL button is pressed
again. Use this position to prime the pump as well as to
calibrate the pump. To stop priming press the MANUAL
button – the bar at the bottom of the display will move from
left to right from ON to AUTO to OFF.
Note: The unit may continue to run in the AUTO position
and the MANUAL button must be pressed until the bar at
the bottom of the display is over the OFF position to stop
the unit fully.
D. Setting into Programmed Position
1. Press the MANUAL button until the bar in the bottom of
the display moves from the OFF to the AUTO position. If
the unit is not in the AUTO position, the program will not be
executed.
600 Cardigan Road
Shoreview, Minnesota
Table 1
Figure 6
Figure 5