manuals.online logo
Brands
  1. Home
  2. •
  3. Brands
  4. •
  5. Multimo
  6. •
  7. Indoor Furnishing
  8. •
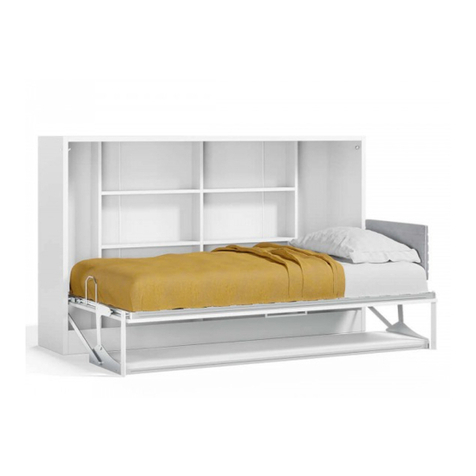
  9. Multimo A 751 SIMPLE TWIN 100 CM User manual

Multimo A 751 SIMPLE TWIN 100 CM User manual

Assembly Instructions
60 min.
110 min.
Technical Service
End User
+-
A 751- SIMPLE TWIN 100 CM
VIDEO
link
Page 1 Page 2
Track Title
(inch) (mm)
Piece Thickness Length Width Piece Thick Height Most
A20,71 40,08 13,58 218 1018 345
B10,71 84,17 13,39 1 18 2138 340
C10,71 84,17 13,39 1 18 2138 340
D10,71 84,17 13,39 1 18 2138 340
A
B
D
C
A
E-R
E-L
F
F
K
G-R
G-L
AMR 03 (300 N)
2 / piece
DD - 01 ( R10 )
18 / piece
TFC - 01(8x70) mm
18 / piece
SG - 01
4 / piece
TAP - 01
32 / piece
KVL 01
14 / piece
MNG - 01
32/ piece
Accessories List
MNX 02
12/ piece
MNX - 03
10 / piece
PL - 04 (5x12x0,7) mm
4 / piece
SC-79
2 / piece
SC-101
3 / piece
AL - 01 (4MM)
1 / piece
AL - 02 (5MM)
1 / piece
KOR -B
1 / piece
BKA - 01
2 / piece
KCE - 01
4/ piece
YSB - 01 ( 3,9x16 ) mm
4 / piece
SYS-01
1 / piece
VTB - 02 (4,2x16) mm
36 / piece
2 / piece
SC-98
KBY- 02
4 / piece14 / piece
SC-110
IM - 02 (6x20) mm
4 / piece
CTM - 01 ( 6x10 ) mm
4 / piece
SKT 01
4 / piece 4 / piece
CTM - 04 ( 8x25 ) mm
LTA - 01
14 / piece
SC-78
2 / piece
H
Page 3 Page 4
STEP 2
STEP 1
E-R
E-L
F
F
BKA - 01
F
KBY - 02
E
VIDEO
link
SYS - 01
VIDEO
link
SC - 98
STEP 3
First of all should be xed from
one point, after that balance
should be controlled and
connection points should be
marked.
ATTENTION!!!
Should be mounted to strong walls such as concrete,brick or ytong.
T his product must not assembly to drywalls.
After all marking process nished ,
the connection had been made before
should be disconnected and then
drilling operations should be completed (STEP 4).
Ø 10 mm / 0,254 nch
DD - 01
TFC - 01
Page 5 Page 6
STEP 4
Ø 10 mm / 0,254 nch
DD - 01 x 11
STEP 5
STEP 6
TFC - 01 X 3
A-
FİRST LOCATE THE STUDS BY USİNG ''STUD
FİNDER'' İN THE WALL AND DRİLL İT
SUPPLY DRYWALL FASTENERS APPROPPRİATE
TO YOUR WALL TYPE. WE RECOMMEND
USİNG STEEL TOGGLE BOLT ANCHOR THAT
SHOWN BELOW
TFC - 01 X 2
DD - 01 X 2
SC - 101
B-
VIDEO
link
SC - 98
TFC - 01 X 6
A-
A-
B-
SC - 101 X 3
VIDEO
link
Page 7 Page 8
STEP 7
KVL 01
MNG - 01
MNG - 01 x 6
KVL - 01 x 3 A
MNG - 01 x 5
MNG - 01 x 10
MNG - 01 x 5 B
C
D
MNX - 03 x 10
KVL - 01 x 4
KVL - 01 x 4
MNX - 03
210°
STEP 8
STEP 9
B
C
D
KVL 01
MNG - 01
210°
210°
210°
210°
VIDEO
link
VIDEO
link
Page 7 Page 8
STEP 7
KVL 01
MNG - 01
MNG - 01 x 6
KVL - 01 x 3 A
MNG - 01 x 5
MNG - 01 x 10
MNG - 01 x 5 B
C
D
MNX - 03 x 10
KVL - 01 x 4
KVL - 01 x 4
MNX - 03
210°
STEP 8
STEP 9
B
C
D
KVL 01
MNG - 01
210°
210°
210°
210°
VIDEO
link
VIDEO
link
Page 9 Page 10
STEP 10
G-R
G-L
H
K
LTA - 01 x 14
H
K
G-R
G-L
Install plastic corners and
metal joints without gaps
SKT - 01
CTM - 01
1-
-3
VIDEO
link
AL - 01
H
G-R
2-
STEP 11
B
C
D
69 mm 69 mm
SC-110 x 10
VTB - 02 x 20
SC-110 x 4
VTB - 02 x 8
VIDEO
link
Assemble the brackets over the
places shown over H,K proles
Assemble the brackets over the
places shown over G-L,G-R proles
STEP 11
H, K prollerden
konumlanan yerlerden
montajı yapınız
Page 11 Page 12
STEP 12
STEP 13
LTA - 01 x 14
B
C
D
Unscrew the Screws
VIDEO
link
STEP 14
MNX - 02
AMR - 03
STEP 15
AMR - 03 SG - 01
MNX - 02 x 12
VIDEO
link
Page 11 Page 12
STEP 12
STEP 13
LTA - 01 x 14
B
C
D
Unscrew the Screws
VIDEO
link
STEP 14
MNX - 02
AMR - 03
STEP 15
AMR - 03 SG - 01
MNX - 02 x 12
VIDEO
link
Page 13 Page 14
STEP 16 STEP 18
STEP 17
AL - 01
SC - 79
IM - 02 x 2
SC - 78
AL - 02
PL - 04
YSB - 01
CTM - 04
AL - 01
CTM - 04
VIDEO
link
VIDEO
link
SC - 78
SC - 78
KOR - B
Page 13 Page 14
STEP 16 STEP 18
STEP 17
AL - 01
SC - 79
IM - 02 x 2
SC - 78
AL - 02
PL - 04
YSB - 01
CTM - 04
AL - 01
CTM - 04
VIDEO
link
VIDEO
link
SC - 78
SC - 78
KOR - B
A
Page 15 Page 16
STEP 19 STEP 20
AMR - 03
VIDEO
link
VIDEO
link
SG - 01
AMR - 03
A
210°
MNG - 01 X 12
A
Page 15 Page 16
STEP 19 STEP 20
AMR - 03
VIDEO
link
VIDEO
link
SG - 01
AMR - 03
A
210°
MNG - 01 X 12
Page 17 Page 18
STEP 21 STEP 22
1. BED CLOSED 2. BED OPEN
KCE - 01 X 4
TAP - 01
VIDEO
link
VIDEO
link
VTD - 02 x 4
SC - 78
Page 17 Page 18
STEP 21 STEP 22
1. BED CLOSED 2. BED OPEN
KCE - 01 X 4
TAP - 01
VIDEO
link
VIDEO
link
VTD - 02 x 4
SC - 78
Page 19 Page 20Page 21 Page 22
ATTENTION / HOW TO / READ ME / OWNER'S GUIDE
1. Unless an tem s free standng, when mountng on a regular drywall, furnture must
be fastened to wood or metal studs. Sold walls made of brck, concrete or smlar
materals are also acceptable. Do not mount furnture on to paper-mache or sheetrock
lke materal wthout properly affxng t to stud.
2. For safety and longevty of the product you must perodcally nspect the mountng
and mechancal connectons for ntegrty and tghtness. Confrm that hardware
remans properly affxed and connectons are snug.
3. Unless noted otherwse on the product page, Wall Bed mattress thckness may not
exceed 6,29 nch. Make sure to remove pllows and excess blankets before closng.
Ths keeps mechansm free of obstructons and unnecessary stress.
4. Do not lean or rest heavy objects on sdes or top of furnture. Ths may cause
balance ssues and compromse the ntegrty of your mountng connectons.
5. Please use beds, desks and shelvng as ntended. Improper use may cause personal
njury and damage to property.
6. Wth seasonal humdty change you must nspect nteror and exteror of furnture.
7. Sngle, Twn, Twn XL beds accommodate the weght of one person, up to 250 lb.
Exceedng recommended weght restrctons may lead to personal njury and property
damage.
8. Before any un-mountng or dsassembly please contact Multmo for techncal
support and nstructons. Falure to properly detach wall bed may result n personal
njury and property damage.
9. Some wall beds have legs that fully extend when open - be aware of where the leg
s and wll be.
10.For Bunk Beds:
a.Always use provded ladder when accessng top bunk.
b.Be slow, careful and aware of surroundngs when openng top bunk.
c.Do not horseplay. Beds are to be slept on only.

Other manuals for A 751 SIMPLE TWIN 100 CM

1

This manual suits for next models

1

Other Multimo Indoor Furnishing manuals
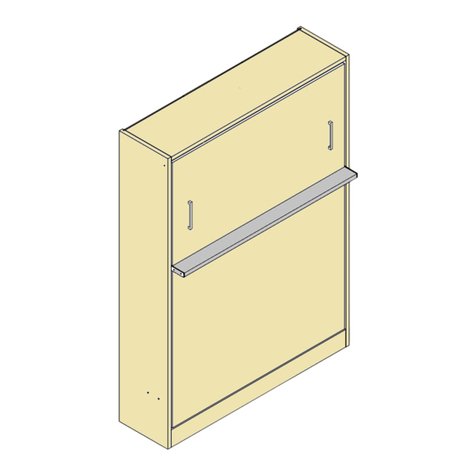
Multimo 221-ROYAL DUOBLE BED User manual

Multimo

Multimo 221-ROYAL DUOBLE BED User manual

Multimo A 513 User manual

Multimo

Multimo A 513 User manual

Multimo 123-HORIZONTAL OPENING DUBLE User manual

Multimo

Multimo 123-HORIZONTAL OPENING DUBLE User manual

Multimo A 216 TWIN BED User manual

Multimo

Multimo A 216 TWIN BED User manual

Multimo A 224 User manual

Multimo

Multimo A 224 User manual

Multimo A 201-SPAZIO TWIN User manual

Multimo

Multimo A 201-SPAZIO TWIN User manual

Multimo A 750 User manual

Multimo

Multimo A 750 User manual

Multimo 1101D-HAPPY User manual

Multimo

Multimo 1101D-HAPPY User manual

Multimo A 209-CAPSULE FOLDING SINGLE BED User manual

Multimo

Multimo A 209-CAPSULE FOLDING SINGLE BED User manual

Multimo A228-ROYAL User manual

Multimo

Multimo A228-ROYAL User manual

Multimo PRIMER LIFE 722 User manual

Multimo

Multimo PRIMER LIFE 722 User manual

Multimo 722-PRIMER LIFE User manual

Multimo

Multimo 722-PRIMER LIFE User manual

Multimo A 700 PRIMER QUEEN BED User manual

Multimo

Multimo A 700 PRIMER QUEEN BED User manual

Multimo A 511 User manual

Multimo

Multimo A 511 User manual

Multimo A 212 CASTELLO User manual

Multimo

Multimo A 212 CASTELLO User manual

Multimo A 215 User manual

Multimo

Multimo A 215 User manual

Multimo PRIMER HAPPY 721 User manual

Multimo

Multimo PRIMER HAPPY 721 User manual

Multimo A 753 SIMPLE FULL SIZE 140 CM User manual
Multimo

Multimo A 753 SIMPLE FULL SIZE 140 CM User manual

Multimo ROYAL MOTORLU YATAK User manual

Multimo

Multimo ROYAL MOTORLU YATAK User manual

Multimo A 750 User manual

Multimo

Multimo A 750 User manual

Multimo A 502 User manual

Multimo

Multimo A 502 User manual

Multimo A 220 User manual

Multimo

Multimo A 220 User manual
Multimo STUDIO 5 RIGHT A-213 User manual

Multimo

Multimo STUDIO 5 RIGHT A-213 User manual

Multimo A 513-ROYAL KING WALL BED User manual

Multimo

Multimo A 513-ROYAL KING WALL BED User manual

Popular Indoor Furnishing manuals by other brands

Habitat Heva 806955 manual

Habitat

Habitat Heva 806955 manual

Kettler Charlbury 0195532-6009 Assembly instructions

Kettler

Kettler Charlbury 0195532-6009 Assembly instructions

Coaster 183645 Assembly instructions

Coaster

Coaster 183645 Assembly instructions

pottery barn kids GEMMA CRIB quick start guide

pottery barn kids

pottery barn kids GEMMA CRIB quick start guide

sweeek. OCARA ACCANCHRX2 manual

sweeek.

sweeek. OCARA ACCANCHRX2 manual

KidKraft 78110 Assembly instructions

KidKraft

KidKraft 78110 Assembly instructions

LAURA JAMES BK008 instruction manual

LAURA JAMES

LAURA JAMES BK008 instruction manual

TURBRO FIRESIDE FS48 user manual

TURBRO

TURBRO FIRESIDE FS48 user manual

Sauder 420449 Instruction booklet

Sauder

Sauder 420449 Instruction booklet

Henley 614/3222 Assembly instructions

Henley

Henley 614/3222 Assembly instructions

7th Haven 7HOT0019 Assembly instructions

7th Haven

7th Haven 7HOT0019 Assembly instructions

Pineapple RYNO BED FILLER PANEL FASTENING manual

Pineapple

Pineapple RYNO BED FILLER PANEL FASTENING manual

Next 876939 Assembly instructions

Next

Next 876939 Assembly instructions

BIG FURNITURE WAREHOUSE Dorset KY003 Assembly instruction

BIG FURNITURE WAREHOUSE

BIG FURNITURE WAREHOUSE Dorset KY003 Assembly instruction

Birlea corona Assembly instructions

Birlea

Birlea corona Assembly instructions

Songmics LPC26 manual

Songmics

Songmics LPC26 manual

bbf A173087F Assembly guide

bbf

bbf A173087F Assembly guide

Levitas Design STRATO manual

Levitas Design

Levitas Design STRATO manual

manuals.online logo
manuals.online logoBrands
  • About & Mission
  • Contact us
  • Privacy Policy
  • Terms and Conditions

Copyright 2025 Manuals.Online. All Rights Reserved.