Multitech RF802 User manual

USB 11 Mbps Wireless Network Adapter
Model RF802USB
Quick Start Guide

Quick Start Guide
Multi-Tech Systems, Inc.
USB 11Mbps Wireless Network Adapter
Model RF802USB
PN S0000231 Revision A
Copyright
This publication may not be reproduced, in whole or in part, without prior
expressed written permission from Multi-Tech Systems, Inc. All rights reserved.
Copyright © 2001, by Multi-Tech Systems, Inc.
Multi-Tech Systems, Inc. makes no representations or warranties with respect to
the contents hereof, and specifically disclaims any implied warranties of
merchantability or fitness for any particular purpose. Furthermore, Multi-Tech
Systems, Inc. reserves the right to revise this publication and to make changes
from time to time in the content hereof without obligation of Multi-Tech
Systems, Inc. to notify any person or organization of such revisions or changes.
Revision Date Description
A 10/03/01 Initial Release
Patents
This product is covered by one or more of the following U.S. Patent Numbers:
6,219,708; 6,151,333; 5,757,801; 5,682,386. Other patents pending.
Trademarks
Trademark of Multi-Tech Systems, Inc. is the Multi-Tech logo.
Windows is a registered trademark of Microsoft.
Technical Support
Multi-Tech Systems has an excellent staff of technical support personnel
available to help you get the most out of your Multi-Tech product. If you have
any questions about the operation of this unit or experience difficulty during
installation, you can contact Tech Support via the following:
Country By Email By Telephone
India support@multitechindia.com (91) 124-340778
World Headquarters
Multi-Tech Systems, Inc.
2205 Woodale Drive
Mounds View, Minnesota 55112
(763) 785-3500 or (800) 328-9717
U.S. Fax 763-785-9874
http://www.multitech.com

Contents
Introduction.............................................................................................................. 1
What’s in Your Wireless USB Package .................................................................. 1
Safety ........................................................................................................................ 1
Wireless LAN Basics ............................................................................................... 2
Installation Overview ............................................................................................... 3
Software Installation for Windows 98/Me/2000 ..................................................... 3
Connecting the RF802USB to Your PC .................................................................. 4
Setting Network Properties in Windows 98/Me ..................................................... 5
Setting Network Properties in Windows 2000 ....................................................... 6
Configuration Utility ................................................................................................ 7
Configuration Tab .................................................................................................... 9
Encryption Tab....................................................................................................... 11
About Tab ............................................................................................................... 13
Technical Specification of the Wireless USB ...................................................... 14
Uninstall RF802USB Software .............................................................................. 16
Limited Warranty.................................................................................................... 18
Federal Communication Commission Interference Statement.......................... 19


Introduction
1
Introduction
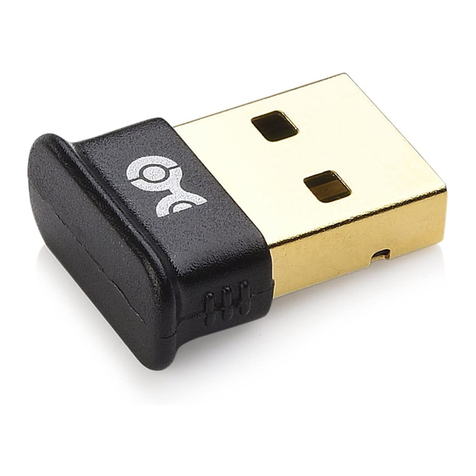
The Multi-Tech Systems, Inc. wireless USB adapter provides an ideal way to
connect your PC to a wireless network or as part of a wired LAN (Local Area
Network) with a wireless network segment. With the wireless USB, you will have
the ability to share information and resources, such as files and printers, and
take full advantage of a “connected” environment for work and play!
The USB adapter comes with drivers for most popular operating systems and
can be integrated into a large network.
This guide provides a quick introduction to wireless technology and its
application, and will assist you with the installation procedure when running
Windows 98/Me/2000.
What’s in Your Wireless USB Package
•Wireless USB Adapter
•This printed Quick Start Guide
•A CD-ROM containing Wireless USB configuration utility software, a complete
user guide, this quick start guide, and drivers. The Configuration Utility is
used for managing the Wireless USB and establishing the wireless connection
with your Access Point (e.g., an RF802EW).
Note: If anything is missing, please contact your vendor.
Safety
USB equipment is designed with the utmost care for the safety of those who
install and use it. However, special attention must be paid to the dangers of
electric shock and static electricity when working with electrical equipment. All
guidelines of this manual and of the computer manufacturer must, therefore, be
allowed at all times to ensure the safe use of the equipment.

Wireless Basics
2
Wireless LAN Basics
Wireless LAN (Local Area Networks) systems offer a great number of advantages
over a traditional, wired system. Wireless LANs (WLANs) are more flexible,
easier to setup and manage, and are often more cost effective than their wired
equivalent.
Using radio frequency (RF) technology, WLANs transmit and receive data over
the air, minimizing the need for wired connections. Thus, WLANs combine data
connectivity with user mobility, and, through simplified configuration, enable
movable LANs.
With wireless LANs, users can access shared information without looking for a
place to plug in, and network managers can set up or augment networks without
installing or moving wires. Wireless LANs offer the following productivity,
convenience, and cost advantages over traditional wired networks:
Mobility - Wireless LAN systems can provide LAN users with access to real-time
information anywhere in their organization; whether a home office, a small
office, or a large corporation. This mobility supports productivity and service
opportunities not possible with wired networks.
Installation Speed and Simplicity - Installing a wireless LAN system can be
fast and easy and can eliminate the need to pull cable through walls and
ceilings.
Installation Flexibility - Wireless technology allows the network to go where
wires cannot go.
Reduced Cost-of-Ownership - While the initial investment required for
wireless LAN hardware might be higher than the cost of wired LAN hardware,
overall installation expenses and life-cycle costs will be significantly lower. Long-
term cost benefits are greatest in dynamic environments requiring frequent
moves, add-ons, and changes.
Scalability - Wireless LAN systems can be configured to meet the needs of
specific applications and installations. Configurations are easily changed and
range from peer-to-peer networks suitable for a small number of users to full
infrastructure networks of thousands of users that allows roaming over a broad
area.
Installation
3
Installation Overview
A Pre-Installation Note: Make sure that the router, the RF802EW, to which
you will be “connected” is in place.
How the RF802EW Works With Your RF802USB: The RF802EW
connects with cables to the Internet and your local area network (LAN). It
is the wireless access point for your RF802USB. Your RF802USB
“connects” wirelessly to the RE802EW.
Installation: Here are some steps you will perform in establishing your wireless
network connection:
1. Install the RF802USB software using the installation CD-ROM included with
your package.
2. Connect the RF802USB to your PC.
3. Configure your RF802USB.
4. Set the network protocol(s) required to communicate on your network. In
most instances, you will be using the TCP/IP protocol.
Software Installation for Windows 98/Me/2000
These steps provide a quick summary of the software installation process. For
detailed installation steps with screen shots, see the chapter entitled Network
Basics.
Note: Some of these steps may vary in Windows 2000. For specific information
click Start > Help.
1. Power on your computer and allow Windows to load fully.
2. Be sure that there is no wireless USB connected to your computer yet.
3. Insert the given Installation CD. The Welcome/Setup screen displays.
Click Next.
4. Accept the license agreement. Click Next.
5. The Choose Destination Location screen displays. Enter the path of the
destination folder; or to set the path of your choice, click Browse.Then click
Next.
6. The Setup program will add an icon to the Program Folder. You may type a
new folder name or select one from the existing Folder list.
7. It takes a few seconds for the utility files to be copied. Then click Finish.

Installation
4
Connecting the RF802USB to Your PC
1. Plug a USB cable into the RF802USB and your PC.
2. A wizard will locate the new hardware (your RF802USB). Choose Display a
list of the known drivers for this device so that I can choose a
specific driver. Then click Next.
3. Select Hardware Types, and then click Next.
4. Click Wireless USB.
5. Click Have Disk.
6. Then enter the path name E:\ (where E is the CD-ROM drive of your
Notebook or PC). The driver files will be copied to this location. Click OK.

Installation
5
Setting Network Properties in Windows 98/Me
These steps provide a quick summary of the setting Network Properties process.
For detailed installation steps with screen shots, see the chapter entitled
Network Basics.
Note: See the steps for Windows 2000 Network Properties below.
1. Right-click Network Neighborhood from the desktop.
2. Select Properties from the context menu. The Network dialog box
displays and presents three main tabs: Configuration, Identification, and
Access Control.
3. Click the Configuration tab.
4. Click the Add button.
5. The Select Network Component Type dialog box displays.
6. Click Protocol, and then click the Add button.
7. The Select Network Protocols dialog box displays.
7a. From the list of manufactures, click on Microsoft.
7b. From the Network Protocols list, select TCP/IP, and then click OK.
8. The TCP/IP protocol is now installed. Click OK, and you will be returned to
Network Component Type dialog box.
9. Click the TCP/IP option for setting the IP address for your computer.
10. You can select either the Static or DHCP setting.
•If you use the Static IP setup, then enter the IP value, Subnet
masking, DNS, Domain/Workgroup name, and Gateway Address
values.
11. After setting these parameters, click OK to return to Network
Component Type.
12. You can now select the File and Printer Sharing options as well as the
Access to your computer. Access can be set for other users connected to
the network by setting the computer sharing options. Click OK.
13. The screen message Do you want to restart your computer will pop up.
Select Yes. Your computer will shut down and restart.

Installation
6
Setting Network Properties in Windows 2000
These steps provide a quick summary of the setting Network Properties process.
For detailed installation steps with screen shots, see the chapter entitled
Network Basics.
1. Right-click My Network Places from the desktop, and select Properties
from the context menu.
2. The Network dialog box displays. Click Local Area Connection à
Properties.
3. Click the TCP/IP option for setting the IP address for your computer.
4. You can select either Obtain an IP address automatically or Set your
own IP address.
•To obtain an IP address automatically, select this option, and the address
is automatically set up.
•To set your own IP address, enter the IP, Subnet Masking, DSN
server, and Default Gateway Address values. Then click OK.
5. You will be returned to the Network Component Type dialog box.
6. You can now select the File and Printer Sharing options as well as the
Access to your computer. Access can be set for other users connected to
the network by setting the computer sharing options. Click OK.
7. The screen message Do you want to restart your computer will pop up.
Select Yes. Your computer will shut down and restart.

Configuration
7
Configuration Utility
The Wireless USB uses its own management software. All functions you can
control are provided by the Configuration Utility. Usually, this application starts
automatically. To start the utility manually, click the Start button, > Programs,
> UBS 11 Mbps Wireless Network Adapter.
A new icon should appear in your Icon tray. If the icon is green, the Wireless
USB adapter is configured right. If the icon is red, the Wireless USB adapter
configuration is invalid or complete. In this case, re-check your configuration by
following the same steps you will use in this chapter to set the initial
configuration.
Figure 1. Icon Tray with a New Icon
To start the configuration, double click on the Wireless Network Adapter icon.
The USB 11Mbps Wireless Configuration Utility screen displays.
The Configuration Utility Screen with the Status Tab Displayed
A Note about Navigation: You can navigate through the tabs by clicking on
the tab. The OK button accepts the information and closes the dialog box.
Other ways to navigate in Windows: The –button (upper right corner)
minimizes the window. The Xbutton closes the application.

Configuration
8
Status Tab
Link Status Group
When Associated fields are listed, the normal flow of operation is Infrastructure
Mode, the PC is connected to its access point, and networking is available.
BSSID is shown in the form of hex digits.
Tx/Rx Rate Information Group
The Tx Packets and Rx Packets display the instantaneous wireless Receive and
Transmit throughput displayed in bytes per second. These values are updated
every two seconds.
Signal Strength
The Signal Strength sliding bar displays the quality of the link between the node
and its Access Point. This bar is active only when the node is in Infrastructure
Mode. The label under the sliding bar summarizes the quality of the link. The
values can be:
No Traffic
Poor
Good
Very Good
Excellent
The driver will start looking for a better Access Point if the Link Quality becomes
Poor. Link Quality is a measure of Receive and Transmit Errors over the radio.

Configuration
9
Configuration Tab
The fields on the Configuration Tab display the operating parameters of the
driver. Changes to any of the parameters can be made on this screen. You do
not have to reboot the PC when changes on this screen are made.
Configuration Utility Screen with Configuration Tab Selected
Change Configuration
To change the current configuration, check the Change Configuration box.
Station ESS ID
Extended Service Set Identifier (Wireless Network Identifier) is the group
name that will be shared by every member of your wireless network. You
will only be able to connect with an Access Point, which has the same ESS
ID. The only option is ANY.

Configuration
10
Network Mode
Two modes are available. The default is Infrastructure.
Ad Hoc - This is the 802.11 peer-to-peer mode of operation. In 802.11Ad
Hoc only one wireless cell is supported for each different SSID.
Communication is Client-to-Client without the use of an Access Point.
802.11 Ad Hoc networking uses the same SSID for establishing the wireless
connection.
Infrastructure - This mode of operation requires an 802.11 Access Point.
All communication is done via the Access Point, which relays packets to
other wireless Clients in the BSS as well as to nodes on a wired network
such as Ethernet.
Preamble
Two different Preambles are available. The default is Long.
Long Preamble - The mandatory supported Long Preamble inter-operates
with the current 1 Mbit/s and 2 Mbit/s DSSS specification (as described in
IEEE Std 802.11).
Short Preamble - The optional Short Preamble is intended for applications
where maximum throughput is desired and interoperability with legacy and
non-short-preamble capable equipment is not a consideration. That is, the
Short Preamble is intended to be used only in networks of like equipment,
all of which can handle the optional mode.
TX Rate
The TX Rate is the transmission rate at which the data packets are
transmitted. You can set this to these fixed values: 1 Mbps, 2 Mbps, 5.5
Mbps or 11 Mbps. The default is Auto.
Update Button
This button becomes active only when one of the fields has been changed.
Click this button to apply the changes to the driver and to save them to the
registry for the next time the PC boots up.

Configuration
11
Encryption Tab
You may desire an additional measure of security on your wireless network.
Additional security can be set on the Encryption Tab.
Configuration Utility with the Encryption Tab Selected
This can be achieved by using WEP (Wired Equivalent Privacy) encryption. WEP
encrypts each frame transmitted from the radio using one of the Keys entered.
When an encrypted frame is received, it will be accepted only if it decrypts
correctly, and this will happen only if the receiver uses the same WEP Keys as
the transmitter.
Encryption (WEP)
Choose either 64 bit or 128 bit from the drop down list box.
WEP Key Entry
Select either a password (Passphrase) or a key (Manual Entry) for your
WEP encryption.
Create with Passphrase – Enter a password in this field.
Manual Entry - Use this field to manually enter the key code. This may be
necessary if you wish to match a key in a different vendor’s product. Note:
The numbers cannot be all zeroes.

Configuration
12
WEP Key to Use
Select a key and then enter the keys in the corresponding fields.
Mode
There are two options. The default is Mandatory.
Mandatory Mode – This mode is the WEP encryption that should be used.
The other station also needs to use WEP encryption in order to establish a
communication with your station. This mode is required for compliance with
the IEEE 802.11b standard.
Optional Mode - This mode allows your station to communicate with other
stations that may or may not use WEP encryption.
Authentication Type
There are two options. The default is Open System.
Open System – If the Access Point is using Open System authentication,
then the wireless adapter will need to be set to the same authentication.
Shared Key – This authentication type is available only if WEP encryption
is enabled. It supports authentication of hosts as either a member of a
group that shares a secret key or a member of those without a shared
secret key. Shared Key authentication requires the use of WEP in order to
share the key without transmitting the secret key in the open.
Apply Change
Click this button to apply any changes made to the fields on this screen.

Configuration
13
About Tab
The About Tab shows the driver version, the product version, and the
application version numbers. Use this information when contacting Tech
Support.
Configuration Utility with About Tab Selected

Technical Specifications
14
Technical Specification of the Wireless USB
Product Name USB 11 Mbps Wireless Network Adapter
Model Number RF802USB
Hardware Compatibility IBM-compatible PC with USB port
Host Interface USB B-type to PC
Dimensions 4 x 2.8 x ¾ inches (10 x 7.2 x 2 mm)
Frequency Band 2.400 ~ 2.4825GHz (subject to local
regulations)
Number of Channels USA and Canada – 11
France – 4
Most European countries – 13
Japan – 13 (optional 14)
Operating Voltage 5V
Spreading DSSS (Direct Sequence Spread Spectrum)
Data Rate 11Mbps, 5.5Mbps, 1Mbps
Transmit Power Nominal Temp Rate: 13 dBm
Extended Temp Rate: 10 dBm min.
Transmit Power, 2.7v to 3v: 10 dBm min.
Receive Sensitivity Nominal Temp Rate:
1 Mbps 10-5 BER @ -87 dBm, minimum
5.5 Mbps 10-5 BER @ -84 dBm, minimum
11 Mbps 10-5 BER @ -81 dBm, minimum
Extended Temp Rate:
1 Mbps 10-5 BER @ -84 dBm minimum
5.5 Mbps 10-5 BER @ -81 dBm minimum
11 Mbps 10-5 BER @ -78 dBm minimum
Modulation 11Mbps and 5.5 Mbps CCK; 2 Mbps: DQPSK;
I Mbps: DBPSK
Security 40-bit and 128-bit WEP Encryption
Antenna External 1 dBi dipole antenna
LED Indicators Power, Link
Drivers Windows 95/98/2000, NT 4.0, Linux
Standards IEEE 802.11b, Wi-Fi compliant
Media Access Protocol CSMA/CA with ACK
Warranty 1 year, optional 3 years
Temperature Range -10 ~ 50oC (Operating), -20 ~ 70 o C (Storing)
Humidity Max. 95% Non-condensing
Operating Range Open Space: 100 – 300m; Indoor: 35 – 100m

Technical Specifications
15
Roaming Full mobility and seamless roaming from cell to
cell and across access points (subject to access
point)
Network Protocol TCP/IP, IPX, NDIS3, NDIS4
Management Ability Link Config for network join and diagnosis
EMC Certification FCC Part 15 Class in US, ETSI 300.328 and CE
EMC-EEC in Europe, ARIB-Telec in Japan
Packaging Generic, Multi-Tech Systems, Inc., private
labeling optional
Data Encryption 64 bit and 128 Bit WEP Encryption
Supported Bit Rates 11 Mbps, 5.5 Mbps, 2 Mbps, 1 Mbps
Utility Software Configuration Utility Software
Standards IEEE 802.11b
Transport Protocols TCP/IP, IPX/SPX, NetBEUI
TCP/IP Protocols BOOTP, SNMP, Telnet, DHCP, FTP
System Requirements IBM compatible with Pentium 100 or faster
processor, USB port
Supported Operating
Systems
Windows 98, Windows Me, Windows 2000
Data Rate 11 : CCK
5.5 : CCK
2 : DQPSK
1 : DBSK
Key Management Automatic Dynamic Key Allocation (ADKA)
through public key
Range Indoor – per cell approx. 35 to 100 meters
Outdoor – per cell approx. 100 to 300 meters
Diagnostic LED Power, Activity
Power Specifications Operating Voltage: +5V, DC (+/-) 5%
Transmit Power Nominal Temp. Range: 17 dBm
Extended Temp. Range: 14 dBm min.
Transmit Power, 2.7v to 3v: 14 dBm min.
Network Architecture Supports Ad-Hoc Mode (Peer-to-Peer without
Access Point) or Infrastructure Mode
(Communications to wired networks via Access
Points with Roaming)
Compliant with IEEE 802.11b
Antenna External antenna supporting diversity
Mobility: Seamless roaming across cell
boundaries with handover

Uninstall Directions
16
Uninstall RF802USB Software
If you want to uninstall the Wireless USB software under the Windows
operating system, complete the following steps:
Uninstall RF802USB in Windows 98
1. Click the Start buttonàSettings àControl Panel àAdd/Remove
àRemove Wireless USB Adapter RF802USB.
2. Click the Start button àPrograms àWindows Explorer àDisk C
àWindows àINF file àOther àThen remove the USB inf file
related to the RF802USB.
3. Click the Start button àRun àtype “regedit“ command àLocal
Machine àEnum àUSB àremove file “VID- 03EB&PID7602”.
4. Click the Start button àRun àtype “ regedit “ command, àLocal
Machine àSystem àCurrent Control Set àServicesàClass à
Net àremove USB file related to the RF802USB.
5. Click the Start button àSettings àTaskbar & Start Menu àStart
Menu Program àRemove àchoose Wireless USB (related to the
RF802USB) àRemove.
Important: Restart your PC to make the changes effective before you
reinstall the driver.
Uninstall RF802USB in Windows ME
1. Click the Start button àSettings àControl Panel àAdd/Remove
àRemove Wireless USB adapter RF802USB.
2. Right-click My Computer on the desktop àProperties àDevice
Manager àNetwork adapter àThen remove Wireless USB adapter
RF802USB.
3. Click the Start button àRun àtype “ regedit “ command àLocal
Machine àSystem àCurrent Control Set àServices àClass à
Net àremove USB file related to the RF802USB.
4. Click the Start button àRun àtype “ regedit “ command àLocal
Machine àEnum àUSB àremove file “VID-03EB&PID7602.”
Important: Restart your PC to make the changes effective before you
reinstall the driver.
Other manuals for RF802
1
This manual suits for next models
1
Table of contents
Other Multitech Adapter manuals

Multitech
Multitech CallFinder CF220-DID User manual

Multitech
Multitech CallFinder CF220-DID User manual

Multitech
Multitech MultiConnect SS MTS2SA-T User manual

Multitech
Multitech ZDXModemRack EN55022 User manual

Multitech
Multitech MultiConnect BT MTS2BTA User manual

Multitech
Multitech MultiConnect Adapter Serial-to-Ethernet Adapter with... User manual

Multitech
Multitech IWAY MT128ISA-SD User manual

Multitech
Multitech MultiConnect Adapter User manual

Multitech
Multitech MultiConnect BT MTS2BTA User manual

Multitech
Multitech MultiModemISDN MTA128ST-USB User manual