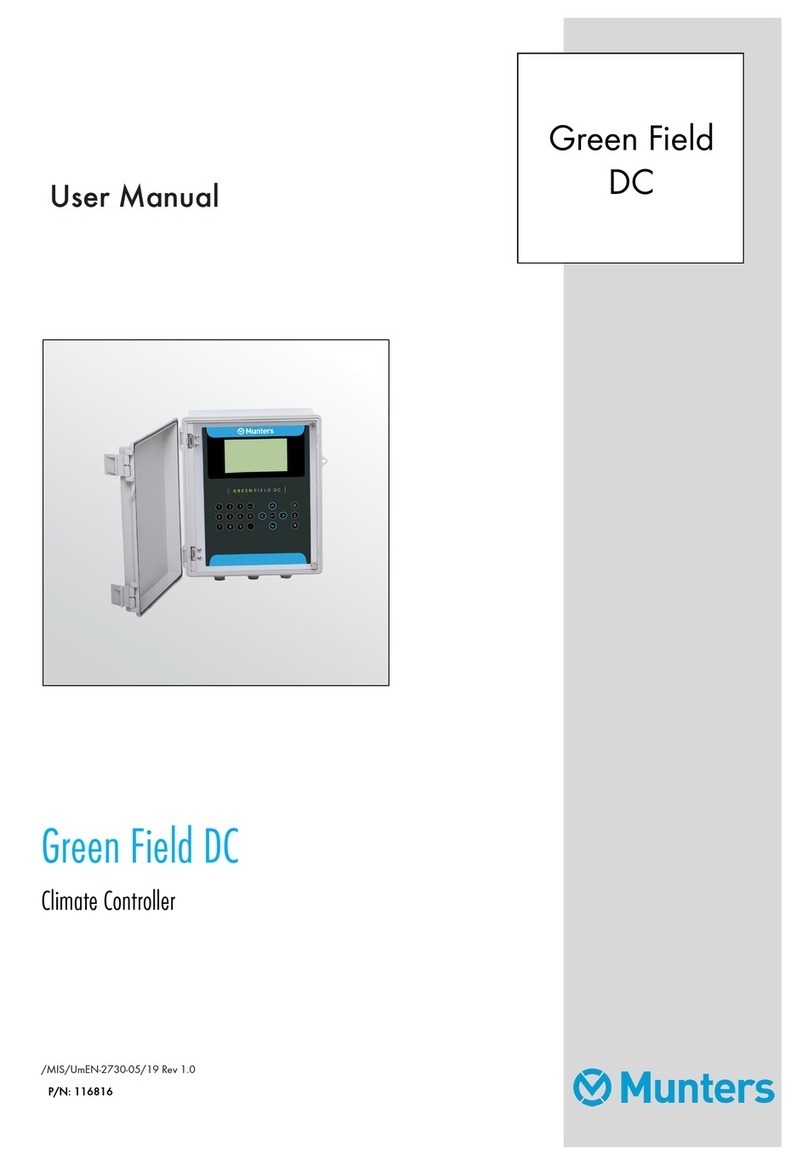
Munters Green Field User manual

User Manual
Green Field
Irrigation Controller
Ag/MIS/UmEN-2732-05/19 Rev 1.1
116782
Green
Field

© Munters AB, 2018 2
Green Field
User manual
Rev 1.1, 09/2019
This manual for use and maintenance is an integral part of the apparatus together with the attached
technical documentation.
This document is destined for the user of the apparatus: it may not be reproduced in whole or in part,
committed to computer memory as a file or delivered to third parties without the prior authorization of the
assembler of the system.
Munters reserves the right to effect modifications to the apparatus in accordance with technical and legal
developments.

© Munters AB, 2018 3
Index
chapter page
1INTRODUCTION ------------------------------------------------------------------------------------------------------------------------------------------6
1.1 Disclaimer--------------------------------------------------------------------------------------------------------------------------------------------------------------------------------
6
1.2 Introduction-----------------------------------------------------------------------------------------------------------------------------------------------------------------------------
6
1.3 Notes -----------------------------------------------------------------------------------------------------------------------------------------------------------------------------------------
6
2GENERAL INFORMATION------------------------------------------------------------------------------------------------------------------------ 7
2.1 Keyboard---------------------------------------------------------------------------------------------------------------------------------------------------------------------------------
7
2.2 Hot Screens----------------------------------------------------------------------------------------------------------------------------------------------------------------------------
7
2.3 Main Menu Icons ---------------------------------------------------------------------------------------------------------------------------------------------------------------
8
2.4 Introduction to Irrigation Programs---------------------------------------------------------------------------------------------------------------------------
8
2.5 Operation Mode-----------------------------------------------------------------------------------------------------------------------------------------------------------------
9
3PROGRAM MENU ------------------------------------------------------------------------------------------------------------------------------------ 11
3.1 Run Time Program------------------------------------------------------------------------------------------------------------------------------------------------------------
11
3.2 Dosing Program----------------------------------------------------------------------------------------------------------------------------------------------------------------
12
3.2.1 Proportional Quantity .......................................................................................................................
13
3.2.2 Proportional Time ...............................................................................................................................
13
3.2.3 Time .........................................................................................................................................................
14
3.2.4 Quantity.................................................................................................................................................
15
3.2.4.1
Example of Dosing by Quantity (Spread)...........................................................17
3.2.4.2
Example of Controlled EC/pH Based on Proportional Quantity.......................17
3.2.5 EC Pre-Control .....................................................................................................................................
18
3.3 Irrigation Program -----------------------------------------------------------------------------------------------------------------------------------------------------------
19
3.3.1 Setting Valve Sequence ...................................................................................................................
21
3.3.2 Adjusting the Water Quantity Based on Weather Conditions..........................................
24
3.3.3 Configuring the Irrigation Calendar............................................................................................
25
3.4 Irrigation Based on External Conditions-------------------------------------------------------------------------------------------------------------
25
3.4.1 Setting the Dry Contacts..................................................................................................................
27
3.4.2 Configuring the Analog Sensors...................................................................................................
28
3.5 Irrigation Based on Radiation Sum------------------------------------------------------------------------------------------------------------------------
30
3.6 Irrigation Based on VPD Sum -----------------------------------------------------------------------------------------------------------------------------------
32
3.7 Introduction to the Influence Program------------------------------------------------------------------------------------------------------------------
33
3.8 Using the Influences -------------------------------------------------------------------------------------------------------------------------------------------------------
33
3.8.1 Setting the Influences ........................................................................................................................
33

© Munters AB, 2018 4
3.8.2Radiation Influence on Target EC.................................................................................................
34
3.8.3 Drainage Influence on Target Radiation Sum..........................................................................
35
3.8.4 Drain Influence on Minimum Time ...............................................................................................
36
3.8.5 Drainage EC Level Influence on Target EC ..............................................................................
37
3.8.6 VPD Influence on Target EC...........................................................................................................
39
3.8.7 Temperature Influence on Target EC...........................................................................................
40
3.9 Agitator----------------------------------------------------------------------------------------------------------------------------------------------------------------------------------
41
3.10 Selector----------------------------------------------------------------------------------------------------------------------------------------------------------------------------------
42
3.11 Filter Flushing----------------------------------------------------------------------------------------------------------------------------------------------------------------------
42
3.12 Cooling ----------------------------------------------------------------------------------------------------------------------------------------------------------------------------------
44
3.13 Misting------------------------------------------------------------------------------------------------------------------------------------------------------------------------------------
46
3.14 Water Heating ------------------------------------------------------------------------------------------------------------------------------------------------------------------
46
4MANUAL MENU --------------------------------------------------------------------------------------------------------------------------------------- 47
4.1 System Pause----------------------------------------------------------------------------------------------------------------------------------------------------------------------
47
4.2 Start/Stop Program--------------------------------------------------------------------------------------------------------------------------------------------------------
48
4.3 Start/Stop Valve---------------------------------------------------------------------------------------------------------------------------------------------------------------
48
4.4 Manual Filter Flush----------------------------------------------------------------------------------------------------------------------------------------------------------
49
5ALARM MENU-------------------------------------------------------------------------------------------------------------------------------------------- 51
5.1 Reset ----------------------------------------------------------------------------------------------------------------------------------------------------------------------------------------
51
5.2 Alarm History----------------------------------------------------------------------------------------------------------------------------------------------------------------------
52
5.3 Alarm Definition----------------------------------------------------------------------------------------------------------------------------------------------------------------
52
5.4 Alarm Setting----------------------------------------------------------------------------------------------------------------------------------------------------------------------
54
5.5 EC/pH Alarm Definition ----------------------------------------------------------------------------------------------------------------------------------------------
55
5.6 EC/pH Alarm Setting ----------------------------------------------------------------------------------------------------------------------------------------------------
55
5.7 Radio System Alarm Definition --------------------------------------------------------------------------------------------------------------------------------
55
5.8 Radio System Alarm View ------------------------------------------------------------------------------------------------------------------------------------------
56
5.9 SMS Subscription ------------------------------------------------------------------------------------------------------------------------------------------------------------
56
6HISTORY MENU---------------------------------------------------------------------------------------------------------------------------------------- 57
6.1 Irrigation Log ----------------------------------------------------------------------------------------------------------------------------------------------------------------------
58
6.2 RAD. & VPD SUM & DRAIN LOG-------------------------------------------------------------------------------------------------------------------------
59
6.3 Uncompleted Irrigation-------------------------------------------------------------------------------------------------------------------------------------------------
59
6.4 Uncompleted Programs------------------------------------------------------------------------------------------------------------------------------------------------
60
6.5 Daily Irrigation-------------------------------------------------------------------------------------------------------------------------------------------------------------------
61
6.6 Irrigation Accumulation------------------------------------------------------------------------------------------------------------------------------------------------
62
6.7 Aux Meter Accumulation --------------------------------------------------------------------------------------------------------------------------------------------
62
6.8 Accumulation Reset---------------------------------------------------------------------------------------------------------------------------------------------------------
63
6.9 Filters ---------------------------------------------------------------------------------------------------------------------------------------------------------------------------------------
63
6.10 Cooling ----------------------------------------------------------------------------------------------------------------------------------------------------------------------------------
64

© Munters AB, 2018 5
6.11 Sensor Log ---------------------------------------------------------------------------------------------------------------------------------------------------------------------------
64
6.12 Event Log-------------------------------------------------------------------------------------------------------------------------------------------------------------------------------
65
6.13 System Log---------------------------------------------------------------------------------------------------------------------------------------------------------------------------
65
7WARRANTY------------------------------------------------------------------------------------------------------------------------------------------------- 66

© Munters AB, 2018 6
1Introduction
1.1 Disclaimer
Munters reserves the right to make alterations to specifications, quantities, dimensions etc. for production
or other reasons, subsequent to publication. The information contained herein has been prepared by
qualified experts within Munters. While we believe the information is accurate and complete, we make no
warranty or representation for any particular purposes. The information is offered in good faith and with
the understanding that any use of the units or accessories in breach of the directions and warnings in this
document is at the sole discretion and risk of the user.
1.2 Introduction
Congratulations on your excellent choice of purchasing a Green Field Controller!
In order to realize the full benefit from this product it is important that it is installed, commissioned and
operated correctly. Before installation or using the fan, this manual should be studied carefully. It is also
recommended that it is kept safely for future reference. The manual is intended as a reference for
installation, commissioning and day-to-day operation of the Munters Controllers.
1.3 Notes
Date of release: July 2019a
Munters cannot guarantee to inform users about the changes or to distribute new manuals to them.
All rights reserved. No part of this manual may be reproduced in any manner whatsoever without the
expressed written permission of Munters. The contents of this manual are subject to change without notice.

© Munters AB, 2018 7
2General Information
•Keyboard
•Hot Screens
•Main Menu Icons
•Introduction to Irrigation Programs
•Operation Mode
2.1 Keyboard
•
Numer keys: Use these keys to enter values or
quantities. In addition, they act as shortcuts to
selections (see the following section).
•
+/- Key: Toggles between positive and negative
values and marks check boxes' option selection. In
a History screen, use this key to toggle between
quantities and time format.
•
Arrows: Scroll up, down, left, and right to select
menus.
•
(MENU)
: Press to get to the main menu;
also acts as "ESC" and "Back" keys.
•
(ENTER)
: Enter menu, submenu, value,
open window, and confirm a value or change.
•: Access Mode
•
(DELETE)
: Erases s typing mistake.
2.2 Hot Screens
Press from the Main Menu to see Read-Only overview running processes. Press again to
return to the Main Menu.
There are 10 Hot Screens/Keys:
•0: Hot Key- Icon of active actions/processes
•1: Main Screen/System Status
•2: Irrigation Process
•3: Irrigation Program Status
•4: Water, EC/pH, Dosing

© Munters AB, 2018 8
•5: Filter Flushing Status
•6: Temperature & Humidity measurement
•7: Weather Station measurement
•8: System Pressure
•9: Drain Status
2.3 Main Menu Icons
2.4 Introduction to Irrigation Programs
To set an irrigation program-regiment/strategy, the grower must select the necessary valves and set the
Run Time and Dosing programs. The grower can define one or more programs for one or more valves.
Refer to PROGRAM MENU, page 11 for detailed information on these programs.
•Run Time Programs
oBased on Time or Quantity
oSet water before and after dosing process (fertilizer injection)
•Dosing Programs (Fertilizer)
oUp to eight dosing channels per program
oEach channel can be defined by:
oQuantity
oProportional Quantity
oTime
oProportional Time
•Irrigation Timing Based on External Condition Programs
oSupports up to 15 programs

© Munters AB, 2018 9
oEach program defines:
oTime frame
oTrigger
oTrigger Type (for example one time only or multiple shots)
2.5 Operation Mode
There are three operation levels:
•Read Only (restricted): All the parameters and menus are visible, but cannot be modified
•User (partially restricted): Menus 1-6 are fully accessible and can be modified. Menus 7 and
8 can be viewed but not modified
•Technician (unrestricted): All menus are fully accessible (no restrictions)
To change the operation mode, press the LOG IN key
Click the MODE icon and insert the password
The controller recognizes the operation mode according to the password that is entered:
MODE
PASSWORD
Read Only
0000
User
9999
Technician
1948
Users can modify all menus except the Installation menus. Technicians can modify all menus.
If an incorrect password is entered, this screen appears.
The Operation mode can be configured to automatically return to the “Read-Only” mode after a certain
amount of time.
NOTE
Refer to the SYSTEM SETUP section in the Installation Manual.
OPERATION MODE –USER
?
1
2
3
OPERATION MODE
Please Enter Password
OPERATION MODE
WRONG PASSWORD
Please Try Again.

© Munters AB, 2018 10
SYSTEM SETUP
HISTORY
History Resolution ► 1 HOUR
WEATHER STATION
Controller Function ► LOCAL
OPERATION MODE
Automatic return to RO mode ► NO
Return period to RO mode
► 00:01
COMMUNICATION
Controller Number ► 1
Lower Port – Protocol ► GREEN NET
Lower Port – BaudRate ► 9600
Upper Port – Protocol ► NONE
Upper Port – BaudRate ► 9600
•To perform a cold start or firmware upgrade, the controller must be in the “Technician”
mode.
•If there is a power failure, the controller powers up with the last used mode.
NOTE
The Return period parameter format is HH:MM. The minimum period is one minute.

© Munters AB, 2018 11
3Program Menu
The Program Menu is used to configure the irrigation programs. Configuration is a multistep process
consisting of setting the following:
•Run Time Program (length of irrigation time or quantity of water to be distributed), page 11
•Dosing Program (fertilizer distribution program), page 12
•Irrigation (time frame and other parameters), page 19
In addition (or as alternative) to starting the irrigation based on time, irrigation can be set to begin based
on:
•Irrigation Based on External Conditions, page 25
•Irrigation Based on Radiation Sum, page 30
•Irrigation Based on VPD Sum, page 32
Furthermore, you can adjust the irrigation process based on environmental factors such as the amount of
radiation, the temperature, or other factors. Refer to Introduction to the Influence Program and
Introduction to the Influence Program, page 33 for more details.
Lastly, use this menu to configure the following functions:
•Agitator, page 41
•Selector, page 42
•Filter Flushing, page 42
•Cooling, page 44
•Misting, page 46
•Water Heating, page 46
3.1 Run Time Program
For every irrigation program, define a Run Time program, which defines the how much water to distribute.
Run Time can be based on either length of time or quantity of water. You can define up to 60 Run Time
programs.
As an option, you can configure irrigation to run for a certain amount of time or quantity before dosing
begins and/or after dosing ends. This process rinses the irrigation pipes of any residual matter.
To set the irrigation Run Time:
1. Go to Program > Water Run Time.
2. Select QTY or TIME.
3. Enter the water quantity/total run time.
4. Enter the Before and/or After quantity/time (optional).
5. Repeat as required for each program.

© Munters AB, 2018 12
2. Water Run Time
Qty.
Define
Time
oDefine value for "before" and "after" time program
NOTE
Whatever figure you enter in Before/After is deducted from the total run time/quantity. For
example if the run time is 15 minutes, a Before time of two minutes and After time of one minute,
then the net dosing time is 12 minutes.
3.2 Dosing Program
For every irrigation program, define a Dosing Program that defines the quantity of fertilizer per channel
and its delivery method. You can define up to 10 Dosing Programs.
NOTE
If there is more than one fertilizer tank for the selected dosing channel, refer to Selector, page 42.
1. Program
WATER RUN TIME PROGRAM
#
Method
Water
Before
After
1
2
3
4
5
6
7
8
9
QTY.
QTY.
QTY.
QTY.
QTY.
QTY.
QTY.
QTY.
QTY.
10.000
25.000
0.000
0.000
0.000
0.000
0.000
0.000
0.000
0.000
0.000
0.000
0.000
0.000
0.000
0.000
0.000
0.000
0.000
0.000
0.000
0.000
0.000
0.000
0.000
0.000
0.000
QTY.
TIME
WATER RUN TIME PROGRAM
#
Method
Water
Before
After
1
2
3
4
5
6
7
8
9
TIME
QTY.
QTY.
QTY.
QTY.
QTY.
QTY.
QTY.
QTY.
00:15:00
25.000
0.000
0.000
0.000
0.000
0.000
0.000
0.000
00:00:00
0.000
0.000
0.000
0.000
0.000
0.000
0.000
0.000
00:00:00
0.000
0.000
0.000
0.000
0.000
0.000
0.000
0.000
WATER RUN TIME PROGRAM
#
Method
Water
Before
After
1
2
3
4
5
6
7
8
9
10
TIME
QTY.
QTY.
QTY.
QTY.
QTY.
QTY.
QTY.
QTY.
QTY
00:15:00
25.000
0.000
0.000
0.000
0.000
0.000
0.000
0.000
0 000
00:0200
5.000
0.000
0.000
0.000
0.000
0.000
0.000
0.000
0 000
00:01:00
5.000
0.000
0.000
0.000
0.000
0.000
0.000
0.000
0 000

© Munters AB, 2018 13
3. Dosing
Dosing can be according to one of the following:
•
Proportional
quantity
•
Proportional time
•
Quantity
•
Time
3.2.1 PROPORTIONAL QUANTITY
Proportional Quantity is the quantity of fertilizer distributed per quantity of water. The proportion can be
one of the following:
•Liters per cube of water
•Gallons per 1000 gallons of water
3.2.2 PROPORTIONAL TIME
Proportional Time takes the required dosing time and spreads out each dose over the irrigation program
in one of two manners:
•Open/close pulses per channel
•Continual flow controlled by analog output
NOTE
Refer to the Installation Manual for more details on configuring the method.
1. Program
DOSING PROGRAM
Program: 1
INJECTION PER DOSING CHANNEL
1
EC
5.00
2
EC
5.00
3
ACID
5.00
---
---
---
EC Dosing Method
PH Dosing Method
P.QTY
P.QTY
DOSING PROGRAM
Program: 1
INJECTION PER DOSING CHANNEL
1
EC
5:00
2
EC
6:00
3
ACID
0.00
---
---
---
EC Dosing Method
PH Dosing Method
P.TIME
P.QTY
P. QTY
P. TIME
TIME
QTY.

© Munters AB, 2018 14
The diagram below shows how each the fertilizer is distributed over the total run time;
•
A dose (P) is injected during
irrigation according to the
calculated schedule.
•
The valve remains open during
dosing, with the opening
percentage determined by the
quantity and dosing time.
3.2.3 TIME
When using the Time delivery method, fertilizer is injected once, for the length of time defined in this
screen.
DOSING PROGRAM
Program: 1
INJECTION PER DOSING CHANNEL
1
EC
00:10
2
EC
00:00
3
ACID
0.00
---
---
---
EC Dosing Method
PH Dosing Method
P.TIME
P.QTY
P. QTY
P. TIME
TIME
QTY.
DOSING PROGRAM
Program: 1
INJECTION PER DOSING CHANNEL
1
EC
00:10
2
EC
00:00
3
ACID
0.00
---
---
---
EC Dosing Method
PH Dosing Method
P.TIME
P.QTY
P. QTY
P.
TIME
TIME
QTY.

© Munters AB, 2018 15
Example: In Channel 3, P1 = 5 minutes.
(one pulse)
3.2.4 QUANTITY
The Quantity method injects a fixed amount of fertilizer in the irrigation water. When using the Quantity
method, there are two options:
•Option A:Bulk (similar to Time method). In this option, fertilizer is injected once, with the
quantity defined in this screen.
Example: Channel 1, P1 = four liters in one pulse
•Option B: Spread (according to dosing configuration set by a technician). Option B is similar
to Proportional Time. In this method, fertilizer is spread out by quantity over the irrigation run
time.
Example: Channel 1 = P1 + P2 + P3…+ Pn = 4 liters
NOTE
The example below shows liters; in the USA use gallons.
DOSING PROGRAM
Program: 1
INJECTION PER DOSING CHANNEL
1
EC
00:15
2
EC
00:10
3
ACID
00:05
-
-
-
-
-
-
-
-
-
EC Dosing Method
PH Dosing Method
TIME
TIME

© Munters AB, 2018 16
Qty.
When installing the Green Field Controller, the installation technician selects the required option. The user
defines the quantity in the above screen.
Main
Menu
7. Dosing Configuration
Define
according
to Bulk or
Spread
Back in Dosing Program
menu, define Injection per
Dosing Channel.
DOSING PROGRAM
Program: 1
INJECTION PER DOSING CHANNEL
1
EC
00:10
2
EC
00:00
3
ACID
0.00
---
---
---
EC Dosing Method
PH Dosing Method
P.TIME
P.QTY
P. TIME
TIME
QTY.
DOSING PROGRAM
Program: 1
INJECTION PER DOSING CHANNEL
1
EC
4.00
2
EC
5.00
3
ACID
2.00
---
---
---
EC Dosing Method
PH Dosing Method
QTY.
QTY.
DOSING CONFIGURATION
EC Control
YES
Ph Control
YES
EC Alarms
YES
pH Alarms
YES
Minimum On Time (sec)
0.8
Minimum Off Time (sec)
0.8
EC Coarse Tuning
5
EC Fine Tuning
5
pH Coarse Tuning
5
pH Fine Tuning
5
Control Cycle EC
4
Control Cycle pH
4
EC/pH Averaging (0-Low, 20-High)
3
Dosing Boost Off Delay (mm:ss)
00:02
Dosing by QTY. Method
SPREAD
DOSING PROGRAM
Program: 1
INJECTION PER DOSING CHANNEL
1
EC
4.00
2
EC
5.00
3
ACID
2.00
---
---
---
EC Dosing Method
PH Dosing Method
QTY.
QTY.

© Munters AB, 2018 17
3.2.4.1 Example of Dosing by Quantity (Spread)
Using Quantity (Spread) is normally done in an open field. The following is an example of a Quantity
(Spread) configuration.
Ch. 1
Spread Qty. = 4 liters
Ch. 2
Spread Qty. = 5 liters
3.2.4.2 Example of Controlled EC/pH Based on Proportional Quantity
The following is an example of how to configure the controller so that the pH is maintained at a certain
level.
Define dosing program: Nutrient amount and desired
EC/pH levels
**Channel 3 (Acid channel): pH is controlled at 5.50. To keep pH levels on target, the Pulse width
(meaning the quantity in each pulse) fluctuates according to controller calculations.
DOSING PROGRAM
Program: 1
INJECTION PER DOSING CHANNEL
1
PASSIV
4.00
2
PASSIV
5.00
3
ACID
2.00
---
---
---
Target PH
Passive Method
PH Dosing Method
5.50
QTY.
P.QTY.
DOSING PROGRAM
Program: 1
INJECTION PER DOSING CHANNEL
1
EC
5.00
2
EC
5.00
3
ACID
5.00
---
---
---
Target EC
Target PH
EC Dosing Method
PH Dosing Method
1.50
5.50
P.QTY
P.QTY

© Munters AB, 2018 18
3 liter
1m³
pH Target = 5.5
3.2.5 EC PRE-CONTROL
Use this option in hydraulic pre-control systems in greenhouses. When collecting excess water from
drains, the grower can set an EC target before water goes through an irrigation system. This method
reuses excess fertilizer and water, recycling them for a second irrigation run.
NOTE
An EC Pre-Control valve relay must be defined by a technician at installation.
EC Pre-Control ON (this enables the
control)
DOSING PROGRAM
Program: 1
EC Pre-Control: ON
INJECTION PER DOSING CHANNEL
1
EC
2.00
2
EC
5.00
3
ACID
3.00
---
---
---
Target EC
Target PH
EC Dosing Method
PH Dosing Method
1.50
5.50
P.QTY
P.QTY
OFF
ON

© Munters AB, 2018 19
Define pre-controlled EC target
3.3 Irrigation Program
In the Irrigation Program screen, complete the irrigation setup.
.
1.
Irrigation
Select program
In this screen define the following:
•Start time: This parameter defines the irrigation program time period. Each period begins at the
defined time and runs until the next defined time. Define up to six periods for each irrigation
program. For example:
oIf you enter one time, the time period is 24 hours, starting from the time entered.
oIf you enter two times, the first period goes from first time defined until the second time.
The second period then starts and continues until the first time. For example in the screen
DOSING PROGRAM
Program: 1
EC Pre-Control: ON
INJECTION PER DOSING CHANNEL
1
EC
2.00
2
EC
5.00
3
ACID
3.00
---
---
---
Target EC
Target PH
Target EC Pre-Control
EC Dosing Method
PH Dosing Method
1.50
5.50
-----
P.QTY
P.QTY
DOSING PROGRAM
Program: 1
EC Pre-Control:
ON
INJECTION PER DOSING CHANNEL
1
EC
2.00
2
EC
5.00
3
ACID
3.00
---
---
---
Target EC
Target PH
Target EC Pre-Control
EC Dosing Method
PH Dosing Method
1.50
5.50
0.80
P.QTY
P.QTY
1. Program

© Munters AB, 2018 20
below, the first period starts at 8:00 and continues until 10:00. The second period begins
at 10:00 and continues until 8:00 (the next day).
•Clock Start: This parameter defines the number of irrigation cycles within each time period. In
the example below, there are two cycles between 8:00 – 10:00 and three cycles from 10:00
– 8:00.
•Min. Time: The minimal amount of time between cycle starts
•Valve #: Select that irrigation valve(s) open(s) (refer to Setting Valve Sequence, page 21).
•Run Time #: Select the required Run Time Program (refer to Run Time Program, page 11).
•Dosing Prog: Select the required Dosing Program (refer to Dosing Program, page 12).
•Day: Type the current day/number of days in cycle (refer to Configuring the Irrigation
Calendar, page 25).
•Dose/Water: For each day define the irrigation regime (refer to Configuring the Irrigation
Calendar, page 25).
•Irrigation Adjustments: Along with irrigation programs based on time, Green Field enables
adjusting or running irrigation based on the following:
oAdjusting the Water Quantity Based on Weather Conditions, page 24
oIrrigation Based on External Conditions, page 25
oIrrigation Based on Radiation Sum, page 30
oIrrigation Based on VPD Sum, page 32
oIntroduction to the Influence Program, page 33
DATE : 19-Apr-07 TIME : 16:12:32
IRRIGATION PROGRAM
Program: 4
Priority:
--
Const. 0%
Start Time
Clock Start
Min. Time
08:00 10:00
2 3
01:00 01:00
Valve #
Run Time #
Dosing Prog
001
1
1
Day: 01/01
Dose/Water
1
D
Other manuals for Green Field
1
Table of contents
Other Munters Irrigation System manuals