Murray 612100x4NA User manual

OWNER’S MANUAL
MANUEL DE L’UTILISATEUR
Model No.
612100x4NA
Modèle No.
612100x4NA
120 V.A.C. 6 AMP. 60 Hz.
Double Insulated
12” Clearing Width
ELECTRIC SNOW SHOVEL
PELLE À NEIGE ÉLECTRIQUE
120 V. CA 6 ampères 60 Hz
Double isolation
Largeur de déblayage 12 po
Caution: Read and Follow all Safety
Rules and Instructions Before
Operating This Equipment
Attention : Lire et suivre toutes les
instructions et consignes de sécurité
et avant d’utiliser cet appareil
F-041073C
LISTED
SNOW MOVER
894Y
File No E76832

2
F-041073C
TABLE OF CONTENTS
WARRANTY 2
SAFE OPERATING PRACTICES 3
ASSEMBLY 4
OPERATING INSTRUCTIONS 7
MAINTENANCE AND STORAGE 10
REPAIR PARTS 13
FRENCH MANUAL 17
ONE YEAR LIMITED WARRANTY
Murray, Inc. warrants to the original purchaser that this unit shall be free from defects in material and workmanship under
normal use and service for a period of One (1) Year from the date of purchase; however, this warranty does not cover engines,
accessories (such as electric starters) and Normal Wear Parts (except as noted below) as the companies that manufacture
these items furnish their own warranties and provide service through their authorized field service facilities. For additional
information, see the warranties covering these particular parts. If you are uncertain whether your unit contains or is equipped
with one or more of these parts, consult your dealer prior to purchase. Subject to the terms and conditions noted in this Limited
Warranty, we shall, at our option, repair or replace at no cost to the original purchaser any part covered by this Limited
Warranty during the applicable warranty period.
Normal Wear Parts are defined as drive belts, augers, shear pins, tires and headlights. These parts are warranted to be free
from defects in material and workmanship as delivered with the product. Any claim for repair or replacement of Normal Wear
Parts must be made within thirty (30) days of the date of purchase. No claims involving damage caused from material use,
abuse or misuse will be honored.
This Murray, Inc. One (1) Year Limited Warranty is your exclusive remedy; however, this warranty is void or does not apply to
any unit that has been tampered with, altered, misused, abused or used for rental or other commercial and/or professional
(non–homeowner) uses. Your warranty does not cover minor mechanical adjustments which are not due to any defect in
material or workmanship. For assistance in making such adjustments, consult your Instruction Book.
To make a claim under this Murray, Inc. One (1) Year Limited Warranty, return the unit (or if authorized in advance, the
defective part) along with your proof of purchase to an Authorized Service Center near you. To locate the nearest Authorized
Service Center, call the Central Parts Distributor for your area shown in the list provided with your unit or check the Yellow
Page listings in your local telephone directory. If you return the entire unit, we will repair the unit. If we authorize the return of
the defective part only, we will either replace or repair the part.This Murray, Inc. One (1) Year Limited Warranty gives you
specific legal rights, and you may also have other rights which vary from state to state. This Limited Warranty is given in lieu
of all other expressed and implied warranties including the implied warranty of merchantability and warranty of
fitness for a particular purpose. If you need additional information on this written warranty or assistance in obtaining service,
write:
MURRAY CANADA, INC.
Factory Customer Service
1195 Coutneypark Drive East
Mississauga, Ont. L5T–1R1
1–800–661–6662
Thank you for purchasing this snow shovel. Care for your snow
shovel properly and it will provide you with satisfactory, labor–
saving performance.
This operator’s manual has been prepared to provide you with
the information necessary for safe operation and proper mainte-
nance. To gain a complete understanding of the snow shovel,
read this manual thoroughly. Before operating familiarize yourself
with the location of controls, operating procedures, and general
maintenance instructions.
FOLLOW THE SAFE OPERATING INSTRUCTIONS to insure
proper snow shovel operating and to prevent possible injury to
yourself or others.
Thank you again for selecting this snow shovel as your labor–
saving tool for snow removal. If you have any questions about
your snow shovel or if you desire parts and service, contact your
authorized service dealer. He is prepared with service parts and
technical knowledge to care for your particular needs.
PRODUCT SPECIFICATIONS
RATING: 120 V.A.C. 6 AMPS, 60 HZ
CLEARING WIDTH: 12”
CLEARING HEIGHT: 7”
WARNING: The motor is equipped with a protector that
will disconnect power to the motor temporarily if the
snow thrower is overworked, and will automatically
reset as the motor cools. If the motor stops, release the control
bar, disconnect the extension cord and allow the motor to cool 5
minutes before continuing operation.

IMPORTANT
3
F-041073C
DO NOT OPERATE THIS EQUIPMENT BEFORE READING THIS MANUAL
Read entire owner’s manual before attempting to assemble
or operate this snow shovel.
Before Operation
Read and understand this manual. Become familiar with the
snow shovel and all its controls.
Exercise caution to avoid slipping or falling, especially when
operating in reverse.
Know how to stop quickly.
KEEP CHILDREN AWAY – Keep bystanders a safe distance
from work area.
Never allow children to operate the snow shovel. Never allow
adults to operate the equipment without proper instruction.
Remove mats, boards, sticks, wire or any foreign objects
which can be picked up and thrown by the snow shovel. Do
not use on gravel surface.
Do not wear lose clothing or jewelry. They could be caught in
moving parts.
Do not operate the equipment without wearing adequate
winter outer garments. Wear footwear which will improve your
footing on slippery surfaces.
Wear rubber boots that don’t leak when operating the snow
shovel.
WARNING: TO PREVENT ELECTRICAL SHOCK use only
with an extension cord suitable for outdoor use and in usable
condition. Extension cords are available at your local service
center.
Inspect the snow shovel. If any part is damaged, have it
inspected by your local Service dealer before operating.
Make sure impeller will spin freely before attaching to power
source.
If impeller will not rotate freely due to frozen ice, thaw unit
thoroughly before attempting to operate under power.
Use only with a receptacle that has been installed in
accordance with local inspection authorities and wired for
110/120V, 10/20 AMP outdoor service.
DO NOT USE OVERLOADED CIRCUIT.
Maintain snow shovel with care. Follow instructions contained
in this manual.
Never attempt to make adjustments while the motor is running
(except where specifically recommended by manufacturer).
To prevent disconnection of snow shovel from extension cord
during operation follow the instructions for securing the
extension cord contained in this manual.
Keep bystanders away from the area of operation.
Avoid accidental starting. Don’t carry plugged in snow shovel
with finger on switch. Be sure switch is off when plugging in.
If snow shovel is to be left unattended, disconnect from power
source.
If extension cord is damaged in any way while plugged in –
pull extension cord from wall receptacle. Replace damaged
cord immediately
WARNING: DON’T ABUSE CORD – never carry snow shovel
by cord or yank cord to disconnect from receptacle. Keep cord
from heat, oil and sharp edges.
Keep hands and feet away from moving parts. Keep clear of
discharge opening at all times.
Don’t force snow shovel. It will perform better and safer at the
rate for which it was designed.
Don’t overreach. Keep proper footing at all times.
If snow shovel strikes a foreign object:
a. Stop immediately
b. Disconnect from power source.
c. Inspect for damage.
d. Repair any damage before restarting.
Operate snow shovel only in adequate light – never in the
dark.
Never direct snow discharge chute toward glass enclosures,
automobiles, or bystanders. Keep children and pets away.
Never discharge snow onto public roads or near moving traffic.
Never attempt using the snow shovel on a roof.
Never operate the snow shovel near window wells, drop–offs,
etc.
Always be sure of your footing, and keep a firm hold on the
handle.
Walk, never run.
Disconnect power cord whenever you leave the operating
position, before cleaning, or maintaining snow shovel.
Preparing for Storage
Remove residue ice or snow from impeller by briefly running
motor out of snow.
Disconnect from power source.
Store snow shovel indoors, in dry, locked place, out of reach of
children.
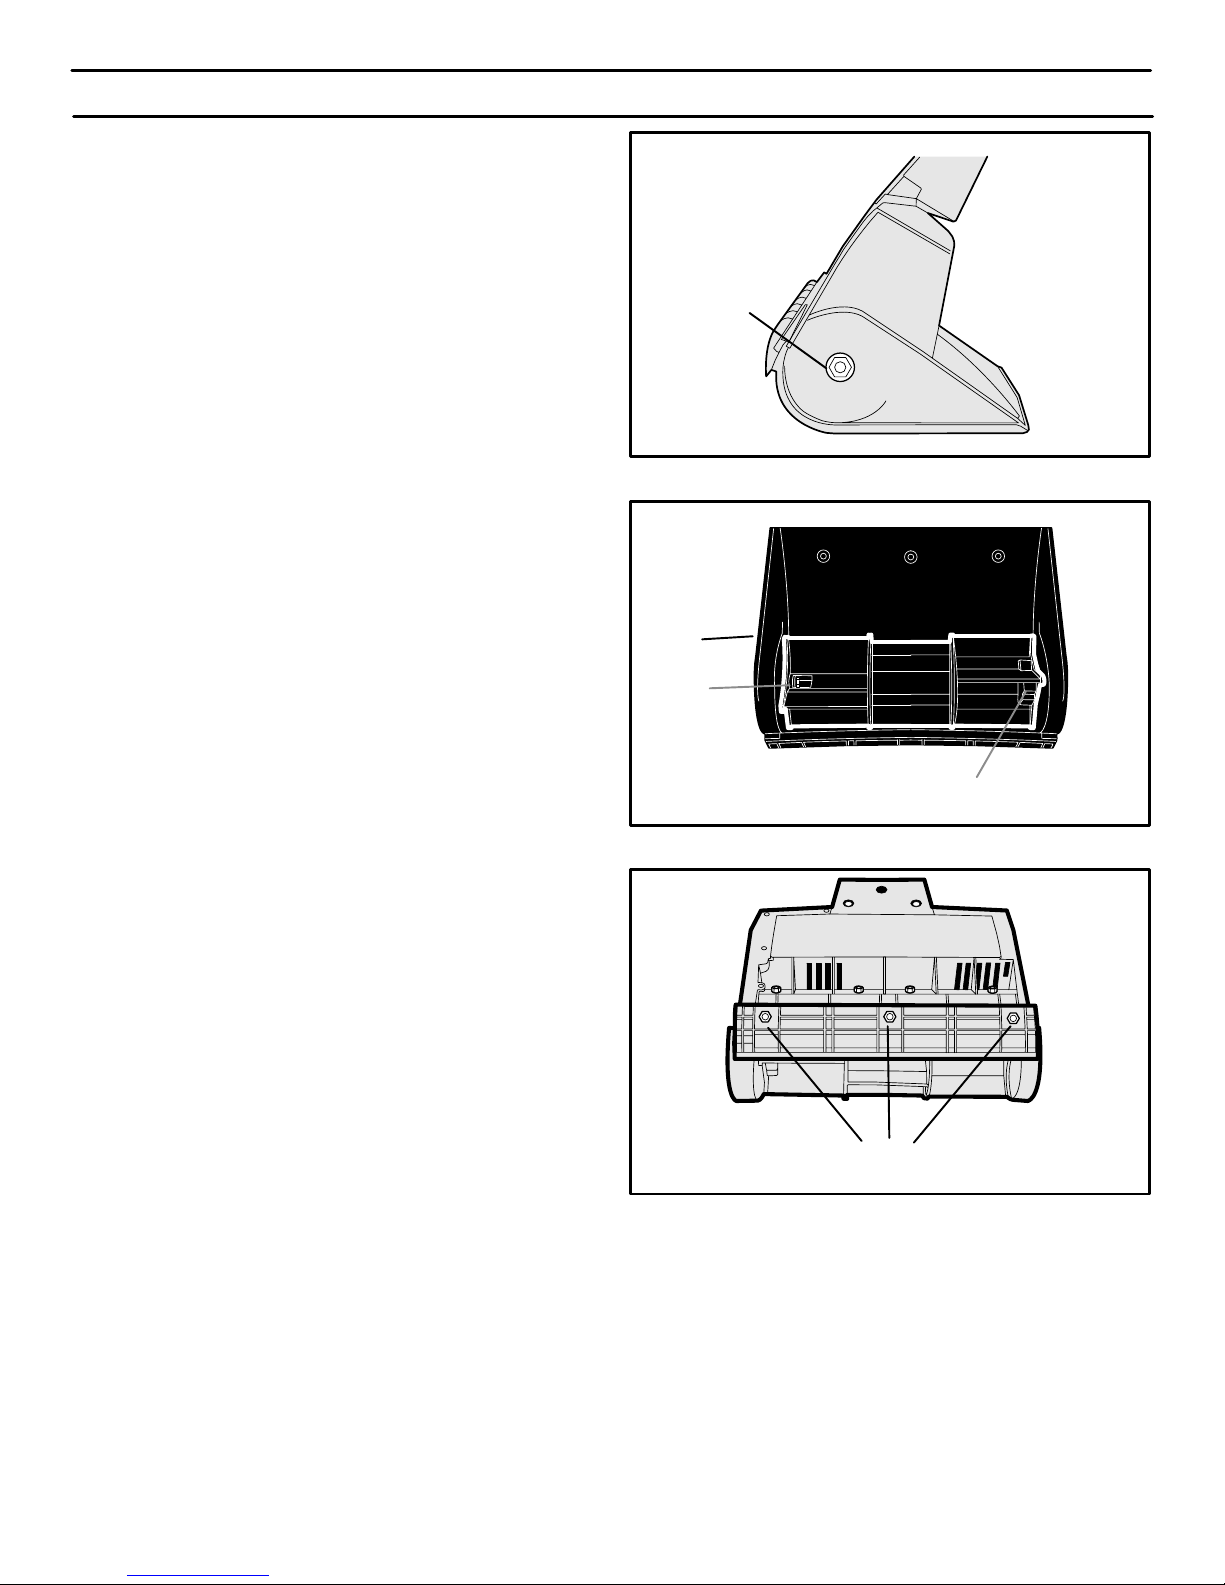
Observe Caution Decals Located On Motor
Housing.
The use of any other accessory or attachment might increase
the risk of injury to the user.
When servicing use only genuine factory replacement parts
and accessories.
For safe operation in snow use only CONTINUOUS power
cords without cuts or cracks in insulation and without taped
splices or mechanical plugs that could seep moisture.
This safety alert symbol identifies important safety messages on machines and in manuals. When you see it, be
alert to the possibility of personal injuries or damage to unit. Follow all instructions in these safety messages.

ASSEMBLY
4
F-041073C
Your snow shovel was completely assembled at the factory,
except for the upper handle assembly.
Shipping Carton
Carefully remove complete unit from carton. Make sure parts bag
and all components have been removed before discarding
carton.
The shipping carton contains the following items:
Snow shovel housing, with lower handles attached.
Upper handle loosely attached to lower handle by the wire
harness.
Plastic bag, containing the following parts (Figure 1):
Owner’s Manual
Plastic probe
Set center grip (left & right pieces)
Strain Relief
(4) #8 X 3/4 screws
Assembly
1. Remove and discard wire protector from lower handle tube.
Figure 2.
NOTE: Care should be given as not to damage wire harness
while assembling snow shovel.
2. Slide the upper handle assembly into the lower handle.
NOTE: You may find it difficult to slide the upper handle
assembly into the lower handle during initial assembly. This
is due to the close tolerance fit between the upper and lower
tubes, required to ensure a rigid assembly. If this problem
arises proceed as follows:
Place a small amount of grease or oil on the inside of lower
tubes. This will ensure a smooth and even fit when sliding
upper tubes into lower tubes.
Fold wire harness, and insert excess wire into lower right
handle tube. Put as much of the wire harness as possible into
lower tube.
While holding lower grip firmly, carefully slide the right and left
upper handle tubes into lower handle tubes until two holes are
aligned evenly on both sides. DO NOT DAMAGE WIRE
HARNESS. Figure 2.
Wipe off any excess grease or oil.
3. Position left center grip, point arrow (found inside of grip)
down, towards the shovel housing, onto handle so that the
tabs in the grip align with the holes on handle tubes. Figure 3.
Plastic Probe
Figure 1
Screws
Strain Relief
Center Grip
Figure 2
Lower Handle
Tube
Upper Handle
Tube
Figure 3
Handle Tube
Center Grip
* Arrow Down
4. Press left grip firmly against handle tubes, it will snap into
position. Figure 3.

ASSEMBLY
5
F-041073C
You may find it necessary to use the plastic probe furnished to
ensure power cord will not be pinched or damaged when
attaching the center grips.
5. Insert plastic probe into holes in handle. Maneuver probe to
ensure the wire harness will not be pinched when installing
center grips.
CAUTION: Do not pinch or damage wire harness while
installing center grip.
6. Place right center grip, point arrow (found inside of grip) down
towards the shovel housing, onto handle tube aligning holes.
Press firmly in place. Figure 4
7. Secure center grips to handle using four #8 X 3/4 poly screws
provided. Figure 5
NOTE: Thoroughly inspect the entire snow shovel for any
loose and/or damage parts prior to using this unit.
Securing the Extension Cord
Use only approved outdoor extension cords of adequate
gauge (16 gauge recommended) which accept the appliance’s
plug. Replace or repair damaged cord. Extension cords are
available at your dealer.
If extension cord is damaged in any manner while plugged in,
pull extension cord from wall receptacle.
The use of any extension cord will cause some loss of power.
To keep this to a minimum and to prevent overheating and
motor burn–out,, use the table below to determine the
minimum wire size (A.W.G.) extension cord.
Extension Cord Length Wire Size A.W.G.
25–100 Feet 16
100–150 Feet 14
Do not exceed 150 feet in extension cord length. Attach strain
relief to trigger stock as follows:
Figure 4
Center Grip
Figure 5
Poly Screws
Figure 6
Trigger Lock
Looped Strain Relief
Trigger

ASSEMBLY
6
F-041073C
Attach strain relief to trigger stock as follows:
Loop strain relief around trigger stock. Figure 6
Fasten strain relief to trigger stock by inserting one tab
through the first slot (Figure 7A), pulling until both tabs are
through (Figure 7B).
Loop extension cord in strain relief through the second slot.
Figure 7C
Secure extension cord to strain relief by looping cord around
tabs as shown in Figure 7D.
This will prevent disconnection in case of accidental pull.
Handle
Strain
Relief
First Slot
Tab
Tabs
Figure 7
Tabs
Extension
Cord Second Slot
Strain
Relief
Extension
Cord
Strain
Relief
AB
CD

OPERATION
7
F-041073C
Know your snow shovel and its controls. Be sure you (or any other operator) have read and understood the Operation
Precautions listed on page 3 of this manual. This snow shovel conforms to applicable North American safety standards.
Figure 8
Power Cord
Connector
Strain Relief
Center Grip
Upper Housing
Lower Housing
Impeller
Scraper Blade
Trigger Lock
Trigger
The Operation of any snow shovel can result in foreign objects thrown into the eyes, which
can result in severe eye damage. Always wear safety glasses or eye shields before starting
your snow shovel and while operating. We recommend Wide Vision Safety Mask for over the
spectacles or standard safety glasses, available at your authorized service dealer.
SNOW SHOVEL OPERATING CONTROLS AND PARTS
TRIGGER LOCK – Push button in and hold. Then squeeze
Trigger Switch.
TRIGGER SWITCH – Squeeze trigger for operation, release
trigger to stop operation.
STRAIN RELIEF – To attach extension cord to the power cord
connector and releave stress on the connection. Also, to keep the
two cords from pulling apart.
IMPELLER – When operating shovel, impeller spins to discharge
snow. Replace damaged or worn impeller.
SCRAPER BLADES – Replace scraper blades when worn or
damaged.

OPERATION
8
F-041073C
HOW TO USE
Clearing Undrifted Snow
Keep area to be cleared free of foreign objects which may be
picked up and thrown by the snow shovel.
Tilt snow shovel forward until impeller contacts the ground.
Push snow shovel forward at a speed comfortable for the
operator.
Do not force the snow shovel, it will perform better at a slow
constant speed. The depth and consistency of the snow will
govern the speed of forward travel.
Direct snow discharge with the wind, whenever possible, at a
slight angle to the left or right as required. Figure 9.
CAUTION: Never direct snow discharge towards
bystanders, glass enclosures or automobiles.
Should you find it necessary to clear snow from over crushed
rock or gravel, push down on handle to raise impeller clear of
loose material that may be thrown.
NOTE: Do not operate snow shovel out of snow for extended
periods of time.
ÎÎÎÎÎÎÎÎÎ
ÎÎÎÎÎÎÎÎÎ
ÎÎÎÎÎÎÎÎÎ
ÎÎÎÎÎÎÎÎÎ
ÎÎÎÎÎÎÎÎÎ
ÎÎÎÎÎÎÎÎÎ
ÎÎÎÎÎÎÎÎÎ
ÎÎÎÎÎÎÎÎÎ
ÎÎÎÎÎÎÎÎÎ
ÎÎÎÎÎÎÎÎÎÎ
ÎÎÎÎÎÎÎÎÎÎ
ÎÎÎÎÎÎÎÎÎÎ
ÎÎÎÎÎÎÎÎÎÎ
ÎÎÎÎÎÎÎÎÎÎ
ÎÎÎÎÎÎÎÎÎÎ
ÎÎÎÎÎÎÎÎÎÎ
ÎÎÎÎÎÎÎÎÎÎ
ÎÎÎÎÎÎÎÎÎÎ
Figure 9
Clearing Drifted Snow
The snow shovel is designed to remove snow approximately 4” to
7” in depth, depending on consistency of the snow. The heavier the
snow, the less depth clearing capability. It may be necessary to
make two or three passes over the same area in order to clear it
acceptably.
With the unique dual position palm trigger switch, snowdrift topping
and clearing is fast and easy.
Grasp handle as shown, and begin to level snowdrift starting
at the top and clearing 4” to 7” depending on consistency of
the snow. Figure 10.
When clearing semi–frozen snow, make your shovel attack in
very short bites. Advance 1” or 2” and back up 12” or more to
enable motor to return to normal operating speed. Allowing
motor to return to normal operating speed enables motor fan
to dissipate excess heat.
IMPORTANT: Running shovel at a constant overload will result in
serious motor damage.
Figure 10

MAINTENANCE
9
F-041073C
CAUTION: To prevent the possibility of electrical
shock or accidental starting of the shovel while
performing maintenance, remove key from switch
and disconnect extension cord.
Lubrication
Your Snowthrower does NOT require any lubrication for the life of
the Snowthrower.
Drive Belt Replacement
Should the drive belt require replacement proceed as follows:
Remove the eleven (11) screws securing the upper housing to
the lower housing and remove upper housing. Figure 11.
You will find the driven pulley and belt on the left side of snow
shovel.
Remove two (2) screws and bracket securing the driven
pulley. Figure 12.
Remove complete driven pulley assembly with belt.
Install new belt around driven pulley and around drive pulley.
Figure 13.
Position belt on the inside of idler pulley as shown in
Figure 13.
Replace driven pulley assembly bracket and driven pulley at
the same time. Figure 13.
Secure bracket with two (2) screws. Figure 13.
Rotate impeller a few turns by hand to ensure proper
operation prior to starting the shovel.
CAUTION: Failure of impeller to spin freely may result in
serious motor damage. Ensure proper operation prior to
starting the snow shovel.
Re–attach upper housing to lower housing using the eleven
(11) screws. Fasten Securely.
Impeller Replacement
Should you find it necessary to replace a damaged or worn
impeller proceed as follows:
Remove the eleven (11) screws securing the upper housing to
the lower housing and remove upper housing. Figure 11.
Figure 11
Upper
Housing
Screws
Screws
Driven Pulley
Figure 12
Belt
Driven Pulley
Assembly Bracket
Screws
Figure 13
Impeller
Driven
Pulley
Drive
Pulley
Driven Pulley
Assembly Bracket

MAINTENANCE
10
F-041073C
Remove lock nut and flat washer found on the right side of
housing. Figure 14.
Remove bolt and metal bearing, from inside of housing.
Figure 15.
Gently pull impeller out from the right side. Figure 15.
Insert new impeller so as to engage with the driven pulley.
Figure 15.
Insert bolt with metal bearing, from the inside of the housing.
Figure 15.
Fasten with lock nut and flat washer.
Rotate impeller a few turns by hand, to ensure proper
operation.
CAUTION: Failure of impeller to spin freely may result in
serious motor damage. Ensure proper operation prior to
starting the snow shovel.
Re–attach upper housing to lower housing using the eleven
(11) screws. Fasten Securely.
Replacing Scraper Bar
To replace a damaged or worn scraper bar, proceed as follows:
Remove the three(3) lock nuts securing the scraper bar.
Figure 16.
Remove the old scraper bar.
Install new scraper bar the same way the old blade came off.
Figure 16.
Secure scraper bar into position by fastening it with the
three(3) lock nuts. Fasten securely.
Rotate impeller a few turns by hand, to ensure proper
operation.
Figure 14
Lock Nut
& Flat Washer
Metal
Bearing
Figure 15
Impeller Engaged
With Driven Pulley
Right
Side
Nylock Nuts Figure 16

MAINTENANCE
11
F-041073C
Parts List - Model 612100x4N
Liste de pièces - Modèle 612100x4N

MODEL 612100x4NA
MODÈLE 612100x4NA REPAIR PARTS
PIÈCES DE RECHANGE
12
F-041073C
10–1
9
10–2
7
13
14
15
12
51
34 35
30
48
29
31
27 25
24 7
33
36
726
18
28
7
20
17
20
16
33
37
39
20 38
42
43
50
19
29
46
47 7
45
20
21
22
23
49
51
40
44
41
52
52
54
3
1
7
77
7
8
6
252
53

MODEL 612100x4NA
MODÈLE 612100x4NA REPAIR PARTS
PIÈCES DE RECHANGE
13
F-041073C
Key
No. Part No. Description Key
No. Part No. Description
1 1501933 Switch
2 1501937 Strain Relief
3 1502068 Lead Wire, Connecting
4 1501934 Handle, Right Half
5 1501935 Handle, Left Half
6 1501936 Cover, Grip
7 1694 Screw, #8 X 3/4 Poly
8 26x283 Screw, #4 X .5 Hi–Low
9 1501938E701 Tube –Handle, Upper
10 578472 Set, Grip Center 12”
10–1 – – – – – Order Set
10–2 – – – – – Order Set
12 577394 Housing, Upper 12”
13 577444E701 Handle, Lower
14 577450 Housing, Rear 12”
15 780115 Screw, 10–9 X 1.062
16 580255 Pulley, Engine
17 577502 Spring, Torsion
18 578732 Pulley, Idler & Brkt. Assy
19 578928 Screw, #8 X1.00
20 1501547 #8 Washer
21 780026 Clamp, Heyco
22 73812 Washer, Flat .505 X 1.00X.06
23 10542 Strain Relief, Cord
24 577536 Bracket, Assy Drive Pulley
25 904970 Bearing–Bronze
26 37X133 Belt
27 577396 Pulley, Driven E12”
28 6711 Washer, Plastic
29 312300 Nut, #10–24 CNHKHX
30 577395 Impeller, 12”
31 577447 Blade, Scraper
33 15X143 Nut, 1/4–20 WDFLcenter Lock
34 582947 Spacer, Impeller
35 710263 Screw, 1/4–20X1.00
36 577393 Housing, Impel 12”
37 577392 Housing, Lower 12”
38 313686 Screw, 1/4–20X.50
39 904975 Bearing, Self Align
40 250x137 Wire Harness, E12”
41 577598 Ring, Ret E
42 760256 Fan, Motor, Extended
43 1501639 Motor, 120V
44 12569 Pin, Grooved
45 577451 Bracket, Motor Mount
46 905135 Screw, #6–32X.75
47 780062 Rectifier, Full Wave
48 577534 Screw, 10–32X.50
49 1740 Probe, Plastic
50 578957 Plug, Retainer
51 780234 Washer, 3/4X1/4X1/16
52 901696 Screw, #8X.50 Poly Grip
53 90314 Z Protector, Harness
– – – – F–041073C Book, Instruction

MODEL 612100x4NA
MODÈLE 612100x4NA REPAIR PARTS
PIÈCES DE RECHANGE
14
F-041073C
BLACK
BLACK
PLUG
SWITCH
WHITE
BLUE OR BLACK
RECTIFIER
MOTOR
MOTOR THERMO
CUT OFF
WHITE
BLACK
RED
WIRING DIAGRAM
MODEL 612100X4NA
+

MODEL 612100x4NA
MODÈLE 612100x4NA REPAIR PARTS
PIÈCES DE RECHANGE
15
F-041073C
57
55
59
56
52
54
53
Symbol denotes top of decal application
60
61
54
63
62
Key No. Part No. Description
52 761068 Decal, Danger Foot
53 761113 Decal, Caution E12
54 760780 Decal, Murray
55 761110 Decal, Cord Usage 12/14”
56 – – – – – – Model Name Plate
Not Serviceable
Key No. Part No. Description
57 761112 Decal, Pinched Wire
59 761114 Decal, Caution
60 762049 Decal, Motor Protection
61 762050 Decal, Motor Protection
62 783027 Decal, Warning
63 48X5236 Decal, Caution Rain

16
F-041073C
TABLE DES MATIÈRES
PIÈCES DE RECHANGE 14
GARANTIE 17
MESURES DE SÉCURITÉ 18
MONTAGE 19
FONCTIONNEMENT 22
ENTRETIEN ET REMISAGE 25
GARANTIE LIMITÉE DE UN AN
Murray, Inc. garantie auprès de l’acheteur initial que cette machine est dépourvue de défauts de matériau et de construction
sous utilisation et entretien normaux pendant une durée de un (1) an à partir de la date d’acquisition ; cette garantie cependant
ne couvre pas les moteurs, accessoires (tels que les démarreurs électriques) et pièces d’usure normale (exceptées les pièces
listées ci–dessous) étant donné que les sociétés fabriquant ces articles offrent leurs propres garanties et fournissent des
réparations par le biais de leurs centres de maintenance spécialisés agréés. Pour plus d’informations, se reporter aux
garanties couvrant ces pièces particulières. Si vous ne savez pas si votre machine contient ou est équipée d’une ou plusieurs
de ces pièces, adressez vous à votre revendeur avant l’acquisition. Sous réserve des modalités et conditions de cette garantie
limitée, nous nous engageons à réparer ou remplacer, à notre discrétion et gratuitement auprès de l’acheteur initial, toute pièce
couverte par cette garantie limitée jusqu’à l’expiration de la garantie applicable.
Les pièces d’usure normale comprennent les courroies d’entraînement, les fraises, les goupilles de cisaillement, les pneus et
les phares. Ces pièces sont garanties sans défaut de matériau ou de construction dans l’état où elles ont été livrées avec le
produit. Toute réclamation concernant la réparation ou le remplacement d’une pièce d’usure normale doit être effectuée dans
les trente (30) jours suivant la date d’acquisition. Aucune réclamation ne sera honorée concernant des dommages provenant
de la simple utilisation ou d’un usage abusif ou non conforme.
Cette garantie Murray, Inc. de un (1) an constitue votre recours exclusif ; cependant, celle–ci est nulle ou sans effet pour les
machines ayant été modifiées, endommagées, utilisées de façon abusive ou lors d’une location ou à des fins commerciales et/
ou professionnelles (autre que domestiques). Votre garantie ne couvre pas les réglages mécaniques mineurs non dus à des
défauts de matériau ou de fabrication. Consultez votre manuel d’utilisation pour une assistance concernant ces réglages.
Pour effectuer une réclamation sous la garantie limitée de un (1) an Murray, Inc., retourner la machine, (ou, sous autorisation
préalable, la pièce défectueuse) accompagnée de votre preuve d’achat, auprès du Centre de maintenance agréé le plus
proche de chez vous. Pour localiser celui–ci, contactez le Distributeur de pièces de votre région figurant sur la liste fournie
avec votre machine, ou consultez les pages jaunes de votre annuaire local. Si vous nous retournez la machine complète, nous
réparerons celle–ci. Si nous autorisons seulement le retour de la pièce défectueuse, nous réparerons ou bien remplacerons
celle–ci. Cette garantie limitée Murray, Inc. de un (1) an vous octroie des droits légaux spécifiques, et vous pouvez
également vous prévaloir d’autres droits dont le contenu varie selon l’Etat où ils s’appliquent. Cette garantie limitée est
délivrée en lieu et place de toute garantie stipulée ou tacite, ceci incluant la garantie tacite de commerciabilité et la
garantie de fonctionnalité pour une tâche définie. Si vous souhaitez recevoir des informations supplémentaires concernant
cette garantie écrite ou une assistance quant à l’obtention de services de réparation, adressez–vous à :
MURRAY CANADA, INC.
Factory Customer Service
1195 Coutneypark Drive East
Mississauga, Ont. L5T–1R1
1–800–661–6662
Nous vous remercions d’avoir acheté cette pelle à neige. En en-
tretenant convenablement votre pelle à neige, celle–ci vous offri-
ra des performances satisfaisantes qui vous faciliteront le travail.
Ce livret d’entretien a été conçu pour vous fournir les renseigne-
ments nécessaires à l’utilisation et l’entretien adéquat de l’appa-
reil. Pour bien comprendre l’usage de la pelle à neige, lire
attentivement ce livret. Avant de l’utiliser, se familiariser avec
l’emplacement des commandes, les méthodes d’utilisation et
l’entretien général.
SUIVRE LES MESURES DE SÉCURITÉ pour garantir une uti-
lisation convenable de la pelle à neige et éviter tout risque de
blessures.
De nouveau, nous vous remercions d’avoir sélectionné cette
pelle à neige qui facilitera le déneigement. Pour toute question au
sujet de la pelle à neige ou pour commander toute pièce ou tout
service d’entretien, communiquez avec le concessionnaire autori-
sé. Il dispose de pièces de rechange et des connaissances tech-
niques pour répondre à vos besoins particuliers.
DONNÉES TECHNIQUES
PUISSANCE NOMINALE: 120 V. CA.A.C.
6 AMPÈRES, 60 HZ
LARGEUR DE DÉNEIGEMENT : 12”
HAUTEUR DE DÉNEIGEMENT : 7”
AVERTISSEMENT : le moteur est équipé d’une
protection qui coupera temporairement l’alimentation
électrique du moteur si la pelle à neige surchauffe, et
qui s’annulera lorsque le moteur aura refroidi. Si le moteur
s’arrête, relâcher la tige de commande, débrancher la rallonge et
laisser le moteur refroidir pendant 5 minutes avant de poursuivre
le travail de déneigement.

IMPORTANT
17
F-041073C
NE PAS UTILISER CET APPAREIL AVANT D’AVOIR LU CE MANUEL
Ce livret doit être entièrement lu avant de tenter d’assembler
ou d’utiliser la pelle à neige.
Avant l’utilisation
Lire et comprendre ce livret. Familiarisez–vous avec les
commandes et la bonne utilisation de la pelle à neige.
Faire attention de ne pas glisser ou tomber, particulièrement
lors de l’utilisation en marche arrière.
Savoir comment arrêter la machine rapidement.
TENIR LES ENFANTS À L’ÈCART – Éloigner toute personne
de la zone de travail .
Ne jamais laisser des enfants utiliser la pelle à neige. Ne
jamais laisser quiconque n’ayant pas reçu les instructions
appropriées se servir de la pelle à neige.
Enlever de la zone à déblayer tous paillassons, planches,
bâtons, fils métalliques qui risquent d’être projetés par la
machine. Ne pas l’utiliser sur du gravier.
Ne pas porter de vêtements amples et de bijoux pouvant se
prendre dans les pièces mobiles.
Ne pas utiliser la machine sans porter de vêtements d’hiver
adéquats. Porter des chaussures qui amélioreront l’équilibre
sur surfaces glissantes.
Porter des bottes de caoutchouc sans fuites lors de l’utilisation
de la pelle à neige.
AVERTISSEMENT : POUR ÉVITER TOUT CHOC
ÉLECTRIQUE, n’utiliser qu’avec une rallonge pour usage
extérieur en bon état. Ces rallonges sont en vente à votre
centre de vente de services local.
Examiner la pelle à neige. Si des pièces sont endommagées,
le faire inspecter par votre dépositaire local avant de l’utiliser.
Veiller à ce que l’impulseur tourne librement avant de brancher
l’appareil.
Si l’impulseur est gelé, faire fondre la glace le bloquant avant
de se servir de l’appareil.
N’utiliser qu’avec une prise électrique conforme aux exigences
d’inspection des autorités locales et câblée pour usage
extérieur 110/120 volts, 10/20 ampères.
NE PAS UTILISER SUR UN CIRCUIT SURCHARGÉ.
Entretenir la pelle à neige avec soin. Suivre les instructions
contenues dans ce livret.
Ne jamais tenter d’effectuer des réglages pendant que le
moteur tourne (sauf sur recommandation particulières du
fabricant).
Pour éviter que la pelle à neige ne se débranche du cordon
électrique lors de l’utilisation, suivre les instructions de fixation
de la rallonge mentionnées dans ce livret.
Éloigner toute personne de l’aire de travail.
Pour éviter tout démarrage accidentel, ne jamais déplacer la
pelle à neige en gardant le doigt appuyé sur l’interrupteur.
Veiller à ce que l’interrupteur soit à l’arrêt avant de brancher
l’appareil.
Débrancher la pelle à neige si elle doit être laissée sans
surveillance.
Débrancher la rallonge électrique immédiatement si elle est
endommagée et la remplacer.
AVERTISSEMENT : MANIPULER LE CORDON
ÉLECTRIQUE AVEC PRÉCAUTION – Ne pas tirer la pelle à
neige par le cordon ni débrancher ce dernier en tirant
brusquement dessus. Tenir le cordon à l’écart de chaleur,
d’huile et d’objets coupants.
Tenir les mains et les pieds à l’écart des pièces mobiles.
Se tenir à l’écart de l’ouverture d’éjection.
Ne pas forcer la pelle à neige. Elle offrira un meilleur
rendement et sera plus sûr si elle fonctionne au rythme pour
lequel elle a été conçue.
Ne pas avancer la pelle à neige trop loin de l’endroit d’appui
des pieds. Garder constamment un bon appui sur le sol.
Si la pelle à neige heurte un corps étranger:
a. Arrêter immédiatement.
b. Débrancher l’appareil de la prise de courant.
c. Repérer toute dégradation de l’appareil.
d. Effectuer les réparations nécessaires avant de remettre
l’appareil en marche.
N’utiliser la pelle à neige qu’avec un éclairage adéquat, jamais
de nuit.
Ne jamais diriger l’ouverture d’éjection de la neige vers des
fenêtres, des automobiles ou des passants. Écarter enfants et
animaux domestiques de la zone de déneigement.
Ne jamais éjecter la neige sur la voie publique ou vers la
circulation.
Ne jamais utiliser la pelle à neige sur un toit.
Ne jamais utiliser les pelles à neige près d’un encadrement de
soupirail, d’une zone de ramassage, etc.
Toujours garder un bon équilibre et maintenir une bonne prise
sur le guidon.
Marcher et ne pas courir.
Débrancher le cordon d’alimentation lorsque la pelle à neige
est laissé sans surveillance, lors de tout entretien ou
nettoyage.
Préparation pour le remisage
Faire tourner l’impulseur à vide pour enlever tout dépôt de
neige et de glace.
Débrancher l’appareil.
Remiser la pelle à neige à l’intérieur, dans un endroit verrouillé
et sec, hors de portée des enfants.
Suivre les conseils de sécurité indiqués par les
autocollants sur le boîtier du moteur.
L’utilisation de tout autre accessoire augmente le risque de
blessures pour l’utilisateur.
Lors de réparations, n’utiliser que des pièces de rechange
d’origine.
Pour effectuer le déneigement en toute sécurité, n’utiliser que
des cordons électriques CONTINUS, en bon état, sans
coupures ni craquelures, sans épissures enrobées de ruban
adhésif et sans prises par lesquelles l’humidité pourrait
pénétrer.
Ce symbole identifie un important message de sécurité figurant sur la machine et dans les
manuels. À sa rencontre, prendre conscience des risques de blessures et respecter atten-
tivement le message qui suit.

MONTAGE
18
F-041073C
Votre pelle à neige a été entièrement montée en usine, à
l’exception du manche.
Carton d’expédition
Sortir soigneusement la machine du carton. S’assurer que le sac
de pièces et tous les éléments on été retirés du carton avant de
jeter celui–ci.
Le carton d’expédition contient les éléments suivants :
Corps de la pelle à neige avec partie inférieure du manche.
Partie supérieure du manche fixée à la partie inférieure par le
faisceau de câblage.
Sac de plastique contenant les pièces suivantes (Figure 17):
Livret d’entretien
Cheville en plastique
Jeux de Poignées centrales (gauche et droite)
Réducteur de tension
(4) vis No. 8 X 3/4
Montage
1. Enlever et jeter le protecteur des fils électriques inséré dans la
partie inférieure du manche. Figure 18.
REMARQUE : S’assurer de ne pas endommager le faisceau
lors de l’assemblage de la pelle à neige.
2. Emboîter la poignée supérieure dans la poignée inférieure.
REMARQUE : Dans certains cas, il peut être difficile
d’assembler le manche supérieur dans le manche inférieur
lors du montage initial de la pelle à neige. Ceci est dû à la
tolérance étroite entre les tubes du manche supérieur et du
manche inférieur, laquelle est nécessaire pour un montage
rigide. Dans ce cas, procéder comme suit :
Verser une légère quantité de graisse ou d’huile à l’intérieur du
tube inférieur. Ceci permettra aux tubes supérieurs de mieux
s’insérer dans les tubes inférieurs.
Plier les câbles et insérer la longueur excédentaire des fils
dans le tube inférieur droit. Insérer la plus grande partie
possible des câbles dans le tube inférieur.
Tout en maintenant fermement la poignée inférieure, pousser
soigneusement les tubes droit et gauche du manche supérieur
dans les tubes du manche inférieur jusqu’ à ce que les trous
des boulons s’alignent sur les deux côtés. NE PAS
ENDOMMAGER LE FAISCEAU DE CÂBLES. Figure 18.
Essuyer tout excès de graisse ou d’huile.
3. Placer la poignée centrale gauche sur le manche en pointant
la flèche (à l’intérieur de la poignée) vers le bas en direction
du corps de la pelle, en alignant les pattes de la poignée sur
les trous du tube du manche. Figure 19.
Cheville en plastique
Figure 17
Vis
Réducteur de tension
Poignée centrale
Figure 18
Tube du manche
supérieur
Tube du manche
inférieur
Figure 19
Tube du manche
Poignée centrale
* Flèche vers le bas

MONTAGE
19
F-041073C
4. Presser la poignée gauche fermement contre la poignée
jusqu’à ce qu’elle s’emboîte correctement dans sa position.
Figure 19.
Il peut s’avérer nécessaire d’utiliser la cheville de plastique
incluse pour empêcher que le câble soit pincé ou endommagé
lors de la fixation des poignées.
5. Insérer la cheville de plastique fournie dans les trous du man-
che. Placer la cheville de façon à éviter que le faisceau de
câbles ne soit pincé ou endommagé lors de l’insertion des
poignées centrales.
ATTENTION : Éviter que le faisceau de câbles ne soit pincé
ou endommagé lors de l’insertion des poignées centrales.
6. Placer la poignée centrale droite sur le manche en pointant la
flèche (à l’intérieur de la poignée) vers le bas en direction du
corps de la pelle, en alignant les trous de la poignée et ceux
du tube. Presser la poignée fermement jusqu’à ce qu’elle
s’emboìte. Figure 20
7. Attacher les poignées centrales sur le manche à l’aide des
quatre vis à tête cruciformes No. 8 X 3/4 incluses. Figure 21
REMARQUE : Inspecter scrupuleusement la pelle à neige
avant de l’utiliser pour détecter toute pièces desserrée et/ou
abimée.
Fixation d’un câble de rallonge
Utiliser uniquement des câbles de rallonge pour usage
extérieur agréés de calibre approprié (calibre 16 de
préférence) pouvant être branchés sur la fiche de l’appareil.
Remplacer ou réparer tout câble endommagé. Les câbles de
rallonge sont disponibles auprès de votre distributeur.
Si le câble de rallonge est endommagé de quelque façon que
ce soit durant l’utilisation, le débrancher immédiatement de la
prise.
L’utilisation d’un câble de rallonge, quel qu’il soit, provoque
une perte d’énergie. Pour minimiser cette perte et pour éviter
toute surchauffe ou grillage du moteur, suivre le shéma
si–dessous pour déterminer le calibre minimum (A.W.G.) du
câble de rallonge.
Longueur du câble de rallonge Calibre du câble (A.W.G.)
25–100 pieds 16
100–150 pieds 14
Ne pas utiliser de câble de plus de 150 pieds de long. Fixer un
réducteur de tension sur la plaquette de la gâchette comme suit :
Figure 20
Poignée centrale
Figure 21
Vis à tête cruciforme
Figure 22
Trigger Lock
Trigger
Réducteur de tension bouclé

MONTAGE
20
F-041073C
Fixer le réducteur de tension à la plaquette de la gâchette comme
suit :
Boucler le réducteur de tension autour de la plaquette.
Figure 22
Attacher le réducteur de tension à la plaquette en insérant
l’une des pattes dans le premier cran (Figure 23A), et tirer
jusqu’à ce que les deux pattes soient rentrées. (Figure 23B).
Placer le câble de rallonge en formant une boucle dans le
réducteur de tension et en le passant dans le second cran.
Figure 23C
Attacher le câble de rallonge au réducteur de tension en
accrochant la boucle autour des pattes comme illustré dans la
Figure 23D.
Cela empêchera un débranchement accidentel si l’appareil est
tiré violemment.
Manche
Réducteur
de tension
Premier
cran
Patte
Pattes
Figure 23
Pattes
Câble de
rallonge Deuxième
cran
Réducteur
de tension
Câble de
rallonge
Réducteur
de tension
AB
CD
Table of contents
Languages:
Other Murray Snow Blower manuals

Murray
Murray 624504x4C User manual

Murray
Murray 627808x84A User manual

Murray
Murray 6271200X54 User manual

Murray
Murray 624804X31 User manual

Murray
Murray 627808x84B User manual

Murray
Murray 622505x4A User manual

Murray
Murray 620351x4NB User manual

Murray
Murray 629909X54B User manual

Murray
Murray 621450X4D User manual

Murray
Murray 624504X4A User manual

Murray
Murray 621450X4NB User manual

Murray
Murray 1695539 User manual

Murray
Murray 6291570X54 User manual

Murray
Murray 620301X4C User manual

Murray
Murray 624504X4 User manual

Murray
Murray 620000x30C User manual

Murray
Murray 624555x61A User manual

Murray
Murray 6291570X61 User manual

Murray
Murray 1738370 User manual

Murray
Murray 627858x61A User manual