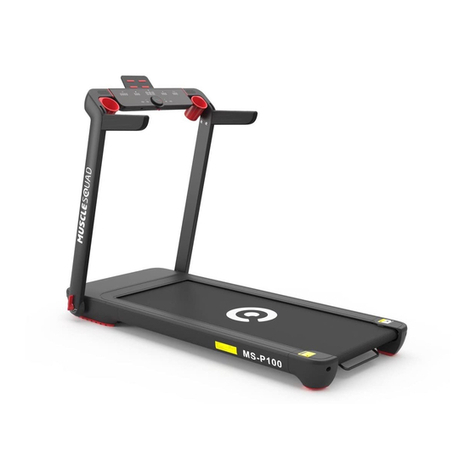
MuscleSquad P200 Manual

MuscleSquad P200 Treadmill
Assembly & User Manual
Important – Please read these instructions fully before assembly and use.
These Instructions contain important information for assembly, safe use, and maintenance.
Maximum User Weight 136 kgs
1

CONTENTS
Warranty 3
Safety 3-4
Assembly 5-11
Workout Area 12
Warm up & Cool down 13-14
Getting Started 15
Console Operation 16
Important Information 17
Operation & Adjustment 18-19
Pulse Mode 20-21
Bodyfat Analysis 22
Care & Maintenance 23-25
Troubleshooting 26
Exploded Diagram 27
Parts 28-29
Further Safety Information 30
Terms & Conditions 31
X
X
X
X
X
X
X
X
X
X
X
X
2

Thanks for purchasing this product. This product will help you exercise your muscles in the correct way and to
improve your fitness – and all this in a familiar environment.
WARRANTY
MuscleSquad assures you that this device was manufactured from high quality materials.
A prerequisite of the machine’s warranty is a proper setup of the device in accordance with the operating
instructions. Improper use and / or incorrect transportation can render the warranty void.
The warranty is for 1 year, beginning from the date of purchase. If the device you acquired is defective, please
contact our Customer Service at info@musclesquad.com within the guarantee period of 12 months from the
purchase date. The warranty applies to the following parts (as far as included in the scope of delivery): Frame,
cable, electronic devices, foam, and wheels. The guarantee does not cover:
1. Damage caused by any external force
2. Intervention by unauthorised parties
3. Incorrect handling of the product
4. Non-compliance with the operating instructions
Wear of parts and expendable items are also not covered (such as the running belt).
The device is only intended for private use. The warranty does not apply to professional usage.
Spare parts can be ordered from Customer Services at info@musclesquad.com.
Please make sure you have the following information to hand when ordering spare parts:
1. Operating instructions
2. Model number (located on the cover sheet of these instructions)
3. Description of attachments
4. Attachment number
5. Proof of purchase with purchase date
Please do not send the device to our firm without being requested to do so by our service team. The costs of
unsolicited shipments will be borne by the sender.
GENERAL SAFETY INSTRUCTIONS
A great deal of emphasis was placed on safety in the design and manufacture ofthis fitness device. Still, it is very
important that you strictly adhere to the following safety instructions. We cannot be held liable for accidents
that are caused due to disregarding this advice.
To ensure your safety and to avoid accidents, please read the operating instructions thoroughly and attentively
before you use the sports device for the first time.
1. Consult your GP before starting to exercise on this device. Should you want to exercise regularly and
intensively, the approval of your GP would be advisable. This is especially true for users with health
problems.
2. We recommend that handicapped people should only use the device when a qualified carer is present.
3. When using the fitness device, wear comfortable clothing and preferably sports or aerobic shoes. Avoid
wearing loose clothing which could get caught in the moving parts of the device.
4. Stop exercising immediately should you feel unwell or if you feel pain in your joints or muscles. In particular,
keep an eye on how your body is responding to the exercise programme. Dizziness is a sign that you are
exercising too intensively with the device. At the first signs of dizziness, lay down on the ground until you feel
better.
5. Ensure there are no children nearby when you are exercising on the device. In addition,the device should be
stowed in a place that children or house pets cannot reach.
6. Ensure that only one person at a time uses the fitness device.
7. After the sports device has been set up according to the operating instructions, make sure all screws, bolts
3

and nuts are correctly fitted and tightened. Use only attachments recommended and/or supplied by the
importer.
8. Do not use a device that is damaged or unserviceable.
9. Always place the device on a smooth, clean and sturdy surface. Never use near water and make sure there
are no pointed objects in the direct vicinity of the fitness device. If necessary, place a protective mat (not
included) to protect your floor underneath the device and keep a free space of at least 0.5 m around the
device for safety reasons.
10. Take care not to put your arms and legs near the moving parts. Do not place any material in openings in the
device.
11. Use the device only for the purposes described in these operating instructions. Use only attachments
recommended by the manufacturer.
12. If the power supply cord is damaged, it must be replaced by the manufacturer, its service agent or similar
persons in order to avoid any danger.
SAFETY PRECAUTIONS
1. Choose a place in reach of a socket when placing the treadmill.
2. Always connect the appliance to a socket with a grounded circuit and with no other appliances connected
to it. It is recommended not to use any extension cords.
3. Faulty grounding of the appliance can cause the risk of electrical shocks. Ask a qualified electrician to check
the socket in case you do not know if the appliance is grounded appropriately. Do not change or modify the
plug provided with the appliance if it is not compatible with your socket type. Ask a qualified electrician to
install a suitable socket.
4. Sudden voltage fluctuations can seriously damage the treadmill. Weather changes or switching on and off
other appliances can cause peak voltages, over-voltage or interference voltage. To limit the danger of
damage to the treadmill, it should be equipped with an over-voltage protective device (not included).
5. Keep the power cord away from the carrying roller. Do not leave the power cord below the striding belt. Do
not use the treadmill with a damaged or worn out power cord.
6. Unplug before cleaning or engaging in maintenance work. Maintenance should only be done by authorised
service technicians, unless otherwise stated by the manufacturer. Ignoring those instructions would
automatically void the warranty.
7. Inspect the treadmill before every use to make sure that every part is operational.
8. Do not use the treadmill outdoors, in a garage or under any kind of canopy. Do not expose the treadmill to
high humidity or direct sunlight.
9. Never leave the treadmill unattended.
Make sure the treadmill belt is always tense. Start the treadmill before stepping on it.
If the supply cord is damaged, it must be replaced by the manufacturer, its service agent or similarly qualified
persons in order to avoid any danger.
This appliance is not intended for use by persons (including children) with reduced physical, sensory, or mental
capabilities.
Children should be supervised to ensure that they do not play with the appliance.
4

ASSEMBLY
Before starting with the assembly of this fitness device carefully read the set up steps. We also recommend that
you view the assembly drawing prior to assembly.
Remove all packaging material and place the individual parts on a free surface. This will provide you with an
overview and will simplify the assembly.
Please consider that there is always the risk of injury when using tools and carrying out technical activities.
Please proceed with care when assembling the device.
Make sure you have a hazard-free working environment and do not, for example, leave tools lying around.
Deposit the packaging material in such a way that it does not pose a danger. Foil andplastic bags are a potential
risk of suffocation for children!
Take your time when viewing the drawings and then assemble the device according to the series of illustrations.
The device must be carefully assembled by an adult person. If necessary, request aid from another technically
talented person.
WARNING!
Use extreme caution when assembling this treadmill. Failure to do so could result in injury.
NOTE: Each step number in the assembly instructions tells you what you will be doing. Read and understand
all instructions thoroughly before assembling the treadmill.
5

GROUNDING INSTRUCTIONS
The treadmill must be electrically grounded. In case of malfunction or break down, grounding provides a
path of least resistance for the electric current, which reduces the risk of electrical shock. This treadmill is
equipped with a power cable with an equipment-grounding conductor and a grounding plug. The plug
must be inserted into an appropriate outlet that is properly installed and grounded in accordance with
electricity codes and ordinances. It should be connected to a 15 Amp dedicated circuit. Make sure that the
treadmill is connected to an outlet with the same configuration as the plug. No adapter or converter
should be used with this product.
DANGER!
Improper connection of the equipment-grounding conductor can result in a risk of electric shock. Check
with a qualified electrician or service person if you are in a doubt as to whether the treadmill is properly
grounded. Do not modify the plug provided with the treadmill. If it does not fit the outlet, get a proper
outlet installed by a qualified technician.
To reduce the risk of electrical shock, always unplug the treadmill from its power source before cleaning
or performing any maintenance tasks.
6

COMPONENTS/PARTS
7

FIXINGS
Total mass of the product is 182 lbs. Total size of the equipment is (width) 76.7” ×
(depth) 34.2” × (height) 58.2”
Console
Handle
Motor Cover
Console Mast
Side Rail
Console
Mast
Cover
Transportation
Wheel End Cap
8

ASSEMBLY INSTRUCTIONS
STEP 1
Carton
Reinforci
ng Tube
Before you start assembly please remove the carton reinforcing tube as show in above diagram, then
cut off the nylon cable tie.
STEP 2
Position the Left & Right Console Mast (
15 & 17
) on the Platform as shown in
the diagram, then connect
them to the Stabiliser (
12
) using 4 x M8 x 15mm Allen Bolts (
3
), 2 x M8 x 95mm Allen Bolts (
4
), 4 x M8
x
105mm Allen Bolts (
5
), 10 x 8mm Spring Washers (
6
) and 10 x 8mm Washers (
7
).
ATTENTION!
Do not tighten the above bolts at this step, there should be a space of 0.078 - 0.118”
left.
Before assembling the Right Console Mast, lead out the main connection wire to the port of
the
right
vertical post
using the binding wire
.
9

STEP 3
Connect the Main Sensor Wire from
the Controller to the Main Sensor Wire from the
Console.
Attach
the Console onto the Left & Right Console Masts (15 & 17), and secure with 6 x M8 x
15mm
Allen Bolts (3), 6
x 8mm Spring Washers (6) and 6 x 8mm Washers (7).
10

STEP 4
Fix the Left Upper Console Mast Cover (56) to the Left Console Mast (15) using 4 x ST4.2 x 15mm Phillips Pad
Screws
(37).
Fix the Right Upper Console Mast Cover (57) to the Right Console Mast (17) using 4 x ST4.2 x 15mm Phillips Pad
Screws
(37).
Respectively
attach the Left and Right Console Mast Covers (58, 59) to the Left and Right Console Masts (15
&
17)
using 4 x ST4.8 x 15mm Phillips Pad Screws (8) and stick on 2 x Console Mast Cover Stickers (10).
11

WORKOUT AREA
The free area must be at least 2 feet greater than the training area. This is a space where you can
safely dismount, without obstruction, in case of an emergency. Where two pieces of equipment
are positioned adjacent to each other the free area may be shared. The free area behind the
treadmill should be 2 feet in length and double the width.
In the event of an emergency, place both hands on the handlebars and put your feet onto the
non-slip surface of the main frame. As you do this, the safe keywill disengage from the computer
and the emergency dismount function will be triggered.
12

TREADMILL WARM UP
Walk on treadmill increasing speed each minute up until at a medium paced jog 5 mins
The aim is to build the heart rate gradually. Start at a medium walking speed and each minute
increase your speed so at the end of the 5mins you are at a mid-paced jog and your muscles are
warm ready to stretch.
Quadriceps stretch (with touch down)
Balancing on one leg (you can use the treadmill arm to
help balance) grab the ankle with the same side hand
and draw the heel towards the glutes. Push the hips
forward to get a deeper stretch through the hip flexor.
Switch sides. Complete for 3 on each side holding the
stretch for 10-15 seconds. To extend the stretch
further, whilst the heel is drawn to the glutes reach
down to touch the toes of balancing leg with free hand.
Lunge with overhead reach and torso twist
Step forward into a lunge position, once balance is
obtained reach up and back to stretch through hip
flexors and lower back, return to lunge position and
twist through the torso using hands in parallel to floor
position to help balance. Complete 5 each side.
Leg swings
Using the treadmill arm to aid balance, face the
treadmill and swing one leg across body in pendulum
motion for 5 complete swings on each leg. Then stand
side on to the treadmill (again using the arm for
balance) and kick one leg forward and backwards in
the pendulum motion for 5 complete swings each leg.
Scorpions
Laying on front with arms out at shoulder height either
side, draw opposite heel to opposite hand as far as you
can twisting through the lower back and remaining
both hands on the floor. Repeat for 5 repetitions each
side.
13

TREADMILL COOL DOWN
Gradually decrease speed on treadmill each minute to a walking pace 5 mins
The aim is to decrease the heart rate progressively each minute by decreasing the speed for
5mins until you’re at a complete stop.
Hanging calf stretch
Using the edge of the treadmill and the treadmill arm for
balance, place ball of one foot on the edge and cross the
other foot behind the ankle. Drop all your weight into
the planted ankle and let the heel drop as low as
possible. Bend at the knee to hit the lower ankle. Do not
bounce. Hold for 20-30 seconds each side.
Figure 4 stretch
Using the treadmill arm for balance if necessary, sit into
a narrow stance squat. Raise one leg and place the ankle
across the other knee creating a figure 4 shape with your
legs. Sit lower into the stretch to intensify. Hold for 20-
30 seconds each side.
World’s greatest stretch
In a kneeling lunge position place the opposite hand to
the front foot into the space next to the foot. Reach the
other arm up to the ceiling, reaching through the
fingertips and twisting through the chest and torso. Take
your gaze up to the reaching fingertips. Hold for 20-
30seconds each side.
Kneeling hamstring stretch
In kneeling lunge position, straighten out the front leg
and reach down to the toes with both hands. If this is
too much reach to the furthest point of the ankle where
you feel a stretch. Hold for 20-30seconds each side.
14

OPERATION & ADJUSTMENT
Plug your fitness equipment into the main power and turn on the switch
(
1
). You will hear a beep and the computer screen will light up.
OVER-CURRENT PROTECTOR:
There is an over-current protector (
2
) located on the right side of the switch (
1
) (see above picture); in case
of short circuit or over-current, the button of the over current protector will pop up and the treadmill will
power off; please unplug the power source and push down the button. Plug the machine back in and then
turn on the switch to restart your treadmill.
GETTING STARTED
15

OPERATION & ADJUSTMENT
CONSOLE OPERATION
16

IMPORTANT
The console will turn off
automatically approximately ten
minutes after the belt stops and
pressing any button on the console
will wake it up.
SAFETY KEY
The safety key must be placed into
the magnetic recess on the console
in order to operate the treadmill.
Always place the safety key in this
position and attach the clip to your
clothing waist band before
beginning your workout.
If you should need to stop the
motor immediately, simply pull the
safety key away from the console.
GENERAL OPERATION
1.
Turn on the power switch at the
front of your treadmill. This switch
is located next to the
mains power cable inlet.
2.
Place the safety key into the
magnetic recess on the middle
front of the computer console.
The console will beep, and all
console window displays will
function with a start display value of
0.
Note:
If the Safety Key is not
placed correctly or is faulty, the
“Speed” window will display "E00",
which indicates that the treadmill
will not operate.
To stop the treadmill in an
emergency, simply pull the safety
key or press the red STOP button. It
is important that you connect the
clothing clip to your shirt or other
suitable clothing during exercise to
ensure that this safety system can
operate easily.
Note:
The readings displayed by the
computer should not be used for
therapeutic purposes as they can
vary due to the sensitivity of the
equipment.
Over exercising may result in serious
injury or death. If you feel faint stop
exercising immediately.
IMPORTANT INSTRUCTIONS
17

OPERATION & ADJUSTMENT
START YOUR TREADMILL
Turn on the treadmill and press the “Start”
button on the console.
Press “Speed +” or “Speed -” to adjust the
speed. Pressing the button once will change
the speed by
0.1 mph
Also, the user can press the “Quick Speed
Select” button to select the desired running
speed.
STOP YOUR TREADMILL
Press the “Speed -” button on the console
to reduce the speed, then press the “Stop”
button on the Console, and the treadmill
will stop; turn off the switch if you intend
to finish your workout.
If you remove the safety key the treadmill
will stop, and the console will display E00
until the safety key is replaced.
TRAINING TIME CONTROL
WORKOUT MODE
Turn on the treadmill, press the “MODE”
button once, the “Time” window flashes and
displays “15:00”. Press “Speed +” / “Speed -”
or “Incline+” / “Incline -” button to select
your desired training time, (the range is
5:00 to 99:00 minutes).
Press “Start” to begin your workout; the
time data will reduce gradually during your
training and the treadmill will stop
automatically when the “Time” window
displays “0:00”.
TRAINING
DISTANCE
CONTROL
WORKOUT MODE
Turn on the treadmill, press the
“MODE” button twice to enter
distance count down mode, the
“Distance” window displays “1.00”.
Press “Speed +” / “Speed -” or
“Incline+” / “Incline -” button to select
your desired training distance (the
range is 0.50 to 99.90 mph).
Press “Start” to begin your workout;
the distance data will reduce
gradually during your training and
the treadmill will stop automatically
when the window displays “0.00”.
BURNING CALORIE CONTROL
WORKOUT MODE
Turn on the treadmill, press the
“MODE” button three times to enter
Calorie count down mode, the initial
calorie is “50.0” Kcal.
Press “Speed +” / “Speed -” or
“Incline+” / “Incline -” button to select
the target calories for your workout
(the range is 10.0 to 999 calories).
Press “Start” to begin your workout,
the calories data will reduce
gradually during your training, and
the treadmill will stop automatically
when the window displays “0.0”.
18

OPERATION & ADJUSTMENT
Programme Workout Model
(P01—P10)
In this mode, the
user has a choice of
Programme P01 to
Programme P10.
1.
Press the “Programme” button once,
the “Pro.” window will display “P01”
and the “Time” window will display
“10:00”, which is the pre-set time of
the treadmill for each programme;
press the “Programme ” button to
select your desired training
programme “P01 to P10”.
2.
The pre-set workout time of the
treadmill for each programme is
10:00Mins; when you finish selecting
workout programme, press “Speed +”
/ “Speed -” or “Incline+” / “Incline -”
button to
select your desired workout
time (the range is: 5:00 to
99:00 minutes).
3.
Press “Start”, and the treadmill
will count down from three
before commencing the
workout. The start speed
depends on the programme
you have chosen.
4.
For all pre-set values, please
refer to the following table and
diagrams.
Any of the training programme levels
have 10 segments, and each segment
time is 1/10 of the total time; during
any training segments, press the
“Speed +” / “Speed -” button to adjust
your speed.
19

PULSE CONTROL WORKOUT MODE
1.
Turn on the treadmill, press
“Programme” button until the “Pro.”
window display “HP1”. “Time”
window will display “10:00” which is
the treadmill’s pre-set workout time
for pulse control workout mode.
2.
Press “Speed +” or “Speed -” button
or press “Incline +” or “Incline -”
button to choose your desired
training time.
3.
Press the “Mode” button, the main
window will display “30”, which is the
treadmill’s pre-set user’s age. Press
“Speed +” or “Speed -”button (or press
“Incline +” or “Incline -” button ) to
choose your correct age
4.
Press the “Mode” button again, the
main window will display your target
heart rate date according to your age
(Please refer to the target heart rate
table on the next page), you can press
“Speed +” or “Speed -” button (or press
“Incline +” or “Incline-” button) to
choose your desired target heart rate
date.
5.
Press “Mode” button to enter your
setting information when starting
your workout; the treadmill will
run at a speed 0.5 mph for about
1min warm up; grasp the two
handle pulse sensors with your
two hands, then the
treadmill will run automatically
according to the user’s
heartbeat rate, every 10
seconds increasing by 0.3 mph.
Once the treadmill speed is at
5 mph, but the heart rate is
lower than the set data, then
the treadmill will increase the
incline by 1% every 10 seconds
to reach your set heart rate.
6.
When your heart rate is over
your set heart rate, then the
treadmill will decrease the
incline by 1% every 10 seconds;
if the user’s heart is still over
your set heart rate, then the
treadmill will decrease running
speed by 0.3 mph , until your
heart rate is lower than your
set heartbeat rate.
7.
The treadmill has three pulse
control workout modes, press
“Programme” button to select
“HP1”, “HP2 “ or “HP3”.
Note:
HP1 Pulse Control Workout
Mode, the treadmill’s default
Max running speed is 5 mph,
HP2 and HP3 Max running
speed is 5.5 mph, and 6 mph.
We recommend you read the
target heart rate zone table
on page 20 carefully before
you start the Pulse Control
Workout.
20
Table of contents
Other MuscleSquad Treadmill manuals