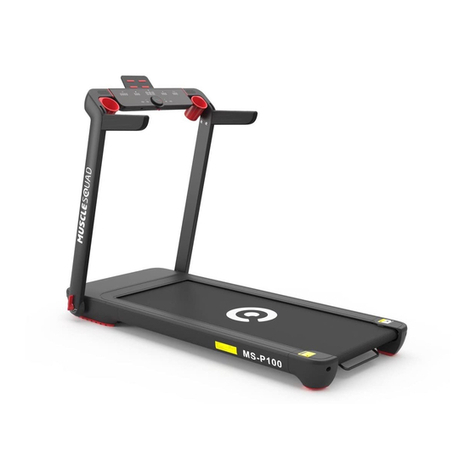
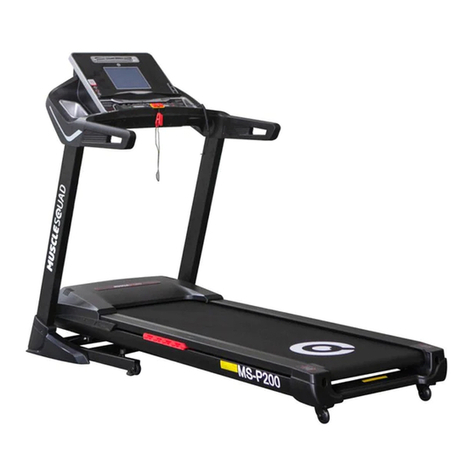
MuscleSquad P300 Manual

MuscleSquad P300 Treadmill
Assembly & User Manual
Important – Please read these instructions fully before assembly and use.
These Instructions contain important information for assembly, safe use, and maintenance.
Maximum User Weight 150 kgs

1
CONTENTS
Warranty 2
Safety Information 2-4
Assembly Instructions 5-7
Product introduction 8
Programmes 9
How to use 10-12
Warm up & Cool Down 13-14
Maintenance 15
Levelling 16
Cleaning 17
Troubleshooting 18
Technical Specification 19-20
Further Safety Information 21
Terms & Conditions 22
X
X
X
X
X
X
X
X
X
X

2
Thanks for purchasing this product. This product will help you exercise your muscles in the correctway and to im-
prove your fitness – and all this in a familiar environment.
WARRANTY
MuscleSquad assures you that this device was manufactured from high quality materials.
A prerequisite of the machine’s warranty is a proper setup of the device in accordance with the operating instruc-
tions. Improper use and / or incorrect transportation can render the warranty void.
The warranty is for 1 year, beginning from the date of purchase. If the device you acquired is defective, please
contact our Customer Service at info@musclesquad.com within the guarantee period of 12 months from the
purchase date. The warranty applies to the following parts (as far as included in the scope of delivery): Frame, ca-
ble, electronic devices, foam, and wheels. The guarantee does not cover:
1. Damage caused by any external force
2. Intervention by unauthorised parties
3. Incorrect handling of the product
4. Non-compliance with the operating instructions
Wear of parts and expendable items are also not covered (such as the running belt).
The device is only intended for private use. The warranty does not apply to professional usage.
Spare parts can be ordered from Customer Services at info@musclesquad.com.
Please make sure you have the following information to hand when ordering spare parts:
1. Operating instructions
2. Model number (located on the cover sheet of these instructions)
3. Description of attachments
4. Attachment number
5. Proof of purchase with purchase date
Please do not send the device to our firm without being requested to do so by our service team. The costs of un-
solicited shipments will be borne by the sender.

3
GENERAL SAFETY INSTRUCTIONS
A great deal of emphasis was placed on safety in the design and manufacture of this fitness device. Still, it is very
important that you strictly adhere to the following safety instructions. We cannot be held liable for accidents that
are caused due to disregarding this advice.
To ensure your safety and to avoid accidents, please read the operating instructions thoroughly and attentively
before you use the sports device for the first time.
1. Consult your GP before starting to exercise on this device. Should you want to exercise regularly and inten-
sively, the approval of your GP would be advisable. This is especially true for users with health problems.
2. We recommend that handicapped people should only use the device when a qualified carer is present.
3. When using the fitness device, wear comfortable clothing and preferably sports or aerobic shoes. Avoid wear-
ing loose clothing which could get caught in the moving parts of the device.
4. Stop exercising immediately should you feel unwell or if you feel pain in your joints or muscles. In particular,
keep an eye on how your body is responding to the exercise programme. Dizziness is a sign that you are exer-
cising too intensively with the device. At the first signs of dizziness, lay down on the ground until you feel bet-
ter.
5. Ensure there are no children nearby when you are exercising on the device. In addition, the device should be
stowed in a place that children or house pets cannot reach.
6. Ensure that only one person at a time uses the fitness device.
7. After the sports device has been set up according to the operating instructions, make sure all screws, bolts
and nuts are correctly fitted and tightened. Use only attachments recommended and/or supplied by the im-
porter.
8. Do not use a device that is damaged or unserviceable.
9. Always place the device on a smooth, clean and sturdy surface. Never use near water and make sure there are
no pointed objects in the direct vicinity of the fitness device. If necessary, place a protective mat (not in-
cluded) to protect your floor underneath the device and keep a free space of at least 0.5 m around the device
for safety reasons.
10. Take care not to put your arms and legs near the moving parts. Do not place any material in openings in the
device.
11. Use the device only for the purposes described in these operating instructions. Use only attachments recom-
mended by the manufacturer.
12. If the power supply cord is damaged, it must be replaced by the manufacturer, its service agent or similar per-
sons in order to avoid any danger.

4
SAFETY PRECAUTIONS
1. Choose a place in reach of a socket when placing the treadmill.
2. Always connect the appliance to a socket with a grounded circuit and with no other appliances connected to
it. It is recommended not to use any extension cords.
3. Faulty grounding of the appliance can cause the risk of electrical shocks. Ask a qualified electrician to check
the socket in case you do not know if the appliance is grounded appropriately. Do not change or modify the
plug provided with the appliance if it is not compatible with your socket type. Ask a qualified electrician to in-
stall a suitable socket.
4. Sudden voltage fluctuations can seriously damage the treadmill. Weather changes or switching on and off
other appliances can cause peak voltages, over-voltage or interference voltage. To limit the danger of damage
to the treadmill, it should be equipped with an over-voltage protective device (not included).
5. Keep the power cord away from the carrying roller. Do not leave the power cord below the striding belt. Do
not use the treadmill with a damaged or worn out power cord.
6. Unplug before cleaning or engaging in maintenance work. Maintenance should only be done by authorised
service technicians, unless otherwise stated by the manufacturer. Ignoring those instructions would automati-
cally void the warranty.
7. Inspect the treadmill before every use to make sure that every part is operational.
8. Do not use the treadmill outdoors, in a garage or under any kind of canopy. Do not expose the treadmill to
high humidity or direct sunlight.
9. Never leave the treadmill unattended.
Make sure the treadmill belt is always tense. Start the treadmill before stepping on it.
If the supply cord is damaged, it must be replaced by the manufacturer, its service agent or similarly qualified
persons in order to avoid any danger.
This appliance is not intended for use by persons (including children) with reduced physical, sensory, or mental
capabilities.
Children should be supervised to ensure that they do not play with the appliance.

5
ASSEMBLY INSTRUCTIONS
Before assembling the treadmill, please check the parts listed in the right figure. The numbers indicate the
specification of the part and the quantity of the part required in the assembly.
Step 1:
Take all parts out. Handle with care and don't leave any parts in the box.

6
Step 2:
Put the
underpan
on the floor and take both struts out. Thread the data
transmission
cable
through
the
right side strut. Then fasten the screws on the bottom stand pillar with the appropriate tool. Also,
tighten the other side strut in the same way.
Step 3 :
Install top console.
Raise the console above the struts, connect the two data transmission cables first, then plug the top con-
sole into the struts (Warning: Avoid squeezing the data transmission cables). Fasten the screws on the up-
per struts with the tools.

7
Step 4 :
Install the display monitor.
1. Two people are needed to assist with the installation; take out the monitor head, one person holds the
monitor head, while one person connects the multi-core wire connections in the meter head with the
multi-core wire connections on the base, A to A, B to B, C to C, D to D. When connecting and inserting,the
two plugs should be inserted horizontally; after hearing a "click" sound, gently pull it, do not separate, and
put the multi-core wire carefully into the casing.
2. After the monitor is placed in a good position, take the corresponding screws and washers, align with
the screw holes and tighten the screws.
After putting the armrest cover in place, take the corresponding screws and washers, align with the screw
holes and tighten the screws.

8
PRODUCT INTRODUCTION
Exercising regularly on the treadmill is beneficial for your health. For respiratory system: Improves the my-
ocardial function, increases cardiopulmonary after exercise.
For nervous system: Freshens and improves the mind and improves analytical capabilities.
Metabolism: Activates your body’s metabolism and effectively accelerates bone growth after exercise.
Immunological function: Lowers blood pressure, boosts the immune system and improves immune re-
sponse and resistance to disease after exercise.

9
PROGRAMMES
Fixed program 1: Weight loss
Fixed program 2: Fat burning
Fixed program 3: Climbing
Fixed program 4: Varied Difficulty Level Training
Fixed program 5: Varied Difficulty Level Training
Fixed program 6: Race
Fixed program 7: Varied Difficulty Level Training
Fixed program 8: Speed interval training
Fixed program 9: Slope interval training
Fixed program 10: Varied Difficulty Level Training
Fixed program 11: Calorie countdown
Fixed program 12: Distance countdown
Heart Rate Speed control: HRC1->HRC2.
1.Icon: Fan, Smart connection.
2.Function button: Start, Stop, Speed+, - ,Slope+, - ,Cooling down, Speed select button 2, 5, 8, 10, 12, 15
KM/H, Slope select Button 3, 6, 9, 11, 13, 15%, Confirm the entry button, turn off the screen button.
3. Function buttons:
•START: Start the tread mill motor.
•STOP: Stop the tread mill motor.
•Speed Button: Click +or-, to change the speed.
•Slope Button: Click +or-, to change the slope.
•Speed Select Button: 2,5, 8, 10, 12, 15KM/H, switches the speed.
•Slope Select Button:3,6,9, 11,13,15%, switches slope angle.
•Right: Countdown mode, button: Time-Distance-Calorie
•Fixed mode, button: PO 1- > P 12
•Left: Count down mode, button: Calorie-Distance-Time
•Fixed mode, button: P12->P01
•Heart Rate Speed control: HRC2->HRC 1
•Reset button: In the non-standby mode, resets the treadmill.
•Off screen button: Switches screen on or off.
•Fan button: Button cycle: Level1-level 2-level 3
•Cool down button, press it when running: Running time over 19 min, it will give 5 mins for
cooling down; running time less than 19mins, it will give 2 mins for cooling down.

10
STARTING THE TREADMILL
Take the power cord, Insert one end into the rear of the treadmill then insert the other end into the power
supply.
Please make sure the safety lock is set up before running, clip one side onto the runner's clothes.
Pulldown the safety switch if you feel uncomfortable. Then seek medical treatment.

11
HEART RATE MANUAL
Put your both hands on the touch sensor to show your heart rate.
FAN & AUDIO

12
There is a high-fidelity stereo system, which can be connected with your audio player or mobile device, so
you can listen while training. When you want to use it, plug one end of the audio cable (not included) into
the jack of the console and the other end into the headphone hole of the player or mobile device; ensure
that the audio cable is fully plugged in. Note: you can buy an audio cable from your local electronics store.
Next, press the play button on the player or mobile device. Adjust the volume with the volume control on
the player or mobile device.

13
TREADMILL WARM UP
Walk on treadmill increasing speed each minute up until at a medium paced jog 5 mins
The aim is to build the heart rate gradually. Start at a medium walking speed and each minute in-
crease your speed so at the end of the 5mins you are at a mid-paced jog and your muscles are
warm ready to stretch.
Quadriceps stretch (with touch down)
Balancing on one leg (you can use the treadmill arm to
help balance) grab the ankle with the same side hand
and draw the heel towards the glutes. Push the hips for-
ward to get a deeper stretch through the hip flexor.
Switch sides. Complete for 3 on each side holding the
stretch for 10-15 seconds. To extend the stretch further,
whilst the heel is drawn to the glutes reach down to
touch the toes of balancing leg with free hand.
Lunge with overhead reach and torso twist
Step forward into a lunge position, once balance is ob-
tained reach up and back to stretch through hip flexors
and lower back, return to lunge position and twist
through the torso using hands in parallel to floor posi-
tion to help balance. Complete 5 each side.
Leg swings
Using the treadmill arm to aid balance, face the tread-
mill and swing one leg across body in pendulum motion
for 5 complete swings on each leg. Then stand side on
to the treadmill (again using the arm for balance) and
kick one leg forward and backwards in the pendulum
motion for 5 complete swings each leg.
Scorpions
Laying on front with arms out at shoulder height either
side, draw opposite heel to opposite hand as far as you
can twisting through the lower back and remaining both
hands on the floor. Repeat for 5 repetitions each side.

14
TREADMILL COOL DOWN
Gradually decrease speed on treadmill each minute to a walking pace 5 mins
The aim is to decrease the heart rate progressively each minute by decreasing the speed for
5mins until you’re at a complete stop.
Hanging calf stretch
Using the edge of the treadmill and the treadmill arm for
balance, place ball of one foot on the edge and cross the
other foot behind the ankle. Drop all your weight into the
planted ankle and let the heel drop as low as possible.
Bend at the knee to hit the lower ankle. Do not bounce.
Hold for 20-30 seconds each side.
Figure 4 stretch
Using the treadmill arm for balance if necessary, sit into a
narrow stance squat. Raise one leg and place the ankle
across the other knee creating a figure 4 shape with your
legs. Sit lower into the stretch to intensify. Hold for 20-30
seconds each side.
World’s greatest stretch
In a kneeling lunge position place the opposite hand to
the front foot into the space next to the foot. Reach the
other arm up to the ceiling, reaching through the finger-
tips and twisting through the chest and torso. Take your
gaze up to the reaching fingertips. Hold for 20-30seconds
each side.
Kneeling hamstring stretch
In kneeling lunge position, straighten out the front leg
and reach down to the toes with both hands. If this is too
much reach to the furthest point of the ankle where you
feel a stretch. Hold for 20-30seconds each side.

15
MAINTENANCE
Because of environment changes or long time use, the running belt may deviate, so the belt needs to be
manually adjusted.
WARNING!
When adjusting the running belt, it is forbidden to touch the belt when the running belt is moving.
How To Adjust The Running Belt Elastic:
When using the treadmill if it suddenly jerks please stop using it immediately as it means the running belt
is too tight.
Adjust the speed to 2km/h, stand on the treadmill, and use your feet to hold the running belt with your
maximum strength.
Listen to whether there is a sound from front roller.
If the front roller keeps moving but makes a loud noise, it means the running belt is too loose.
If there is a small noise, and the front roller stops running it means the motor belt is too loose.
1. Tighten the running belt.
2.Loosen the running belt.

16
LEVELLING THE TREADMILL
1. Place a level on the running belt to check if the treadmill is level.
2. Stand at the rear near to the adjustable feet.
3. Ask someone to help lift the back of the treadmill
4. Adjust the rear feet as needed

17
CLEANING & MAINTENANCE
1. Stand at the end of machine, then pull up the running belt. Use a dry cloth to clean the running board.
2. It is highly suggested to clean the board every 6 months.
3. After cleaning, the running belt and running board need to be "properly" lubricated.
T

18
TROUBLESHOOTING
CODE
FAILURE
REASON
SOLUTION
E01
E07
Display board can't
receive signal
A. Display board connecting cable
is damaged
Check the
connection or change invert or display
board.
B. Inverter connecting cable dam-
aged
E02 Incline motor prob-
lem
A. Incline motor connection cable
problem
R
econnect cable
B. Incline motor damage
Change incline motor
C. Inverter problem
Change inverter
E03 Over voltage
A. Inverter problem
Change inverter
B. AC voltage too high
Check AC power
E04/E05
Current too high
A. Over loaded
Decrease load weight
B. Transmission jammed
Check transmission
C. Motor problem
Change motor
D. Inverter damage
Change inverter
E10
Overheating
Inverter problem
Change inverter
E13 IGBT SHORT-CIRCUIT Inverter problem
C
hange inverter
E15
Receives start signal
but does not receive
stop signal
Unusual stopping
P
ower off and restart after 5 min
E16 Power problem
A. Inverter damage
Change inverter
B. Motor connection cable loose
C
heck connection cable
C. Motor damaged
Change motor
E17
Current U sensor is-
sue Inverter problem
C
hange inverter

19
TECHNICAL SPECIFICATION
Operating Volt-
voltage±10%(50Hz)
Distance Display
0
.
1-99
.
9km
U
Wih
180KG
Cl i
Di l
00-999kcal
Dimensions
2000x876
x1625mm
Heart Rate
40-250beat/m
Running Area
d
k /h
Machine
N.W
.:
178
Skg/G.W
.:
16
2kg
Incline
0-21%
Packaging
Size
(LxW
x
H
)
2170x1020x455mm
1050x1020x390mm
AmbientTemperature
0°C-40°C
Safety
Protection
Multiple Protection
Motor
Power
220VAC
Peak
Power
7
.
0HP
Time Range
00:00-99:59 (min:sec)
Driver
220VAC
10A
Console Display
Speed, Time, Distance, Calorie, Heart Rate. Running Program. Incline and so on
1
RUNNING FRAME
23
SCREW M8×50
45
SCREW M5×16
2
COVER
24
RUBBER
46
SPRING RING 5
3
SCREW ST4.8×16
25
RUBBER 5
47
RIGHT COLUMN LOWER COVER
4
FOOT PART
26
RUNNING DECK
48
LEFT COLUMN COVER
5
INCLINE FRAME
27
RUNNING BELT
49
RIGHT COLUMN COVER
6
INCLINE FRAME AXLE
28
SCREW M8×45
50
CONTROL BOARD
7
SCREW M10×80
29
RUBBER
51 SCREW M4×10
8
SPRING RING 10
30
FRONT ROLLER
9
SCREW M10×70
31
SCREW M10×30
52
5 CORE CABLE
10
WHEEL PART
32
REAR ROLLER
53
DUST PREVENTION
11
RING 10
33
SCREW M10×85
54
POWER BOARD
12
SCREW M10
34
SIDE RAIL
55
POWER SWITCH
13
INCLINE MOTOR
35
RAIL BUTTON
56
POWER PLUG
14
SCREW M10×45
36
LED
57
SCREW ST3×8
15
SCREW M10×70
37
HORIZONTAL BELT
58
POWER CABLE
16
MOTOR AC
38
RIGHT END CAP
59
FRONT COVER
17
MOTOR BELT
39
SCREW M5×12
60
FRONT COVER BUTTON
18
MOTOR FRAME
40
LEFT END CAP
61
OIL INPUT FOR DECK
Table of contents
Other MuscleSquad Treadmill manuals