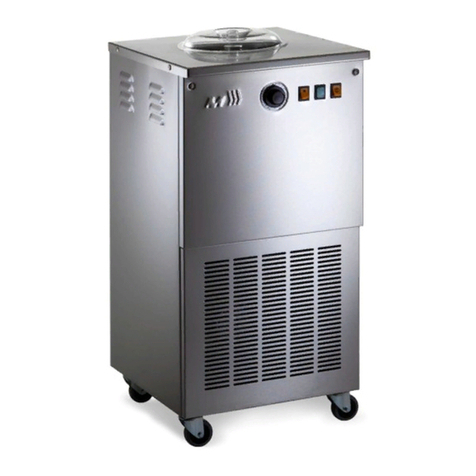
Musso CONSUL User manual

MACCHINE PER GELATI
ICE-CREAM MACHINES
MACCHINE PER GELATI
ICE-CREAM MACHINES
Manuale d’Istruzioni
Instruction Manual


MODO DE EMPLEO & PRECAUCIONES IMPORTANTESMODO DE EMPLEO & PRECAUCIONES IMPORTANTES
pag. 19pag. 19
MODO DE EMPLEO & PRECAUCIONES IMPORTANTES
pag. 19
ISTRUZIONI & PRECAUZIONI PER L’USO
pag. 7
INSTRUCTIONS & PRECAUTION FOR USEINSTRUCTIONS & PRECAUTION FOR USE
pag. 10pag. 10
INSTRUCTIONS & PRECAUTION FOR USE
pag. 10
INSTRUCTIONS & INSTRUCTIONS & PRÉCAUTIONS POUR L'EMPLOIPRÉCAUTIONS POUR L'EMPLOI
pag. 13pag. 13
INSTRUCTIONS & PRÉCAUTIONS POUR L'EMPLOI
pag. 13
ANWENDUNG & WICHTIGE VORSICHTSMASSNAHMENANWENDUNG & WICHTIGE VORSICHTSMASSNAHMEN
pag. 16pag. 16
ANWENDUNG & WICHTIGE VORSICHTSMASSNAHMEN
pag. 16
ИНСТРУКЦИЯ ПО ЭКСПЛУАТАЦИИ ИНСТРУКЦИЯ ПО ЭКСПЛУАТАЦИИ
ВАЖНЫЕ МЕРЫ ПРЕДОСТОРОЖНОСТИ ВАЖНЫЕ МЕРЫ ПРЕДОСТОРОЖНОСТИ
pag. 22pag. 22
ИНСТРУКЦИЯ ПО ЭКСПЛУАТАЦИИ
ВАЖНЫЕ МЕРЫ ПРЕДОСТОРОЖНОСТИ
pag. 22
SPECIFICHE TECNICHE
TECHNICAL SPECIFICATIONS
pag. 6

MINIMINIMINI
GELATIERA DA CASA
HOME ICE CREAM MACHINE
STELLASTELLASTELLA
GELATIERA PROFESSIONALE E DA CASA
PROFESSIONAL AND HOME ICE CREAM MACHINE

GIARDINOGIARDINOGIARDINO
GELATIERA PROFESSIONALE
PROFESSIONAL ICE CREAM MACHINE
CLUBCLUBCLUB
GELATIERA PROFESSIONALE
PROFESSIONAL ICE CREAM MACHINE
CONSULCONSULCONSUL
GELATIERA PROFESSIONALE
PROFESSIONAL ICE CREAM MACHINE

MODEL
MAX INGREDIENTS
CAPACITY (L)
BOWL CAPACITY
(L)
PREPARATION TIME
(min)
DIMENSION
HEIGHT - WIDTH - DEPTH (cm.)
NET WEIGHT (kg.)
POWER (W)
PADDLE INDUCTION
MOTOR (RPM)
MECHANIC TIMER
(min.)
STANDARD CURRENT
SINGLE PHASE
230/50
230/60
REFRIGERANT
BODY
CONSUL
3.5
15
30/40
85 x 44 x 60
105
1200
76
60
R404A
STAINLESS
STEEL
CLUB
2.5
6
30/40
83 x 42 x 45
65
570
72
60
R134A R134A R134A R134A
GIARDINO
2.5
6
30/40
43 x 62 x 42
62
570
72
60
STELLA MINI
1.5 0.75
3 2
30/40 30/40
31 x 51 x 35 27 x 45 x 30
31 18
250 200
76 80
60 60
110/60
230/50
110/60
230/50
110/60
230/50
110/60
230/50
Specifiche Tecniche
Technical Specifications
6
STAINLESS
STEEL
STAINLESS
STEEL
STAINLESS
STEEL
STAINLESS
STEEL

PRECAUZIONI IMPORTANTI
Questo apparecchio non deve essere utilizzato da persone (compresi i bambini)
le cui capacita' fisiche sensoriali o mentali sono ridotte. E' opportuno sorvegliare i
bambini per evitare che giochino con l'apparecchio.
CONDIZIONI DI UTILIZZO
Non utilizzare un apparecchio che presenti un cavo difettoso o danneggiato, che
sia caduto e presenti danni visibili e anomalie di funzionamento.
Non immergete mai l'apparecchio il cavo o la presa elettrica nell'acqua o in altro
liquido.
Utilizzate un piano di lavoro stabile lontano da schizzi d'acqua.
Scollegate l'apparecchio quando non l'utilizzate o durante le operazioni di pulizia.
Per la vostra sicurezza utilizzate solo accessori e ricambi adatti al vs.
apparecchio.
La spatola ha parti taglienti, prestare attenzione durante la pulizia.
Tenere mani e utensili lontano dal contenitore mentre la gelatiera è in funzione per
prevenire lesioni personali o danni all'apparecchio.
Non lasciate pendere il cavo di alimentazione a portata di mano dei bambini.
Non ostruite le griglie di areazione. Assicuratevi che la tensione di alimentazione
del vs. apparecchio corrisponda a quella del vs. Impianto elettrico. Collegate
sempre l'apparecchio ad una presa provvista di messa a terra. Evitate di
scollegare l'apparecchio tirando il cavo.
Utilizzate sempre l'apparecchio con il coperchio al suo posto.
Il vs. apparecchio è composto da diversi materiali che possono
essere riciclati, lasciatelo in un punto di raccolta autorizzato.
Non superare la quantità prescritta:
Gelatiera Mini - Lussino l. 0,750
Gelatiera Stella l. 1,5
Gelatiera Fiume - Giardino l. 2,5
Gelatiera Zara - Club l. 2,5
Gelatiera Consul - Ragusa l.3,5
7

ISTRUZIONI PER L'USO
1. Inserire la spina dell'apparecchio in una presa di corrente monofase
220v o della tensione indicata sull'apparecchio.
2. Ruotare in senso orario la manopola del TIMER a giro completo.
3. Provare A VUOTO il funzionamento dell'apparecchio azionando i
due interruttori.
"SPATOLA" e "FREDDO" .
4. Dopo essersi accertati del perfetto funzionamento, versare la
miscela da gelare a macchina ferma, e sempre con la spatola e la
vite di fermo inserite nelle loro sedi.
E' IMPORTANTE CHE LA MISCELA NON SIA CALDA E NON SUPERI LA
QUANTITA' PRESCRITTA
5. Per iniziare il ciclo di lavoro, il timer deve essere azionato ; poiché
quando si ferma il ciclo del freddo si interrompe, si consiglia di
azionare il timer sui 50 minuti per impedire di interrompersi a
gelato non ancora pronto.
In caso di interruzione attendere qualche minuto prima di
riprendere il lavoro. Per controllare se il gelato è pronto (dopo
circa 20/30 min.), agire solo con l'interruttore della spatola. A
lavorazione ultimata, per ottenere una migliore estrazione del
gelato, spegnere il freddo agendo sull'interruttore e lasciare
funzionare la sola spatola per qualche minuto. Si otterrà una
migliore amalgama della crema e l'estrazione ne sarà facilitata.
6. PULIZIA DELLA MACCHINA
Togliere la vite di fermo ed estrarre il blocco spatola.
Procedere con il lavaggio della vaschetta.
Rimettere la spatola facendo attenzione all'esatta posizione.
8

Ingredienti
1 lt latte
7 tuorli d’uovo
350 gr zucchero
1 buccia di limone
Gelato alla crema
Esecuzione
Mettere in un recipiente assolutamente inodore i tuorli
d'uovo. Sbatterli aggiungendo gradatamente lo
zucchero, no a quando non saranno ben montati.
Aggiungere a poco a poco e sempre mescolando il latte
tiepido con la buccia di limone. Mettere a fuoco lento per
8/10 minuti mescolando nché gli ingredienti si saranno
ben amalgamati.
Suggerimenti
Con questa crema base e un po' di fantasia si potranno
preparare moltissime qualità di gelati.
EVITARE CHE I LIQUIDI BAGNINO IL PERNO CENTRALE.
SI RACCOMANDA DI NON LASCIARE INDURIRE TROPPO IL GELATO, PER
EVITARE LA ROTTURA DELL'INGRANAGGIO DI TRASMISSIONE.
MANUTENZIONE
L'apparecchio non necessita di alcuna speciale manutenzione.
L'uso corretto ne garantisce l'efficienza per molti anni.
9

IMPORTANT PRECAUTIONS
This appliance must not be used by persons (including children) with physical,
sensorial or mental Impairment. Children should be supervised to ensure that
they do not play with the appliance.
CONDITIONS OF USE
Do not use the appliance if the power cable is damaged, if it has been dropped, if
there is any visible damage to it or if it is not working correctly.
Never place the appliance, the power cable or the plug in water or in any other
liquid.
Use the appliance on a stable work surface away from water.
Disconnect the appliance when not in use and before cleaning.
For your safety, only use accessories and spare parts suitable for the appliance.
The paddle has sharp parts: use caution when cleaning.
Keep hands and utensils away from the bowl while the ice cream machine is
running to prevent personal injury or damage to the appliance.
Do not let the power cable hang within reach of children.
Do not obstruct ventilation grills.
Check that the rateo voltage of your appliance matches your mains voltage.
Always connect the appliance to an earthed socket.
Do not pull the power cable in order to unplug the appliance.
Always use the appliance with its cover in place.
Your appliance consists of various materials that can be
recycled. Leave it at an authorized collection point.
Do not exceed the amounts shown:
Mini - Lussino l. 0,750
Stella l. 1,5
Fiume - Giardino l. 2,5
Zara- Club l. 2,5
Consul - Ragusa l. 3,5
10

INSTRUCTIONS FOR USE
1. Plug the appliance into a single-phase 220V wall socket, or a
socket with the voltage shown on the appliance itself.
2. Turn the TIMER knob through one complete clockwise turn.
3. Make sure the appliance is working correctly by testing the two
switches ("PADDLE" and "COLD") while the appliance is EMPTY.
4. After testing, pour in the mixture you wish to churn with the
machine turned off and the paddle and locking screw in their
places.
DO NOT POUR HOT MIXTURES INTO THE APPLIANCE AND DO NOT
EXCEED THE AMOUNT INDICATED
5. Use the timer to start the working cycle. Since the refrigerator
turns off when the machine stops, it is best to set the timer to 50
minutes to prevent the machine stopping before the ice cream is
ready.
If the machine is turned off, wait a few minutes before starting it
again.
To see if the ice cream is ready (after about 20-30 minutes), only
switch the paddle off.
To remove the ice cream more easily once churning is complete,
turn off the refrigerator ("COLD") and let the paddle work on its
own for a few minutes. The ice cream will blend better and this
makes it easier to remove.
6. MACHINE CLEANING
Remove the locking screw and lift out the paddle block.
Wash the bowl.
Put the paddle back making sure it is locked into exactly the right
place.
11

Italian Ice Cream Base Preparation
Ingredients
1 L milk
7 egg yolks
350 g. sugar
1 lemon peel
Execution
Put the egg yolks into a completely odourless bowl.
Whisk, while gradually adding the sugar, until well whipped.
Add the warm milk and lemon zest a little at time while stirring
continuously. Place over a low heat and stir for 8-10 minutes
until the ingredients are well blended.
Tips
To make all the various different kinds of italian ice cream,
you need to start with an ice cream base preparation, which is
nished off in different ways according to the desired variety
or avour.
With the italian ice cream base preparation and a little
imagination, you can prepare lots of different kinds of ice
cream.
DO NOT GET THE CENTRAL PIN WET.
TO AVOID BREAKING THE DRIVE GEAR, DO NOT LET THE ICE CREAM
HARDEN EXCESSIVELY.
MAINTENANCE
The appliance needs no special maintenance. Proper use ensures many years of
service.
12

PRÉCAUTIONS IMPORTANTES
Cet appareil n'est pas prévu pour être utilisé par des personnes (y compris les
enfants) dont les capacités physiques, sensorielles ou mentales sont réduites. Il
convient de surveiller les enfants pour s'assurer qu'ils ne jouent pas avec
l'appareil.
CONDITIONS D'UTILISATION
N'utilisez pas l'appareil s'il a un cordon défectueux ou endommagé, s'il est tombé
et présente des détériorations visibles ou des anomalies de fonctionnement. Ne
plongez jamais l'appareil, le fil électrique ou la prise de courant dans l'eau ou dans
un autre liquide. Utilisez un plan de travail stable à l'abri des projections d'eau.
Débranchez l'appareil quand il ne sert pas et avant de le nettoyer. Pour votre
sécurité, utilisez uniquement des pièces de rechange et des accessoires
appropriés.
La spatule a des parties coupantes ; faites attention lorsque vous la lavez.
Afin d'éviter tout risque de dommages physiques ou matériels, ne mettez pas les
mains ou des ustensiles à proximité du récipient lorsque la sorbetière est en
marche. Ne laissez pas pendre le cordon d'alimentation à portée de main des
enfants. N'obstruez pas les grilles d'aération.
Vérifiez que la tension du réseau correspond bien à celle indiquée sur l'appareil.
Branchez toujours l'appareil sur une prise reliée à la terre.
Ne débranchez pas l'appareil en tirant sur le cordon.
Lorsque vous utilisez l'appareil, vérifiez que le couvercle est bien en place.
Cet appareil comprend des matériaux pouvant être recyclés.
Laissez-le dans un centre de récolte autorisé.
Ne dépassez pas la quantité indiquée :
Sorbetière Mini - Lussino 0,750 l
Sorbetière Stella 1,5 l
Sorbetière Fiume - Giardino 2,5 l
Sorbetière Zara - Club 2,5 l
Sorbetière Consul - Ragusa 3,5 l
13

MODE D'EMPLOI
1. Introduisez la che d'alimentation de l'appareil dans une prise secteur
monophasée de 220 volts ou de la tension indiquée sur l'appareil.
2. Faites faire un tour complet dans le sens des aiguilles d'une montre
au MINUTEUR.
3. Faites un essai À VIDE de l'appareil en manipulant les deux
interrupteurs « SPATULE » et « FROID ».
4. Après vous être assuré que l'appareil fonctionne bien, versez le
mélange à glacer dans l'appareil à l'arrêt. La spatule et la vis d'arrêt
doivent toujours être en place.
IL EST IMPORTANT QUE LE MÉLANGE NE SOIT PAS CHAUD ET QU'IL NE
DÉPASSE PAS LA QUANTITÉ INDIQUÉE
5. Pour démarrer le cycle de préparation, réglez le minuteur ; lorsqu'il
s'arrête, le cycle du froid s'interrompt. Nous vous conseillons donc de
le régler sur 50 minutes pour éviter qu'il ne s'interrompe avant que la
glace ne soit prête.
En cas d'interruption, attendez quelques minutes avant de reprendre
le cycle.
Pour contrôler si la glace est prête (après 20 à 30 minutes), coupez
uniquement l'interrupteur de la spatule.
Une fois la préparation achevée, pour qu'il soit plus facile d'extraire la
glace, coupez l'interrupteur du froid et laissez tourner uniquement la
spatule pendant quelques minutes. La crème sera mieux amalgamée et
l'extraction plus aisée.
6. NETTOYAGE DE L'APPAREIL
Retirez la vis d'arrêt et ôtez le bloc spatule.
Lavez le bac.
Remettez la spatule en faisant attention à ce qu'elle soit bien en place.
14

Préparation de la crème de base
Ingrédients
1 lt de lait
7 jaune d'œuf
350 gr de soucre en poudre
1 écorce de citron
Exécution
Mettre les jaune d'œuf dan un récipient bien propre.
Battre les jaune d'œuf en ajoutant, petit à petit, le
sucre en poudre. Lorsque les jaune d'œuf seront
montés ajouter lentement le lait tiède et l’écorce de
citron. Mettre le récipient sur un feu doux pendant
8-10 minutes et continuer à mélanger les ingrédients
qui devronts former une pâte lisse.
Suggestion
Avec cette Creme de base et un peu de fantaisie,
on pourra préparer de nombreuses qualités de glace.
FAITES ATTENTION À NE PAS VERSER DE LIQUIDE SUR L'AXE
CENTRAL.
NOUS VOUS CONSEILLONS DE NE PAS TROP LAISSER DURCIR LA
G L A C E P O U R É V I T E R D ' E N D O M M A G E R L ' E N G R E N A G E D E
TRANSMISSION.
ENTRETIEN
Aucun entretien spécial n'est nécessaire. Si vous l'utilisez correctement, votre
appareil fonctionnera pendant de nombreuses années.
15

WICHTIGE VORSICHTSMASSNAHMEN
Dieses gerät darf nicht von personen verwendet werden, deren körperliche,
geistige oder sinnes-wahrnehmungs-fähigkeiten eingeschränkt sind, wozu auch
kinder zu zählen sind. Es ist sorge dafür zu tragen, dass kinder nicht mit dem
gerät spielen.
NUTZUNGSBEDINGUNGEN
Das gerät nicht betreiben, wenn sein stromkabel beschädigt ist, wenn es
heruntergefallen ist, oder wenn es funktionsstörungen bzw. Offensichtliche
beschädigungen aufweist. Das gerät, sein stromkabel oder die stromsteckdose
niemals in wasser oder eine andere flüssigkeit tauchen. Gerät auf eine stabile,
spritzwassergeschützte arbeitsfläche stellen. Nach dem gebrauch und bei
reinigungsarbeiten den netzstecker ziehen. Benutzen sie zu ihrer sicherheit nur
zubehör und ersatzteile, die für ihr gerät geeignet sind. Das rührelement weist
scharfe kanten auf, weshalb bei der reinigung vorsicht geboten ist. Um
verletzungen und schäden am gerät zu verhüten, hände und utensilien vom
eisbehälter fernhal-ten, wenn der speiseeisbereiter in betrieb ist. Das
stromspeisekabel nicht auf die greifhöhe von kindern herabhängen lassen. Die
belüftungsöffnungen niemals abdecken. Vergewissern sie sich, dass die
versorgungsspannung ihres gerätes dem stromnetz entspricht. Das gerät nur an
eine steckdose mit erdung anschliessen. Zum entfernen des netzsteckers stets
am stecker selbst und nicht am kabel ziehen. Das gerät nur mit korrekt
aufgesetztem deckel betreiben.
Ihr gerät besteht aus diversen recyclefähigen bauteilen. Sorgen sie
für seine korrekte entsor-gung, wenn sie es nicht mehr betreiben.
Die vorgeschriebenen höchstmengen nicht überschreiten:
Speiseeisbereiter Mini - Lussino 0,750 l
Speiseeisbereiter Stella 1,5 l
Speiseeisbereiter Fiume - Giardino 2,5 l
Speiseeisbereiter Zara - Club 2,5 l
Speiseeisbereiter Consul - Ragusa 3,5 l
16

ANWENDUNG
1. Den Netzstecker des Gerätes an eine 220 V-Einphasen-
Stromsteckdose bzw. mit dem am Gerät angegebenen
Spannungswert anschließen.
2. Den Timer-Drehknopf um eine vollständige Umdrehung im
Uhrzeigersinn verstellen.
3. Das Gerät UNBEFÜLLT probeweise betreiben, indem man die
beiden Schalter „Rührbetrieb" [„SPATOLA"] und „Kühlbetrieb"
[„FREDDO"] betätigt.
4. Wenn sichergestellt ist, dass das Gerät einwandfrei funktioniert
und das Rührelement sowie die Feststellschraube korrekt
eingesetzt sind, die Eiszutaten bei stillstehendem Gerät in den
Behälter geben.
DIE ZUTATENMISCHUNG DARF NICHT WARM SEIN UND DIE
VORGESCHRIEBENE HÖCHST-MENGE NICHT ÜBERSCHREITEN.
5. Um die Eisbereitung zu starten, muss der Timer betätigt werden;
es wird eine Timer-Einstellung von 50 Minuten empfohlen, um
eine Unterbrechung der Kühlungsphase vor dem Ende der
Eisbereitung zu vermeiden.
Falls die Kühlung unterbrochen wird, empfiehlt es sich, vor
Neuaufnahme der Eisbereitung mehrere Minuten abzuwarten.
Zur Überprüfung, ob das Speiseeis fertig ist (nach etwa 20-30
Min.), nur den Rührbetriebs-Schalter betätigen.
Zur leichteren Entnahme des fertigen Speiseeises aus dem
Beh ä lt e r em p fi e hlt es s i ch, den K üh l be- t rie b-S c hal ter
abzustellen, das Rührelement jedoch noch mehrere Minuten
weiterlaufen zu lassen. Dadurch vermischt sich die Creme
besser und lässt sich leichter aus dem Behälter entnehmen.
17

Herstellung der Grundcreme
Zutaten
1 lt milch
7 eilgeb
350 gr zucker
1 zitronenschale
Ausführung
Geben Sie das Eigelb in eine geruchlose Schüssel, nach und
nach den Zucher hinzugeben, bis alles gut verrührt ist.
Fügen Sie die warme Milch schluckweise mit der Zitronenschale
unter Rühren hinzu. Setzen Sie alles unter ständigem Rühren
bei schwacher Hitze 8-10 Minuten auf, bis die Zutaten gut
vermischt sind.
Vorschläge
Um vielseitige Geschmacksrichtungen von Eiscremes zu
erhalten, ist es wichting von einer Cremegrundlage auszugehen,
die con Zeit zu Zeit je nach Qualität oder bevorzugter
Geschmacksnote verändert wird.
Mit dieser Cremegrundlage und ein wenig Phantasie können
Sie viele Eiscremes mit verschiedenen Geschmacksrichtungen
zubereiten.
6. REINIGUNG DER MASCHINE
Die Feststellschraube entfernen und die Rührelement-
Baugruppe herausnehmen.
Den Behälter ausspülen.
Das Rührelement wieder einsetzen und seine korrekte Position
überprüfen.
VERMEIDEN SIE, DEN ZENTRALEN STIFT ZU BENETZEN.
ES WIRD EMPFOHLEN, DAS SPEISEEIS NICHT ÜBERMÄSSIG HART WERDEN
ZU LASSEN, DAMIT DAS GETRIEBE KEINEN SCHADEN NIMMT.
PFLEGE
Das Gerät bedarf keiner speziellen Wartungsarbeiten. Bei sachgemäßem
Gebrauch wird es seine volle Leistungsfähigkeit über viele Jahre bewahren.
18

PRECAUCIONES IMPORTANTES
Esta máquina no debe ser utilizada por personas (incluidos los niños) con
capacidades físicas sensoriales o mentales reducidas. Es necesario vigilar a los
niños para evitar que jueguen con la máquina.
CONDICIONES DE EMPLEO
No utilice la máquina con el cable defectuoso o dañado, o si después de una
caída presenta daños visibles o anormalidades de funcionamiento.
No sumerja jamás el aparato, el cable o el enchufe en agua u otro líquido.
Utilice una mesa de trabajo estable lejos de salpicaduras de agua.
Desconecte la máquina cuando no la utilice o durante la limpieza.
Para su seguridad utilice solo accesorios y piezas de recambio aptos para su
aparato.
La espátula tiene partes cortantes, tenga cuidado durante la limpieza.
Mantenga las manos y utensilios lejos del contenedor mientras la máquina está
funcionando para prevenir lesiones personales o daños de la máquina.
No deje el cable de alimentación colgando al alcance de los niños.
No obstruya las parrillas de ventilación.
Asegúrese de que la tensión de alimentación de su máquina corresponda a la de
su instalación eléctrica.
Conecte siempre la máquina a una toma con puesta a tierra.
No desconecte la máquina tirando el cable.
Utilice siempre la máquina con la tapa o cubierta en su lugar.
Si su máquina está compuesta por varios materiales que puedan
reciclarse, al eliminarla déjela en el sitio autorizado de recogida.
No supere la cantidad indicada:
Máquina para hacer helados Mini - Lussino 0,750 litros
Máquina para hacer helados Stella 1,5 litros
Máquina para hacer helados Fiume - Giardino 2,5 litros
Máquina para hacer helados Zara - Club 2,5 litros
Máquina para hacer helados Consul - Ragusa 3,5 litros
19

MODO DE EMPLEO
1. Enchufe la máquina en una toma de corriente monofásica 220 V
o con la tensión indicada en el aparato.
2. Gire una vuelta completa, en el sentido de las agujas del reloj, la
manivela del TIMER.
3. Pruebe el funcionamiento con la máquina VACÍA accionando los
dos interruptores “ESPÁTULA” y “FRÍO”.
4. Después de haberse asegurado de que funciona perfectamente,
vierta la mezcla para hacer el helado con la máquina parada y
siempre con la espátula y el tornillo de parada alojados en sus
asientos.
ES IMPORTANTE QUE LA MEZCLA NO ESTÉ CALIENTE Y NO SUPERE LA
CANTIDAD INDICADA
5. Para iniciar el ciclo de trabajo, el timer tiene que estar accionado,
puesto que cuando se para el ciclo del frío se interrumpe, se
aconseja poner el timer en 50 minutos aproximadamente para
impedir que se interrumpa cuando el helado aún no está listo.
En caso de interrupción espere algunos minutos antes
recomenzar el proceso.
Para controlar si el helado está listo (después de 20/30 minutos
aproximadamente), actúe solo con el interruptor de la espátula.
Al terminar el proceso de elaboración, para obtener una mejor
extracción del helado, apague el frío accionando el interruptor y
deje funcionar solo la espátula algunos minutos. Conseguirá una
mezcla mejor de la crema y esto facilitará la extracción.
6. LIMPIEZA DE LA MÁQUINA
Quite el tornillo de parada y extraiga el bloqueo de la espátula.
Lave el contenedor.
Coloque la espátula prestando atención a la posición exacta.
20
Other manuals for CONSUL
1
This manual suits for next models
4
Table of contents
Languages:
Other Musso Ice Cream Maker manuals