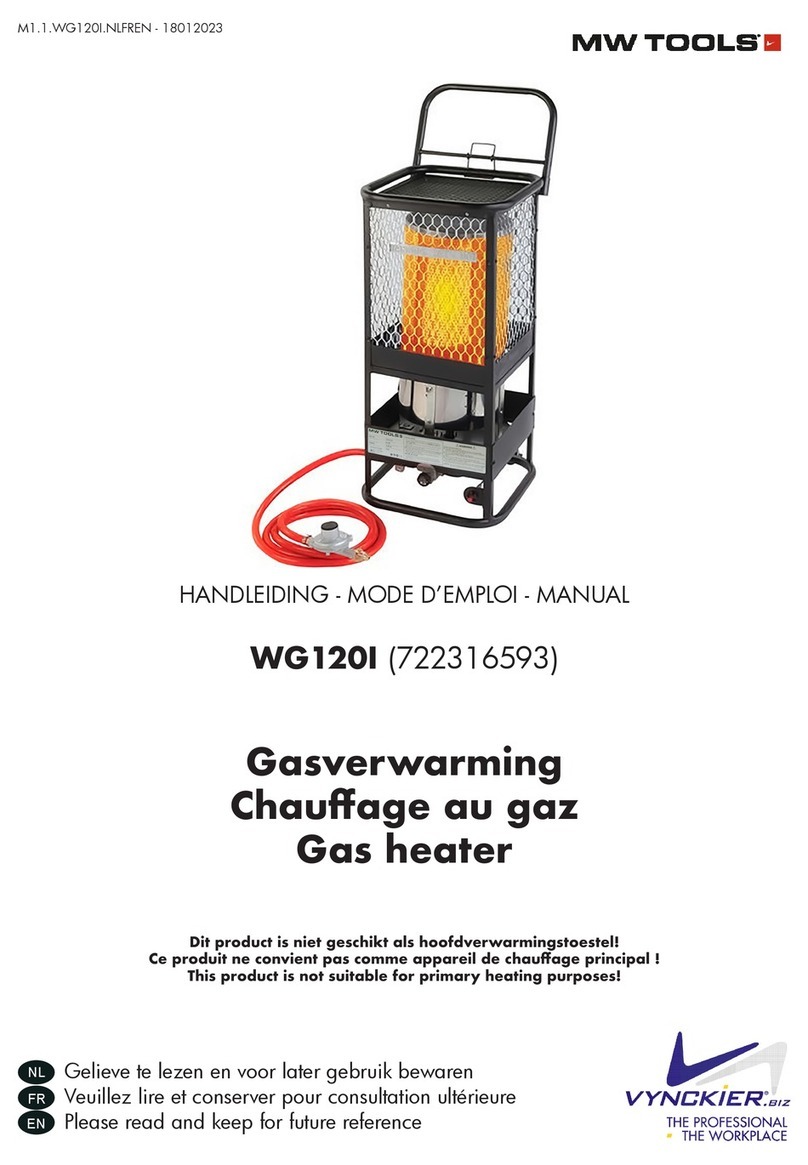
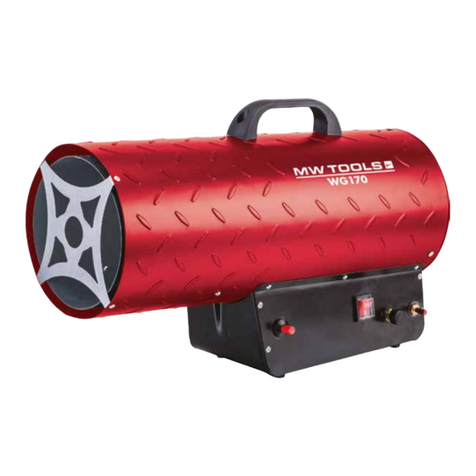
MW TOOLS WG450 User manual

M1.1.WG450.NLFREN - 01022023
HANDLEIDING - MODE D’EMPLOI - MANUAL
WG450 (722316591)
Gasverwarming
Chauage au gaz
Gas heater
Dit product is niet geschikt als hoofdverwarmingstoestel!
Ce produit ne convient pas comme appareil de chauage principal !
This product is not suitable for primary heating purposes!
Gelieve te lezen en voor later gebruik bewaren
Veuillez lire et conserver pour consultation ultérieure
Please read and keep for future reference
FR
EN
NL

2
NL
M1.1.WG450.NLFREN - 01022023
1 GARANTIE
Dit product is gegarandeerd tegen fabricagefouten voor een periode van 12 maanden vanaf de datum van aankoop. Deze
garantie vervalt als blijkt dat het product op een of andere manier is misbruikt of gemanipuleerd, of niet is gebruikt waarvoor
het was bedoeld. Defecte goederen moeten worden teruggestuurd naar de plaats van aankoop, geen enkel product kan naar
ons worden teruggestuurd zonder voorafgaande toestemming.
Deze garantie heeft geen invloed op uw wettelijke rechten.
2 VEILIGHEIDSVOORSCHRIFTEN
Lees, en zorg ervoor dat u de volgende voorzorgsmaatregelen en de gevaren die aan dit soort apparatuur verbonden zijn
volledig begrijpt.
• Controleer het verwarmingstoestel grondig op schade. Gebruik een beschadigd verwarmingstoestel NIET.
• Breng GEEN wijzigingen aan in het verwarmingstoestel en gebruik GEEN verwarmingstoestel dat niet meer in de
oorspronkelijke staat is.
• Gebruik enkel propaangas.
• Gebruik alleen dampvrije propaantoevoer. Als er vragen zijn over dampafname, vraag het dan aan uw
propaanleverancier.
• Monteer de propaancilinders verticaal (afsluiter naar boven). Beveilig ze tegen vallen of omstoten en bescherm ze tegen
beschadiging.
• Plaats propaansgasessen op minstens 2,1 meter afstand van de verwarmer en richt de uitlaat niet op de tanks.
• BELANGRIJK: Gebruik alleen de slang en regelaar die bij het verwarmingstoestel zijn geleverd. Controleer de slang voor
elk gebruik van het verwarmingstoestel. Als er sprake is van overmatige slijtage, of als de slang is doorgesneden, vervang
deze dan door de slang die op de onderdelenlijst staat voordat u het verwarmingstoestel gebruikt.
• Niet gebruiken voor de verwarming van bewoonbare delen van woonhuizen; voor gebruik in openbare gebouwen,
raadpleeg de nationale voorschriften.
• Alleen voor gebruik binnenshuis in goed geventileerde ruimtes.
• Indien op enig moment een gasgeur wordt waargenomen, STOP DAN ONMIDDELLIJK het gebruik totdat de gasbron is
opgespoord en verholpen.
• Installeer de verwarmer zodanig dat deze niet direct wordt blootgesteld aan spatwater, regen en/of druipwater.
• Zorg voor een minimale afstand tot normaal brandbaar materiaal (zoals papier).
• Vanwege de hoge oppervlakte- en uitlaattemperaturen moeten volwassenen en kinderen voldoende vrije ruimte in acht
nemen om brandwonden of ontbranding van kleding te voorkomen.
• Alleen gebruiken op een stabiele, vlakke ondergrond.
• Niet gebruiken in combinatie met kanalen. De luchtinlaat of -uitlaat niet beperken.
• Gebruik alleen de aangegeven elektrische spanning
• Niet verplaatsen, hanteren of onderhouden terwijl het apparaat heet is of brandt.
• Alleen gebruiken in overeenstemming met plaatselijke voorschriften.
• Geen torsiebelasting op de slangen aanbrengen.
2.1 Minimumvereisten voor luchtverversing
• Minimum ventilatie opening 1m2
• Niet gebruiken in ongeventileerde ruimtes.
• De verbrandings- en ventilatieluchtstroom mag niet worden belemmerd.
Inhoud
1. Garantie ...............................................................................................................................................................
2. Veiligheidsvoorschriften ...........................................................................................................................................
3. Elektrische aansluitingen..........................................................................................................................................
4. Propaangas aansluitingen .......................................................................................................................................
5. Montage ...............................................................................................................................................................
6. Voorbereiding........................................................................................................................................................
7. Bedieningsinstructies...............................................................................................................................................
8. Onderhoud, opslag & service ..................................................................................................................................
9. Product eigenschappen ...........................................................................................................................................
10. Onderdelen...........................................................................................................................................................
11. EG conformiteitsverklaring .......................................................................................................................................

3
NL
M1.1.WG450.NLFREN - 01022023
2.2 Minimum afstand tot brandbare materialen
Voorzijde 2,4 m Bovenzijde 1 m
Zijkanten 0,6 m Achterzijde 0,6 m
2.3 Risico’s op koolstofmonoxidevergiftiging
Ook al heeft dit verwarmingstoestel een verbrandingsrendement van bijna 100%, toch produceert het kleine hoeveelheden
koolstofmonoxide.
• Koolstofmonoxide (CO) is giftig.
• Zwangere vrouwen, mensen met een hart- of longaandoening, bloedarmoede of onder invloed van alcohol, of mensen op
grote hoogte lopen meer risico op koolstofmonoxide.
• CO kan zich ophopen in een afgesloten ruimte en als er geen adequate ventilatie is, kan dat fataal zijn.
De vroege symptomen van verstikking door onvoldoende ventilatie zijn:
Hoofdpijn Misselijkheid
Duizeligheid Droge mond of keelpijn
Als iemand deze symptomen vertoont, moet hij ONMIDDELLIJK FRISSE LUCHT KRIJGEN. Schakel de verwarming uit en laat
hem nakijken voordat u hem weer gebruikt. Volg alle waarschuwingen in deze handleiding op.
WE RADEN HET GEBRUIK VAN EEN CO-DETECTOR AAN.
3 ELEKTRISCHE AANSLUITINGEN
AANDACHT: LEES DEZE ELEKTRISCHE VEILIGHEIDSINSTRUCTIES GRONDIG DOOR VOORDAT U HET
PRODUCT OP HET NET AANSLUIT
Sluit het netsnoer aan op een standaard 220-240Volt (50Hz) stroomvoorziening via een goedgekeurde stekker. Als de stekker
moet worden vervangen wegens beschadiging, moet deze worden verwijderd en moet een nieuwe worden aangebracht
volgens de onderstaande bedradingsinstructies. De oude stekker moet veilig worden weggegooid, omdat het insteken in een
stopcontact elektrisch gevaar kan opleveren.
AANDACHT: DE DRADEN IN HET NETSNOER ZN GEKLEURD VOLGENS DE VOLGENDE CODE:
GROEN/GEEL = AARDE, BLAUW = NEUTRAAL, BRUIN = SPANNING.
• De BLAUWE draad moet worden aangesloten op de klem met het opschrift N of zwart.
• De BRUINE draad moet worden aangesloten op de met L gemarkeerde of rood gekleurde KLEM.
• De GELE EN GROENE draad moet worden aangesloten op de klem met de aanduiding E of de groene kleur.
W raden ten zeerste aan dat deze machine op het net wordt aangesloten via een
aardlekschakelaar.
Als u niet zeker bent, raadpleeg dan een gekwaliceerde elektricien. Probeer GEEN reparaties uit te
voeren.

4
NL
M1.1.WG450.NLFREN - 01022023
4 PROPAANGAS VOORZIENING
AANDACHT: HET MONTEREN EN VERWISSELEN VAN DE GASFLESSEN MOET IN EEN VLAMVRE
OMGEVING GEBEUREN
AANDACHT: GEBRUIK UITSLUITEND PROPAANGASFLESSEN DIE VERKRGBAAR ZN B
BOUWMARKTEN OF GASLEVERANCIERS.
Dit draagbare, direct gestookte verwarmingstoestel op gas is ontworpen voor een veilige, efciënte en betrouwbare werking en
is uitsluitend bestemd voor gebruik op propaangas. Zoals bij alle
mechanische apparatuur worden optimale prestaties alleen bereikt als de
juiste bedienings- en onderhoudsprocedures worden gevolgd.
Om het risico van ijsvorming bij langdurig gebruik op maximale
capaciteit te verminderen, moet u een gases met een grotere capaciteit
gebruiken, of twee/drie essen parallel, zoals aangegeven in het diagram.
Zorg ervoor dat de propaangases, gasslang en elektrische kabel
achter het toestel worden geplaatst, uit de buurt van de hitte.
In geval van een gaslek
1. Doof alle rookwaren en andere open vuur.
2. Bedien GEEN elektrische schakelaars en steek geen lucifers aan.
3. Sluit alle toevoerkranen van de gastank of cilinder.
4. Gebruik uw telefoon NIET. Gebruik de telefoon van een buur of uw mobiele telefoon van buiten het gebouw of waar u het
gaslek hebt ontdekt om de brandweer te bellen.
5. Laat iedereen onmiddellijk het gebouw of het gebied verlaten.
Ga het gebouw of het gebied NIET opnieuw binnen totdat een getrainde servicemedewerker of de brandweer zegt dat het
veilig is om terug te keren.

5
NL
M1.1.WG450.NLFREN - 01022023
5 MONTAGE
3.Bevestig de handgreep aan het onderste frame en
zet hem vast met vier machineschroeven. 4. Schuif de as in positie.
5. Plaats de ashoes op elk uiteinde.
6. Plaats de wielen op elk uiteinde.
7. Plaats het afstandsstuk op elk uiteinde.
8. Zet alles vast met een splitpen aan elk uiteinde
van de as.
2. Bevestig het onderste frame en zet het vast met
zes van de meegeleverde machineschroeven.
1. Zet het verwarmingstoestel op zijn kop zoals
afgebeeld. W adviseren de hulp van een
assistent om het verwarmingstoestel
tdens de montage op te tillen en op zn
plaats te houden.

6
NL
M1.1.WG450.NLFREN - 01022023
6 VOORBEREIDING
6.1 Plaatsing
• Plaats het verwarmingstoestel op veilige afstand van brandbare materialen.
• Dit verwarmingstoestel mag niet op houten vloeren of andere brandbare materialen worden geplaatst.
• Bij gebruik dient het verwarmingstoestel te rusten op geschikt isolatiemateriaal van ten minste 2,54 cm dik, dat zich in alle
richtingen boven het verwarmingstoestel uitstrekt.
6.2 Grootte en capaciteit van propaangasessen
De tabel toont bij benadering de grootte van de es die nodig is voor deze
verwarmingstoestellen. Om de graek te gebruiken:
1. Selecteer de laagste verwachte luchttemperatuur (onderaan de graek)
2. Ga recht omhoog naar de gewenste werkingsduur (links)
3. Lees de vereiste esgrootte af.
Gebruik altijd volle gasessen met een goede luchtcirculatie en
zonder vorst op de essen.
6.3 De gases aansluiten
1. Controleer het verwarmingstoestel op mogelijke transportschade. Gebruik het verwarmingstoestel niet als u schade aantreft
2. Volg alle “Algemene veiligheidsmaatregelen”.
3. Sluit een POL-tting (Prest-o-Lite) op de slang/regelaar aan op de propaantank(s).
• Draai de POL-tting linksom in de schroefdraad van de tank. Draai hem stevig vast met een sleutel.
4. Sluit het verwarmingstoestel aan door de slangtting rechtsom te draaien.
• Zorg ervoor dat alle gasaansluitingen goed vastzitten.
5. Open de gaskraan van de cilinder en controleer alle gasverbindingen met een oplossing van water en zeep.
GEBRUIK GEEN VLAM.
6. Sluit het netsnoer aan op een 220-240V, 50Hz, stopcontact.
7 BEDIENINGSINSTRUCTIES
AANDACHT: VOORDAT U HET VERWARMINGSTOESTEL START, MOET U ERVOOR ZORGEN DAT
DE MINIMALE VENTILATIEVOORSCHRIFTEN IN ACHT WORDEN GENOMEN OM HET RISICO VAN
KOOLMONOXIDEVERGIFTIGING TE VOORKOMEN.
7.1 Opstarten verwarmingstoestel
1. Open de propaantoevoerkraan op de propaantank(s) langzaam.
• Als deze niet langzaam wordt geopend, zal de terugslagklep op de propaantank de gasstroom stoppen. Sluit in dat
geval de propaantoevoerkraan dicht en langzaam weer openen
2. Zet de thermostaat op ‘hoog’.
3. Zet de hoofdschakelaar op ON (I).
• Het verwarmingstoestel zal automatisch ontsteken.
4. Stel de gewenste warmteafgifte in
5. Stel de thermostaat in op de gewenste stand.
• Het verwarmingstoestel gaat automatisch uit en aan naarmate de
luchttemperatuur in het verwarmingsgebied varieert.

7
NL
M1.1.WG450.NLFREN - 01022023
7.2 Verwarmingstoestel uitschakelen
1. Sluit de klep van de propaangases goed af.
2. Blijf het verwarmingstoestel gebruiken totdat alle brandstof in de slang is verbrand
3. Zet de stroomschakelaar in de stand OFF (O).
4. Zet de verwarmingsthermostaat op “off”.
5. Haal de stekker van het verwarmingstoestel uit het stopcontact.
7.3 Herstart na veiligheidsstop
1. Sluit de klep van de propaanes goed af.
2. Haal de stekker uit het verwarmingstoestel.
3. Wacht 5 minuten.
4. Start het verwarmingstoestel opnieuw op volgens de bovenstaande opstartprocedure.
8 ONDERHOUD, OPSLAG & SERVICE
AANDACHT: OM PERSOONLK LETSEL TE VOORKOMEN, DIENT U VOOR ONDERHOUD DE
STEKKER VAN HET VERWARMINGSTOESTEL UIT HET STOPCONTACT TE HALEN.
8.1 Onderhoud & opslag
1. Het verwarmingstoestel moet ten minste eenmaal per jaar door een gekwaliceerd persoon worden geïnspecteerd.
2. Controleer vóór elk gebruik de aansluiting van de zachte “0”-ring op de bolle kant van de POL-tting. Als de “0”-ring
afgesneden, geschuurd of anders beschadigd is, moet hij worden vervangen.
3. Schakel het gas bij de LPG-toevoercilinder(s) uit als het verwarmingstoestel niet in gebruik is.
4. Wanneer het verwarmingstoestel binnenshuis moet worden opgeslagen, moet de verbinding tussen de gases(sen) en
het verwarmingstoestel worden verbroken en moeten de gases(sen) uit het verwarmingstoestel worden verwijderd en
buitenshuis worden opgeslagen in overeenstemming met de plaatselijke voorschriften.
8.2 Service
Er kan gevaar ontstaan indien een verwarmingstoestel wordt gebruikt dat is gewijzigd of niet naar behoren functioneert.
Wanneer het verwarmingstoestel goed werkt:
• blijft de vlam binnen het toestel
• is de vlam overwegend blauw met misschien wat gele puntjes.
• is er geen sterke onaangename geur, brandende ogen of ander lichamelijk ongemak.
• is er geen rook of roet binnen of buiten het verwarmingstoestel.
• is er geen ongeplande of onverklaarbare uitschakeling van het verwarmingstoestel.
De onderdelenlijsten en het bedradingsschema tonen het verwarmingstoestel zoals het werd samengesteld. Gebruik geen
verwarmingstoestel dat anders is dan afgebeeld. Gebruik in dit verband alleen de slang, regelaar en cilinderaansluiting (POL-
tting) die bij het verwarmingstoestel zijn geleverd.Een verwarmingstoestel dat niet goed werkt, moet worden gerepareerd,
maar alleen door een getraind, ervaren onderhoudspersoon.

8
NL
M1.1.WG450.NLFREN - 01022023
9 PRODUCT EIGENSCHAPPEN
Model WG450
Gas type LPG & Propane
BTU waarde 240,000-450,000
Maximum drukstroom Flesdruk
Minimum druk 1.5 Bar
Output Regelaar 20 PSIG (0.15MPa)
Elektrische Input 220-240V, 50Hz
Ontsteking Directe vonk
Primaire vlamcontrole Vaste staat 10-15 sec timing
Temperatuurbereik 15°C - 35°C
Brandstofverbruik 5.0 - 9.5 kg/hr
Brandstofopening No 1
Grootte brandstofopening 2.35 mm
Verwarmde luchtuitvoer 2376 m3/h
Gewicht 24.6 kg
Afmetingen 994 x 404 x 621 mm

9
FR
M1.1.WG450.NLFREN - 01022023
Table des matières
1. Garantie ..............................................................................................................................................................
2. Consignes de sécurité .............................................................................................................................................
3. Connexions électriques............................................................................................................................................
4. Alimentation en gaz propane...................................................................................................................................
5. Assemblage...........................................................................................................................................................
6. Préparation............................................................................................................................................................
7. Instructions d'utilisation............................................................................................................................................
8. Maintenance, stockage & service .............................................................................................................................
9. Spécications du produit .........................................................................................................................................
10. Pièces détachées ....................................................................................................................................................
11. Déclaration de conformité CE...................................................................................................................................
1 GARANTIE
Ce produit est garanti contre tout défaut de fabrication pendant une période de 12 mois à compter de la date d’achat. Cette
garantie n’est pas valable s’il s’avère que le produit a été utilisé de manière abusive ou modiée de quelque manière que ce
soit, ou qu’il n’a pas été utilisé aux ns pour lesquelles il a été conçu. Les produits défectueux doivent être renvoyés à leur lieu
d’achat. Aucun produit ne peut nous être renvoyé sans autorisation préalable.
Cette garantie n’affecte pas vos droits statutaires.
2 CONSIGNES DE SÉCURITÉ
Lisez et assurez-vous de bien comprendre les précautions suivantes et les dangers associés à ce type d’équipement.
• Vériez soigneusement que l’appareil n’est pas endommagé. NE PAS utiliser un appareil de chauffage endommagé.
• NE PAS modier l’appareil et NE PAS utiliser un appareil qui n’est plus dans son état d’origine.
• Utilisez uniquement du gaz propane
• N’utilisez que du propane sans vapeur. Si vous avez des questions sur l’admission des vapeurs, demandez à votre
fournisseur de propane.
• Montez les bouteilles de propane verticalement (robinet d’arrêt vers le haut). Empêchez-les de tomber ou d’être renversées
et protégez-les contre les dommages.
• Placez les réservoirs de propane à au moins 2,1 mètres de l’appareil et ne dirigez pas l’échappement vers les réservoirs
• IMPORTANT: N’utilisez que l’ensemble tuyau et régulateur fourni avec le chauffage. Inspectez le tuyau avant chaque
utilisation du chauffage. En cas d’abrasion ou d’usure excessive, ou si le tuyau est coupé, remplacez-le par le tuyau indiqué
dans la liste des pièces avant d’utiliser le chauffage.
• Ne pas utiliser pour le chauffage des zones habitables des locaux domestiques ; pour l’utilisation dans les bâtiments
publics, se référer aux réglementations nationales.
• A utiliser à l’intérieur uniquement dans des endroits bien ventilés.
• Si, à tout moment, une odeur de gaz est détectée, ARRÊTEZ IMMÉDIATEMENT le fonctionnement jusqu’à ce que la source
de gaz ait été localisée et corrigée.
• Installez le chauffage de manière à ce qu’il ne soit pas directement exposé aux projections d’eau, à la pluie et/ou aux
gouttes d’eau.
• Maintenez une distance minimale par rapport aux matériaux combustibles normaux (par exemple, le papier).
• En raison des températures élevées de la surface et de l’échappement, les adultes et les enfants doivent respecter des
distances sufsantes pour éviter les brûlures ou l’inammation des vêtements.
• N’utilisez l’appareil que sur une surface stable et plane.
• Ne pas utiliser avec des conduits. Ne pas restreindre l’entrée ou la sortie d’air.
• Utilisez uniquement la tension électrique spéciée
• Ne pas déplacer, manipuler ou entretenir l’appareil lorsqu’il est chaud ou brûlant.
• N’utilisez l’appareil qu’en conformité avec les codes locaux.
• Ne soumettez pas les tuyaux à des contraintes de torsion.
2.1 Exigences minimales d’ouverture de ventilation
• Ouverture de ventilation minimale de 1m2
• Ne pas utiliser dans des zones non ventilées.
• Le ux d’air de combustion et de ventilation ne peut pas être obstrué.

10
FR
M1.1.WG450.NLFREN - 01022023
2.2 Distances minmales par rapport aux combustibles
Devant 2,4 m Top 1 m
Côtés 0,6 m Arrière 0,6 m
2.3 Risques d’intoxication au monoxyde de carbone
Même si ce chauffage fonctionne avec une efcacité de combustion proche de 100 %, il produit tout de même de petites
quantités de monoxyde de carbone.
• Le monoxyde de carbone (CO) est toxique.
• Les femmes enceintes, les personnes souffrant de problèmes cardiaques ou pulmonaires, d’anémie ou sous l’inuence de
l’alcool, ou les personnes vivant à haute altitude, sont plus susceptibles d’être affectées par le monoxyde de carbone.
• Le CO peut s’accumuler dans un espace conné et l’absence de ventilation adéquate peut être fatale.
Les premiers symptômes d’une asphyxie causée par une ventilation inadéquate sont les suivants:
Mal de tête Nausées
Étourdissements Bouche sèche ou mal de gorge
Si une personne présente ces symptômes, elle doit IMMÉDIATEMENT APPORTER DE L’AIR FRAIS. Éteindre le chauffage et le
faire réviser avant de l’utiliser à nouveau. Assurez-vous de suivre tous les avertissements de ce manue.
NOUS RECOMMANDONS L’UTILISATION D’UN DÉTECTEUR DE MONOXYDE DE CARBONE
3 CONNEXIONS ÉLECTRIQUES
ATTENTION: LISEZ ATTENTIVEMENT CES CONSIGNES DE SÉCURITÉ ÉLECTRIQUE AVANT DE
CONNECTER LE PRODUIT AU RÉSEAU ÉLECTRIQUE..
Branchez le cordon d’alimentation sur un réseau électrique standard de 220-240Volts (50Hz) à l’aide d’une che homologuée.
Si la che doit être changée parce qu’elle est endommagée, elle doit être retirée et remplacée par une nouvelle, en suivant les
instructions de câblage indiquées ci-dessous. L’ancienne che doit être mise au rebut en toute sécurité, car son insertion dans
une prise de courant peut entraîner un risque électrique.
ATTENTION: LES FILS DU CÂBLE D’ALIMENTATION SONT COLORÉS SELON LES CODES SUIVANTS
CODE : VERT/JAUNE = TERRE, BLEU = NEUTRE, MARRON = COURANT.
• Le l BLEU doit être connecté à la borne marquée N ou de couleur noire.
• Le l MARRON doit être connecté à la borne marquée L ou de couleur rouge.
• Le l JAUNE ET VERT doit être connecté à la borne marquée E ou de couleur verte
Nous recommandons fortement que cette machine soit connectée au réseau électrique par
l’intermédiaire d’un dispositif à courant résiduel (RCD).
Si vous n’êtes pas sûr, consultez un électricien qualié. N’essayez PAS d’eectuer des réparations.

11
FR
M1.1.WG450.NLFREN - 01022023
4 ALIMENTATION EN GAZ PROPANE
ATTENTION: LE MONTAGE ET LE REMPLACEMENT DES BOUTEILLES DE GAZ DOIVENT ÊTRE
EFFECTUÉS DANS UNE ATMOSPHÈRE SANS FLAMME.
ATTENTION: VOUS NE DEVEZ UTILISER QUE DES BOUTEILLES DE GAZ PROPANE DISPONIBLES
AUPRÈS DES MARCHANDS DE MATÉRIAUX DE CONSTRUCTION OU DES FOURNISSEURS DE GAZ.
Ce chauffage au gaz portable à combustion directe est conçu pour offrir
un fonctionnement sûr, efcace et able, et est destiné à être utilisé avec
du gaz propane uniquement. Comme pour tout équipement mécanique,
des performances optimales ne seront obtenues que si les procédures
d’utilisation et d’entretien correctes sont respectées.
An de réduire le risque de givrage en cas de fonctionnement prolongé
à la capacité maximale, vous devez utiliser une bouteille de gaz
de plus grande capacité, ou deux/trois bouteilles en parallèle comme
indiqué sur le schéma.
Assurez-vous que la bouteille de gaz propane, le tuyau de gaz et le câble électrique soient sont placés derrière l’appareil, loin
de la chaleur.
En cas de fuite de gaz
1. Éteignez toutes les matières fumantes et autres ammes
2. Ne pas utiliser d’interrupteurs électriques ou d’allumettes.
3. Fermez tous les robinets d’alimentation du réservoir ou de la bouteille de gaz
4. N’utilisez PAS votre téléphone. UTILISEZ le téléphone d’un voisin ou votre téléphone portable depuis l’extérieur du bâtiment
ou l’endroit où vous avez détecté la fuite de gaz pour appeler les pompiers
5. Faites immédiatement sortir tout le monde du bâtiment ou de la zone.
Ne retournez PAS dans le bâtiment ou la zone avant qu’une personne qualiée ou les pompiers ne vous disent que vous
pouvez y retourner en toute sécurité.

12
FR
M1.1.WG450.NLFREN - 01022023
5 ASSEMBLAGE
3. Attachez la poignée au cadre inférieur et xez-la
à l’aide de quatre vis à métaux. 4. Faites glisser les axes en position.
5. Placez le manchon de l’axe sur chaque extrémité.
6. Placez les roues sur chaque extrémité.
7. Placez l’entretoise sur chaque extrémité.
8. Fixez le tout en place avec une goupille fendue à
chaque extrémité de l’axe.
2. Attachez le cadre inférieur et xez-le à l’aide de
six des vis à métaux fournies.
1. Mettez le chauffage en position verticale comme
indiqué. Nous recommandons l’aide d’un
assistant pour soulever et stabiliser le
chauage pendant le montage.

13
FR
M1.1.WG450.NLFREN - 01022023
6 PRÉPARATION
6.1 Placement
• Placez le chauffage à une distance sécurisée des matériaux combustibles.
• Ce chauffage ne doit pas être placé sur des planchers en bois ou autres matériaux combustibles.
• Lorsqu’il est utilisé, le chauffage doit reposer sur un matériau isolant approprié d’au moins 2,54 cm d’épaisseur et
dépassant le chauffage de 1m ou plus dans toutes les directions.
6.2 Taille et capacité des bouteilles de propane
Le tableau indique la taille approximative de la bouteille requise pour ces chauffages
Pour utiliser le tableau:
1. Sélectionnez la température de l’air la plus basse prévue (en bas du tableau)
2. Déplacez-vous directement vers le haut jusqu’au moment de l’opération souhaité
(côté gauche)
3. Lisez la taille du cylindre requise.
Utilisez toujours des bouteilles pleines, avec une bonne circulation d’air et sans
givre sur les bouteilles.
6.3 Raccordement de la bouteille de gaz
1. Vériez que le chauffage n’a pas été endommagé pendant le transport. Si c’est le cas, n’utilisez pas le chauffage.
2. Suivez toutes les précautions de “Consignes de sécurité”.
3. Connectez un raccord POL (Prest-o-Lite) sur l’ensemble tuyau/régulateur au(x) réservoir(s) de propane.
• Tournez le raccord POL dans le sens inverse des aiguilles d’une montre dans les lets du réservoir. Serrez fermement à
l’aide d’une clé.
4. Raccordez le tuyau au chauffage en tournant le raccord du tuyau dans le sens des aiguilles d’une montre.
• Assurez-vous que tous les raccords de gaz sont bien xés.
5. Ouvrez le robinet de gaz de la bouteille et vériez tous les raccords de gaz avec une solution d’eau et de savon.
N’UTILISEZ PAS DE FLAMME.
6. Branchez le câble d’alimentation à une prise de courant de 220-240V, 50Hz.
7 INSTRUCTIONS D’UTILISATION
ATTENTION: AVANT DE METTRE LE CHAUFFAGE EN MARCHE, VOUS DEVEZ VOUS ASSURER
QUE LES EXIGENCES MINIMALES DE VENTILATION SONT RESPECTÉES AFIN D’ÉVITER TOUT RISQUE
D’INTOXICATION AU MONOXYDE DE CARBONE
7.1 Démarrage du chauage
1. Ouvrez lentement le robinet d’alimentation en propane de la ou des bouteilles de propane.
• S’il n’est pas ouvert lentement, le clapet de retenue de l’excès de débit sur la bouteille de propane arrêtera l’écoulement
du gaz. Si cela se produit, fermez le robinet d’alimentation en propane et ouvrez-le à nouveau lentement.
2. Réglez le thermostat sur ‘high’.
3. Placez l’interrupteur d’alimentation sur la position ON (I).
• Le chauffage s’allume automatiquement..
4. Réglez la puissance de chauffe sur le réglage souhaité.
5. Réglez le thermostat sur le réglage souhaité.
• Le chauffage s’éteint et se rallume automatiquement lorsque la température
de l’air de l’air dans la zone du chauffage.

14
FR
M1.1.WG450.NLFREN - 01022023
7.2 Extinction du chauage
1. Fermez solidement le robinet de la bouteille de propane.
2. Continuez à faire fonctionner le chauffage jusqu’à ce que tout le carburant dans le tuyau soit brûlé.
3. Mettre l’interrupteur d’alimentation en position OFF (O).
4. Mettez le thermostat du chauffage sur “off”
5. Débranchez le chauffage
7.3 Redémarrage après arrêt de sécurité
1. Fermez fermement le robinet de la bouteille de propane
2. Débranchez le chauffage.
3. Patientez 5 minutes.
4. Redémarrez, en suivant la procédure de démarrage du chauffage ci-dessus.
8 MAINTENANCE, STOCKAGE & SERVICE
ATTENTION: POUR ÉVITER TOUTE BLESSURE, DÉBRANCHEZ LE CHAUFFAGE DE L’ALIMENTATION
PRINCIPALE AVANT DE PROCÉDER À L’ENTRETIEN
8.1 Maintenance & stockage
1. Le chauffage doit être inspecté au moins une fois par an par une personne qualiée.
2. Avant chaque utilisation, vériez le positionnement de la bague souple “0” au niveau du nez du raccord POL. Si la bague
“0” est coupée, éraée ou autrement endommagée, remplacez-la.
3. Fermez le gaz à la (aux) bouteille(s) d’alimentation en gaz de pétrole liquéé lorsque le chauffage n’est pas utilisé
4. Lorsque le chauffage doit être stocké à l’intérieur, la connexion entre la ou les bouteilles de gaz GPL et le chauffage doit
être déconnectée et la ou les bouteilles doivent être retirées du chauffage et stockées à l’extérieur conformément aux
réglementations locales
8.2 Service
L’utilisation d’un chauffage qui a été modié ou qui ne fonctionne pas correctement peut entraîner une situation dangereuse.
Lorsque le chauffage fonctionne bien:
• La amme est contenue dans le chauffage.
• La amme est essentiellement bleue avec peut-être un peu de jaune.
• Il n’y a pas d’odeur désagréable forte, de sensation de brûlure dans les yeux ou d’autres désagréments physiques.
• Il n’y a pas de fumée ou de suie à l’intérieur ou à l’extérieur du chauffage.
• Il n’y a pas d’arrêts non planiés ou inexpliqués du chauffage.
Les listes de pièces et le schéma de câblage montrent le chauffage tel qu’il a été construit. N’utilisez pas un chauffage
différent de celui qui est présenté. N’utilisez que le tuyau, le détendeur et le raccord de bouteille (raccord POL) fournis avec
le chauffage.Un chauffage qui ne fonctionne pas correctement doit être réparé, mais uniquement par un technicien qualié et
expérimenté.

15
FR
M1.1.WG450.NLFREN - 01022023
9 SPÉCIFICATIONS DU PRODUIT
ModèlE WG450
Type de gaz LPG & Propane
Valeur BTU 240,000-450,000
Débit pression maximum Pression de la bouteille
Pression minimum 1.5 Bar
Sortie du régulateur 20 PSIG (0.15MPa)
Alimentation électrique 220-240V, 50Hz
Allumage Direct Spark
Contrôle de la amme primaire Etat solide 10-15 sec timing
Plage de température de fonctionnement 15°C - 35°C
Consommation de carburant 5.0 - 9.5 kg/hr
Orice de carburant N° de port 1
Orice de carburant Taille du port 2.35 mm
Sortie d’air chauffé 2376 m3/h
Poids 24.6 kg
Dimensions 994 x 404 x 621 mm

16
EN
M1.1.WG450.NLFREN - 01022023
1 GUARANTEE
This product is guaranteed against faulty manufacture for a period of 12 months from the date of purchase. Please keep your
receipt which will be required as proof of purchase.This guarantee is invalid if the product is found to have been abused or
tampered with in any way, or not used for the purpose for which it was intended. Faulty goods should be returned to their place
of purchase, no product can be returned to us without prior permission.
This guarantee does not effect your statutory rights.
2 SAFETY INSTRUCTIONS
Read, and make sure you fully understand the following precautions and the hazards associated with this type of equipment.
• Check the heater thoroughly for damage. DO NOT operate a damaged heater.
• DO NOT modify the heater or operate a heater which has been modied from its original condition.
• Use only propane gas.
• Use only VAPOUR WITHDRAWAL propane supply. If there is any question about vapour withdrawal, ask your propane
dealer.
• Mount the propane cylinders vertically (shut-off valve up). Secure them from falling or being knocked over and protect them
from damage.
• Locate propane containers at least 7ft. (2.13), from the heater and do not direct the exhaust toward containers.
• IMPORTANT: Use only the hose and regulator assembly provided with the heater. Inspect the hose assembly before each
use of the heater. If there is excessive abrasion or wear, or hose is cut, replace with the hose assembly listed on the parts list
before using the heater.
• Not to be used for the heating of habitable areas of domestic premises.
• For indoor use only in well ventilated areas.
• If at any time gas odor is detected, IMMEDIATELY STOP operation until the source of gas has been located and corrected.
• Install the heater such that it is not directly exposed to water spray, rain and/or dripping water.
• Maintain minimum clearance from normal combustible material (e.g. like paper).
• Due to the high surface and exhaust temperatures, adults and children must observe sufcient clearances to avoid burns or
clothing ignition
• Operate only on a stable, level surface.
• Do not use with duct work. Do not restrict air inlet or exit.
• Use only the electrical voltage specied.
• Do not move, handle or service while hot or burning.
• Use only in accordance with local codes.
• Do not place torsional stress on any hoses.
2.1 Minimum fresh air opening requirements
• Minimum ventilation 3ft2
• Do not use in unventilated areas.
• The ow of combustion and ventilation air must not be obstructed.
Contents
1. Guarantee ............................................................................................................................................................
2. Safety instructions...................................................................................................................................................
3. Electrical connections..............................................................................................................................................
4. Propane gas supply ................................................................................................................................................
5. Assembly...............................................................................................................................................................
6. Preparation............................................................................................................................................................
7. Operating instructions.............................................................................................................................................
8. Maintenance, storage & servicing.............................................................................................................................
9. Product specications..............................................................................................................................................
10. Spare parts............................................................................................................................................................
11. EC declaration of conformity....................................................................................................................................

17
EN
M1.1.WG450.NLFREN - 01022023
2.2 Minimum clearances from combustibles
Front 8 Ft Top 3 Ft
Sides 2 Ft Rear 2 Ft
2.3 Risks of carbon monoxide poisoning
Even though this heater operates very close to 100 percent combustion efciency, it still produces small amounts of carbon
monoxide.
• Carbon Monoxide (CO) is toxic.
• Pregnant women, persons with a heart or lung condition, anaemia or under the inuence of alcohol, or those at high altitude,
are more likely to be effected by Carbon Monoxide.
• CO can build up in a conned space and failure to provide adequate ventilation can be fatal.
The early symptoms of asphyxiation caused by inadequate ventilation are:
Headache Nausea
Dizziness Dry mouth or sore throat
Should anyone show these symptoms, they must GET FRESH AIR IMMEDIATELY. Turn off the heater and have it serviced before
using again. Be sure to follow all warnings in this manual.
WE RECOMMEND THE USE OF A CARBON MONOXIDE DETECTOR
3 ELECTRICAL CONNECTIONS
WARNING: READ THESE ELECTRICAL SAFETY INSTRUCTIONS THOROUGHLY BEFORE CONNECTING
THE PRODUCT TO THE MAINS SUPPLY.
Connect the mains lead to a standard, 220-240Volt (50Hz) electrical supply through an approved plug. If the plug has to be
changed because of damage, it must be removed and a replacement tted, following the wiring instructions shown below. The
old plug must be discarded safely, as insertion into a power socket could cause an electrical hazard.
WARNING: WIRES IN THE MAINS LEAD ARE COLOURED IN ACCORDANCE WITH THE FOLLOWING
CODE: GREEN/YELLOW = EARTH, BLUE = NEUTRAL, BROWN = LIVE.
• The BLUE wire must be connected to the terminal which is marked N or coloured black.
• The BROWN wire must be connected to theterminal which is marked L or coloured red.
• The YELLOW AND GREEN wire must be connected to the terminal which is marked E or or coloured green.
We strongly recommend that this machine is connected to the mains supply through a Residual
Current Device (RCD)
If you are not sure, consult a qualied electrician. DO NOT try to do any repairs.

18
EN
M1.1.WG450.NLFREN - 01022023
2.4 If you smell gas
LP gas and natural gas have man-made odorants added specically for detection of fuel gas leaks.
If a gas leak occurs you should be able to smell the fuel gas. Since Propane (LP) is heavier than air you should smell for the
gas odour near to the oor. ANY GAS ODOUR IS YOUR SIGNAL TO GO INTO IMMEDIATE ACTION!
4 PROPANE GAS SUPPLY
WARNING: THE FITTING AND CHANGING OF THE GAS CYLINDERS MUST BE CARRIED OUT IN A
FLAME FREE ATMOSPHERE.
WARNING: YOU SHOULD ONLY USE PROPANE GAS CYLINDERS AVAILABLE FROM BUILDERS
MERCHANTS OR GAS SUPPLIERS.
This portable, direct-red gas heater is designed to give safe, efcient and
reliable operation, and is for use with propane gas only. As with all
mechanical equipment, optimum performance will only be achieved if
the correct operation and servicing procedures are followed.
In order to reduce the risk of icing up when operating at long periods at
maximum capacity, you should use a larger capacity gas bottle,
or two/three bottles in parallel as shown in the diagram.
Ensure the Propane gas bottle, gas hose and electric cable, are
positioned behind the unit, away from the heat.
In the event of a gas leak
1. Extinguish all smoking materials and other open ames.
2. Do NOT operate electric switches or light matches.
3. Close all supply valves on gas tank or cylinder.
4. Do NOT use your phone. USE a neighbour’s phone or your mobile phone from outside the building or wherever you
detected the gas leak to call the re service.
5. Immediately get everyone out of the building or area.
Do NOT re-enter the building, or area until a trained service person or the re service advises it is safe to return.

19
EN
M1.1.WG450.NLFREN - 01022023
5 ASSEMBLY
3. Attach the handle to the lower frame and secure
using four machine screws.
4. Slide the axle into position.
5. Place the axle sleeve onto each end.
6. Place the wheels onto each end.
7. Place the spacer onto each end.
8. Secure everything in place with a cotter pin on
each end of the axle.
2. Attach the lower frame and secure using six of the
machine screws provided.
1. Stand the heater on end as shown. We
recommend the help of an assistant to lift
and steady the heater during assembly.

20
EN
M1.1.WG450.NLFREN - 01022023
6 PREPARATION
6.1 Location
• Position the heater at a safe distance from combustible materials.
• This heater must not be placed on wooden oors or other combustible materials.
• When used, the heater should rest on suitable insulating material at least 1 inch thick and extending 3 ft or more beyond
the heater in all directions.
6.2 Size and capacity of propane cylinders
The chart shows the approximate size of the cylinder required for these heaters.
To use the chart:
1. Select the lowest air temperature expected (at the bottom of the chart)
2. Move straight up to time of operation desired (left side)
3. Read the cylinder size required.
Always use full cylinders with good air circulation and no frost on the cylinders.
6.3 Connecting the gas bottle
1. Check the heater for possible shipping damage. If any is found do not use the heater.
2. Follow all of the “General Safety” precautions.
3. Connect a POL (Prest-o-Lite) tting on hose/regulator assembly to the propane tank(s).
• Turn the POL tting anti-clockwise into the threads on the tank. Tighten rmly using a wrench.
4. Connect the hose to the heater by rotating the hose tting clockwise.
• Make sure that all gas connections are secure.
5. Open the cylinder’s gas valve and check all gas connections with a soap and water solution. DO NOT USE A FLAME.
6. Connect the power cable to a 220-240V, 50Hz, mains socket.
7 OPERATING INSTRUCTIONS
WARNING: BEFORE STARTING THE HEATER, YOU MUST ENSURE THAT THE MINIMUM
VENTILATION REQUIREMENTS ARE OBSERVED TO AVOID THE RISK OF CARBON MONOXIDE
POISONING
7.1 Heater start up
1. Open the propane supply valve on the propane tank(s) slowly.
• If not opened slowly, the excess-ow check valve on the propane tank will stop the gas ow. If this happens, close the
propane supply valve and open again slowly
2. Set thermostat to ‘high’.
3. Set the power switch to the ON (I) position.
• The heater will ignite automatically.
4. Adjust the heat output to the desired setting.
5. Set the thermostat to the required setting.
• The heater will turn off and on automatically as the air temperature
varies in the heater area.
This manual suits for next models
1
Table of contents
Languages:
Other MW TOOLS Gas Heater manuals