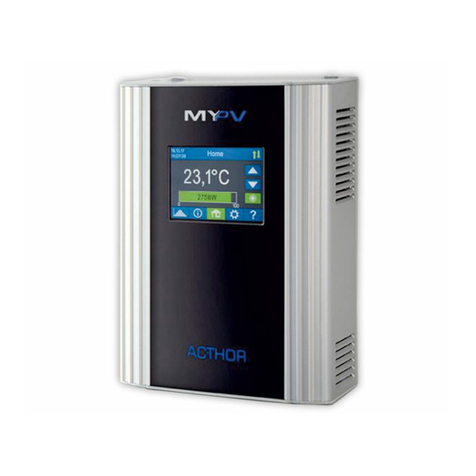
MYPV AC-THOR User manual

AC•THOR®/ AC•THOR®9s Operating instructions, version a0020806 1
AC•THOR / AC•THOR 9s
Photovoltaic-Power-Manager for hot water and space heating
Operation Manual

AC•THOR®/ AC•THOR®9s Operating instructions, version a0020806 2
Contents
1. Assembly .............................................................................................................................. 4
2. Commissioning...................................................................................................................... 4
1. Select language................................................................................................................. 4
2. Select operating mode ....................................................................................................... 4
3. Select control of the control (the signal source) for the AC•THOR......................................... 4
4. Temperature sensor assignment and activation ................................................................... 7
5. Save the settings............................................................................................................... 7
3. Controls and displays............................................................................................................. 8
Homescreen.......................................................................................................................... 8
Status symbol .................................................................................................................... 9
Data logger........................................................................................................................... 9
Status information on the display ........................................................................................... 9
Settings .............................................................................................................................. 11
Help ................................................................................................................................... 11
4. Operating modes................................................................................................................. 11
M1: Hot water..................................................................................................................... 11
Explanation...................................................................................................................... 11
Specific settings for operating mode M1 ............................................................................ 12
Temperature sensors (only with AC•THOR 9s)................................................................... 14
M2: Hot water stratified charging ......................................................................................... 14
Explanation...................................................................................................................... 14
Specific settings for operating mode M2 ............................................................................ 15
M3: Hot water 6 kW/18kW................................................................................................... 16
Explanation...................................................................................................................... 16
Load measurement on relays with my-PV Meter (recommended) ........................................ 17
Specific settings for operating mode M3 ............................................................................ 18
M4: Hot water + Heat pump................................................................................................ 19
Explanation...................................................................................................................... 19
Specific settings for operating mode M4 ............................................................................ 20
M5: Hot water + Space heating............................................................................................ 21
Explanation...................................................................................................................... 21
Specific settings for operating mode M5 ............................................................................ 22
Temperature sensors ....................................................................................................... 23
M6: Space heating............................................................................................................... 23
Explanation...................................................................................................................... 24
Specific settings for operating mode M6 ............................................................................ 24
Temperature sensors ....................................................................................................... 24
M7: Hot water + PWM......................................................................................................... 25
Explanation...................................................................................................................... 25
Specific settings for operating mode M7 ............................................................................ 26
M8: Frequency mode........................................................................................................... 27
5. General settings .................................................................................................................. 27

AC•THOR®/ AC•THOR®9s Operating instructions, version a0020806 3
6. Web-Interface..................................................................................................................... 29
Search for devices in the network......................................................................................... 29
Systems without Internet access .......................................................................................... 31
Connect Web-Interface........................................................................................................ 31
Home (homepage) .............................................................................................................. 32
Data logger......................................................................................................................... 32
Status information............................................................................................................... 33
Settings .............................................................................................................................. 34
Special setting possibilities in the Web-Interface ................................................................... 35
Special settings for operating mode M3 (6kW/18 kW) ........................................................ 35
Legionella boost outputs (only with AC•THOR 9s) .............................................................. 36
Control Settings ............................................................................................................... 36
Measurement Settings...................................................................................................... 39
EV Function ..................................................................................................................... 41
Multi units ....................................................................................................................... 42
Cloud Mode ..................................................................................................................... 43
Debug-Mode.................................................................................................................... 45
Help ................................................................................................................................... 45
7. Frequency control ............................................................................................................... 45
Explanation ..................................................................................................................... 45
Specific settings for Frequency control .............................................................................. 46
8. Potential-free input for external control ................................................................................ 46
9. Modbus RTU connection for external control ......................................................................... 47
10. Firmware update................................................................................................................. 47
Update from server ............................................................................................................. 47
Manual Update ................................................................................................................ 47
Update with SD card............................................................................................................ 48
11. Status codes ....................................................................................................................... 48
12. Temperature sensors: Assignment and function (only with AC•THOR 9s)................................ 48
13. Fault temperature sensors ................................................................................................... 48
14. Error messages on the Display ............................................................................................. 49
15. Fault signals by the AC•THOR Logo...................................................................................... 49

AC•THOR®/ AC•THOR®9s Operating instructions, version a0020806 4
Before placing into operation it is essential to read the assembly instructions provided with the
device.
Commissioning takes place in a few steps and must be carried out when the AC•THOR is started for
the first time or after resetting to factory settings.
Use the left and right arrow keys to see more options.
From firmware version a0020202 onwards, French or Spanish can be selected in addition to German
and English.
See chapter headed "Operating modes".
The selection can also be changed at a later date.
Use the left and right arrow keys to see more options.
Besides the my-PV Meter and open communication protocols such as http, Modbus TCP, Adjustable
Modbus RTU and Adjustable Modbus TCP, as well as frequency control, pre-set signal sources are
available for many compatible manufacturers.
For certain compatible partners the choice between „Auto“ (automatic IP-search of the device) or
„Manual“ (manual entry of the IP address of the source) is possible. If a control type with the
addition "Manual" is selected, the next step is to set the IP address of the signal source.
In the case of a control mode with the addition "Manual", the IP address of the signal source
must not change during operation (e.g. by a DHCP router), otherwise the AC•THOR will lose the
control signal.
Signalsource
Hardware
Interface
Comments
my-PV Meter Auto
LAN
(RJ45, Ethernet)
Connection to my-PV Meter in the network is set up automatically. Setting up
the connection may take up to a minute!
my-PV Meter Manual
LAN
(RJ45, Ethernet)
Connection to my-PV Meter in the network is set up by entering the IP
address manually.
my-PV Power Meter
Direkt
Direct
connection
(RJ45, cross-
over network
cable)
Connection to the my-PV Power Meter is established directly without a
network. A crossover network cable must be used for this type of
connection!
No direct connection is possible with the my-PV WiFi Meter!
Adjustable Modbus RTU
Modbus RTU
(RS485, A B
GND)
Cannot be selected on the display, configuration is done in the web
interface. Temporary network access (RJ45, Ethernet) is therefore required
at least for commissioning. See chapter "Special setting possibilities in the
Web-Interface".
Connection diagram according to chapter 9.
When controlling via Modbus RTU, the operating mode M7 cannot be used!
Adjustable Modbus TCP
(Sunspec etc)
LAN
(RJ45, Ethernet)
Cannot be selected on the display, configuration is done in the web
interface. See chapter "Special setting possibilities in the Web-Interface".
Carlo Gavazzi EM24
Manual
LAN
(RJ45, Ethernet)
Approved for meter type EM24 with Modbus TCP.

AC•THOR®/ AC•THOR®9s Operating instructions, version a0020806 5
Digital Meter P1
Modbus RTU
(RS485, A B
GND)
Device connection requires the " Digital Meter P1Interface" from my-PV as
hardware interface. See here.
When controlling via Modbus RTU, the operating mode M7 cannot be used!
Frequency
Mains
connection
See chapter 7 Frequency control.
Fronius Auto / Manual
Fronius Gen24 Manual
Fronius Sunspec Manual
LAN
(RJ45, Ethernet)
Smart Meter required.
For Modbus control Sunspec must be activated.
GoodWe Manual
LAN
(RJ45, Ethernet)
Works with GoodWe high-voltage hybrids (ET/BT single-phase and EH/BH
three-phase) that communicate via the GoodWe LAN module (not WLAN)
using Modbus TCP.
For systems with battery storage, a value of 290W feed-in is preset as the
target value of the control; without a battery, the value can also be reduced.
Growatt (Modbus RTU)
Modbus RTU
(RS485, A B
GND)
The control signal is received via Modbus RTU (RS485, A B GND)!
Connection diagram according to chapter 9.
When controlling via Modbus RTU, the operating mode M7 cannot be used!
Growatt connection assignment for RS485:
Note: Inverters that are not SPH-UP may need to be updated to the latest
firmware version to communicate via RS485, according to Growatt. To do
this, send the Growatt serial number and a short explanation to
http
LAN
(RJ45, Ethernet)
A description of this open protocol is available in a separate document,
which will be provided on request.
Huawei (Modbus RTU)
Modbus RTU
(RS485, A B
GND)
The control signal is received via Modbus RTU (RS485, A B GND)!
Connection diagram according to chapter 9.
When controlling via Modbus RTU, the operating mode M7 cannot be used!
If the Huawei Smart Dongle is used on the inverter, communication
problems may occur with this type of connection. We therefore recommend
using the control type "Huawei (Modbus TCP) Manual" if possible, especially
if a battery storage unit is present!
Huawei (Modbus TCP)
Manual
LAN
(RJ45, Ethernet)
Works with Huawei devices that communicate via Modbus TCP, such as the
Huawei Smart Dongle-WLAN-FE!
Note: From dongle firmware SPC124, TCP must be activated locally via the
Huawei app!
Alternatively, the AC•THOR could also be controlled via Modbus RTU. If a
battery storage is available, however, the "Huawei (Modbus TCP) Manual"
must be used explicitly!
IME Conto D4 Modbus
MID (Modbus RTU)
Modbus RTU
(RS485, A B
GND)
The control signal is received via Modbus RTU (RS485, A B GND)!
Connection diagram according to chapter 9.
When controlling via Modbus RTU, the operating mode M7 cannot be used!
Tested by my-PV with IME Conto D4 Modbus MID.
KACO TL1 + TL3 Manual
LAN
(RJ45, Ethernet)
Sunspec must be enabled on inverter.
Kostal PIKO IQ
Plenticore plus Manual
LAN
(RJ45, Ethernet)
Suitable electricity meters please refer to the Kostal descriptions.
Modbus must be activated on the inverter.
Kostal Smart Energy
Meter Manual
LAN
(RJ45, Ethernet)
Device ID as set on the device.
Modbus Settings –Modbus TCP –set “Enable TCP Slave” active

AC•THOR®/ AC•THOR®9s Operating instructions, version a0020806 6
MEC electronics Manual
LAN
(RJ45, Ethernet)
Approved for meter type MECmeter.
Modbus TCP
LAN
(RJ45, Ethernet)
A description of this open protocol is available in a separate document,
which will be provided on request.
QCELLS (Modbus RTU)
Modbus RTU
(RS485, A B
GND)
The control signal is received via Modbus RTU (RS485, A B GND)!
Connection diagram according to chapter 9.
When controlling via Modbus RTU, the operating mode M7 cannot be used!
Tested by my-PV with Q.VOLT HYB-G3 5.0 kW 1P, baud rate 115200.
According to information from Q CELLS, the devices in the Q.VOLT HYB-G3
series support RTU communication.
The correct communication connection to the Q.VOLT HYB-G3 inverter can
be found in the Q CELLS manual.
RCT Power Manual
LAN
(RJ45, Ethernet)
-
Slave
LAN
(RJ45, Ethernet)
Cannot be selected manually. See chapter “
Multi units”
SMA Direct meter
communication
Auto / Manual
LAN
(RJ45, Ethernet)
This control type is available for the SMA Energy Meter and SMA Sunny
Home Manager devices.
If this control type is carried out by the Sunny Home Manager, the
superordinate energy planning for the my-PV device is then not given. There
is also no visualization in the Load Balance. However, the power control is
then carried out significantly faster than with the control type "SMA Home
Manager".
SMA Home Manager
LAN
(RJ45, Ethernet)
The power signal which the SMA Sunny Home Manager gives the my-PV
device depends not only on the feed-in, but also on the superordinate
energy planning.
SolarEdge Manual
Alternative:
SolarEdge Synergy for
2-unit Manual
SolarEdge Synergy for
3-unit Manual
LAN
(RJ45, Ethernet)
Modbus TCP must be enabled on SolarEdge.
The communication usually works either via port 502 or 1502.
According to the latest information from SolarEdge, this control only works
when connected via LAN, not WLAN.
Solax (Modbus RTU)
Modbus RTU
(RS485, A B
GND)
The control signal is received via Modbus RTU (RS485, A B GND)!
Connection diagram according to chapter 9.
When controlling via Modbus RTU, the operating mode M7 cannot be used!
Tested by my-PV with X1-Hybrid5.0-G4, baud rate 115200.
According to information from Solax, the G4 units support RTU
communication.
The correct communication connection to Solax can be found in the Solax
instructions.
Steca Auto
LAN
(RJ45, Ethernet)
-
Sungrow Manual
LAN
(RJ45, Ethernet)
Works with Sungrow devices that communicate via Modbus TCP.
Varta Auto / Manual
LAN
(RJ45, Ethernet)
-
Victron Energy 1ph /
3ph Manual
LAN
(RJ45, Ethernet)
With Modbus control, the excess power control can be selected according to
one or three phases.
TIP: For many of these and other manufacturers there are separate instructions
for the required settings. More information about compatible manufacturers can be
found here.
When controlled by an inverter, a feed-in meter is required in the system. The query of the
inverter otherwise provides no data.

AC•THOR®/ AC•THOR®9s Operating instructions, version a0020806 7
We ask for your understanding that we cannot do any binding support for third-party
products. For questions about third-party products, please contact the technical support of the
respective company.
Not every signal source is approved for hybrid systems with battery storage. If necessary,
please contact the technical support of my-PV.
Operation with battery may require additional control parameters. In this case, please contact
the technical support of my-PV.
A number is assigned to the sensor in the order in which it is selected. The selection can be
deselected by tapping on the key once more.
To assign a sensor to the respective entry in the list, the serial numbers can be identified on a label
attached to the sensor wire.
TIP: As the measuring value of the sensor is already shown in the selection
list, an assignment can alternatively also be made by simply altering the
temperature on the sensor.
TIP: The use of a sensor is not necessary if the optional boost backup or
the legionella programme are not used and the heat generator is switched
off by a thermostat!
By saving the settings the commissioning for the use of excess power is finished.
Additional functions, such as the optional boost backup, must be set separately.

AC•THOR®/ AC•THOR®9s Operating instructions, version a0020806 8
The "Home" button always returns you to the home screen. The upper bar shows the current date,
time, the unit number und the operating mode (mode M1 –Mx). On the right, symbols show the
unit's current status.
The contents of the home screen vary according to the operating mode and shows how much power
the AC•THOR is currently feeding into the load. Depending on how many, if any, temperature
sensors are defined, the measured values are also shown.
Homescreen AC•THOR:
Presentation
according to operating
mode
Date, Device number
time Operating mode Status
Main menu
Single-Boost
Homescreen AC•THOR 9s:
With the AC•THOR 9s,
the power display
consists of three bars.
Load output Out-3
Load output Out-2
Load output Out-1
If several temperature
sensors are used, the
sensor number is
displayed.
The button "Single boost" only appears in hot water operating modes if the function for
ensuring a minimum temperature is activated. Actuating the button starts a once-only
boost backup mode. This can also be deactivated while it is in operation.
If the boost backup is actuated automatically based on the day of the week, time of day or
temperature, it cannot be deactivated by using the button.

AC•THOR®/ AC•THOR®9s Operating instructions, version a0020806 9
Lights up = set temperature reached
Flashes = stand-by, waits for excess
Lights up = heats with PV excess. Flashes = boost backup mode
Lights up = no control signal
Lights up = physical connection to the RJ45 network connection is intact
Lights up = no intact physical connection to the RJ45 network connection
Block active
Recorded production data, meter values and temperatures can be read off at any time. The
respective values can be selected using the "Open" button. These can be presented in the three
views of the current year, month or day using the "Calendar" button.
TIP: Type directly in the diagram on the individual bars to present the data in their
next level of definition and on the button of the data logger again to return to the
previous level.
The following data can be displayed:
Total power: Shows the total power figures for all the connected loads. The yellow bars indicate the
PV excess power used, the green bars the proportion of grid energy when the optional temperature
boost backup is active.
Meter: indicates the value of the total power drawn from the grid (red) including household loads
and grid feed-in (green) at the metering point.
Power 1: shows the power data for load 1.
Power 2: shows the power data for load 2.
Temperature 1-4: shows the data of the temperature probe.
The data of all variables relevant to the operation are shown in a list.
Output: shows the current output of the AC•THOR power unit.

AC•THOR®/ AC•THOR®9s Operating instructions, version a0020806 10
Meter: shows the current data for the meter at the measuring point. A positive value shows drawing
from the grid, a negative value, feeding into the grid.
PV: If a corresponding measuring point has been set in the Web-Interface under Setup, the value of
the PV power is available here. See Measurement Settings.
Load: shows the nominal power of the load (at 230 V) which is currently being supplied by the
AC•THOR output unit. This value can be determined from an output of 500 W.
With AC•THOR 9s, the load status (0 or 1) at the three outputs is displayed at this point.
If "none" or "0" is displayed even though a load is connected, the cause may be a thermostat that
has been switched off or a safety temperature limiter that has been triggered.
Temperature 1: Current data probe 1
Temperature 2: Current data probe 2
Temperature 3: Current data probe 3
Temperature 4: Current data probe 4
IP: shows the current IP address of the AC•THOR.
Ctrl IP: shows the current IP address of the signal source. Shown in addition in the line below is the
designation of the signal source and the current measured value. A positive value shows drawing
from the grid, a negative value, feeding into the grid.
Status: Shows the unit's current status. See chapter "Status codes".
For AC•THOR 9s the number consists of two parts. On the left the status code of power unit
AC•THOR 9s, on the right the status code of power unit AC•THOR.
Grid voltage: shows the current input voltage at the AC•THOR (only with AC•THOR)
Grid power: shows the current input power at the am AC•THOR (only with AC•THOR)
Output voltage: shows the current output voltage of the AC•THOR (only with AC•THOR)
Power 1: Power at output Out-1 (only with AC•THOR 9s)
Power 2: Power at output Out-2 (only with AC•THOR 9s)
Power 3: Power at output Out-3 (only with AC•THOR 9s)
Frequency: shows the current grid frequency.
Temperature output unit: shows the current temperature of the AC•THOR power electronics.
Fan: shows the current speed setting of the internal fan.
Serial number: shows the unit serial number.
MAC address: shows the MAC address of the unit.
Version: shows the current firmware version of the unit.
Version power stage: shows the current firmware version of the AC•THOR output unit.
For AC•THOR 9s the firmware version of the PS consists of two parts.
pXXX: Power stage AC•THOR
sXXX: Power stage AC•THOR 9s
Device number: shows the unit number set. This is also visible on the home screen.
Operating mode: shows the operating mode set (M1 –Mx). This is also visible on the home screen.
Latest firmware: shows the latest firmware version, or "current" is displayed.
Update status: Ok, loading (number of files), or waiting for installation
Output unit update status: Ok, loading, or waiting for installation
Cloud Status: Regardless of whether the cloud mode is active or not, it is displayed whether the
cloud server my-PV.LIVE is reachable. If the info "99, Timeout" is displayed at this point, please
send the 16-digit serial number to support@my-pv.com.

AC•THOR®/ AC•THOR®9s Operating instructions, version a0020806 11
Ethernet (E) Firmware: Shows the status of the update progress when a new version is loaded.
Power stage (P) Firmware: Shows the status of the update progress when a new version is loaded.
Power stage 9s (S) Firmware: Shows the status of the update progress when a new version is
loaded.
Relay status: shows the current status of the switch output (0 or 1).
For AC•THOR 9s this number has four digits. The first digit shows the status of the switch output (0
or 1), the second digit whether Out-3 is switched (0 or 1), the third digit whether Out-2 is switched
(0 or 1) and the fourth digit shows the output that is currently supplied by the power stage (1, 2 or
3).
See chapter "General settings" for general unit settings, also chapter "Operating modes" for settings
specific to the respective operating mode.
After activation, brief information on the current view appears on the display. In the web interface the
button leads to the online Operation Manual which corresponds to the firmware version installed.
You will find wiring diagrams for the respective operating modes and for wiring three-phase
heating elements in the assembly instructions supplied with the AC•THOR, as well as in the
latest version at any time on www.my-pv.com.
AC•THOR: Hot water with a single-phase immersion heater
AC•THOR 9s: Hot water with a three-phase immersion heater or with 3 single-phase immersion
heaters
TIP for AC•THOR:
A single-phase heating element does not necessarily have to have 3kW power. Of
course, smaller outputs such as 2kW are also possible!
TIP for AC•THOR 9s:
A three-phase heating element does not necessarily have to have 9kW power.
Smaller outputs such as 4.5kW, 6kW or 7.5kW are also possible!
Likewise, three single-phase elements can have a power of less than 3kW!
In this operating mode, an electric heating element is supplied linearly with excess PV energy. It can
be fitted with a bimetal thermostat to switch off when the temperature for which it is set is reached.
Otherwise the my-PV temperature sensor is to be used.

AC•THOR®/ AC•THOR®9s Operating instructions, version a0020806 12
With AC•THOR 9s in operation with three single-phase heating elements, bimetal thermostats
must be present on all three immersion heaters!
Optionally, the AC•THOR can also take over guaranteeing the hot water temperature. For this, the
my-PV temperature sensor is to be used.
The my-PV temperature sensor is in all cases to be installed in the storage tank above the
heating element to provide a reliable reading!
Data my-PV
temperature sensor
Current power output
Homescreen
Single-Boost
Starts a once-only boost
backup mode
(button only appears if boost
backup is activated)
TIP: With the hot water boost backup, limit the use of grid power by avoiding the
switch-off at maximum temperature. To do this, set the value higher than the cut
out temperature on the immersion heating element thermostat and site the
temperature sensor between the immersion heating element and the top edge of the
storage tank. In this way, in boost backup mode only the volume above the sensor
will be heated to the minimum temperature, while when there is excess PV, the
entire contents above the immersion heating element will be heated.
Hot water 1 temperatures
Adjustable is the maximum permitted temperature to be reached at the my-PV temperature sensor
(factory setting = 60 °C). This has nothing to do with a bimetal thermostat which may be installed!
If the cut out temperature of an immersion heating element with a bimetal thermostat is set
too low, the AC•THOR may possibly be unable to reach the desired temperature!
If the optional automatic temperature boost backup is shown "On" in the window on the right
(factory setting "Off") or the relay output has been selected, a minimum temperature can then be
set (factory setting 50 °C).
Automatic temperature boost backup "On":
The AC•THOR can ensure a minimum temperature at the my-PV temperature sensor through the
immersion heating element connected. This is supplied with maximum power.
Relay output:
Alternatively, the minimum temperature can be maintained by enabling an external heat source.
Enablement is by means of a potential-free contact. For details of wiring the potential-free contacts,
please refer to the assembly instructions in the chapter "Connections".

AC•THOR®/ AC•THOR®9s Operating instructions, version a0020806 13
TIP for AC•THOR (not AC•THOR 9s):
If as an external heat source a second immersion heating element (maximum 3 kW)
is used, it can be suitably connected up for 6 kW operation. This differs from the 6
kW operating mode in that here the second immersion heating element is only used
for temperature boost backup and not as an extension to the normal control range!
Hot water 1 min switching times
This setting can be selected when the temperature boost backup is "On" under "Hot water 1
temperatures", or when the relay output has been selected.
There are two time windows available to maintain the minimum temperature on the my-PV
temperature sensor. Start and finish can each be defined at full hours. Factory settings suggest
switching times of 5 to 11 pm and 5 to 7 am.
TIP: Restrict the times when the minimum temperature has to be maintained to
mornings and evenings, to increase your own PV consumption through the day!
Start hour and stop hour refer to the same calendar day. If a time window is defined over
midnight, hot water backup will not start!
If the adjusted start-hour is after the stop-hour, hot water backup will not start!
Hot water 1 min weekdays
This setting can be selected when the temperature boost backup is "On" under "Hot water 1
temperatures", or when the relay output has been selected.
You can select the weekdays on which the minimum temperature has to be maintained. In the
factory settings, all weekdays are activated.
Legionella program
For ensuring drinking water hygiene, a period can be specified by the end of which a set minimum
temperature must again be reached after the last time it was reached. The number of days in this
period can be set between 1 and 14. A time at which the legionella program is to start can also be
specified. Factory settings are number of days 7, starting time 8 pm, temperature is 60 °C, the
legionella program is "Off".
The immersion heating element is supplied with maximum power.
Load priority (only with AC•THOR 9s)
Defines the sequence in which the three load outputs are controlled.
Out 1-2-3: Standard, for a three-phase immersion heater.
Out 3-2-1: For stratified charging with three single-phase immersion heater.
For Out 3-2-1, it is essential to observe the order of the load outputs according to the wiring
diagram!
Boost output (only with AC•THOR 9s)
If boost backup is activated for AC•THOR 9s, it is possible to specify which load outputs are to be
used for this purpose. All three outputs are activated at the factory.
TIP: If, for example, 3 single-phase heating elements are used, it may only be
necessary to use the boost function on the top heating element. This keeps storage
capacities free for excess energy, which can significantly improve the degree of self-
sufficiency!

AC•THOR®/ AC•THOR®9s Operating instructions, version a0020806 14
TIP: If not all three outputs of a three-phase heating element are used for boosting,
control power is still available in case of excess energy!
Optionally, three temperature sensors can also be used in the operation of three single-phase
heating elements. The assignment must be made vice versa to the load outputs.
Note: One temperature sensor is always enclosed with the AC•THOR, other sensors must be
purchased separately.
Load output / heater
Sensor number
Out-3 / Top
1
Out-2 / Center
2
Out-1 / Bottom
3
Excess power control and boost backup are then carried out individually for each heating element;
the settings in " Hot water 1 temperatures" affect all three elements. If only one sensor is used, this
only switches off the upper heating element, the other heating elements must be controlled via
thermostats.
AC•THOR: Hot water with two single-phase immersion heaters
AC•THOR 9s: Hot water with two three-phase immersion heaters
In a water tank in this operating mode, two immersion heating elements are supplied successively
and linearly with excess PV power. The upper element has priority. The aim is to reach the desired
temperature at the tapping point as quickly as possible before further excess power heats up the
remaining contents of the tank.
As soon as the upper immersion heating element reaches the target temperature the lower heater
will be supplied. If no my-PV temperature sensor is used, the switch-over takes place via the
thermostats of the heating elements, the AC•THOR then regularly checks whether the upper heating
element is available again. If the my-PV temperature sensor is used, the changeover takes place
when the temperature at the sensor reaches the set maximum value.
Both heating elements must be equipped with a bimetal thermostat to switch off when the set
temperature is reached!
With AC•THOR, the switchover between the single-phase heating elements takes place directly via
the integrated relay (see wiring diagram). With the AC•THOR 9s, the relay operates a three-pole NC
contact and a three-pole NO contact (see wiring diagram), which then switch over the three-phase
heating elements.
TIP: It is also possible to control two immersion heating element s in separate tanks.
The "upper" heater would then for instance be located in a drinking water tank, the
"lower" heater in a buffer tank alongside it.
Optionally, the AC•THOR can also take over the boost backup of the hot water temperature at the
upper immersion heater. For this, the my-PV temperature sensor is to be used.
The my-PV temperature sensor must in any event be installed in the hot water tank above the
upper heater to provide a reliable reading!

AC•THOR®/ AC•THOR®9s Operating instructions, version a0020806 15
Data my-PV
temperature sensor
Current power output
Homescreen
An arrow shows which
heater is currently being
supplied.
(upper or lower)
Single-Boost
Starts a once-only boost
backup mode
(button only appears if boost
backup is activated)
Hot water 1 temperatures
Adjustable is the maximum permitted temperature to be reached at the my-PV temperature sensor
(factory setting = 60 °C). This has nothing to do with a bimetal thermostat which may be installed!
If the cut out temperature of an immersion heating element with a bimetal thermostat is set
too low, the AC•THOR may possibly be unable to reach the desired temperature!
If the optional automatic temperature boost backup is shown "On" in the window on the right
(factory setting "Off"), a minimum temperature can then be set (factory setting 50 °C).
Automatic temperature boost backup "On":
The AC•THOR can ensure a minimum temperature at the my-PV temperature sensor with the upper
heater. This is supplied with maximum power.
Hot water 1 min switching times
This setting can be selected when the temperature boost backup is "On" under Hot water 1
temperatures".
There are two time windows available to maintain the minimum temperature on the my-PV
temperature sensor. Start and finish can each be defined at full hours. Factory settings suggest
switching times of 5 to 11 pm and 5 to 7 am.
TIP: Restrict the times when the minimum temperature has to be maintained to
mornings and evenings, to increase your own PV consumption through the day!
Start hour and stop hour refer to the same calendar day. If a time window is defined over
midnight, hot water backup will not start!
If the adjusted start-hour is after the stop-hour, hot water backup will not start!
Hot water 1 min weekdays
This setting can be selected when the temperature boost backup is "On" under Hot water 1
temperatures".
You can select the weekdays on which the minimum temperature has to be maintained. In the
factory settings, all weekdays are activated.

AC•THOR®/ AC•THOR®9s Operating instructions, version a0020806 16
Legionella program
For ensuring drinking water hygiene, a period can be specified by the end of which a set minimum
temperature must again be reached after the last time it was reached. The number of days in this
period can be set between 1 and 14. A time at which the legionella program is to start can also be
specified. Factory settings are number of days 7, starting time 8 pm, temperature is 60 °C, the
legionella program is "Off".
The upper immersion heating element is here supplied with maximum power.
Boost output (only with AC•THOR 9s)
If boost backup is activated for AC•THOR 9s, it is possible to specify which load outputs are to be
used for this purpose. All three outputs are activated at the factory.
TIP: If not all three outputs of a three-phase heating element are used for boosting,
control power is still available in case of excess energy!
AC•THOR: Hot water 6kW
AC•THOR 9s: Hot water 18kW
The AC•THOR 9s assumes two three-phase loads, three single-phase loads are not
permitted in this operating mode!
TIP: In this operating mode, it is strongly recommended that both the AC•THOR
control and the power measurement at the switched load are carried out with a my-
PV Meter!
In this operating mode, two heating elements are supplied with excess PV power in a water storage
tank. One of them be regulated continuously variable, the other cuts in as soon as sufficient surplus
PV is available. When this occurs, the first heater starts again from 0 with the power regulation. The
total range of regulation is thus extended.
Both heaters have to be fitted with a bimetal thermostat to cut out when the set temperature is
reached. The my-PV temperature sensor is to be used.
There are two operating modes:
A fixed threshold value can be set from which the second load is switched on. This threshold value is
set in the web interface. See chapter "Special setting options in the web interface".
Alternatively, a my-PV Meter can be used to measure the power of the switched load. See chapter
"Load measurement at relays with my-PV Meter (recommended)".
The power switched at the relay must not be greater than the power that can be controlled by
the AC•THOR. Otherwise, unstable control behavior would be expected. Error 106 is displayed!
Third party control types may not be able to command the power up to 6kW / 18 kW!
If no my-PV Meter is used for power measurement at the switched load, the power display of
the AC•THOR and the energy recording of the data logger cannot take this consumption into
account!

AC•THOR®/ AC•THOR®9s Operating instructions, version a0020806 17
The following applies to external control via "Modbus TCP", "http" or "SMA Home Manager"
(not "SMA Direct Meter Communication"): An AC•THOR without an available load at the
controllable output cannot be externally controlled in M3 operating mode. Since the load at the
relay is not controllable, an unstable control behavior would be expected! This also applies if a
my-PV Meter is used for power measurement at the switched load!
Multiple units (multi-mode): A slave without an available load at the controllable output cannot
be controlled in the M3 operating mode in multi-mode. Since the load at the relay is not
controllable, an unstable control behavior would be expected!
This also applies if a my-PV Meter is used for power measurement at the switched load!
The following applies to frequency control: This operating mode is not suitable for off-grid
systems. my-PV recommends using several AC•THORs instead to increase the control range!
Optionally, the AC•THOR can also take over boost backup of the hot water temperature with both
immersion heating elements.
The my-PV temperature sensor must in any event be installed in the hot water tank above the
upper heater to provide a reliable reading!
Data my-PV
temperature sensor
Current power output
Homescreen
Relay state
Single-Boost
Starts a once-only boost
backup mode
(button only appears if boost
backup is activated)
The power display is automatically scaled by the additional power.
If a my-PV Meter is used for power measurement at the switched load, then the consumption is also
shown in the power display and taken into account in the energy recording of the data logger.
The configuration is done in the web interface. See chapter "Special setting options in the web
interface".
Scaling of the power display:
•With the AC•THOR to 3,000 watts + power measurement at the relay
•With AC•THOR 9s to 3,000 watts + power measurement at the relay / 3
A three-phase load is assumed at the relay (see wiring diagram).
Example AC•THOR 9s:
The power of the switched load was measured at 6,000 watts, the relay is switched. The
three 3kW bars are each extended by 2kW (6kW/3).

AC•THOR®/ AC•THOR®9s Operating instructions, version a0020806 18
Homescreen AC•THOR 9s in the web interface
When measuring the load on relays with a my-PV Meter, it is essential to follow the
corresponding wiring diagram!
The relay is switched on for the first time when a surplus level of 3kW is exceeded with the
AC•THOR or 9kW with the AC•THOR 9s. As soon as a measured value of the load is available,
it is taken into account as a switching threshold in further operation!
If the nominal power at the switched load is reduced at a later point in time (e.g. due to a
modification of the system), the switching threshold must be changed once to "Load on relay".
Afterwards, the setting can be changed back to "Load measurement at relay with my-PV
Meter". See chapter "Special setting options in the web interface".
Hot water 1 temperatures
Adjustable is the maximum permitted temperature to be reached at the my-PV temperature sensor
(factory setting = 60 °C). This has nothing to do with a bimetal thermostat which may be installed!
If the cut out temperature of an immersion heating element with a bimetal thermostat is set
too low, the AC•THOR may possibly be unable to reach the desired temperature!
If the optional automatic temperature boost backup is shown "On" in the window on the right
(factory setting "Off"), a minimum temperature can then be set (factory setting 50 °C).
Automatic temperature boost backup "On":
With both immersion heaters, the AC•THOR can assure a minimum temperature at the my-PV
temperature sensor. These are supplied with maximum power.
Hot water 1 min switching times
This setting can be selected when the temperature boost backup is "On" under Hot water 1
temperatures".
There are two time windows available to maintain the minimum temperature on the my-PV
temperature sensor. Start and finish can each be defined at full hours. Factory settings suggest
switching times of 5 to 11 pm and 5 to 7 am.
TIP: Restrict the times when the minimum temperature has to be maintained to
mornings and evenings, to increase your own PV consumption through the day!
Start hour and stop hour refer to the same calendar day. If a time window is defined over
midnight, hot water backup will not start!

AC•THOR®/ AC•THOR®9s Operating instructions, version a0020806 19
If the adjusted start-hour is after the stop-hour, hot water backup will not start!
Hot water 1 min weekdays
This setting can be selected when the temperature boost backup is "On" under Hot water 1
temperatures".
You can select the weekdays on which the minimum temperature has to be maintained. In the
factory settings, all weekdays are activated.
Legionella program
For ensuring drinking water hygiene, a period can be specified by the end of which a set minimum
temperature must again be reached after the last time it was reached. The number of days in this
period can be set between 1 and 14. A time at which the legionella program is to start can also be
specified. Factory settings are number of days 7, starting time 8 pm, temperature is 60 °C, the
legionella program is "Off".
The immersion heaters are supplied with maximum power.
AC•THOR: Hot water with a single-phase immersion heater
AC•THOR 9s: Hot water with a three-phase immersion heater
In this operating mode the electric immersion heating element of a heat pump is linearly supplied
with excess PV power. This can be equipped with a bimetal thermostat to switch off when the set
temperature is reached. Otherwise the my-PV temperature sensor must be used.
The my-PV temperature sensor must in any event be installed in the hot water tank above the
upper heater to provide a reliable reading!
On exceeding a given excess power threshold, operation of the heating pump will be enabled. This
threshold can be set. Similarly a minimum time for which this threshold must be exceeded. At the
same time as the heat-pump is working, the additional excess power can be passed by the AC•THOR
to the immersion heating element . This is activated in the factory settings.
After the defined excess power threshold has been exceeded for a specified time (t P>), the heat-
pump starts for the minimum operating time (t run). This may also result in power being drawn from
the grid!
When the minimum operating time has expired, the heat-pump remains enabled, provided there is
still excess PV power available and the target temperature at the my-PV temperature sensor is not
yet reached. If this now causes a fall in the excess PV power, the heat-pump will only be disabled
after 60 seconds.
Once the heat-pump is disabled, it will not be reactivated for a period which can be set (t wait).
Optionally, the AC•THOR can also take over guaranteeing the hot water temperature. This is carried
out by enabling the heat-pump, when the immersion heating element will continue to be linearly
supplied with excess.
The target temperature of the heat-pump control is not to be set lower than the AC•THOR
minimum temperature, as this could then no longer be guaranteed!

AC•THOR®/ AC•THOR®9s Operating instructions, version a0020806 20
Data my-PV
temperature sensor
Current power output
Homescreen
Time period and time
counter value of the HP
control
Single-Boost
Starts a once-only boost
backup mode
(Button appears only when
the relay output is activated)
Hot water 1 temperatures
Adjustable is the maximum permitted temperature to be reached at the my-PV temperature sensor
(factory setting = 60 °C). This has nothing to do with a bimetal thermostat which may be installed!
If the cut out temperature of an immersion heating element with a bimetal thermostat is set
too low, the AC•THOR may possibly be unable to reach the desired temperature!
If the optional automatic temperature boost backup with relay output has been selected, a minimum
temperature can then be set (factory setting 50 °C).
Relay output:
The AC•THOR can also maintain the minimum temperature at the my-PV temperature sensor by
enabling the heat-pump.
Hot water 1 min switching times
This setting can be selected when the relay output is selected under "Hot water 1 temperatures".
There are two time windows available to maintain the minimum temperature on the my-PV
temperature sensor. Start and finish can each be defined at full hours. Factory settings suggest
switching times of 5 to 11 pm and 5 to 7 am.
TIP: Restrict the times when the minimum temperature has to be maintained to
mornings and evenings, to increase your own PV consumption through the day!
Start hour and stop hour refer to the same calendar day. If a time window is defined over
midnight, hot water backup will not start!
If the adjusted start-hour is after the stop-hour, hot water backup will not start!
Hot water 1 min weekdays
This setting can be selected when the relay output is selected under "Hot water 1 temperatures".
You can select the weekdays on which the minimum temperature has to be maintained. In the
factory settings, all weekdays are activated.
Legionella program
For ensuring drinking water hygiene, a period can be specified by the end of which a set minimum
temperature must again be reached after the last time it was reached. The number of days in this
period can be set between 1 and 14. A time at which the legionella program is to start can also be
This manual suits for next models
1
Other MYPV Controllers manuals