Naito DISPLE User manual

Contents
SafetyPrecautions
AboutWarranty
About''DISPLE"
Whatis''DISPLE"?
BaseModule
ControlBox
ControlBoxLightingeffectpattern
NamesofParts
StarterKit(Plug-inmodule)
StarterKit(Surfacemodule)
BaseModule+ControlBox
StandardSet
MethodofPartsAssembling
BaseModule
FrameParts
AcrylicBoard
Wiring
HowtoUse(procedureforlightingeffects)
ProductSpecification
Troubleshooting
ContactUs
1
6
7
7
8
9
10
11
11
11
12
13
14
14
15
16
17
18
19
21
21
InstructionManual
forallthecollectors

1
●Themeaningsofthegraphicsymbolsareasfollows
thingsthatyoushouldnotdo(thingsprohibited)
thingsthatyoushouldfollowtodo(compulsory)
PROHIBITIONPROHIBITION
INSTRUCTIONINSTRUCTION
●Eachitemisdividedintothefollowingcategories
※1Seriousinjury
thosethathaveaftereffectssuchasblindness,injury,burns,electricshock,fracture,
poisoning,etc.,andthoserequiringhospitalizationorlong-termhospitalizationfor
treatment.
※2Injury
thosethathaveaftereffectssuchasinjury,burns,electricshock,etc.,thatrequireno
hospitalizationorlong-termhospitalizationfortreatment.
※3Propertydamage
expandeddamageconcerninghouses,householdgoods,livestockandpets.
ifyouhandleitincorrectly,there'sapossibilityofdeathor
seriousinjury※1
ifyouhandleitincorrectly,there'sapossibilityofinjury※
2orpropertydamage※3
WARNING
CAUTION
Pleasereadthesesafetyprecautionscarefullybeforeuseanduseyourproduct
correctly.
Pleasealwayskeepthismanualevenafterreading.
Thesesafetyprecautionsdescribeitemsthatarerequiredtoprotectyouandother
peoplefrombeingharmedordamagedbyusingthisproduct.Pleasefullyobserve
safetyprecautions.
SafetyPrecautions

2
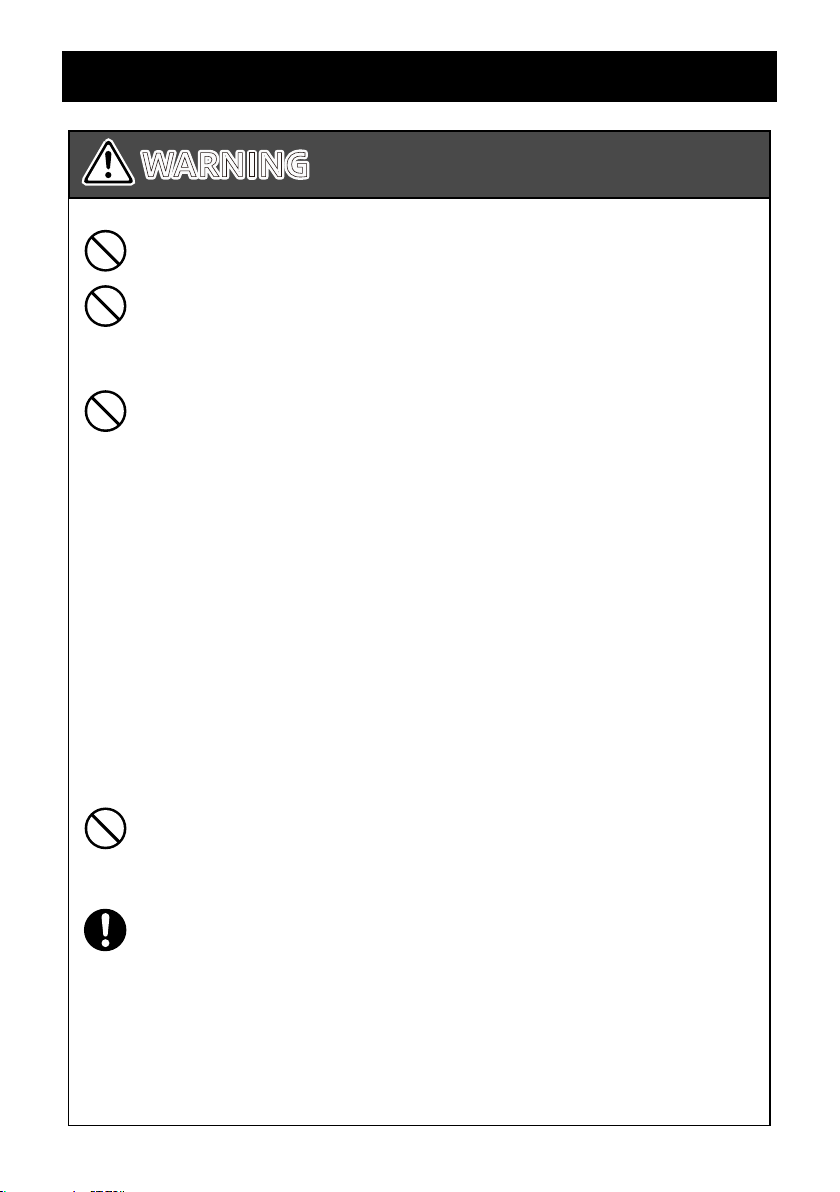
Pleasedonotdisassemble,modifythisproduct,orrepairitbyyourself.If
not,itmaycauseelectricshock,injuryormalfunction.
Pleasedonotusethisproductinwetplaceswherethereisadangerof
gettingwet.
Useinthebathroom,showerroom,oroutdooretc.maycauseafire,
electricshockormalfunction.
PleasenotethefollowingswhenusingtheACadapter.Ifnot,itmaycause
afire,electricshockormalfunction.
・ PleaseusetheACadapterdedicatedtothisproduct.
IfyouuseotherACadapter,itwillcausemalfunction.
・ PleasedonotputthingsontheACadapter,donotcoverit,orhangit.If
not,there'sapossibilityofgettinghightemperaturewhichisvery
dangerous.
・ PleaseusetheACadapterwithahouseholdpowersupply.
・ Pleasedonotprocess,forciblybend,twistorpullthecables.
・ WhenunpluggingtheACadapterfromtheoutlet,alwaysholdthe
adapterandpullitout.Ifyoupullthecables,itmaybethecauseof
disconnectionorshortcircuit,anditmaycauseafireorelectricshock.
・ ConfirmthatthedustisnotattachedtotheACadapter,andplugitinto
theoutletfirmlyuptotheroot.Ifdustorthelikeisattached,itmightbe
thecauseofafire.
Pleasebeawareofaccidentalingestion.Thisproductincludessmallparts.
Ifsmallchildrenaccidentallyswallowsuchsmallparts,there'sadangerof
suffocation.
Pleasekeeptheproductandthesmallparsoutofreachofchildren.
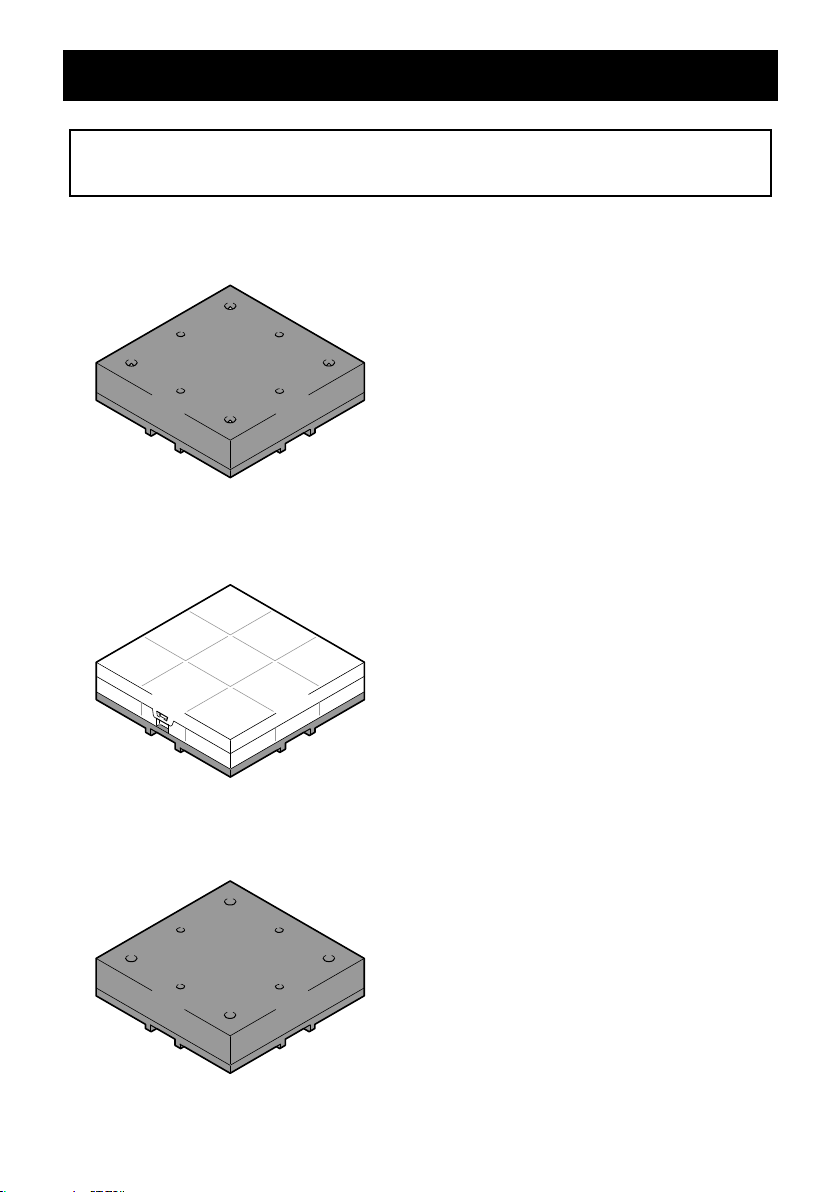
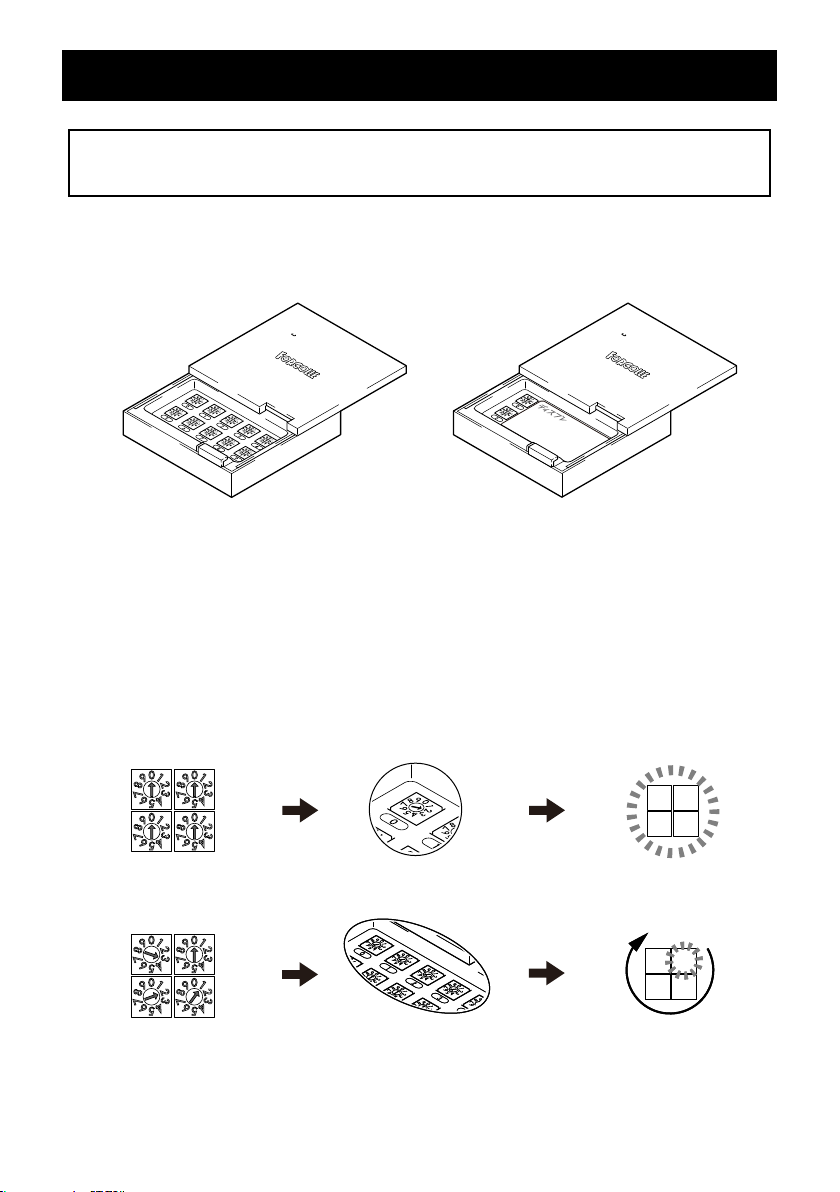
Whenassemblingthisproduct,makesuretoturnofftheproductswitch
andremovetheACadapterfromtheoutlet.Ifnot,itmightbethecauseof
afireorelectricshock.
SafetyPrecautions
WARNING
If you handle it incorrectly, there's a possibility of
deathorseriousinjury.

3
Ifthereappearsasmokeorastrangesmell,turnoffthepowerimmediately
andunplugtheACadapterfromtheoutlet,andcontactus.
Ifyoucontinuetouseitasitis,itwillcauseanelectricshock,fireorinjury.
Pleasedonotplacethisproductinthefollowingplaces,inordertoavoida
fireorelectricshock,injuryormalfunction.
・ Placesexposedtodirectsunshine
・ Placeswherethetemperaturebecomeshighsuchasneartheheating
appliances
・ Placeswithhighhumidityanddust
・ Placeswherethetemperaturedifferenceishigh
・ Inacorrosivegasatmosphere(C1,H2S,NH3,SO2,NOx,etc.)
・ Whereinfantsandpetscanreach
・ Placessubjecttovibrationandimpact
・ Inclinedplaces
・ Closetoobjectsgeneratingstrongmagneticforceandradiowaves.
Whenassembling,pleasemakesuretouseprecisionscrewdriveretc.Please
donotuseelectricscrewdriver.
Ifnot,theproductmaybedamagedbecauseitismadeofplasticresin.
Pleasedonottouchtheconnectorendpartdirectlybyhand.
Ifnot,staticelectricitymayflowandpartsmaybedestroyed.
Pleasebecarefulnottoputforeignobjectssuchasliquidandmetalinside
theproduct.
Ifnot,itmaycauseashortcircuit,fireormalfunction.
SafetyPrecautions
WARNING
If you handle it incorrectly, there's a possibility of
deathorseriousinjury.
CAUTION
If you handle it incorrectly, there's a possibility of
injuryorpropertydamage.

4
Thisproductisaprecisionpart.Pleasedonotdrop,applyshockorunrea-
sonablepower.
Ifnot,itmaycauseadamageorbreakdown.
TheLEDradiatesheat.Pleasedonottouchitdirectlywithyourhand.
Pleasebecarefulofburnswhileitislitandimmediatelyafterturnedoff.
PleasedonotlookdirectlyonthelitLEDforalongtime.
Ifnot,itmayadverselyaffectyoureyes
DependingonthestimulationoftheLEDlight,youmayrarelygetsick.
Duetolightemissioneffectpatternrepeatingblinkingorotherlightstimu-
lus,symptomssuchaseyepain,visionabnormality,migraine,seizuresand
syncopemayrarelyoccur.
Ifyoufeeluncomfortableorpainfulinsomeofyourspiritandbody,imme-
diatelystopusingtheproduct.
Whencleaningthisproduct,pleaseturnoffthepowerforsafety,andnotethe
following.
●Modules
Pleasewipewithadryclothofsoftmaterialsuchasmicrofibercloth.Wipingwith
ahighlyvolatilechemicalsuchasthinner,benzene,oralcoholmaycausethe
producttobedamagedordistorted.Pleaseuseadrycottonswabetc.toremove
depositsfromtheterminalend.
●AcrylicBoard
Pleasewipewithaneutraldetergent(1to2%watersolution)andlukewarmwater
usingasoftclothsuchasmicrofibercloth.Ifwipedwithavolatilechemicalsuch
asglasscleaner,thinner,benzene,alcohol,etc.,finecracksmayenterorthecolor
maychange.
SafetyPrecautions
Maintenance
CAUTION
If you handle it incorrectly, there's a possibility of
injuryorpropertydamage.

5
When disposing of this product, please follow the local ordinance of your specific
countryofresidence.
Aboutdisposalofthisproduct
1)ThisproductandthismanualarecopyrightsofNAITOInc.Therefore,
reproduction,copying,reprinting,alterationofthisproductandthe
wholeorpartofthismanual,withoutpermission,isprohibitedbylaw.
2)Thisproductissubjecttochangeinspecificationwithoutnotice.
3)Wearenotresponsibleforanylosscausedbyuseofthisproductdeviat-
ingfromthespecification(rating)andprecautionsdescribedinthis
manual.
4)ThisproductisdesignedonlyforuseinJapan.Ifthisproductisused
outsideofJapan,weshallnotberesponsibleforanyloss,damagesand
troubles.
*TheACadapterincludedintheControlBoxSetiscompatiblewitha
powersupplyof100Vto240V,buttheshapeoftheACplugisforJapan
domesticuse(Atype).Therefore,whenusingoutsideofJapan,itis
necessarytoprepareapowerconversionplugforthespecificcountries.
Foroverseaspowersupplyconversionplug,operationcheckhasnotbeen
carriedoutbyus,andoperationguaranteeisnotavailable.
Aboutthisproductandthismanual
5

6
1)Ifyourproductisbrokenwithinthewarrantyperiodunderthecorrect
usageinaccordancewiththecontentsofthewarrantyprovision,wewill
exchangeitwiththesameproductorequivalent.
2)Thewarrantyperiodis3monthsfromthedateofpurchasedescribedin
the"Invoice".
3)Ifyourproductisbrokenwheninuseandyouwantareplacement,
pleasecontactus.
4)Pleasenote,however,itisoutofwarrantyinthefollowingcases.
①Whenthewarrantyperiodhaselapsedfromthedateofpurchase
②Misuse,disassembly,remodeling,damageduetorepairbyyourself
③Breakdownanddamageduetounavoidableforcessuchasfire,earth-
quake,floodetc.
④Ifthecauseofthefailureisduetootherproductthanthisproduct.
⑤Generalfailureordamagewhenusedforgeneraluseotherthanhome
use(e.g.businessuse)
5)Yourretunedproductwillbeourpossession.
6)Wewillmakeitoutofrangeofwarrantyforincidentaldamageresulting
fromtheuseorfailureofthisproduct.
7)ThiswarrantyprovisioniseffectiveonlyinJapan.
AboutWarranty

7
"DISPLE"isanewideadisplaycasethatcanbeassembledquiteeasily
accordingtothesizeofyourcollections,withamodulestructurein
100mmX100mmbasemoduleasthesmallestunit.Asthebasemodules,
wehavemade"plug-inmodule"thatcantakepowerfromtheelectrode
jackand"surfacemodule"thatglowswithsurfacelightemissionofthe
LEDs.Thesebasemodulescanbeconnectedbyanarbitrarycombination
irrespectiveofthefloorsurface/ceilingsurface,andbycontrollingfromthe
controlbox,lightingeffectcanbeeasilyenjoyed.
Itisjustrightsizefornot-to-scaleminifiguresand1/12figures,andyou
canalsoenjoyplayingwiththebasemodulealonebycombiningwiththe
controlbox.
Youcanextendthesizefreelybyaddingabasemodulewithoutincreasingthe
displaycasewithdifferentsizesevenwhenitemsincrease,suchasminifigures
andcollectionsofseriesitems.Lightingeffectsonsuchasfiguresandlarge
plasticmodelsandmagnificentdioramadirectingarealsopossible.
Whatis"DISPLE"?
Thesizecanfreelybeextended!
About"DISPLE"
YoucanplaceaneffectmodulesuchasaspotlighttypeLEDlightonaplug-in
module.
Inaddition,itispossibletoilluminatewithsurfacebrightnessofthesurface
moduleinsufficientbrightness,andninepatternsoflightingeffectsforeach
basemodulefromthecontrolboxispossible.
LEDlightingeffectpatterncanbeadded!
Themodulardisplaycase"DISPLE"canbecomposednotonlyofsizebutalso
ceilingsurface/floorsurfacewithyourfavoritebasemodule.
By combining performance modules such as "One Touch LED Connector"
whichcanbepowereddirectlyfromtheplug-inmoduletotheminiLED,and
"ShimmeringModule"and"TurntableModule"drivenbythemotor,whichwill
beaddedinourproductlineupinthefuture,willalsoexpandenjoymentofthe
display.
Easyandfreecombination!
Productline-upaddedoneafteranother!

8
Plug-inModule
Itisamodulethatcantakepowersupply
fromtheelectrodejacksplacedatfour
corners.Youcanturnonthespecifically
designedspotlightsimplybyinsertingitto
theelectrodejack.Also,ifyouuse"OneTouch
LEDConnector"(tentativename)whichcan
aggregateLEDsetc.tobereleasedinthe
future,powercanbesupplieddirectlytothe
LEDsembeddedinthemodel.
SurfaceModule
Itisamodulethatemitslightwith9LEDs
inside.Itglowswithsufficientbrightnesseven
byasingleunit,andthevariationoflighting
effectwillalsoexpandbysettingacontrol
box.
BlankModule
Itisamodulewithelectronicboardremoved
fromtheplug-inmodule.Pleaseuseitfor
substitutingplug-inmoduleforsizeexpan-
sion.
* Sinceanelectronicboardisnotincluded,it
cannotbeusedasapowerdistribution.
BaseModule
About"DISPLE"

9
Fourbasemodulesconnected
SettheIDnumberto(0),(1),
(2),(3)respectively
Setpatternnumber(6)tocontrol
boxIDnumbers
(0),(1),(2),(3)
Fourbasemodules
blinkingloopinIDorder
*Asforeachname,refertotheNamesofParts(controlpart),andfortheprocedureofoperation,see
HowtoUse.
・Upto10linescanbecontrolled
・Withasoundsensingfunction
・Upto2linescanbecontrolled
Fourbasemodulesconnected
SetalltheIDnumbersto(0)
Setpatternnumber(2)toID
number(0)ofcontrolbox
Fourbasemodules
simultaneouslyflashing
ControlBoxSE ControlBoxLE
Itisacontrolboxthatcontrolsthelightingeffects,whichcanbesaidasthe"brain"of
"DISPLE".Inadditiontosupplyingpowertothebasemodule,youcancontrolthebase
modulesconnectedbyjointpartswithninepatternsoflightingeffects.
Directionoflightinglikestagelightingcanalsobedoneeasily.With"SE"built-in
soundcollectionmicrophone,itisalsopossibletoproducelightingresponsiveto
soundsflowingaround.Asinglecontrolboxcansupplypowerupto24basemodules.
YoucancontrolthebasemodulesettothesameIDnumberastheIDnumberofthe
ControlBoxSEwiththerotaryswitchoftheControlBoxSE.
Forexample:
ControlBox
About"DISPLE"

10
0.OFF
1.Lit:Continuestolightup.
2.Blinking:Repeatslightingonandoffatfixedintervals.
3.Shimmering:Brightnessofthelightingchangescontinuously,givingeffectsof
shimmering.
4.Dimming(adjusted):Brightnessofthelightingchangesstepwise.
5.Dimming(fixed):Youcanfixthebrightnessofthelighting4.Setitto5whenit
reachestothebrightnesslevelyoulike.
6.IDlighting(loop):RepeatsblinkingintheorderoftheID(number)setinthebase
module.
7.IDlighting(reverse):BlinkinginreverseID(number)isaddedtothepattern6,and
theroundtripoflightingisdirected.
8.Soundsensor1:Respondstosurroundingsoundsandmusic,anddirectsthelight
emissioneffect.
9.Soundsensor2:SameastheSoundsensor1.Thereisadifferenceinmicrophone
sensitivity.
ControlBoxSELightingeffectpattern
0.OFF
1.Lit:Continuestolightup.
2.Blinking1:Repeatslightingonandoffatfixedintervals(long).
3.Blinking2:Repeatslightingonandoffatfixedintervals(short).
4.Dimming(adjusted):Brightnessofthelightchangesstepwise.
5.Dimming(fixed):Youcanfixthebrightnessofthelighting4.Setitto5whenit
reachestothebrightnesslevelyoulike.
6.Shimmering:Brightnessofthelightingchangescontinuously,givingeffectsof
shimmering.
7.Blinking1(alternatelyflashing):Blinksatfixedintervals(long)alternatelywith
themodulesetat2.
8.Blinking2(alternatelyflashing):Blinksatfixedintervals(long)alternatelywith
themodulesetat3.
9.Dimming(alternatelyflashing):Brightnesschangesstepwisealternatelywiththe
modulesetat4.
ControlBoxLELightingeffectpattern
About"DISPLE"

11
StarterKit(Plug-inModule)
StarterKit(SurfaceModule)
NamesofParts
Basemodule(Surfacemodule) ControlboxSE/LE
Interface
part
ACadapter
Interfacecable
Screw
Basemodule(Plug-inmodule) ControlboxSE/LE
Interface
part
ACadapter
Interfacecable
Spotlight
Screw

12
BaseModule,ControlboxSE/LE
NamesofParts
Rotaryswitch
Powerswitch
IDnumber
IDnumber
パターンナンバー
eachbasemodule(reverseside)
ControlboxSE
ControlboxLE
*sameasControlboxSE

13
Thenumberofscrews,jointpartsandspotlightsareomitted.
Acrylicboardshavedifferentdimensions.(forfrontuse,forsideuse,forbackside).
Itisapartforpowerdistribution.Itisunnecessarywhenassemblingusingablankmodule.
Itisanoptionalpart.Pleasepurchaseseparately.
*1
*2
*3
*4
Basemodule
(Surfacemodule)
Framepart
(spacer)
Basemodule(Plug-inmodule)
ControlboxSE/LE
Interfacepart
Interfacepart
ACadapter
Interfacecable
(short)
Spotlight
Interfacecable
(long)
Framepart
(cover)
Framepart
(straight)
Framepart
(corner)
Framepart
(center)
Jointpart
Acrylicboard
(side)*2
Acrylic
board
(front)
Acrylic
board(back)
Topboard
Screw
Frontface
*2
*2
*2
*3
*3
*3 *4
*3 *4
*3 *4
*3 *4
*3
*1
* Thecontentsofthesetchangesaccordingtotheselectedmoduleconfiguration.
* Thefigurebelowisacombinationexampleofthetopsurface,surfacemodule,
floorsurfaceandplug-inmodule
(e.g.:D202030S-PS)
*3
StandardSet
NamesofParts

14
Inassemblingthisproduct,please
prepareaPhillipsscrewdriver.
Determinetheinterfacepartmount-
ingposition(thepositionwherethe
electricsignalisinput)
1
Afterplacingthebasemodule,secure
theframepart(center)withascrew
usingaPhillipsscrewdriver.
3
UseaPhillipsscrewdrivertofixthe
jointpartbetweenthemoduleswith
screws.
4
Placethebasemodulewhilechecking
thedirectionofcurrentflow.Atthis
time,makesurethatcurrentflows
throughallthebasemodulesconnect-
edstartingfromtheinterfacepart
mountingposition.
2
Pleasedonottouchmetalterminal
end,donotwetitandputforeign
objectsinside.Ifnot,itmaycausea
contactfailureormalfunction.
CAUTION
※Thefigureisacombinationexampleof200X200sizebasemodule.
Use8screwstofixoneframepart(center).
Tightenthemindiagonalorder.
Usetwoscrewstofixonejointpart.
directionofcurrent
flow
Interfacepart
mountingposition
1
2
Interfacepart
mountingposition
2
4
3
MethodofPartsAssembling(BaseModule)

15
※Thefigureisacombinationexampleof200X200sizebasemodule.
1Inassemblingthisproduct,please
prepareaPhillipsscrewdriver.Fitthe
framepart(straight)intotheassem-
bledbasemodule.
2Fromeachadjacentpoint,fiteach
framepartsimilarlysoastogoaround
thebasemodule.
3Fittheclawsofthelastframepart
(corner)sidebyside.
UsingaPhillipsscrewdriver,fixeach
framepartwithscrews.
4Fittheframepart(cover)intoeach
recess.
4screwsareusedtofixoneframepart.
Onescrewisusedtofixoneframe
part.
Pleasedonottouchmetalterminal
end,donotwetitandputforeign
objectsinside.Ifnot,itmaycausea
contactfailureormalfunction.
CAUTION
5UseaPhillipsscrewdrivertosecure
theinterfacepartwithascrew.
Excludinginterfacepartmountingposition.
1
2
3
45
MethodofPartsAssembling(FramePart)

MethodofPartsAssembling(AcrylicBoard)
Fittheacrylicboards(forside,for
back)intothebasemodulethathas
alreadybeenassembled.
1
Attachoptionalpartssuchasspotlight
totheelectrodeoftheplug-inmodule.
2
Fittheframepart(spacer)asshownin
thegrooveonthefrontside.
3
Fittheupperpartbasemoduleonthe
topplace.
4
Enterthepiece(exhibit)tobe
displayed.
5
Fittheacrylicboard(forfrontside)in
theorderfromthetoptothebottom
asshown.
6
Dimensionsofacrylicboardsaredifferent
forsideuse,backuseandfrontuse.
1 11
2
3
4
5
6
16
※Thefigureisacombinationexampleof200X200sizebasemodule.

MethodofPartsAssembling(Wiring)
17
Connecttheinterfacecable(long)to
interfacepartonthetopsurface.
1
Connecttheinterfacecables(longand
short)fromthetopsurfacetothe
interfacepartonthefloorsurface.
2
ConnecttheACadaptercableand
interfacecable(short)
respectivelytothecontrolbox,and
finallyplugtheACadapterintothe
AC100V〜240Voutlet.
3
Pleasedonotpullortwisteachcable
forcibly,nortouchmetalterminal
end,donotwetitorenterforeign
objectsinside.Ifnotitmaycausea
contactfailureormalfunction.
CAUTION
Besuretoinserttheconnectorsofeach
interfacecabletotherootuntilaclick
soundisheard.
Besuretoinsertalltheconnectorsfirmlyto
theroots.
1
2
2
3
3
※Thefigureisacombinationexampleof200X200sizebasemodule.

18
Whenhandlingthisproduct,please
prepareaPhillipsscrewdriveranda
flatheadprecisionscrewdriver
(eyeglassscrewdriveretc.)
Usingaflatheadprecisionscrewdriver,
settherotaryswitchofthebase
moduletotheIDnumbercontrolled
bythecontrolbox.
1
Usingaflatheadprecisionscrewdriver,
settherotaryswitchofthecontrolbox
tothedesiredlightingeffectpattern
number.
2
Uponcheckingalltheconnectionsof
ACadapter,interfacecablesand
AC100V〜240Voutlet,thenturnon
thepowerswitchofthecontrolbox.
3
Confirmthatthelightingoperates
correctlyasitisset,andfixthetop
boardwithscrewstothetopsideusing
aPhillipsscrewdriver.
4
Refertotheproductoverview(ControlBox
SE)forthedescriptionofthelightingeffect
pattern.
Use16screwstofixonetopboard.Tighten
themindiagonalorder.
1
2
ON
3
4
※Thefigureisacombinationexampleof200X200sizebasemodule.
HowtoUse(procedureforlightingeffects)

19
Plug-inModule
BMD-P01
W100mmXD100mmXH29.8mm
about101g
ACadapter(DC12V/2.0A)
0.6VA(when2spotlightsarelit)
5kg
ABS
Modelnumber
Size
Weight
Powersource
Powerconsumption
Withstandload
Material
BMD-S01
W100mmXD100mmXH29.8mm
White
about101g
ACadapter(DC12V/2.0A)
0.8VA
5kg
ABS,Polycarbonate
Modelnumber
Size
LEDemissioncolor
Weight
Powersource
Powerconsumption
Withstandload
Material
Modelnumber
Size
Weight
Withstandload
Material
Modelnumber
Size
Weight
Powersource
Powerconsumption
Material
ControlBoxSE/LE
CBX-001、CBX-002
W100mmXD100mmXH20.0mm
about136g
ACadapter(DC12V/2.0A)
1.2VA
ABS
SurfaceModule
BlankModule
BMD-B01
W100mmXD100mmXH29.8mm
about64g
5kg
ABS
ProductSpecification
Table of contents
Other Naito Display Case manuals
Popular Display Case manuals by other brands

Federal
Federal SNR482C-2 Installation and operation instructions

Nordcap
Nordcap PV 450 R LED manual

Structural Concepts
Structural Concepts Harmony HMG2642R.4439 Installation & operating manual

Hussmann
Hussmann PSM15E3R installation manual

Hatco
Hatco FLAV-R-SAVOR LFST-48 Installation and operating manual

Nordcap
Nordcap PV 100 LED manual