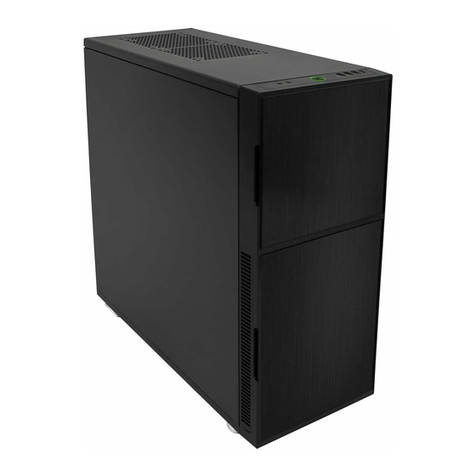
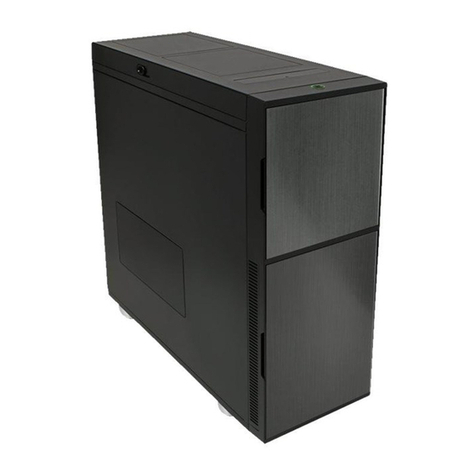
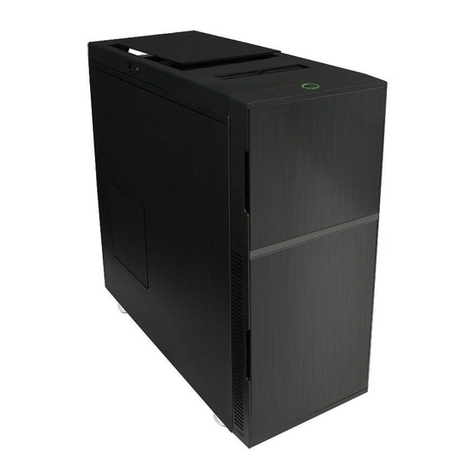
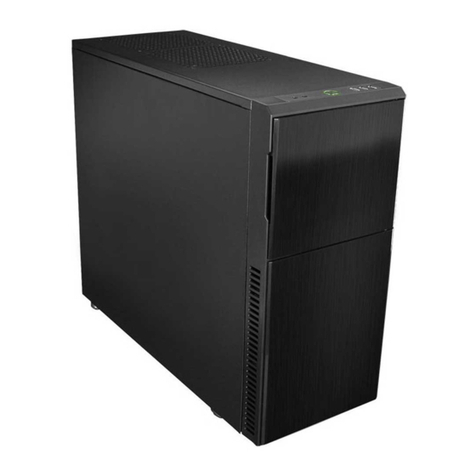
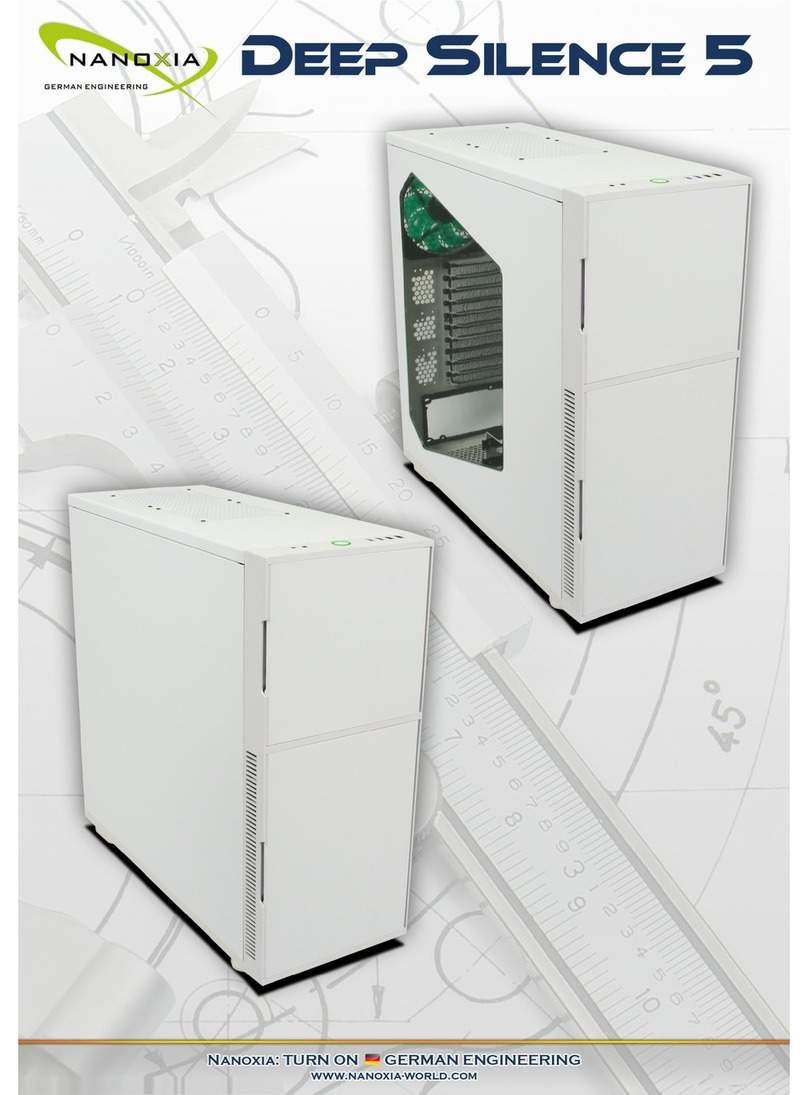
Nanoxia Deep Silence 5 User manual

© Nanoxia 2014

MAnual_DeepSilence5_revB_DE_EN.indd 3-4 23.10.2014 10:04:58

I. Einleitung
• Spezikaonen
• Zubehör
• Features
II. Montageanleitung
1. Einbau des Mainboards
2. Einbau externer Laufwerke
2.1 Opsche Laufwerke
2.2 Nutzung des externen 3,5“ Schachts
3. Einbau der Festplaen
3.1 Montage der Festplaen
3.2 Umbau und Enernen der Festplaen-Käge
3.3 Nutzung des 6 x 2,5“ Montagerahmens
4. Enernen der Gehäusefront
5. Montage der Gehäuselüer
5.1 Lüer in der Gehäusefront
5.2 Lüer im Gehäusedeckel
5.3 Lüer am Gehäuseboden
6. Die 2-Kanal Lüersteuerung
6.1 Anschluss der Lüer an die Lüersteuerung
6.2 Betrieb der Lüersteuerung
7. Einbau einer Wasserkühlung
7.1 Einbau eines Radiators oder einer Kompaktkühlung hinter der Gehäusefront
7.2 Einbau eines Slim-Radiators oder einer Kompaktkühlung unter dem Gehäusedeckel
8. Das I/O-Panel
III. Support
III. Support
Dear customer,
The PC case you purchased has undergone a very thorough quality control. Nevertheless,
should there be any unexpected problems with your case we ask that you rst approach the
dealer where you purchased the product. They are prepared to assist you with competent and
uncomplicated advice and praccal support.
If perhaps a few screws were missing or you might have a queson that can’t be answered by
this manual, please do not hesitate to contact us directly by e-mail. Our sta will respond to all
inquiries quickly and professionally.
Likewise, we would appreciate your suggesons and comments about our case very much.
Customers from Germany and other European countries can use the following e-mail address
for support quesons, spare parts or warranty issues:
support@nanoxia-world.com
Customers from Africa, Asia, Australia as well as North and South America can use the
following e-mail address for support quesons, spare parts or warranty issues:
support.overseas@nanoxia-world.com
For general inquiries, comments, suggesons and the like please refer to:
info@nanoxia-world.com
We are sure that you will be sased with Nanoxia Deep Silence 5 Rev. B for many years to
come, so please enjoy your new PC case.
Your Nanoxia Support-Team
________________________________________________________________02
__________________________________________________________02
________________________________________________________________02
_______________________________________________________________03
________________________________________________________06
___________________________________________________06
________________________________________________07
___________________________________________________07
______________________________________07
____________________________________________________07
_______________________________________________08
______________________________08
___________________________________09
_______________________________________________10
________________________________________________11
_____________________________________________11
______________________________________________12
______________________________________________12
_______________________________________________13
_______________________________13
___________________________________________14
______________________________________________14
_____14
____15
___________________________________________________________15
________________________________________________________________16
DE
01
32
MAnual_DeepSilence5_revB_DE_EN.indd 5-6 23.10.2014 10:04:59
I. Einleitung
Wir beglückwünschen Sie zu Ihrem neuen Nanoxia Deep Silence 5 in der Revision B. Wir sind
davon überzeugt, dass Sie von Ihrem neuen PC- Gehäuse über viele Jahre hinweg begeistert
sein werden.
Die Nanoxia Deep Silence Serie konnte bereits mehr als 100 Auszeichnungen durch die inter-
naonale Fachpresse für sich verbuchen. Das innovave Konzept und die außerordentliche
Qualität begeistern gleichermaßen Fachwelt und Enthusiasten.
Basierend auf den Anregungen unserer Kunden hat unser Designer-Team im Rahmen der
Produktentwicklung sinnvolle Opmierungen entwickelt, die Sie in der vorliegenden Revision wie-
dernden. So haben unsere Entwickler z.B. einen neuargen 6 x 2,5“ Montagerahmen entwickelt,
der die platzsparende und entkoppelte Montage von bis zu sechs 2,5 Zoll HDD/SSD ermöglicht.
Das Deep Silence 5 bietet auch in der neuen Revision besonders viel Platz für Ihre anspruchsvollen
Projekte. Aufgrund der modularen Festplaenkäge bietet das Gehäuse ein Höchstmaß an
Variabilität und Kompabilität, sowohl für Wasserkühlungsvorhaben als auch zum Einbau von
High-End Systemen mit Lukühlung.
Spezikaonen
Abmessungen: 552 x 232 x 550 mm (Höhe x Breite x Tiefe)
Material: Stahl, Kunststo
Externe Laufwerke: 3 x werkzeuglose Einschübe 5,25“
1 x werkzeugloser Kombischacht 5,25 & 3,5“
Interne Laufwerke: 8 x 2,5“ bzw. 3,5“ Einschübe (max. 11)
6 x 2,5“ Einschübe
Gummiverschlüsse für
Schlauchdurchführungen
EPS-Kabel 24-Pin ATX Kabel Schrauben zur Montage
von Lüftern
Mainboard
Abstandhalter
Schrauben zur
Mainboardmontage
Schrauben zur
3,5“ Festplattenmontage
Schrauben für
3,5“ Montagerahmen
Schrauben zur
2,5“ Festplattenmontage
Schrauben zur 2,5“
Festplattenmontage (lang)
Schrauben zur
Netzteilmontage
Rändelschrauben
Zubehör
Finally, reinstall the fans. For maximum cooling performance, you can also mount addional
fans on the back of the radiator.
7.2 Installaon of a slim radiator or com-
pact water cooling soluon under the top
cover
Under the top cover, you can install in a
240/280 mm slim radiator. To mount a radiator
under the cover, please use the 120/140
mm fan mounng holes.
Before the installaon, please check carefully,
if the distance to the motherboard compo-
nents is sucient.
8. The I/O-Panel
The I/O panel includes connectors for exter-
nal USB devices (2 x USB 2.0, 2 x USB 3.0),
and the microphone and headphone ports.
The blue USB connectors are super-Speed
USB 3.0, USB 2.0 ports are black. The le
audio connector (when viewed from the
front) is for headphones, the right is intended
for a microphone.
The hard drive acvity is indicated by
ickering of the illuminated power buon
Radiator
with 2 fans
mounted
Radiator
with 4 fans
mounted
EN
02 31
MAnual_DeepSilence5_revB_DE_EN.indd 7-8 23.10.2014 10:05:01

Sollte Ihnen eines der oben aufgeführten Teile fehlen, so informieren Sie bie unseren Kunden-
service per E-Mail: support@nanoxia-world.com
Features:
- Watercooling ready
- Vollständige, individuell anpassbare Schalldämmung mit hochwergen Materialien nach
Industriestandard
- 6 x 2,5“ Montagerahmen
- Werkzeugfreie Montage der opschen Laufwerke
- 2 x USB 3.0, 2 x USB 2.0 frontseig
- 10 Slots für Erweiterungskarten
- Maximale Grakkartenlänge: 338 mm, bzw. bis zu 468 mm bei demonerten
Festplaenkägen
- Raum für CPU-Kühler mit einer maximalen Bauhöhe von 185 mm
- Montageönung für CPU-Kühler im Mainboardträger
- Kabelmanagement mit 9 gummierten Durchführungen im Mainboardträger
- Nanoxia VentCover (schallgedämmt): 2 x Gehäusedeckel
- Stufenlose 2-Kanal Lüersteuerung für bis zu 6 Lüer
Schalldämmung
Das Nanoxia Deep Silence 5 Rev. B ist mit dem Anspruch entwickelt worden, dem Käufer ein
möglichst geräuscharmes Gehäuse bei gleichzeig niedrigsten Systemtemperaturen zu bieten.
Das Schalldämmungskonzept basiert auf mehreren, ineinandergreifenden Designelementen:
Wichgster Bestandteil ist die großächige Auskleidung des Gehäuses mit schallabsorbierenden
Dämmmaen. Die verwendeten Materialien wurden speziell nach den Anforderungen der
Entwickler der Nanoxia Deep Silence Gehäuseserie hergestellt. Die verwendete Dämmung
wirkt gleichermaßen gegen Körper- und Luschall.
Im Lieferumfang enthalten sind spezielle Gummi-Verschlüsse, mit denen alternav die
Schlauchdurchführungen oberhalb des rückwärgen Gehäuselüers geschlossen werden
können, wenn Sie diese nicht benögen sollten.
6.2 Operaon of the fan control
The sliders for controlling the fans controller
can be found behind the upper front door.
The upper slider controls channel A and the
lower slider controls channel B.
7. Installing a water cooling soluon
In Nanoxia Deep Silence 5 Rev. B you can install radiators or compact water cooling systems
both behind the front panel and under the top cover. We recommend the installaon of the
radiator behind the front panel.
7.1 Installaon of a radiator or compact water cooling soluon behind the front
Thanks to the modular HDD-cages, you can mount a 120 or 240 mm radiator or a compact
water cooling soluon behind the front.
Please note that the cooler must not exceed 315 mm in length.
For the installaon, please remove the modular HDD-cages (see Chapter 3.2). Open the lower
front door and the “Easy Access” Panels and remove the fans. Hold the radiator from the inside
and secure it with screws, using the corresponding mounng slots.
DE
30 03
MAnual_DeepSilence5_revB_DE_EN.indd 9-10 23.10.2014 10:05:03

Die demonerbaren Nanoxia VentCover verschließen die 120/140 mm Lüer-Önungen im
Gehäusedeckel und ermöglichen es, zwischen geringstmöglicher Geräuschkulisse oder
bestmöglicher Gehäusebelüung zu wählen.
Ein weiteres Designelement für eine opmale Schalldämmung ist die Verwendung von zwei
schallgedämmten Fronüren. Festplaen und Netzteil werden selbstverständlich entkoppelt
monert.
Das gesamte Schalldämmungskonzept des Deep Silence 5 Rev. B wird somit höchsten
Ansprüchen gerecht.
Belüungssystem
Das Nanoxia Deep Silence 5 Rev. B verfügt über ein integriertes Belüungssystem - bestehend
aus drei serienmäßigen 140 mm Deep Silence Lüern und einer integrierten 2-Kanal Lüer-
steuerung. Insgesamt können bis zu sechs Lüer monert werden.
Die Nanoxia VentCover im Gehäusedeckel können jederzeit enernt werden und erlauben den
Einbau von 120 mm oder 140 mm Lüern zur opmierten Wärmeabfuhr.
Die Deep Silence Axiallüer wurden speziell für einen besonders geräuscharmen Betrieb
opmiert. Regel- und Drehzahlbereich von Lüersteuerung und Gehäuselüern wurden so
deniert, dass der Anwender die Gehäusebelüung ideal an sein System und seine Anforde-
rungen anpassen kann.
Alle Luansaugönungen (Front und Boden) verfügen über leicht zugängliche und einfach zu
reinigende Staublter. Hinter der unteren Fronür benden sich „Easy Access Panel“, die einen
besonders leichten Zugri sowohl auf die Staublter als auch auf die frontseigen 140 mm
Lüer ermöglichen.
Serienausstaung:
Front: 2 x 140 mm Nanoxia Deep Silence Lüer (max. 1.100 U/Min)
Rückseite : 1 x 140 mm Nanoxia Deep Silence Lüer (max. 1.100 U/Min)
Oponale Bestückung:
Deckel: 2 x 120/140 mm Lüer
Gehäuseboden: 1 x 120/140 mm Lüer (Demontage HDD-Halter erforderlich)
The dust lter at the boom can be pulled out for easy cleaning.
Addional case fans on the boom should be mounted so that cooler air is introduced into
the case (fan rear side facing inwards).
6. The 2-channel fan controller
The Deep Silence 5 Rev. B is equipped with a 2-channel fan control for up to six case fans. You
can operate up to three fans per channel.
6.1 Connecng the fans to the fan control
The fan controller is powered by a 4-pin Molex connector that is connected directly to the
power supply.
The controller has two channels (A and B), with each channel able to control up to three 3-pin
fans, therefore a total of six fans can be controlled.
The fan controller is not designed for the operaon of powerful fans. Please take this into
account in parcular when using fans from other manufacturers. The maximum power per
channel must not exceed 18 was.
EN
04 29
MAnual_DeepSilence5_revB_DE_EN.indd 11-12 23.10.2014 10:05:04

Watercooling-ready
Das Nanoxia Deep Silence 5 Rev. B ist wie alle Nanoxia Gehäuse für die Verwendung von
Wasserkühlungen ausgelegt. So lassen sich im Gehäuse sowohl hinter der Gehäusefront als
auch unter dem Gehäusedeckel Radiatoren oder kompakte Wasserkühllösungen unterbringen.
Gehäusedeckel: 120/140/240/280 mm Slim-Radiator
Bie beachten Sie, dass bei der Montage einer Wasserkühlung im Deckel darauf geachtet werden
muss, ob genügend Abstand zu den Mainboard-Komponenten gegeben ist. Wir empfehlen
grundsätzlich die Radiator-Montage im Frontbereich des Gehäuses.
Gehäusefront: 120/240 mm Radiator
Hinter der Gehäusefront kann ein 120/240 mm Radiator monert werden. Bie beachten
Sie, dass die vorderen Festplaenkäge hierfür ausgebaut werden müssen – der HDD-Käg auf
der sekundären Schiene kann im Regelfall im Gehäuse verbleiben.
Bei Kompakt-Wasserkühlungen sollten Sie vor der Montage prüfen, ob die werksseigen
Schläuche zwischen Kühler und Radiator ausreichend lang dimensioniert wurden, um die
Lüer-Radiatoren-Kombinaon frontseig moneren zu können.
Schlauchdurchführungen:
Rückseig stehen vier gummierte Schlauchdurchführungen zur Verfügung, so dass entspre-
chende Wasserkühlungs-Komponenten extern betrieben bzw. monert werden können.
Im Folgenden nden Sie einige wertvolle Tipps und Erklärungen für die opmale Nutzung
Ihres neuen Gehäuses und für die Installaon Ihrer Hardware.
5.2 Fans under the top cover
If you want to install addional fans at the top of the case, please remove the Nanoxia VentCovers
rst by removing the screws on the outside of the case.
Next, hold the fans from the inside and secure them to the top by fastening the screws from
the outside.
Case fans installed at the top of the case should exhaust air out of the case (fan rear side
facing outwards).
5.3 Fan at the boom of the case
You can install a 120 or 140 mm fan on the boom of the case. To do that, you must remove
the secondary HDD-cage mounng rail from the case boom. We recommend the following
procedure:
a) Remove the dust lter and unscrew the
screws on the two guide rails of the lter to
remove it.
b) To remove the secondary hard drive
bracket, please remove the four screws, as
shown on the image.
c) Please place the fan on the inside of the case and secure it from the outside
d) Aach the dust lter mounts again to the case boom and slide the dust lter back to its
original posion.
DE
28 05
MAnual_DeepSilence5_revB_DE_EN.indd 13-14 23.10.2014 10:05:05

II. Montageanleitung
1. Einbau des Mainboards
Im Deep Silence 5 Rev. B lassen sich E-ATX, XL-ATX, ATX, M-ATX und Mini-ITX Mainboards moneren.
Um einen möglichst problemlosen Einbau Ihres Mainboards zu gewährleisten, empfehlen wir
Ihnen folgende Vorgehensweise:
Entnehmen Sie bie den Formfaktor Ihres Mainboards und dafür vorgesehene Gewindelöcher
den folgenden Abbildungen:
E-ATX XL-ATX, ATX Micro-ATX Mini-ITX
Befesgen Sie die mitgelieferte EPS-Verlängerung an Ihrem Mainboard – diese bie noch nicht
mit dem Netzteil verbinden.
Moneren Sie als Nächstes den CPU-Kühler – bei großvolumigen Kühlern kann die Befesgung
der EPS-Verlängerung nach der Montage schwierig sein.
Setzen Sie das Mainboard nun vorsichg
ins Gehäuse und fädeln Sie dabei die EPS-
Verlängerung durch die dafür vorgesehene
Önung oben im Mainboardtray hindurch.
Verschrauben Sie dann das Mainboard mit
dem Mainboardträger. Nach dem Einbau des
Netzteiles können Sie die EPS-Verlängerung
auf der Rückseite des Mainboardträgers mit
dem EPS-Anschluss des Netzteils verbinden.
5. Fan assembly
Three 140 mm fans are pre-installed in your case. You can mount up to six fans in total.
We recommend the use of the 120 or 140 mm Nanoxia Deep Silence fans, available separately.
These are technically and visually equivalent to the factory-installed case fans and will work in
perfect harmony with the built-in fan control of your case.
You can, of course, connect the addional fans to the fan controller (see Chapter 6).
All air intake openings are equipped with easy to clean dust lters. We recommend that you
clean them on a regular basis.
5.1 Front Fans
To switch the fans in the front or to clean the dust lters, rst open the lower front door. Next,
open the “Easy Access Panel” by pushing slightly on the le side of the panel (picture 5A).
You can remove the fan by pushing away the retaining lugs a lile bit from the fan and then
pull the fan out (picture 5B).
The dust lters can easily be pulled out, as you can see here (picture 5C).
Please note, that the lter elements must be fully inserted to guarantee the proper operaon
of the “Easy Access Panel”.
picture 5A
picture 5B
picture 5C
EN
06 27
MAnual_DeepSilence5_revB_DE_EN.indd 15-16 23.10.2014 10:05:07

2. Einbau externer Laufwerke
Im Deep Silence 5 Rev. B können Sie bis zu vier externe Laufwerke moneren. Zum Lieferumfang
gehört zudem ein Adapterrahmen zum Einbau eines 3,5“ Laufwerkes.
2.1 Opsche Laufwerke
Enernen Sie zuerst beide Seitenteile des Gehäuses. Der Einbau der opschen Laufwerke
erfolgt vollständig ohne Werkzeug und Schrauben.
Enernen Sie die 5,25“ Blende, indem Sie
den seitlichen Kipphebel vorsichg nach
vorne ziehen und die Blende dann heraus-
nehmen.
Lösen Sie bie auf beiden Seiten die Arre-
erung, indem Sie den schwarzen Schieber
nach hinten ziehen (1).
Schieben Sie das Laufwerk in die gewünschte
Posion.
Arreeren Sie die Halterung, indem Sie den
Schieber wieder zurück in die Ausgangsposion
schieben (2).
2.2 Nutzung des externen 3,5“ Schachts
Wenn Sie z.B. einen 3,5“ Card Reader o.ä. verbauen möchten, können Sie hierfür den internen
Adapterrahmen nutzen. Enernen Sie zuerst die 5,25“ Blende (siehe Kapitel 2.1).
Önen Sie die beiden Schnellverschlüsse des untersten 5,25 Zoll Schachts und entnehmen Sie
den Einbaurahmen. Moneren Sie den Card Reader im Rahmen und setzen Sie dann Rahmen
inkl. Card Reader wieder in den Schacht ein. Arreeren Sie die Schnellverschlüsse. Am Ende
setzen Sie die im Lieferumfang enthaltene 3,5 Zoll Adapterblende vorsichg vor den Card
Reader.
3. Einbau der Festplaen
Im Deep Silence 5 Rev. B können Sie bis zu 14 Festplaen vibraonsenkoppelt moneren. Es
stehen bis zu 11 x 2,5“/3,5“ Kombischächte zur Verfügung. Mitgeliefert wird der neu entworfene
6 x 2,5“ Montagerahmen, der drei 3,5“ Schächte zum Einbau benögt. Durch die Verwendung
des 5,25“ auf 3,5“ Adapters können sogar bis zu 15 Festplaen verbaut werden.
1
2
4. Removing the front panel
To remove the front panel, simply hold the
cut-out at the boom of the front panel and
pull it towards you with a rm tug.
Please note that the cables of the I/O-panel
are guided through the front into the chassis,
so please be careful when removing the
front.
DE
vercally in the frame and secure them on both sides with the 2.5 inch mounng screws (long).
Then push the frame with the hard drives into the HDD cage in the posion you prefer.
If you plan to put the frame in the addional 3-bay HDD-cage, we recommend connecng the
SATA power and data cables, before pushing the mounng frame back into the cage and then
guide the cables through the appropriate cable guides in the motherboard tray.
26 07
MAnual_DeepSilence5_revB_DE_EN.indd 17-18 23.10.2014 10:05:11

3.1 Montage der Festplaen
Der Einbau der 3,5“ Festplaen erfolgt in den abgebildeten Montagerahmen. Um einen der
Rahmen zu entnehmen, drücken Sie die herausstehenden Halterungen zusammen und ziehen
Sie den Schlien vorsichg heraus.
Um eine Festplae in einen Schlien einzubauen, legen Sie die Festplae so ein, dass die
Anschlüsse nach hinten zeigen und xieren Sie die Festplae mit Hilfe der beiliegenden
Schrauben.
Für die Montage von 3,5“ Festplaen nutzen
Sie bie die Bohrungen auf Abb. 3A
Für die Montage von 2,5“ Festplaen nutzen
Sie bie die Bohrungen auf Abb. 3B.
Um die Plae zu arreeren, schieben Sie
abschließend den Schlien mit der Festplae
wieder in den Schacht, bis die Halterung im
Käg eingerastet ist.
3.2 Umbau und Enernen der Festplaen-Käge
Ihr neues Gehäuse verfügt über drei modulare HDD-Käge (2 x 3 HDD, 1 x 5 HDD). Diese
können bei Bedarf enernt oder versetzt werden.
Durch diese einmalige Variabilität können Sie:
- die Anzahl der verfügbaren HDD Plätze anpassen
- überlange Grakkarten installieren
- den Lustrom in ihrem System opmieren
- eine Wasserkühlung im Frontbereich hinter den
Serienlüern moneren
Um den oberen HDD-Käg zu entnehmen, enernen
Sie zuerst das von vorne gesehen linke Seitenteil und
die beiden Daumenschrauben, mit denen der Käg
xiert ist. Dann können Sie ihn vorsichg nach vorne
herausziehen.
Abb. 3A Abb. 3B
3.3 Ulizing the 6 x 2.5 inch mounng frame
Our newly developed 6 x 2.5 inch frame allows the space-saving mounng of up to six 2.5 inch
drives. For installaon, the mounng frame will need three 3.5 inch bays.
To mount the hard disks, please remove the mounng frame. Insert your 2.5 inch drives
EN
If you want to remove the lower hard drive cage in order to install a water cooling radiator,
simply loosen the 8 screws holding the cage to the chassis.
First remove the front panel (see chapter 4).
Next loosen the four screws securing the HDD cage to the front panel.
Finally, remove the four screws at the boom of the case which allow the cage to be removed.
08 25
MAnual_DeepSilence5_revB_DE_EN.indd 19-20 23.10.2014 10:05:13

3.1 Mounng of hard disk drives
Install the 2.5 or 3.5 inch hard drives in the illustrated mounng frames. In order to extract the
frame, squeeze the protruding brackets and pull the slide out gently.
To install a hard drive into a bracket insert the disk so that the connectors point to the back and
aach the hard drive using the screws provided
For the ng of 3.5 inch hard drives
please use the holes in Figure 3A
For the ng of 2.5 inch hard drives
please use the holes in Figure 3B
To lock the drive, push the bracket with the
drive back installed back into the slot unl the
bracket is re-engaged.
3.2 Conversion and removal of the HDD-cages
Your new case is equipped with three modular HDD-cages (2 x 3-bay, 1 x 5-bay). The cages can
be removed, swapped or reposioned.
Due to this unique variability, you can:
- Adjust the number of available HDD mounts
- Install extra-long graphic cards
- Opmize the air ow within the case
- Mount a water cooling system behind the front fans
To remove the upper HDD cage, rst remove the le
side as seen from the front as well as the two thumb
screws that secure the cage. Then you can carefully
pull it out.
Figure 3A Figure 3B
DE
Wenn Sie den unteren HDD-Käg hinter der Gehäusefront demoneren möchten, um z.B.
einen Radiator zu verbauen, müssen Sie die 8 Schrauben lösen, mit denen der Käg mit dem
Gehäuse verschraubt ist.
Hierfür enernen Sie bie zuerst die Gehäusefront (siehe Kapitel 4).
Lösen Sie dann die vier Befesgungsschrauben des HDD-Kägs in der Gehäusefront.
Als letzten Schri enernen Sie die vier Schrauben im Gehäuseboden und entnehmen Sie
dann den Käg.
3.3 Nutzung des 6 x 2,5“ Montagerahmens
Unser neu entwickelter 6 x 2,5“ Montagerahmen ermöglicht die platzsparende Montage von
bis zu sechs 2,5“ HDD/SSD. Der Montagerahmen beansprucht drei 3,5“ Schächte zum Einbau.
Zur Installaon der Laufwerke entnehmen Sie zuerst den Montagerahmen. Setzen Sie Ihre 2,5“
Laufwerke verkal in den Rahmen und xieren Sie sie auf beiden Seiten mit den 2,5“ Montage-
schrauben (lang).
0924
MAnual_DeepSilence5_revB_DE_EN.indd 21-22 23.10.2014 10:05:15

4. Enernen der Gehäusefront
Um die Front zu enernen, greifen Sie von
vorne in die Önung an der Unterkante der
Kunststofront und ziehen mit einem kräigen
Ruck daran.
Bie beachten Sie, dass die Kabel des I/O
Panels oberhalb der Front ins Chassis
geführt werden. Seien Sie bie
entsprechend vorsichg, wenn Sie die
Front enernen.
2. Installaon of external drives
You can install up to four external drives. An adapter frame for mounng a 3.5 inch drive is
included.
2.1 Opcal drives
To install the opcal drives, please remove both side panels. The installaon of opcal
drives is tool-free.
Remove the 5.25 inch cover by pulling the
lateral lng lever cauously towards you
and take out the cover.
Then loosen the lock on both sides by drag-
ging the black slider backwards (1).
Then slide the drive into the desired posi-
on.
Lock the holder by pushing the slider back
to its original posion (2).
2.2 Ulizing the external 3.5 inch bay
If you for example desire to place a 3.5 inch card reader, you can use the internal adapter for
this purpose. Please remove at rst the 5.25 inch cover (see chapter 2.1).
Open the two quick release of the boom 5.25 inch bay and remove the adapter frame. Install
the card reader in the frame and then put both the frame and the card reader back into the
bay. Lock the quick-release. At the end you can put the included 3.5 inch adapter plate carefully
before the card reader.
3. Installaon opons of HDD’s
The Deep Silence 5 Rev. B allows you the decoupled mounng of 14 hard disk drives. A total
of 11 x 2.5/3.5 inch bays are available. Included is the newly developed 6 x 2.5 inch mounng
frame, which will take three 3.5 inch bays for installaon. By using the 5.25 inch to 3.5 adaptor,
you can mount a total of 15 hard disks drives in your case.
1
2
EN
Setzen Sie dann den Rahmen mit den Festplaen an die von Ihnen gewählte Posion im Fest-
plaenkäg.
Falls Sie den Rahmen im zusätzlichen 3-fach HDD-Käg unterbringen wollen, empfehlen wir
Ihnen, die SATA Strom- und Datenkabel anzuschließen, bevor Sie den Montagerahmen wieder
in den Käg schieben und die Kabel dann durch die dafür vorgesehenen Kabelführungen im
Mainboard-Träger zu fädeln.
Wir empfehlen die Verwendung von SATA Daten- und Stromkabeln mit geraden Anschlüssen.
Wenn Sie dieses einmalige Feature nicht nutzen möchten, sind ausreichend 3,5“ Monta-
geschlien im Lieferumfang enthalten, um alle 13 Schächte mit Laufwerken bestücken zu
können.
10 23
MAnual_DeepSilence5_revB_DE_EN.indd 23-24 23.10.2014 10:05:17

5. Montage der Gehäuselüer
Im Deep Silence 5 Rev. B sind drei 140 mm Gehäuselüer bereits vorinstalliert. Sie können die
Lüerbestückung auf bis zu 6 Stück erweitern.
Wenn Sie weitere Lüer verbauen möchten, empfehlen wir die Verwendung der separat im
Handel erhältlichen Nanoxia Deep Silence Lüer. Diese entsprechen technisch und opsch den
werksseig monerten Gehäuselüern und harmonieren perfekt mit den integrierten Lüer-
steuerungen Ihres Towers.
Sie können zusätzliche Lüer selbstverständlich an die Lüersteuerung (siehe Kapitel 6)
anschließen.
Alle Luansaugönungen des Deep Silence 5 Rev. B sind mit leicht zu reinigenden Staubltern
versehen. Wir empfehlen Ihnen, diese regelmäßig zu säubern.
5.1 Lüer in der Gehäusefront
Um die Lüer in der Front zu tauschen oder die Staublter zu reinigen, önen Sie zuerst die
untere Fronür. Önen Sie dann die „Easy Access Panel“ durch leichten Druck auf die linke
Seite des Rahmens (Abb. 5A).
Den Lüer entnehmen Sie, indem Sie beide Haltenasen etwas vom Lüer wegdrücken und den
Lüer herausziehen (Abb 5B).
Die Staublter lassen sich einfach herausziehen (Abb 5C).
Bie beachten Sie, dass die Filtereinsätze für eine einwandfreie Funkon der „Easy Access
Panel“ vollständig eingeschoben sein müssen.
Abb. 5A
Abb. 5B
Abb. 5C
II. Installaon Instrucons
1. Installaon of the motherboard
You can mount E-ATX, XL-ATX, ATX, M-ATX and Mini-ITX motherboards in the Deep Silence 5
Rev. B. In order to ensure an easy installaon of your motherboard, we suggest the following
procedure:
Please consult the following charts to nd your motherboard form factor. Aach the stand-os
according to your motherboard form factor.
E-ATX XL-ATX, ATX Micro-ATX Mini-ITX
Aach the included EPS extension cable on to your motherboard – do not connect it to the
power supply yet.
Next you should mount the CPU cooler - for very large CPU coolers, the aachment of the EPS
extension cable aer installaon can be dicult.
In the next step place the motherboard
gently inside the case and lead the EPS
extension cable through the opening
provided in the top le of the mainboard
tray. Fix the motherboard to the mother-
board tray.
Aer the installaon of the power supply,
you can connect the EPS extension cable to
the EPS-connector on the PSU at the back of
the motherboard-tray
DE
22 11
MAnual_DeepSilence5_revB_DE_EN.indd 25-26 23.10.2014 10:05:18

5.2 Lüer im Gehäusedeckel
Wenn Sie Lüfter im Gehäusedeckel unterbringen wollen, entfernen Sie bitte zuerst die
serienmäßigen Nanoxia VentCover durch Lösen von jeweils 4 Schrauben an der Außenseite des
Gehäuses.
Als Nächstes halten Sie die Lüer von innen an den Gehäusedeckel und verschrauben Sie diese
dann von außen.
Lüer im Deckel sollten die Entlüung unterstützen und die Lu aus dem Gehäuse befördern
(rückwärge Lüerseite ist nach außen gerichtet).
5.3 Lüer am Gehäuseboden
Am Gehäuseboden können Sie einen 120 oder 140 mm Lüer moneren. Dazu müssen Sie die
am Boden verschraubte Festplaenkäg-Montageschiene enernen. Wir empfehlen folgende
Vorgehensweise:
a) Entnehmen Sie den Staublter und lösen
Sie die Schrauben an den beiden Führungs-
schienen des Filters, um diese zu enernen.
b) Um die sekundäre Festplaenhalterung
zu enernen, lösen Sie die vier Schrauben,
wie auf dem Bild zu sehen.
c) Halten Sie den Lüer von innen an den Gehäuseboden und verschrauben Sie ihn von außen.
d) Befesgen Sie die Staublter-Halterungen wieder am Gehäuseboden und schieben Sie den
Staublter wieder an seine ursprüngliche Posion.
Watercooling-ready
The Nanoxia Deep Silence 5 Rev. B has been prepared for the installaon of a water cooling
system.
Therefore you can install radiators or a compact water cooling soluon under the top cover as
well as behind the front panel.
Top cover: 120/140/240/280 mm slim radiator
Before installing a water cooling system under the cover, please ensure if there is sucient
distance to the motherboard components. We recommend mounng the radiator behind the
front of the case.
Front: 120/240 mm radiator
Behind the front panel, a 120 or 240 mm radiator can be mounted. Please note that the front
HDD-cages must be removed for this - the HDD cage on the secondary mounng rail can
usually remain in the case.
For compact water cooling soluons, you should check before the installaon if the original
factory hoses between the cooler and radiator are suciently long enough in order to mount
the radiator-fan-combinaon at the front of the case.
Rubber hose guides:
Four rubber hose guides are located in the rear, so that the appropriate water cooling compo-
nents can be operated or mounted externally.
On the next pages you can nd some useful ps and explanaons for the opmal use of your
new case and for the installaon of your hardware.
EN
12 21
MAnual_DeepSilence5_revB_DE_EN.indd 27-28 23.10.2014 10:05:19

Den Staublter im Gehäuseboden können Sie für die Reinigung einfach nach hinten herauszie-
hen.
Ein zusätzlicher Gehäuselüer am Boden sollte so monert werden, dass frische Lu in das
Gehäuse befördert wird (die rückwärge Lüerseite ist nach innen gerichtet)
6. Die 2-Kanal Lüersteuerung
Das Deep Silence 5 Rev. B verfügt über eine 2-Kanal Lüersteuerung für bis zu 6 Gehäuselüer.
Sie können bis zu drei Lüer pro Kanal betreiben.
6.1 Anschluss der Lüer an die Lüersteuerung
Die Stromversorgung erfolgt über einen 4-poligen Molex-Stecker, der an das Netzteil
angeschlossen wird.
Die Lüersteuerung bietet zwei separate Kanäle (A und B), wobei jeder Kanal bis zu drei 3-Pin
Lüer betreiben kann, dadurch lassen sich insgesamt bis zu 6 Lüer regeln.
Die Regelung ist nicht für den Betrieb von leistungsstarken Lüftern konzipiert. Bitte
berücksichgen Sie dies insbesondere bei der Verwendung von Lüern anderer Hersteller.
Die maximale Leistungsaufnahme darf 18 Wa je Kanal bzw. Steuerung nicht überschreiten.
The removable Nanoxia VentCovers mask the 120/140 mm fan holes in the case top. They
allow the user to choose between the least possible noise and improved case venlaon.
Another design element for opmum sound insulaon is the use of two sound-insulated front
doors. The doors are equipped with sound-absorbing foam. Hard drives and power supply are
also decoupled mounted.
The whole concept of sound proong meets the highest expectaons.
Venlaon System
The Nanoxia Deep Silence 5 Rev. B has an integrated venlaon system consisng of three 140
mm Deep Silence fans and a built-in 2-channel fan controller. A total of up to six fans can be
mounted.
The Nanoxia VentCover under the top can be removed at any me and allow the installaon of
120 mm or 140 mm fans for opmized heat dissipaon.
The Deep Silence axial ow fans have been specically opmised for very quiet operaon. The
range of fan speeds and controls was designed to enable each user to adjust the case venlaon
to their own needs.
All air intake openings (front and boom) are readily accessible and have easy to clean dust
lters. Behind the lower front door two “Easy Access Panels” are located, allowing an easy
access to both the dust lter and the front 140 mm fans.
Standard Equipment:
Front: 2 x 140 mm Nanoxia Deep Silence fans (max. 1,100 rpm)
Rear: 1 x 140 mm Nanoxia Deep Silence fans (max. 1,100 rpm)
Oponal Equipment:
Top cover: 2 x 120/140 mm fans
Boom: 1 x 120/140 mm fan (removal of the HDD-holder necessary)
DE
20 13
MAnual_DeepSilence5_revB_DE_EN.indd 29-30 23.10.2014 10:05:20

6.2 Betrieb der Lüersteuerung
Die Schieberegler der Lüersteuerung
nden sich in der Gehäusefront hinter der
oberen Fronür. Der von vorne gesehen
linke Regler steuert die Lüer des ersten
Kanals (A1, A2 und A3), der rechte Regler
steuert die Lüer des zweiten Kanals
(B1, B2 und B3)
7. Einbau einer Wasserkühlung
Im Nanoxia Deep Silence 5 Rev. B können Sie sowohl hinter der Gehäusefront, als auch unter
dem Gehäusedeckel Radiatoren oder kompakte Wasserkühlungen befesgen. Wir empfehlen
grundsätzlich die Montage des Radiators hinter der Gehäusefront.
7.1 Einbau eines Radiators oder einer Kompaktkühlung hinter der Gehäusefront
Durch die modularen HDD-Käge können Sie hinter der Gehäusefront einen 120 oder 240 mm
Radiator oder eine kompakte Wasserkühllösung moneren.
Bie beachten Sie, dass der zu verbauende Radiator nicht länger sein darf als 315 mm.
Enernen Sie zum Einbau zuerst die modularen Festplaenkäge (siehe Kapitel 3.2). Önen
Sie die untere Fronür und die dahinter liegenden „Easy Access“ Panel, um die Lüer zu
entnehmen. Halten Sie den Radiator von innen an die Front und verschrauben Sie ihn von
vorne durch die entsprechenden Montageschlitze.
If you are missing any of the items listed above, please contact our customer service
immediately: support@nanoxia-world.com
Features:
- Watercooling ready
- Complete customizable soundproong with high quality materials meeng industrial standards
- 6 x 2.5 inch mounng frame
- Tool-free mounng of opcal drives
- 2 x USB 3.0, 2 x USB 2.0
- 10 Slots for expansion cards
- Max. VGA length: 338 mm (up to 468 mm with the HDD cages removed)
- Room for CPU coolers with a maximum height of up to 185 mm
- Mounng hole for CPU cooler in the motherboard tray
- Cable management with 9 rubberised holes in the motherboard tray
- Stepless 2-channel fan control for up to 6 fans
- Nanoxia VentCover (noise indulated): 2 x top cover
Noise Insulaon
The Nanoxia Deep Silence 5 Rev. B has been developed with the aim to oer the buyer a low-
noise case, while at the same me allowing for extremely low system temperatures. The sound
insulaon design is based on mulple interacng design elements:
The most important part is the large scale lining of the case with sound-absorbing insulaon
materials. These materials are manufactured specically to meet the requirements of the
developers of the Nanoxia Deep Silence case series and act equally against airborne sound and
structure-borne noise.
Included are special rubber seals which can be used to alternavely close the tube holes above
the rear chassis fan, in case you don’t need to use them.
EN
14 19
MAnual_DeepSilence5_revB_DE_EN.indd 31-32 23.10.2014 10:05:22

Anschließend setzen Sie bie die Lüer wieder ein. Für eine maximale Kühlleistung können Sie
noch zusätzliche Lüer auf der Rückseite des Radiators moneren.
7.2 Einbau eines Slim-Radiators oder einer
Kompaktkühlung unter dem Gehäusedeckel
Unter dem Gehäusedeckel können Sie einen
240/280 mm Slim-Radiator verbauen.
Zum Einbau eines Radiators unter dem
Gehäusedeckel nutzen Sie bie die 120/140
mm Lüer-Montagelöcher.
Bie prüfen Sie vor der Montage sorgfälg,
ob genügend Abstand zu den Mainboard-
Komponenten gegeben ist.
8. Das I/O-Panel
Das I/O Panel beinhaltet die Anschlüsse für
externe USB Geräte (2 x 2.0, 2 x 3.0), sowie
Mikrofon und Kopörer.
Die blauen USB-Anschlüsse sind Super-
Speed USB 3.0, die USB 2.0 Anschlüsse sind
in Schwarz gehalten. Der von vorne gesehen
linke Audio-Anschluss ist für Kopörer, der
rechte für Mikrofon vorgesehen.
Die Festplaenakvität wird durch Flackern
des Power-Buons angezeigt.
Radiator
mit 2
Lüern
bestückt
Radiator
mit 4
Lüern
bestückt
I. Introducon
Congratulaons on the purchase of your new Nanoxia Deep Silence 5 Revision B. We are condent
that you will be delighted by your new PC case for many years to come.
The Nanoxia Deep Silence series has already won more than 100 awards from the internaonal
trade press. The innovave design and the exceponal quality certainly delight experts and
enthusiasts alike.
Based on the suggesons of our customers, our design team has developed meaningful op-
mizaons in the context of product development, which you will nd in the present revision.
For example, our designers have created a novel 6 x 2.5 inch mounng frame, which allows the
space saving and decoupled mounng of up to six 2.5 inch drives.
In the new revision, the Deep Silence 5 Tower provides plenty of space for your most demanding
projects. Due to the modular hard drive cages, the case oers maximum versality and compa-
bility, both for water cooling project and the installaon of high-end systems with air cooling.
Specicaons
Dimensions: 552 x 232 x 550 mm (Height x Width x Depth)
Material: Steel, plascs
External drive bays: 3 x 5,25 inch (tool-free)
1 x 5.25 inch /w 3.5 inch adapter (tool-free)
Internal drive bays: 8 x 2.5/3.5 inch bays (max. 11)
6 x 2.5 inch
Rubber sealings for
tube holes
EPS 4+4-Pin extension 24-Pin ATX extension Fan screws Stand-offs
for mainboard
Screws for
mainboard mounting
Screws for
HDD mounting
Screws for
3.5” mounting frame
Mounting screws for
2.5“HDD/SSD
Mounting screws for
2.5“HDD/SSD (long)
Mounting screws
for PSU
Thumbscrews
Accessories
DE
18 15
MAnual_DeepSilence5_revB_DE_EN.indd 33-34 23.10.2014 10:05:23

III. Support
Sehr geehrter Kunde,
das von Ihnen erworbene Gehäuse wurde einer sorgfälgen Qualitätskontrolle unterzogen.
Sollte es wider Erwarten Probleme mit Ihrem Gehäuse geben, so bien wir Sie, zuerst an den
Händler heranzutreten, bei dem Sie das Produkt erworben haben. Dieser wird Ihnen kompetent
mit Rat und Tat zur Seite stehen.
Sollten Ihnen eventuell ein paar Schrauben abhandengekommen sein oder Sie einfach eine
Frage haben, die dieses Handbuch nicht beantworten kann, so zögern Sie bie nicht, uns direkt
per E-Mail zu kontakeren. Unser Support-Team wird sich kurzfrisg mit Ihnen in Verbindung
setzen und gemeinsam werden wir eine schnelle, unkomplizierte Lösung für Sie nden können.
Ebenso würden wir uns über Anregungen und Kommentare zu unserem Gehäuse sehr freuen.
Unsere Kunden aus Deutschland und anderen europäischen Ländern wenden sich bie für
Support-Anfragen, Ersatzteile oder Garanefragen an:
support@nanoxia-world.com
Kunden aus Afrika, Asien, Australien und Nord- und Südamerika wenden sich bie für Support-
Anfragen, Ersatzteile oder Garanefragen an:
support.overseas@nanoxia-world.com
Allgemeine Anfragen, Kommentare, Anregungen und ähnliches senden Sie bie an:
info@nanoxia-world.com
Wir sind sicher, dass Sie mit dem Nanoxia Deep Silence 5 Rev. B viele Jahre zufrieden sein
werden und wünschen Ihnen viel Spaß mit Ihrem neuen Gehäuse.
Ihr Nanoxia Support-Team
I. Introducon
• Specicaons
• Accessories
• Features
II. Installaon Instrucons
1. Installaon of the motherboard
2. Installaon of external drives
2.1 Opcal drives
2.2 Ulizing the external 3.5 inch bay
3. Installaon opons of HDD’s
3.1 Mounng of hard disk drives
3.2 Conversion and removal of the HDD-cages
3.3 Ulizing the 6 x 2.5 inch mounng frame
4. Removing the front panel
5. Fan assembly
5.1 Front fans
5.2 Fans under the top cover
5.3 Fan at the boom of the case
6. The 2-channel fan control
6.1 Connecng the fans to the fan control
6.2 Operaon of the fan control
7. Installaon of a water cooling
7.1Installaon of a radiator or compact water cooling behind the front
7.2 Installaon of a radiator or compact water cooling under the top cover
8. The I/O-Panel
III. Support
EN
________________________________________________________________18
__________________________________________________________18
_____________________________________________________________18
_______________________________________________________________19
____________________________________________________22
____________________________________________22
______________________________________________23
_______________________________________________________23
________________________________________23
_______________________________________________23
____________________________________________24
_________________________________24
_________________________________25
_________________________________________________26
___________________________________________________________27
_________________________________________________________27
______________________________________________28
___________________________________________28
_______________________________________________29
___________________________________29
___________________________________________30
______________________________________________30
____________30
__________31
___________________________________________________________31
________________________________________________________________32
16 17
MAnual_DeepSilence5_revB_DE_EN.indd 35-36 23.10.2014 10:05:23
Other manuals for Deep Silence 5
1
Table of contents
Other Nanoxia Enclosure manuals

Nanoxia
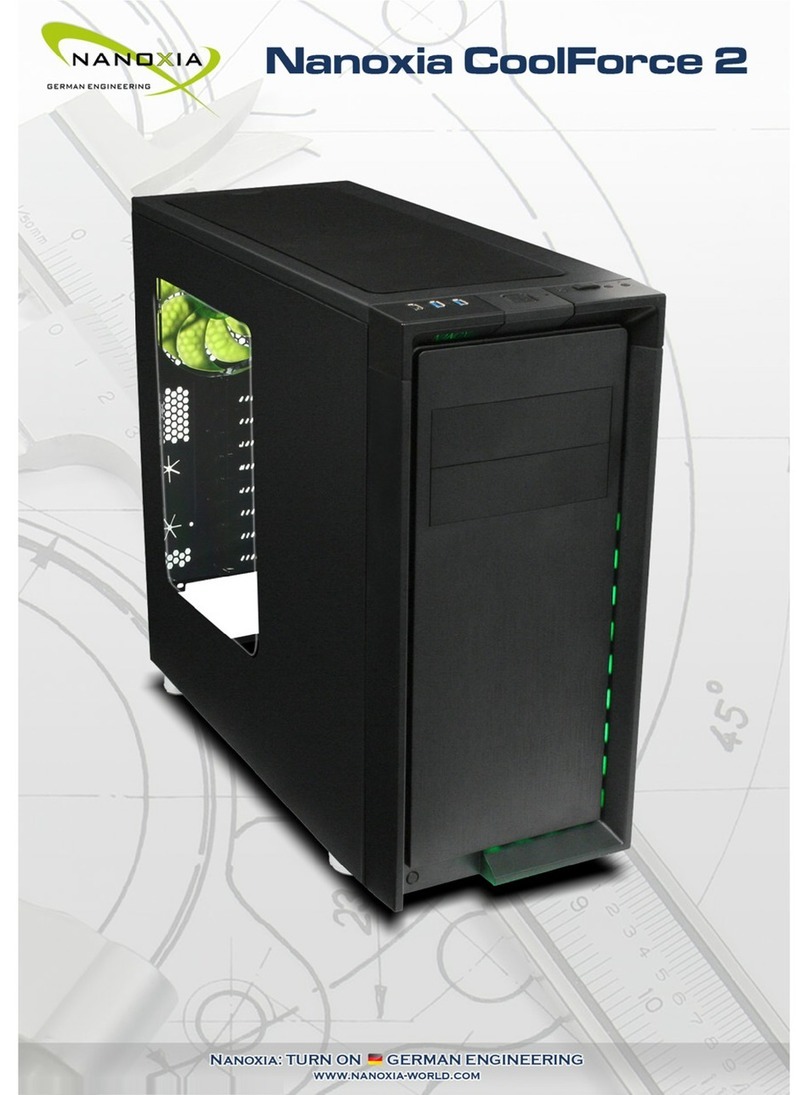
Nanoxia CoolForce 2 User manual

Nanoxia
Nanoxia Deep Silence 3 User manual

Nanoxia
Nanoxia DEEP SILENCE 2 User manual

Nanoxia
Nanoxia Deep Silence 6 Revision B User manual

Nanoxia
Nanoxia Deep Silence 5 User manual

Nanoxia
Nanoxia CoolForce 1 User manual

Nanoxia
Nanoxia Deep Silence 1 Revision B User manual

Nanoxia
Nanoxia Deep Silence 5 Rev. B User manual

Nanoxia
Nanoxia PROJECT S MINI User manual