manuals.online logo
Brands
  1. Home
  2. •
  3. Brands
  4. •
  5. Napoleon
  6. •
  7. Grill
  8. •
  9. Napoleon Gourmet Grills BIPT450 Manual

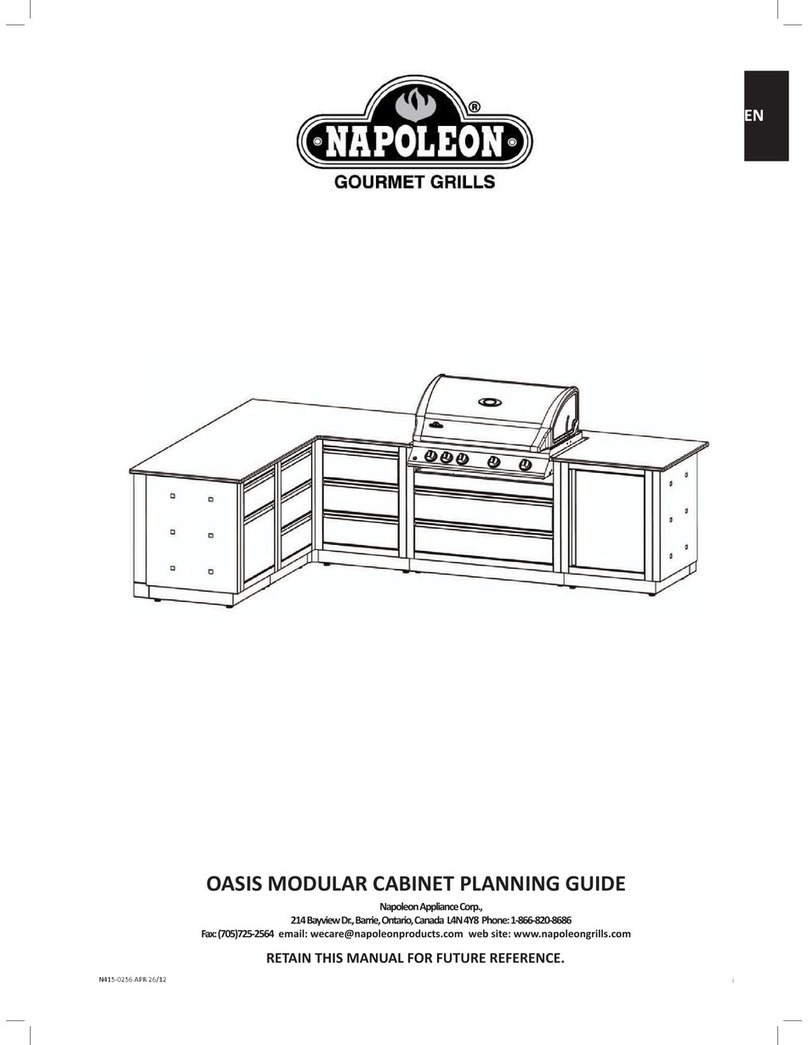
Napoleon Gourmet Grills BIPT450 Manual

APPLY SERIAL NUMBER LABEL FROM CARTON
Serial No.
XXXXXX000000
MODEL NO.
N415-0175 NOV 25/10

Please use this manual in conjuncon with your main manual to properly assemble your built-in grill. Refer to
the main manual for operang, cleaning, and maintenance instrucons.



: The piping up to the gas grill is the responsibility of the installer and piping
should be located as shown in the built-in instrucons. A exible metal connector is included to simplify the
installaon of the unit. Connect this exible metal connector to the are ng on the end of the manifold.
Connect the other end of the connector to the gas piping. Ensure that the connector does not pass through a
wall, oor, ceiling or paron, and is protected from damage. Do not use a hose to connect the unit except to
connect the cylinder regulator to the piping system. It must be connected with rigid pipe, copper tube or an
approved exible metal connector which complies with Z21.4 /CSA 6.10.
The installaon must comply with CAN B149.1 Natural Gas and Propane installaon code in Canada, or to the
Naonal Fuel Gas code, ANSI Z223.1 in the United States. The gas supply pipe must be suciently sized to
supply the BTU/h specied on the rang plate, based on the length of the piping run. If installing a side burner,
a separate line must be branched o to the side burner unit and enter the side burner opening at the specied
locaon. If the enclosure is to house a propane cylinder, the tank poron of the enclosure must be venlated
according to local codes, and must not have communicaon with the cavity used to enclose the gas grill. A
propane tank can not be stored below the gas grill.
: Built in cylinder enclosures which completely enclose the cylinder must have
both of the following:
1. At least one unobstructed venlaon opening on the exposed exterior side of the enclosure located within
5 in (127 mm) of the top of the enclosure. The opening must have a total free area of more than 20 in
2
(130
cm2)
for a 20 lb (9.1 kg) cylinder and 30 in2 (195 cm2) for a 30 lb (13.6 kg) cylinder.
2. At least one venlaon opening on the exposed, exterior side of the enclosure located 1 in (25.4 mm) or less
from the oor level. The opening must have a total free area of more than 10 in2 (65 cm2) for a 20 lb (9.1 kg)
cylinder and 15 in2 (100 cm2) for a 30 lb (13.6 kg) cylinder. The upper edge must be no more than 5 in (127
mm) above the oor level.




www.napoleongrills.com

• The cylinder valve(s) must be readily accessible for hand operaon. A door on the enclosure to gain access
to the cylinder valves is acceptable, provided it is non-locking and can be opened without the use of tools.
• The enclosure for the LP-gas cylinder must isolate the cylinder from the burner compartment to provide
shielding from radiaon, a ame barrier, and protecon from foreign material, such as hot drippings. The
enclosure cannot be located directly below the grill.
• There must be a minimum clearance of 2 in (51 mm) between the oor of the LP-gas cylinder enclosure
and the ground.
• The enclosure must be designed so that the LP-gas cylinder can be connected, disconnected and the
connecons inspected and tested outside the cylinder enclosure. Any connecons that can be disturbed
when installing the cylinder in the enclosure must be accessible for tesng inside the enclosure.
: The piping up to the gas grill is the responsibility of the installer and piping
should be located as shown in the built-in instrucons. A exible metal connector is included to simplify the
installaon of the unit. Connect this connector to the are ng on the end of the manifold. Connect the
other end of the connector to the gas piping. Ensure that the connector does not pass through a wall, oor,
ceiling or paron, and is protected from damage. Do not use hose to connect the unit. It must be connected
with rigid pipe, copper tube or an approved exible metal connector which complies with Z21.4 /CSA 6.10.
The installaon must comply with CAN B149.1 Natural Gas and Propane Installaon Code in Canada, or to the
Naonal Fuel Gas Code, ANSI Z223.1 in the United States. The gas supply pipe must be suciently sized to
supply the BTU/h specied on the rang plate, based on the length of the piping run. If installing a side burner,
a separate line must be branched o to the side burner unit and enter the side burner opening at the specied
locaon.






  
20 lb (9.1kg) 20in2 (130cm2) 10in2 (65cm2)
30 lb (13.6kg) 30in2 (195cm2) 15in2 (100cm2)
















3
www.napoleongrills.com





























  





  
  
BIPT450 29 1/2”
749mm
20 5/8”
524mm
8 7/8”
225mm
BIPT600 37 3/4”
959mm
20 5/8”
524mm
8 7/8”
225mm
BIPT750 49 3/4”
1264mm
20 5/8”
524mm
9 5/8”
244mm
BIU405 27 1/2”
699mm
16 3/4”
425mm
12”
305mm


SIDE BURNER 12 3/4”
324mm
16 1/2”
419mm
4 1/2”
114mm


4
www.napoleongrills.com
















     
N370-0069
N370-0071
FLAT VERTICAL PAINTED DOOR
FLAT VERTICAL STAINLESS DOOR
13 ¼” (337mm)
13 ¼” (337mm)
18 ¼” (464mm)
18 ¼” (464mm)
N370-0070
N370-0072
FLAT HORIZONTAL PAINTED DOOR
FLAT HORIZONTAL STAINLESS DOOR
18 ¼” (464mm)
18 ¼” (464mm)
13 ¼” (337mm)
13 ¼” (337mm)
N370-0356SS
N370-0357SS
CURVED STAINLESS STEEL DOOR
308 SIZE
CURVED STAINLESS STEEL DOOR
450 SIZE
22 ½” (572mm)
27” (686mm)
19 ¾” (502mm)
19 ¾” (502mm
N370-0358SS CURVED STAINLESS STEEL DOUBLE
DOOR - 600/750 SIZE
35 ¼” (895mm) 19” (483mm)




5
www.napoleongrills.com
     
N370-0361 PF STYLE STAINLESS STEEL DOOR 17” (432mm) 23 ¼” (591mm)
N370-0359 PF STYLE STAINLESS STEEL SINGLE
DRAWER
17 ¼” (438mm) 6 ¾” (171mm) 23” (584mm)
N370-0360 PF STYLE STAINLESS STEEL TRIPLE
DRAWER
17 ¼” (438mm) 22 ¾” (578mm) 23” (584mm)
N370-0502
N370-0503
DOUBLE DOOR SMALL
DOUBLE DOOR LARGE


28 ¼” (718mm)
37 ¾” (959mm)
20 ¼” (514mm)
20 ¼” (514mm)
N370-0504
N370-0505
SIDE BURNER NATURAL
SIDE BURNER PROPANE
12 ¾” (324mm)
12 ¾” (324mm)
16 ½” (419mm)
16 ½” (419mm)
4 ½” (114mm)
minimum
BIZC450
BIZC600
ZERO CLEARANCE SHELL - 450 SIZE
ZERO CLEARANCE SHELL - 600 SIZE
35 ⅞” (911mm)
44 ⅛” (1121mm)
11 ⅛” (283mm)
11 ⅛” (283mm)
22 15/16” (584mm)
22 15/16” (584mm)


6
www.napoleongrills.com

N570-0086
N080-0213
N715-0080
N570-0086
N080-0213
W445-0031
N010-0281
N010-0568
This grill is designed for masonry, enclosures only, and must be installed and serviced by a
qualied installer to local codes.
1. Aach side mounng brackets to each side of the grill using #14 x 1/2" screws (N570-0086).
2. Lay the rear trim piece across the back of the opening. To keep it in place, a dab of silicone may be applied
to each wing of the rear trim.
3. Lower the unit in place, the wings on the rear trim should be under the side mounng brackets. Connect the
ex supply line to the ng at the end of the manifold.
4. The enre installaon must be leak tested before operang the unit.
7
www.napoleongrills.com

This grill is designed for masonry, enclosures only, and must be installed and serviced
by a qualied installer to local codes.
1. Aach side mounng brackets to each side of the grill using #14 x 1/2” screws (N570-0086).
2. Lay the rear trim piece across the back of the opening. To keep it in place, a dab of silicone may be ap-
plied to each wing of the rear trim.
3. Lower the unit in place, the wings on the rear trim should be under the side mounng brackets. Connect
the ex supply line to the ng at the end of the manifold.
4.The enre installaon must be leak tested before operang the unit.
N080-0213
N080-0213
N570-0086
N715-0081
N570-0086
W445-0031
N010-0281
N010-0569
8
www.napoleongrills.com

N080-0213
N715-0082
N570-0086
N010-0570
W445-0031
N010-0281
N080-0213 N570-0086
This grill is designed for masonry,  enclosures only, and must be installed and serviced by a
qualied installer to local codes.
1. Aach side mounng brackets to each side of the grill using #14 x 1/2" screws (N570-0026).
2. Lay the rear trim piece across the back of the opening. To keep it in place, a dab of silicone may be applied
to each wing of the rear trim.
3. Lower the unit in place, the wings on the rear trim should be under the side mounng brackets. Connect the
ex supply line to the ng at the end of the manifold.
4.The enre installaon must be leak tested before operang the unit.
9
www.napoleongrills.com
This grill is designed for masonry, enclosures only, and must be installed and serviced by a
qualied installer to local codes. Access must be provided in the enclosure for drip tray removal and cleaning.
1. Aach side mounng brackets to each side of the grill using #14 x 1/2" screws (N570-0086). The wings on
the rear trim should be under the side mounng brackets.
2. Lay the rear trim piece across the back of the opening. To keep it in place, a dab of silicone may be applied
to each wing of the rear trim.
3. Aach the supplied brackets ush with the front of the opening as per the dimensions in the above drawing
(fasteners not included).
4. Lower the unit in place ensuring the brackets installed in the previous step engage between the control
panel and the base bracket. Connect the ex line to the ng at the end of the manifold.
5. The enre installaon must be leak tested before operang the unit.

N570-0086
N080-0215
N715-0083
N570-0086
N080-0215
N080-0155
N010-0281
W445-0031
10
www.napoleongrills.com

1. Unpack the drawer frame assembly.
2. Remove the drawers from the enclosure by fully extending them and then liing up to remove them from
the slides.
3. Shim the opening to ensure that the enclosure ts snuggly into the opening. Ensure that the side shims
are located at the same height as the enclosure mounng holes. The boom of the opening may need to be
shimmed as well to ensure that the front of the enclosure is plumb.
4. Once the enclosure is level and square, fasten into place. (Fasteners not included).
5. Re-install the drawers by pping the back of the drawer down into the slide. Once the wheels are inserted
into the slide, lower the front of the drawer unl it is level, then push in. Note: if the enclosure is installed with
shims that are too thick, the wheel will not engage into the slide. The shim thickness will need to be reduced.
6. Remove the protecve coang from all remaining surfaces.

1. Unpack the door and frame.
a. For the curved stainless steel doors, remove the door(s) from the frame by liing the door while holding on
to the pivot rod. This will allow the pivot rod to come out of the hole on the boom of the frame. Once the
pivot is removed from the boom hole, the enre door can be dropped and removed from the frame.
b. For the PF style stainless steel door, the door needs to be removed by loosening the center philips screw on
the hinge furthest away from the door. This will allow the hinge to separate.
c. For double door kits N370-0502/N370-0503, refer to the instucons included with the door kit.
2. Center the frame in the opening. Mark the locaon of the pivot holes, top and boom. Remember on the
PT600 double doors, there will be a pivot rod on both ends. The PF style doors do not have pivot rods. Once
all pivot holes are marked, remove the frame and using a 3/8” drill bit, drill out the clearance holes for the
pivot rod. These clearance holes should be at least 1/2” deep. Aer the holes are complete, you may once
again center the frame in the opening. Starng with the hinged side, shim between the frame and side wall
of the opening. Ensure the shims are close to the hinge on the PF style doors. When the frame side wall is
plumb, fasten it to the cabinet with screws (not provided). Aach the other side of the frame in the same
fashion, ensuring the frame is square.
3. Other than on the curved stainless steel double door kit, fasteners are not required on the top and boom
of the frame. The curved stainless steel double door frame must be fastened in the center both at the top and
boom.
4. Once the frame has been secured and checked for squareness, the door can be re-installed.
5. Remove the protecve coang from all remaining surfaces.
11
www.napoleongrills.com
FAX TO: 705 727 4282
CONTACT NAME:______________________________________________________________________
SHIP TO :_____________________________________________________________________________
_________________________________________________________________________________________
_________________________________________________________________________________________
_________________________________________________________________________________________
TEL :_________________________________ FAX :______________________________
EMAIL: __________________________________________________________________
VISA OR MASTERCARD # :_______________________________________ EXPIRY DATE: _____________
SIGNATURE:_____________________________________________________________________________
QUANTITY
TAXES MAY APPLY
SHIPPING EXTRA
IF CONFIRMATION IS REQUIRED PLEASE INCLUDE A FAX NUMBER OR EMAIL ADDRESS
ACCESSORIES & PARTS ORDER FORM
PART NUMBER DESCRIPTION
PLEASE PRINT CLEARLY
12
www.napoleongrills.com

Other manuals for Gourmet Grills BIPT450

1

This manual suits for next models

3

Other Napoleon Grill manuals

Napoleon PRO22-LEG-2 User manual

Napoleon

Napoleon PRO22-LEG-2 User manual

Napoleon BILEX605 User manual

Napoleon

Napoleon BILEX605 User manual

Napoleon ROGUE RSE425RSIB-1 User manual

Napoleon

Napoleon ROGUE RSE425RSIB-1 User manual

Napoleon BIPRO665RB User manual

Napoleon

Napoleon BIPRO665RB User manual

Napoleon PTSS215 E User manual

Napoleon

Napoleon PTSS215 E User manual

Napoleon ROGUE RXT425SB User manual

Napoleon

Napoleon ROGUE RXT425SB User manual

Napoleon PTSS215 E User manual

Napoleon

Napoleon PTSS215 E User manual

Napoleon TravelQ 285 User manual

Napoleon

Napoleon TravelQ 285 User manual

Napoleon EG215 User manual

Napoleon

Napoleon EG215 User manual

Napoleon BILEX 485 User manual

Napoleon

Napoleon BILEX 485 User manual

Napoleon PRESTIGE II 450 User manual

Napoleon

Napoleon PRESTIGE II 450 User manual

Napoleon BIPRO 825-3 User manual

Napoleon

Napoleon BIPRO 825-3 User manual

Napoleon PRO285 User manual

Napoleon

Napoleon PRO285 User manual

Napoleon R525 User manual

Napoleon

Napoleon R525 User manual

Napoleon Prestige Pro Series User manual

Napoleon

Napoleon Prestige Pro Series User manual

Napoleon Rogue RSE425RSIBPK-1 User manual

Napoleon

Napoleon Rogue RSE425RSIBPK-1 User manual

Napoleon MIRAGE 485 User manual

Napoleon

Napoleon MIRAGE 485 User manual

Napoleon NK22K-LEG-2 User manual

Napoleon

Napoleon NK22K-LEG-2 User manual

Napoleon PRO500-3 User manual

Napoleon

Napoleon PRO500-3 User manual

Napoleon PRO500-3 User manual

Napoleon

Napoleon PRO500-3 User manual

Napoleon LE485RB User manual

Napoleon

Napoleon LE485RB User manual

Napoleon R525SBPK User manual

Napoleon

Napoleon R525SBPK User manual

Napoleon P500RSIBP-3 User manual

Napoleon

Napoleon P500RSIBP-3 User manual

Napoleon Prestige PRO BIPRO825RBINSS-3 User manual

Napoleon

Napoleon Prestige PRO BIPRO825RBINSS-3 User manual

Popular Grill manuals by other brands

SUMM Easy Go manual

SUMM

SUMM Easy Go manual

Outback Cook Dome 703 Charcoal Assembly and operating instructions

Outback

Outback Cook Dome 703 Charcoal Assembly and operating instructions

Traeger TFB30LZAC owner's manual

Traeger

Traeger TFB30LZAC owner's manual

Tesla QG700 manual

Tesla

Tesla QG700 manual

Cuisinart Searin CGG-059 Assembly and operating instructions

Cuisinart

Cuisinart Searin CGG-059 Assembly and operating instructions

Roller Grill PSF 400 E Instructions for use and installation

Roller Grill

Roller Grill PSF 400 E Instructions for use and installation

Thulos TH-GP207 instruction manual

Thulos

Thulos TH-GP207 instruction manual

Sirman PD VC Operating and maintenance manual

Sirman

Sirman PD VC Operating and maintenance manual

Uberhaus 780-0007A manual

Uberhaus

Uberhaus 780-0007A manual

Rosle Videro G3 Instructions for use

Rosle

Rosle Videro G3 Instructions for use

Weber 56206 owner's guide

Weber

Weber 56206 owner's guide

Silvercrest SKG 2000 A1 operating instructions

Silvercrest

Silvercrest SKG 2000 A1 operating instructions

Klarstein 10029123 manual

Klarstein

Klarstein 10029123 manual

GLEN CANYON 720-0104-NG Use and care guide

GLEN CANYON

GLEN CANYON 720-0104-NG Use and care guide

Gasmate LANTOS GM172-154 manual

Gasmate

Gasmate LANTOS GM172-154 manual

Outback Party FS5680 Assembly and operating instructions

Outback

Outback Party FS5680 Assembly and operating instructions

Carlo Cracco Masterpro BGMP-9146 instruction manual

Carlo Cracco

Carlo Cracco Masterpro BGMP-9146 instruction manual

Weber Gas Go-Anywhere owner's guide

Weber

Weber Gas Go-Anywhere owner's guide

manuals.online logo
manuals.online logoBrands
  • About & Mission
  • Contact us
  • Privacy Policy
  • Terms and Conditions

Copyright 2025 Manuals.Online. All Rights Reserved.