NASCAR Pusher 2pl User manual

64" &EJUJPO
$PJO*O 5JDLFU 0VU 3FFM 'FBUVSF 0QUJPOBM 4XJQF
'BDJMJUZ
.BOVBM .PWJOH $PJO &OUSZ
1MBZFS
Produced by :
Harry Levy Amusement Contractor Ltd
Patricia Way
Pysons Road Industrial Estate
Broadstairs
Kent CT10 2LF
Tel 0044 1843 866 464 Fax 0044 1843 860 144
email: [email protected]
Issue 2 April 2007

Page 2 of 23
Contents
Section 1 Commissioning
1.1 - Receipt of machine
1.2 - Electrical connection
1.3 - Electrical supply entry
1.4 - Physical dimension
1.5 - Initial operation
Section 2 Access
2.1 Access to the machine
Section 3 Game Operation
3.1 - The game
3.2 - Priming the playfield with coins
3.3 – General care and maintenance
Section 4 Electrical Systems
4.1 - Circuit breakers
4.2 - Ticket board
4.3 - Sound board
4.4 – Hoppers
4.5 – Hopper microphone board
4.6 – Tilt board
4.7 - Power supplies
4.8 – Alarm board
4.9 – Coin-in sensors
4.10 – Counters
4.11 – Swipe change facility (Optional Fit)
4.12 – Top-sign flashing lights board & PSU
Section 5 Lighting
5.1 - Fluorescent lighting
5.2 – Dichroic lighting
Section 6 Mechanical Systems
6.1 - Pusher motor drive
6.2 - Coin entries
6.3 - Pusher boxes
Section 7 Fault Finding
7.1 - Methodology
7.2 – System checking
7.3 – Basic checks
Section 8 Spares Listing
Section 9 Schematic wiring diagrams

Page 3 of 23
1.1 Receipt Of Machine
Upon receipt of machine carefully remove all protective packaging and establish machine on a
flat and level floor. Take care to protect the machine from sudden shocks etc. when lifting or
manhandling.
The machine should only be situated indoors, and should not be subjected to any other
environments. Ensure all ventilation grills have at least 4" (100mm) clearance from other
surfaces to permit adequate cooling.
1.2 Electrical Connection
The Nascar machine should be connected to the mains supply via a suitable plug to suit your
installation requirements (Ref: Section 2.1). A competent trained person should always carry
this out. If in any doubt, consult a qualified electrician.
Mains wiring: Live Black
Neutral White
Earth Green or Green/Yellow
THIS MACHINE MUST BE EARTHED/GROUNDED
1.3 Electrical Supply Entry
This machine electrical supply connects at the rear.
The On/Off switch for the machine is located in the right hand lower compartment.
1.4 Physical Dimension
See following page….

1224
1913
1500

1.5 Initial Operation
Connect the mains supply and switch ON (Ref: Section 1.3).
The Top-Sign and coin entry fluorescent lamps will light, the top sign Nascar lamps will
sequence.
The pusher boxes will start moving.
Each reel will align its datum and rotate to its starting position.
The hoppers will run to clear any stray coins. Please check for foreign objects before floating.
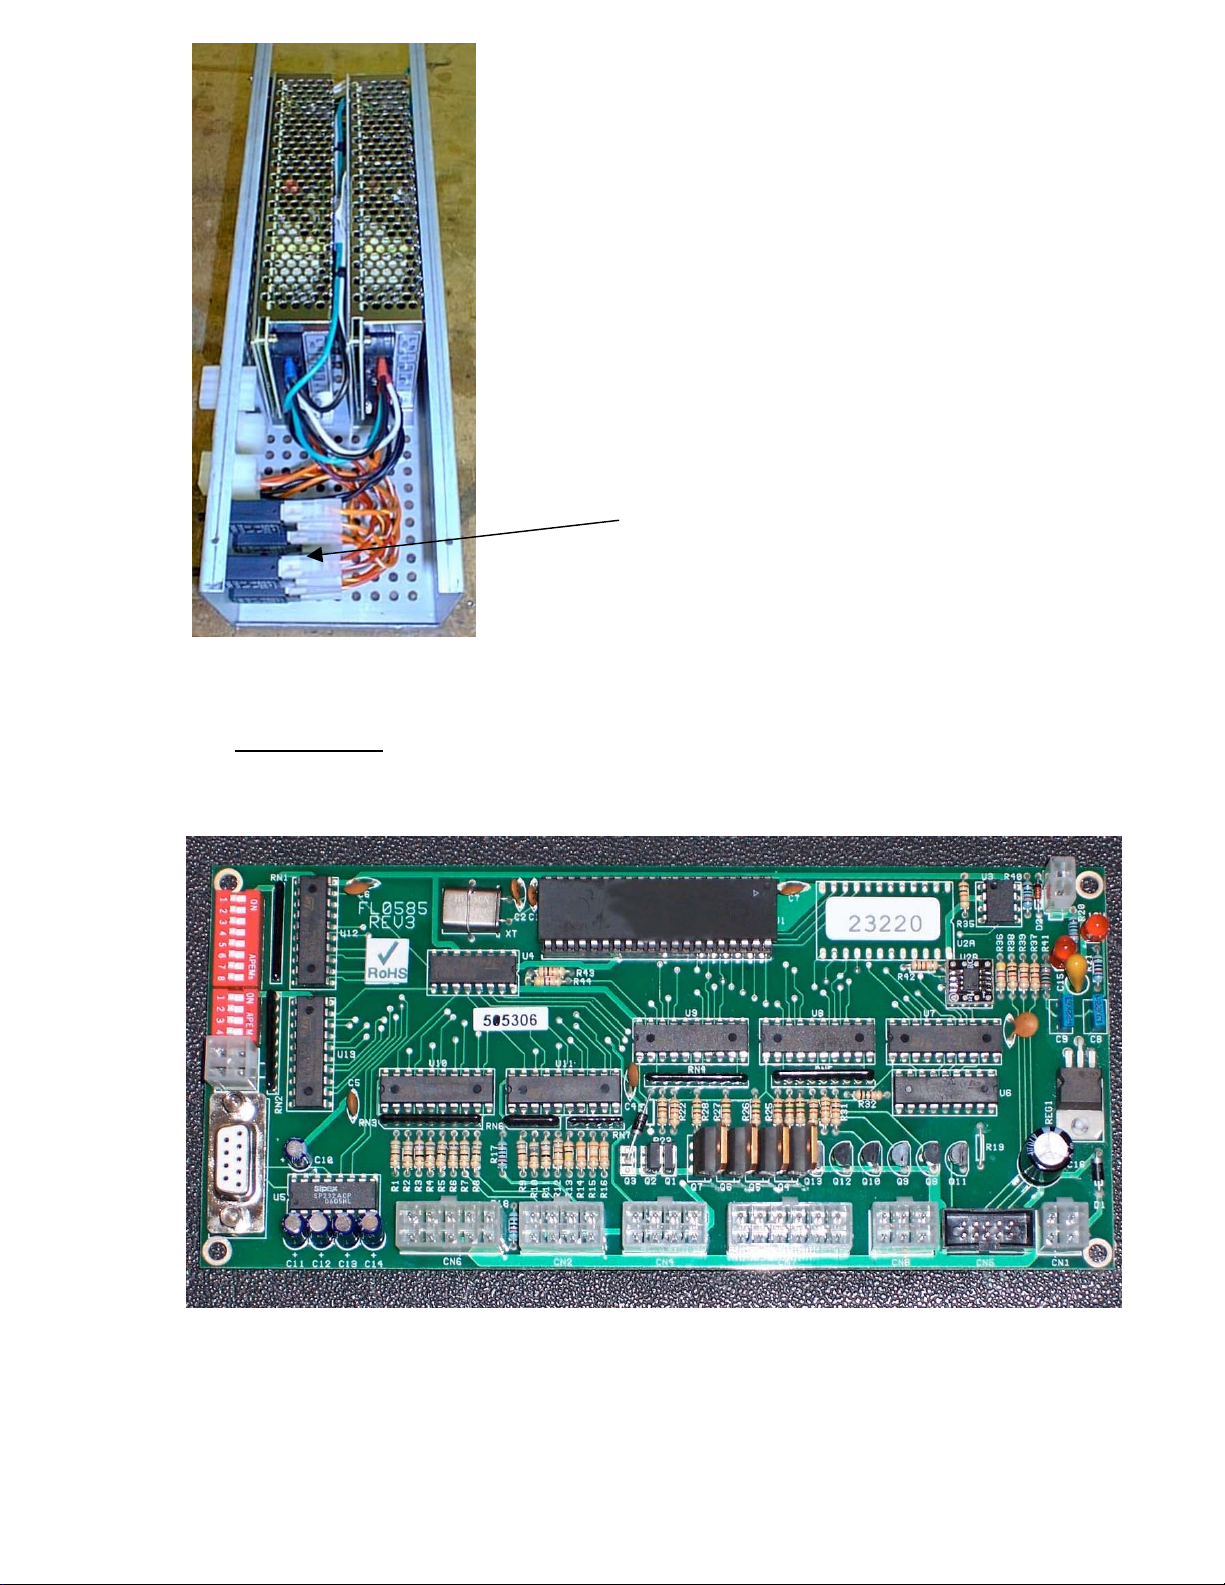
A short time latter the 'Attract' sound will operate depending on the switch settings on the Sound
Board. The volume level may be adjusted if required by means of a volume control fitted on the
Sound Board. This is located in the left hand lower cabinet on the central web.
Insert a coin in to the coin entry chute; a sound will be heard as the coin is accepted. The
corresponding section coin-in counter will increment and the player section will become active.
The game is now initiated and will remain so for approximately 20 seconds.
The anti abuse 'slam-tilt' alarm feature may be tested by thumping on a lower cabinet door. The
alarm should sound, and the top sign lights go out. The count hopper will run, diverting any
coins falling from the playfield into the cashbox. The count output from this hopper is ignored
during tilt conditions, thus no awards made. The operation of the tilt or slam tilt alarm stops all
games in progress and lasts approx 10 seconds.
A safety feature is incorporated which will stop the pusher drive motor should a jam or
restriction occur. Simply holding back an advancing pusher box may test this. To effect reset of
this feature, operate the reset switch located on the rear of the right hand cabinet.
2.1 Access To Machine
WARNING - DANGEROUS VOLTAGES EXIST WITHIN THIS MACHINE
Playfield
Release the lock at the top of the glass and hinge backward far enough to get a firm
handhold either side. Carefully lift clear of the machine and store safely.
Coin-Entry
Release the locks at the top of the door and hinge down.
Lower Cabinet
Release the locks, hinge outward, disconnect cables at connectors and lift clear.
Cashbox
Release the lock at the top, hinge outward, and lift clear. The cash box is located within.
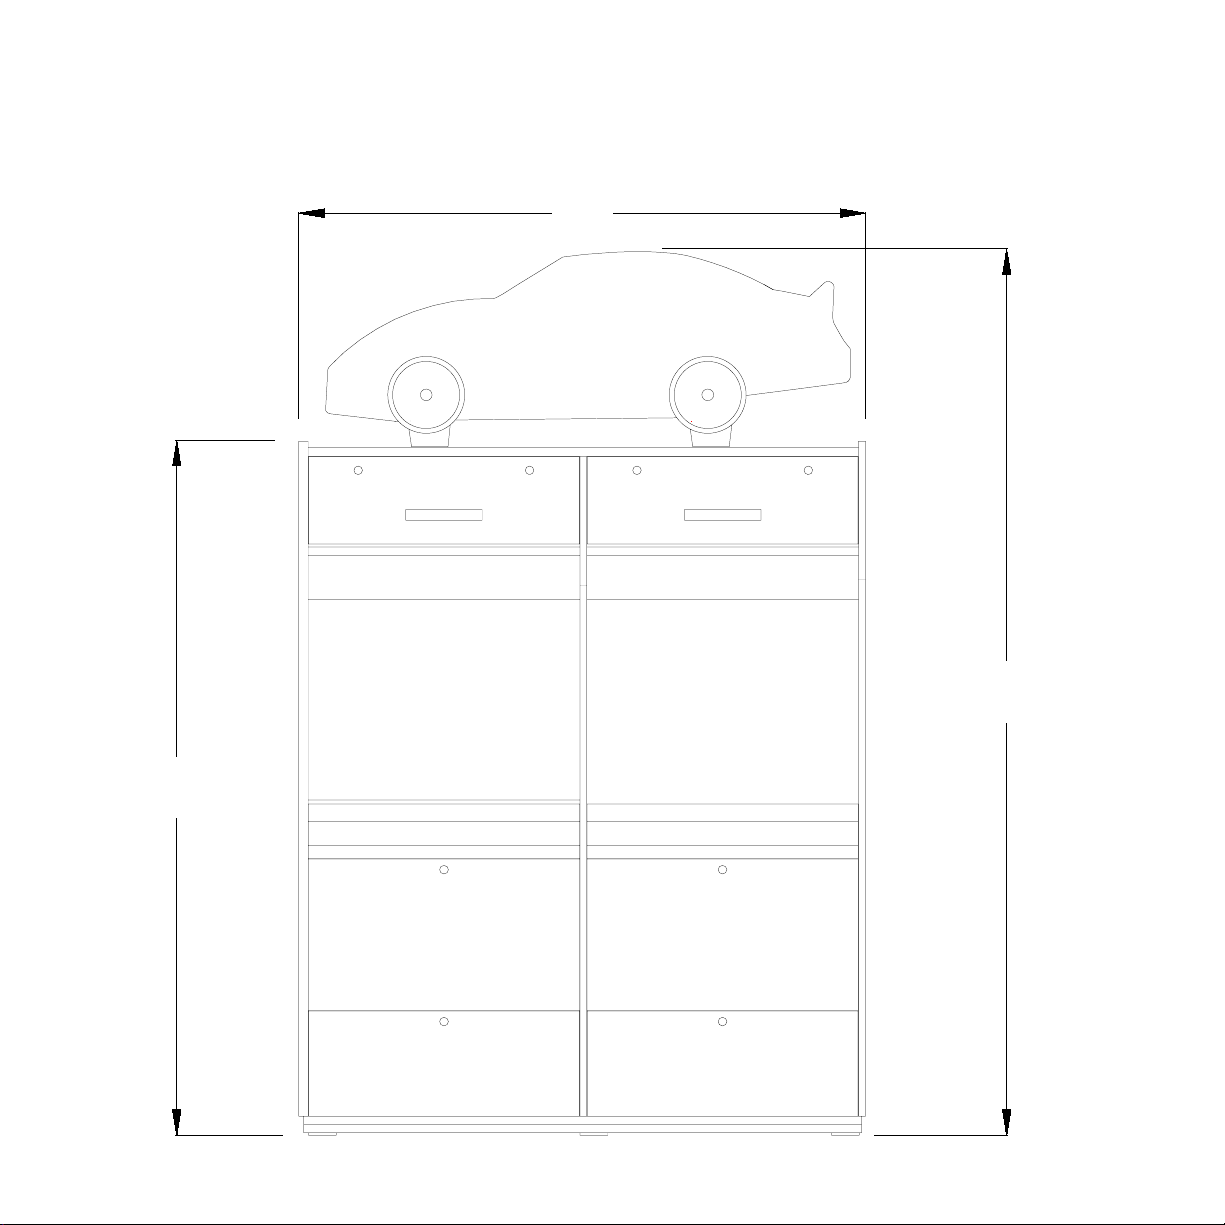
Top-Sign
Release the lock on the rear door and lift clear.
From the front, the artwork panel may be unscrewed and removed.

Page 6 of 23
3.1 The Game
Attract Mode
When not in active play, the machine lighting and pusher box mechanism operate continuously.
The attract tune is played at intervals dependant on the settings made on the Sound Board
Active Play Mode
When coins of the correct type are inserted into a coin entry chute they are detected by an optical
sensor activating that particular player section and then pass down the pin perspex to the
playfield. Coins of the incorrect type fall through the chute and are collected in the reject trays,
not activating the sensors.
Feature.
Coins passing down the trigger chutes trigger a spin. Correctly matching the halves of a car leads
to a bonus win, as shown by the amount in the flashing lit window on the artwork.
Winnings.
When the player section is active, coins pushed off the playfield are detected by a microphone
connected to the win chute, which in turn activates the count hopper. The coins are counted in to
the cash box, and the count processed to generate the award of redemption tickets. After coin
entry, a player section remains enabled for approximately 20 seconds, allowing the player the
full benefit from the effects of his coin.
Coins in and tickets out are recorded on separate electro-mechanical counters. It is
recommended that readings of these counters be taken regularly, to establish a clear pattern of
usage/profit and thus any significant deviations may highlight a fault condition requiring
attention.
3.2 Priming The Playfields With Coins.
Each player section requires approximately 750 coins, of which the first 650 may be hand placed
on the playfield. The final 100 for each section should be played in to the machine via the coin
entry slots in order to achieve the best possible visual appearance of the playfield area.
Remember to record the coin counter readings after priming for your records.

Page 7 of 23
3.3 General Maintenance & Care
The Nascar is a robust and reliable machine, which looked after will give years of profitable
service. Regular cleaning is the key to optimum condition and performance.
To maintain all visible surfaces in an 'as new condition':
3. Plastic and Glass Fibre - use a general purpose (non aggressive) water based detergent and
finish with a quality furniture polish.
2. Laminated Cabinet trims - clean with an all purpose non-aggressive cleaner and finish to a
high gloss using a furniture polish.
3. Glass and Chrome - clean with a quality window cleaning solution.
Do not use caustic or abrasive cleaners. Always use cleaning products in accordance with the
manufacturers instructions.
The machine utilises 'sealed for life' type bearings and a high quality mechanical components
that do not require regular greasing or regular servicing.
It is recommended an initial inspection be carried out after approximately two months usage, to
check for any signs of wear on the moving parts. Adjust as required, and thereafter inspect
annually.

Page 8 of 23
4Electrical Systems
4.1 Circuit Breakers
Mains Supply Circuit Breaker
The Mains Supply is protected by a thermally operated circuit breaker, which can be
manually reset. This circuit breaker is rated at 5 Amps, and is located in a metal
enclosure together with the main supply switch, located in the right hand lower cabinet.
Should this device trip, firstly ascertain the cause of the fault and rectify. To reset the
device, simply depress the centre back in to the body of the circuit breaker.
Motor Fuse
The Motor fuse is located on the motor control PCB inside the 110v power box in the
right hand lower cabinet. This fuse is designed to protect the motor control circuitry and
must only be replaced with an identical item. Failure of this fuse would normally
indicate a motor fault.
Motor fuse 2 Amp (T) 20mm
(T) = Time Delay/Anti-Surge
Power Supplies
The machine power supply units and the dichroic transformer unit all have circuit
breakers fitted in the low voltage sides of the circuits. These circuit breakers are
physically mounted within the metal enclosures of these units, and the reset buttons are
easily accessible without opening the units.
Resetting these devices, having identified and rectified the fault condition, is simply a
case of pressing the white button back in to the body of the device. Since these are
thermally operated devices, a small ‘cooling down’ time may be required after tripping
before reset can be achieved.

Page 9 of 23
Circuit Breakers
4.2 Logic Board
Each section Logic board is located on the left hand web of each section lower compartment.
Nascar 2-Player Logic PCB
Power
Supply
Box

Page 10 of 23
Program: NASC_02 V1.0
DIP Switch Settings:
DIP Switch Bank 1
Poles 1 & 2: Ticket on coin in
1 2 Qty Award
off off 0
on off 1
off on 2
on on 3
Poles 3 & 4: Win Select Table
3 4 Upper LH Upper RH Lower LH Lower RH
off off 5 10 15 20
on off 2 4 6 8
off on 3 6 9 12
on on 10 20 30 40
Poles 5 – 8: Tickets per coin pushed from playfield
5 6 7 8 Tickets
Off off off off 1
On off off off 2
Off on off off 3
On on off off 4
Off off on off 5
On off on off 6
Off on on off 7
On on on off 8
Off off off on 9
On off off on 10
Off on off on 11
On on off on 12
Off off on on 13
On off on on 14
Off on on on 15
On on on on 16

Page 11 of 23
Notes on calculating percentages:
To calculate percentages, the value of a ticket is taken as 1cent. So, 1 ticket is 4% of the
payout. Values different from this need to have a conversion factor applied to each part of
the calculation.
The ‘nominal % payout’ (below) is calculated by adding together the playfield
percentage and the feature percentage. In practice, this means that you set the amount that
the playfield pays, and the feature pays out the rest. Mercy tickets are not included in this
calculation.
1) Decide on the percentage you wish to pay out.
2) If you wish to issue mercy tickets, decide how much of the total percentage is paid by
these tickets and deduct it from (1) e.g. issue 1 mercy ticket per coin-in, deduct 4%
from the total.
3) Set the switches (below) to the value nearest to this calculation.
4) Decide on the percentage to be paid from playfield winnings. Set the switch bank 1 poles
5-8 accordingly. The remaining percentage is paid by reel feature winnings.
The reel feature payout fluctuates about the mean, and is more or less stable after about 20,000
coins have passed through the game.
DIP Switch Bank 2
Poles 1-3: Payout ratio – Nominal % payout
1 2 3
off off off 20
on off off 25
off on off 30
on on off 35
off off on 40
on off on 45
off on on 50
on on on 55
Pole 4: Percentage Reset
To reset percentage calculation registers to nominal value, with machine switched off, set pole 4
ON.
Switch machine on, set pole 4 OFF. A sound will indicate success.
Repeat for all sections as required.
4.3 Sound Board

Page 12 of 23
DIP Switches
Volume
The sound board is located in the left hand section on the central web.
Sound Board
Program: PIC: QSOUND75 V1.0
EPROMS: NASSND A1 V1.0
NASSND A2 V1.0
DIP-Switch settings
Pole 1 2 3 Select
off off off No attract music
on off off 30 sec attract music interval
off on off 60 sec attract music interval
on on off 90 sec attract music interval
off off on 120 sec attract music interval
on off on 150 sec attract music interval
off on on 180 sec attract music interval
on on on 210 sec attract music interval
Pole 4 5 Number of tunes
Off off 1
On off 2
Off on 3 (Default)
On on 4
Pole 6 7 Not used
Pole 8 Tune Select
Off Single line select
On Binary Select (Default)
Loudspeaker (6979)
The loud speakers are located in the top sign Nascar wheels. They are rated at 8 Ohms 15 watts.
4.4 Hoppers

Page 13 of 23
Sensitivity
The hopper fitted in each player section is a ‘count’ hopper. This hopper is used solely to count
the number of coins that fall over the edge of the playfield, directing it’s output to the cashbox.
This hopper does not need initial priming with coins and should always ‘run to empty’. Each
section hopper is controlled in its operation by the logic board.
4.5 Hopper Microphone PCB
Each player section has a Piezo coin detector microphone. The Piezo microphone is part of the
win chute assembly. The sound detector PCB is located in the lower cabinet of each section on
the left hand side wall.
Microphone PCB (Sound Detector)
4.6 Tilt board
The Tilt board is located in the 110v power box in the lower right cabinet. This board has a
pendulum tilt device (located in the top sign) and the slam tilt switches (all lower compartment
doors) as its inputs. Should any one of these inputs be activated, the tilt board immediately
activates an audible alarm (located in the top sign) and switches off the mains lighting in the top
sign, so as to indicate which machine is being tampered with. The count hoppers are activated
and emptied to the cash boxes. No ticket awards are made. Provided there are no further inputs,
the tilt alarm condition will only remain active for a short period of time, when it will then
automatically reset.
4.7 Power Supplies
Time
Mic Socket
Fuse
Connections
for switched
mains
Tilt
B
oard

Page 14 of 23
Power
Supply
Box
Dichroic Lighting PSU
WARNING - Dangerous voltages (115 V) - Disconnect from the mains supply!
The main power supply unit contains 12 and 24 volt switch-mode power supply units and their
associated circuit breakers. This unit provides all the DC supplies for use in the machine.
The low voltage AC supply for the dichroic lighting is provided from a transformer mounted in a
separate unit. The unit provides a circuit breaker for each dichroic lamp.
The 110v Power box contains the motor control board, tilt board and wiring to distribute the
switched 110v supply to the various components in the machine.
4.8 Alarm Board (7819)
Located in the topsign, this board drives a sounder to produce the alarm tone for tilt, motor jam
etc.
Alarm Board
Sounder
110v power Box
Rear
view
of
Machine

Page 15 of 23
4.9 Coin-In Sensor
When a coin is entered via one of the coin chutes it passes through a twin-beam opto sensor. If
valid, the interface board sends a signal to the main logic board, and the game is now ‘live’ for
the player.
Dual Opto Sensors Dual Opto Interface Board
4.10 Counters
Electro-mechanical counters are provided in each player section, located in the coin entry
compartment of each section. These counters record the number of coins-in, tickets issued and
feature awards. Taking readings of these counters regularly will obviously facilitate the
monitoring of the machine performance and assist in cash accounting.

Page 16 of 23
4.11 Swipe Change Facility (Optional Fit)
The machine may be interfaced with a swipe card change facility. Wiring for a change board and
interface relay is provided, but a change board and swipe relay board should be purchased
separately. This is ‘interface’ circuitry, and the swipe card system needs to be installed by a
trained person. The supplied installation basically provides for a pulsed input, inhibit relay
output and payout hopper control.
There are free-ended Yellow and Black wires, which carry the swipe pulse input (black wire is
the zero volt reference for this input). A Green and Grey pair of wires are the volt free contacts
of the inhibit relay. These lengths of wire are coiled and secured with cable ties to adjacent
machine harness in the coin entry area.
Change Board
Program: CHANGE21 V1.1
Dip Switch Settings
SW1
Poles 1 2 3 4 5 6 Coins-per-Swipe
Off off off off off on 1
On off off off off on 2
Off on off off off on 3
On on off off off on 4
Off off on off off on 5
On off on off off on 6
Offononoffoffon7
On on on off off on 8
Off off off on off on 9
On off off on off on 10
Off on off on off on 11
On on off on off on 12
Off off on on off on 13
On off on on off on 14
Offonononoffon15
On on on on off on 16
Off off off off on on 17
On off off off on on 18
Offonoffoffonon19
On on off off on on 20
SW3
SW2
SW1

Page 17 of 23
Dip Switch Settings (continued).
Pole 1 2 3 4 5 6 Coins Per Swipe
Off off on off on on 21
On off on off on on 22
Off on on off on on 23
On on on off on on 24
Offoffoffononon25
On off off on on on 26
Off on off on on on 27
Ononoffononon28
Off off on on on on 29
Onoffonononon30
Offononononon31
On on on on on on 32
SW2 and SW3 are not used and all poles should be off.
4.12 Top Sign Flashing Lights Board & PSU
Located in the top sign, this board controls the lamp display of the top sign ‘Nascar’. This board
has a bank of DIP switches fitted, but they serve no purpose and there are no user settings
associated with this board.
In order to cool the drive transistors used on this board, a dedicated cooling fan is mounted
directly over the board to provide forced air cooling.
The lamps fitted in the top sign panel displays are 12V 1.2W 0.1A 5mm Wedge type. These
lamps are multiplexed and driven from a 48V power rail in order to achieve high brightness.
F
lashing Lights Control Board
F
an Assisted Coolin
g

Page 18 of 23
5.0 Cabinet Lighting
5.1 Fluorescent Lighting
WARNING – Dangerous Voltages (115v) - switch OFF prior to replacing!
Fluorescent tube lighting is situated in the top sign area, with the attendant gear tray. A second
gear tray provides for the coin entry lighting. The tilt board is located in the 110v Power Box
(Section 4.7), and this interrupts the electrical supply to the Top Sign Fluorescent lamps in the
event of a tilt or tamper condition.
5.2 Dichroic Lighting
Low voltage dichroic spot lamp lighting is situated at the top of each playfield. These lamps are
easily replaced by simply pulling the old bulb free from the fitting, and pushing the replacement
bulb back in place. These lamps are rated at 35W, and should only be replaced with a similarly
rated lamp.
WARNING - These lamps become very hot in operation - allow to cool before handling!
6.0 Mechanical Systems
6.1 Pusher Box Motor Control
This system utilises an opto-electronic method to monitor the motor load, and stop the motor in
the event of a restriction/jam.
The motor drive shaft extends some 35mm out of the rear end of the motor case. It is here that
the opto sensor PCB is located, secured to the motor case. The motor shaft has a hole drilled
through, which conduits the infra-red beam when correctly aligned. With the rotation of the
motor shaft, this results in the beam being continually interrupted, and a resultant string of pulses
produced by the opto receiver.
Opto Sensor PCB Mounted To Motor
Opto Sensor
PCB
Rear End Of
Motor Case
Motor Shaft

Page 19 of 23
Close Up Of Opto Sensor PCB
The pulses produced by the opto receiver are monitored by the circuitry of the motor control
PCB. This control circuit basically monitors for a given number of pulses within a set time
frame. Should this number of pulses decrease beyond the tolerated amount, the supply to the
motor is immediately switched off via a solid-state relay.
The control of the motor cut off point may be set by way of a 4 way DIP switch mounted on the
motor control board (located in the 110v power box):
Pole 1 2 Response
off off Fastest
on off 2nd Fastest
off on 2nd Slowest
on on Slowest
Pole 3 4 Stop Resistance
off off Weakest
on off 2nd Weakest
off on 2nd Hardest
on on Hardest
When the system operates and stops the motor, the supply to the motor remains off until manual
reset is initiated. This creates the opportunity to ensure the machine is in a safe state to re-start;
Opto
Receiver
Hole For
Motor Shaft
Opto
Transmitter
Reset
Switch
Alarm/Operation
Relay
Motor
Fuse
Motor Supply
Solid State Relay
DIP Switches
Sensor LED

Page 20 of 23
a visual check by the attendant ensuring that there is no longer any item causing the obstruction.
Reset of the system is done by depressing the recessed button switch located on the rear of the
machine on the right.
There is an LED on the Motor Control PCB, which indicates the output of the opto-sensor. In
normal operation this will appear to be continuously ON, due to the high repetition rate of the
pulses. This facility may be used to check the operation of the sensors, by manually rotating the
motor shaft and observing the LED. The LED should turn on then off as the hole in the shaft
passes between the sensors. Disconnect the motor 110v mains supply first.
The 20mm fuse on this PCB is to provide over current protection to the solid-state relay/motor
combination.
The other relay (RL1) is used to provide a switching function upon system operation, which is
used for signalling to other circuits for alarm operation etc.
6.2 Coin Entry
Each player section has three coin entry chutes. The chutes are designed to reject fraud coins into
a reject tray just inside the door.
This is not a high level of discrimination, but serves well and reliably in this application. Other
than keeping the chutes clear and clean no specific maintenance is required
Coin entry chutes are situated on the front of the machine. The chutes are fixed and require no
maintenance. Twin-opto sensors are fitted to detect coins, and to detect and discourage
fraudulent intent.
The central chute on the pin-perspex is motorised as shown below.
Moving Coin Entry Mechanism
6.3 Pusher boxes
The pusher boxes are mounted on two Accuride slide bearings. An annual check to remove any
build up of dust, and a light coat of grease will ensure many years of reliable service.
Table of contents
Popular Game manuals by other brands

Learning Resources
Learning Resources Goodie Games LER 1180 manual

Beleduc
Beleduc FIND MONTY! Instruction

goliath
goliath DOMINO RALLY ULTIMATE ADVENTURE instructions

Milton Bradley
Milton Bradley Electronic Arcade Mania instructions

Hasbro
Hasbro Autobot Hacker X-3 81056 instructions

Hathaway
Hathaway Maverick II BG50390 Assembly instructions