National Luna Classic 40 litre User guide

PORTABLE REFRIGERATOR

This manual / handbook is a combined publication,
for models manufactured from 2009.
Identify your model and follow the relevant
colour coded pages for best use.
National Luna Portable Refrigeration Models:
National Luna Classic Range
40-65-80-125 Litre
Double Door 74/95 Litre
Twin Compartment 90 Litre
Weekender 50 LitreTwin
Weekender 52 Litre
Relevant information, common to all models
Please complete the tear-out return card to register your warranty
National Luna fridges have been tested to international safety specications
SANS 60335-2-24:2003
SANS 60335-1:2007
IEC 60335-2-24:2002
IEC 60335-1:2006
The National Luna range of products have been
designed and manufactured in South Africa since 1989.
Every product sold is of the highest possible quality,
manufactured with world-class technology,
marketed & serviced by a knowledgeable & dedicated team,
locally & internationally
2

Index
Page
Introduction 4
Installation Guidelines 5
Connecting Power 6
Wiring Guidelines 6
Temperature Settings 7
Celsius / Fahrenheit Conversion Chart 8
Speed Control 9
Battery Protection 10
National Luna Classic Range 12
National Luna Double Door and Twin Range 15
National Luna Weekender Range 19
Troubleshooting 26
National Luna Warranty 27
3

Congratulations on the purchase of your National Luna portable fridge / freezer.
The National Luna range of portable fridges and freezers are high-performance, high efciency
refrigerators ideal for harsh conditions and applications that are limited to battery power such as off-
road vehicles, caravans and solar installations.
The versatility of each of the National Luna models allows the use of a wide range of AC supply voltage
(85V DC - 265V AC) as well as 12-volt or 24-volt battery power (9.6V AC - 31.5V DC).
The use of a custom-designed digital thermostat and smart control circuitry ensures temperature
stability and low power consumption.
All refrigerator models are built using high quality materials, unique assembly techniques and strict
testing procedures to ensure the highest level of quality and performance.
Introduction
Precautions
When the refrigerator is used in an automotive application, ensure that it is secured to prevent
accidental movement. The carry handles can be used with straps or tie-downs if necessary.
• A base mounting plate is optional and recommended for most applications.
• Allow a 50mm gap around the refrigerator compressor area for ventilation.
• Do not block or cover the ventilation holes.
• Ensure the correct type of cable and connectors are used for installation.
• Ensure that any power leads connected to the refrigerator will not be pulled or damaged by
any movement of the fridge - especially where slides or drawers are used.
• Do not use a power lead that is damaged.
• Do not connect the refrigerator to a power source that does not comply with the input
power specications. (Displayed on the fridge’s rear panel)
• When storing the fridge, ensure that the lid is propped open to allow for aeration. Disconnect the
appliance from an electrical source. (Note: When the fridge is switched off, the interior light will still
function if the unit is connected to a power source).
4

Installation guidelines
When installing the refrigerator into a vehicle for the rst time, ensure that the electrical connections
to the vehicle’s battery are secure and the specied wiring is used.
(See wiring guidelines on page 6)
The fridge is supplied with a pre-made cable for use with a 12 / 24-volt DC supply.
This cable is terminated with a high-quality male plug for connection into your vehicle.
1. Install the supplied female
socket into your vehicle
in a convenient location.
2. Use a suitable cable to connect the
socket to the vehicle’s battery.
A cable thickness of 4mm2or greater is
recommended.
Centre pin ( + )
Fitting an in-line fuse
Although the fridge has a built-in fuse, it is
recommended to install an additional fuse
on the positive wire as close to the battery as
possible. This will protect against short-circuits
that may occur along the length of the cable.
Ensure that all connections are properly
crimped and insulated.
If you choose to change the attached plug on the DC cable for a different type, rst ensure that the
power has been disconnected before cutting it.
Split and strip the wires as required for the new plug. Take care to ensure that the correct polarity is
used on the plug and crimp the connections where possible.
An automotive fuse with a rating
of 15A is recommended
When installing electrical outlets in your vehicle, do
not rely on the vehicle’s body for an electrical earth.
5
Male Plug
Female Socket

6
Connecting power
All National Luna Portable refrigerators can accept
a DC voltage ranging from 9.6V to 31.5V, as well as
an AC voltage range from 85V to 265V.
Both power inputs are fuse protected :
- 3.15A Time-lag fuse for AC input.
- 15A automotive blade fuse for DC input.
An AC and DC source can be connected to the
refrigerator simultaneously. Under these conditions,
the AC supply will be chosen as the primary power
source.
If the AC supply is interrupted, the DC supply will be
automatically selected and operation will continue
normally. (After a 1 minute delay)
Fuse (15amp)
Fuse 3.15amp
(5x20 Glass Fuse)
Suggested Wiring Specications
One of the most problematic issues with installing a 12-volt refrigeration system is incorrect wiring.
Most users do not understand the importance of maintaining battery voltage over the distance from
the battery to the installed fridge.
While most car cigarette lighter sockets appear to be adequate, in practise a large voltage drop
occurs between the socket and the car battery. This may result in the fridge shutting down as a
result of a low-voltage condition.
It is recommended the following table be used as a guide to establish what cable thickness is to be
used depending on the distance from the car battery to the fridge. As a rule of thumb one should
use a 1.0 mm2multi-strand copper wire per meter of distance from the battery.
Note: Two wires (positive and negative) must be connected from the battery to the fridge / plug point.
Cable Size Max Length between battery & fridge
Cross Section
mm2
12 Volt Operation
Meters
24 Volt Operation
Meters
4 4 8
6 6 12
10 10 20

7
Dynamics of Temperature Settings
Danfoss BD35F compressor
The compressor is controlled by the digital thermostat setting.
The Danfoss BD35F compressor is used on all of the National Luna fridge/freezer product range.
Developed in Germany, it has a unique Multi - Speed (2,000 - 3,500 rpm) capability which makes it
ideal for use in all mobile applications up to an angle of 35 degrees. It can function efciently in ex-
treme conditions where it is not uncommon to have ambient temperatures above 40ºC.
Inner Bin / Cooling Compartment
To control temperature, the thermostat sensor must be placed in a position in order to take a tempera-
ture reading.
For practical purposes National Luna has elected to place this temperature sensor on the metal surface
forming the interior bin of the fridge/freezer. Thus the switching on and off of the compressor will be
controlled by the bin surface area temperature.
The inner volume of the cooling bin (i.e. core/centre temperature) will take time to “pull down” to
equalise the bin temperature. (In practise it is common that the set temperature will be within 3ºC of the
core temperature).
Ambient temperatures surrounding the fridge must also be taken into consideration. Very high outside
temperatures will play a major role in the running time of the fridge. (e.g. The fridge will run longer to
maintain or reach the target temperature set).
When setting temperatures below -12ºC the refrigeration system will have a
larger temperature range between switching on and off

3°C to 6°C
0°C to 4°C
-6°C to -11°C
-18°C
Fresh fruits & vegetables
Dairy products
Smoked / prepared meats
Cold beverages
Short-term frozen meats
Frozen meats and sh
Ice cream / frozen desserts
Recommended choice of temperatures
Temperature Guidelines
The following table is a guideline to setting
the correct temperature range for different
foodstuffs.
60
43
32
12
6
0
-6
-12
-18
-24
-30
140
109.4
89.6
53.6
42.8
32
21.2
10.4
-0.4
-11.2
-22.0
ºC ºF
8
Setting the Temperature
The digital thermostat tted to the
National Luna Portable refrigerator
allows accurate setting of the desired
cooling temperatures.
With the single compartment refrigerators,
temperatures can be selected between
+20°C and -30°C in 1°C increments.
When powering up the fridge the rst time, the temperature inside the fridge will be reected on
the display. (NOTE: the previously set temperature will be in memory)
To select the new cooling temperature, press and hold the button until the display starts to
ash. (The previous set temperature will be displayed).
Press or to raise or lower the desired temperature. The thermostat will accept the
new setting and exit the setting mode 10 seconds after the last button was pressed. (It will now
remember the new set temperature).
The temperature display will reect the inner bin temperature prior to the new setting. Provided
the new setting is colder, the compressor will then switch on and cool the fridge further to the set
point. (During this time the run indicator light will be displayed).

Selecting the “Turbo” mode will over-ride the Smart Control
function and the unit will run at maximum speed
9
National Luna refrigerators have an advanced speed
control which will vary the speed of the compressor in
order to conserve power and optimise performance.
For situations where maximum cooling power is
required, press and hold the “Turbo” button until the
indicator is illuminated.
This will bypass automatic control and force high
speed operation.
Speed Control
Introduction to Smart Compressor Control
National Luna developed a Smart Compressor Control ( advanced automatic speed control) function
which has been tted as standard to all current models.
• Logic 1 (Setting the bin temperature in a range of +20ºC to -11ºC).
The compressor will operate at 3 speeds : low 2,000 rpm, medium 2,750 rpm and high 3,500 rpm.
On initial start-up the fridge will automatically run at full speed to bring the inner bin temperature
down as fast as possible. It will then step down to medium speed to reach the set temperature point
where the fridge will then switch off. Temperature will then be maintained at low speed.
This logic makes the fridge operate and maintain the desired bin temperature under all ambient
temperature conditions optimising performance and efciency.
Should the temperature of the fridge contents change, such as when fresh foodstuffs are added, the
fridge will automatically speed up to cool the new contents.
• Logic 2 Deep Freezing (Setting temperature below -11ºC).
When temperatures are set below -11ºC, the Smart Compressor Control will operate at high speed
(initial start-up) to bring temperature down as fast as possible to the desired set point. Thereafter
temperature will be maintained at medium speed.

10
Battery Voltage vs Capacity
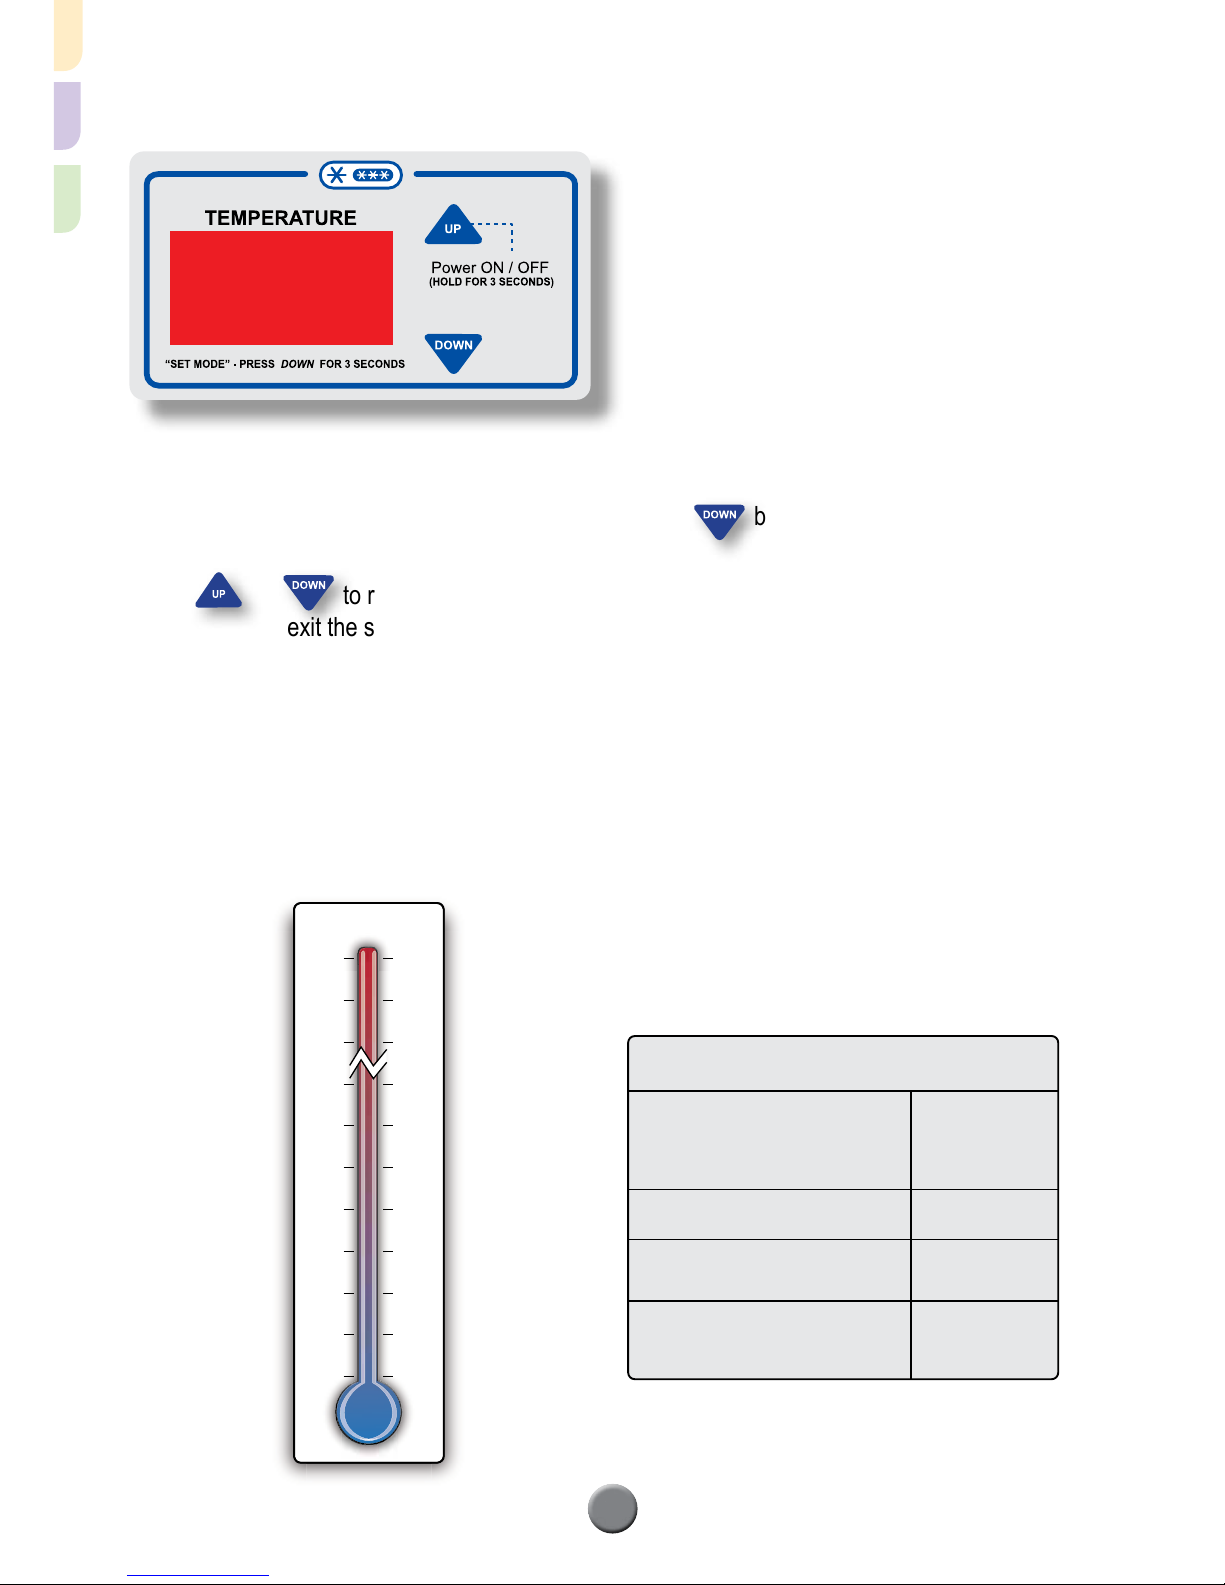
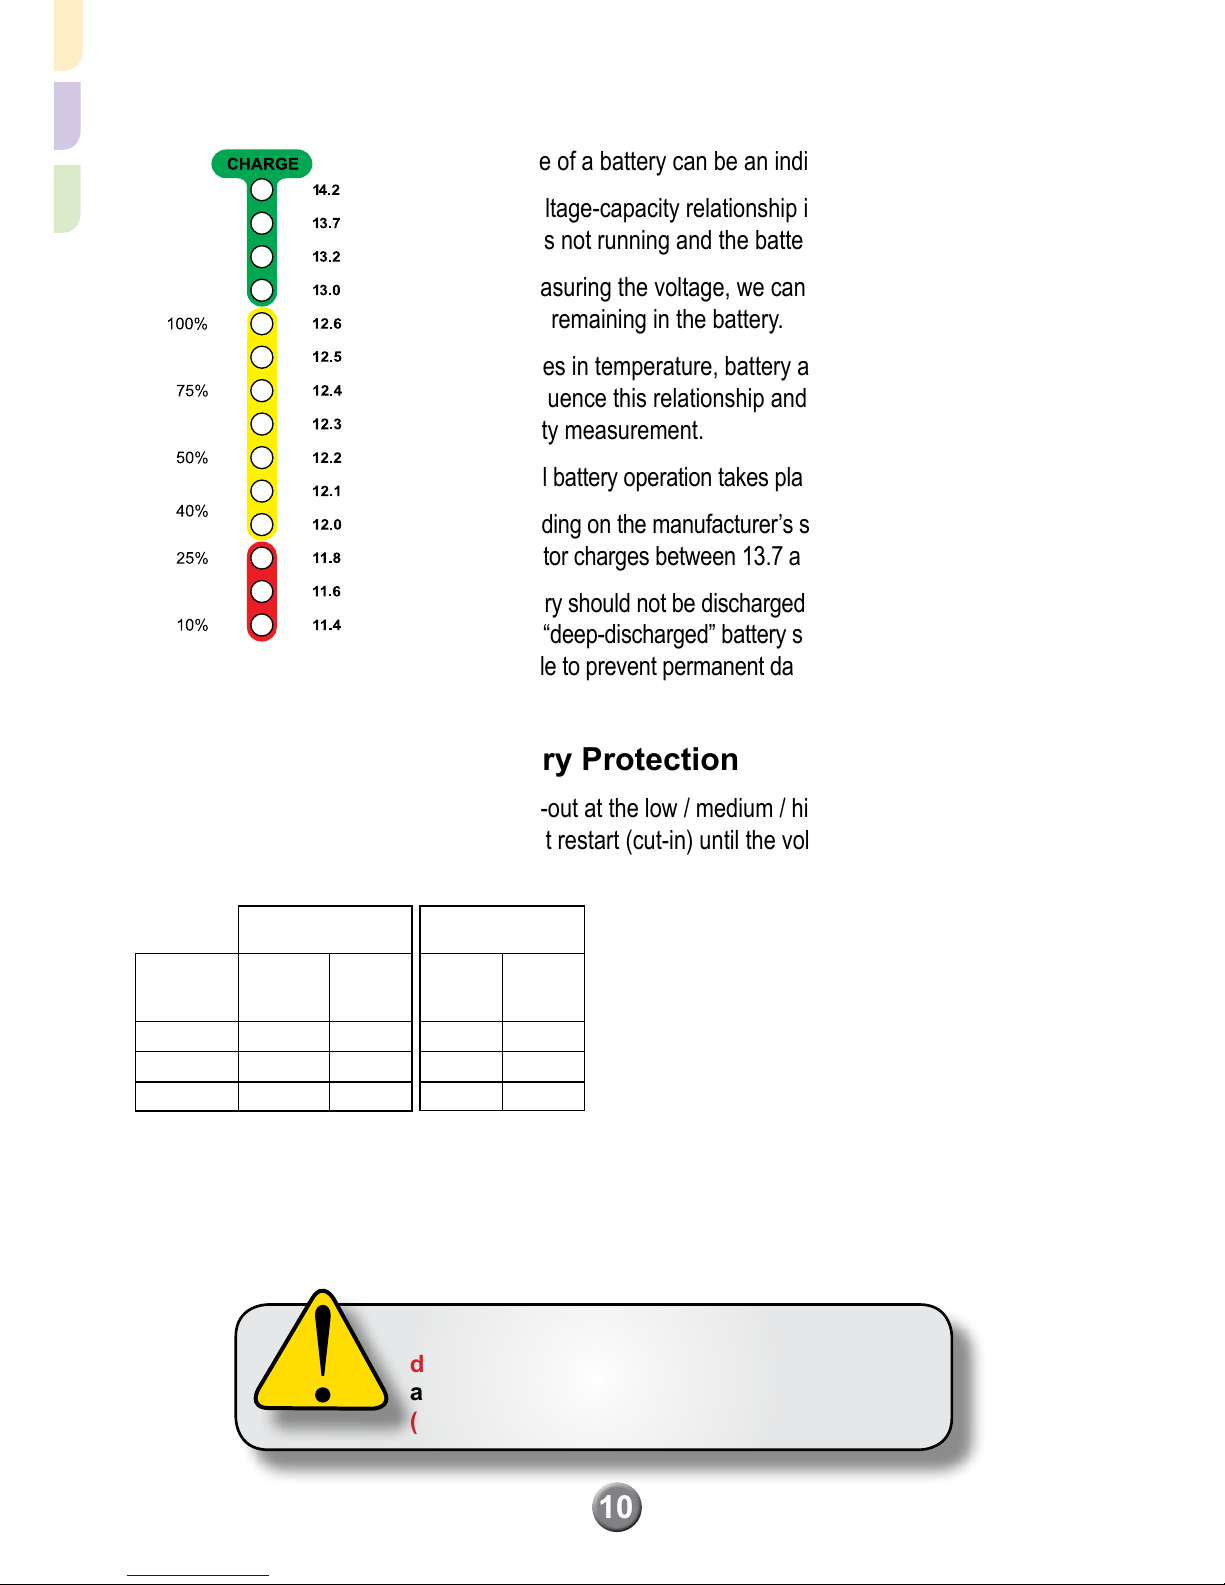
• Voltage of a battery can be an indication of its “state-of-charge”.
• The voltage-capacity relationship is most accurate when the
fridge is not running and the battery temperature is at 25°C.
• By measuring the voltage, we can estimate the amount of
energy remaining in the battery.
• Changes in temperature, battery age and general battery health
can inuence this relationship and therefore result in inaccurate
capacity measurement.
• Normal battery operation takes place between 12.0 and 12.6 volts.
• Depending on the manufacturer’s specications a normal car’s
alternator charges between 13.7 and 14.2 volts.
• A battery should not be discharged below 11.8 volts as a general
rule. A “deep-discharged” battery should be recharged as soon as
possible to prevent permanent damage.
Danfoss Low Voltage Battery Protection
The Danfoss electronic control unit will cut-out at the low / medium / high selected setting.
Once the compressor has cut-out, it will not restart (cut-in) until the voltage rises.
The table below reects the set points.
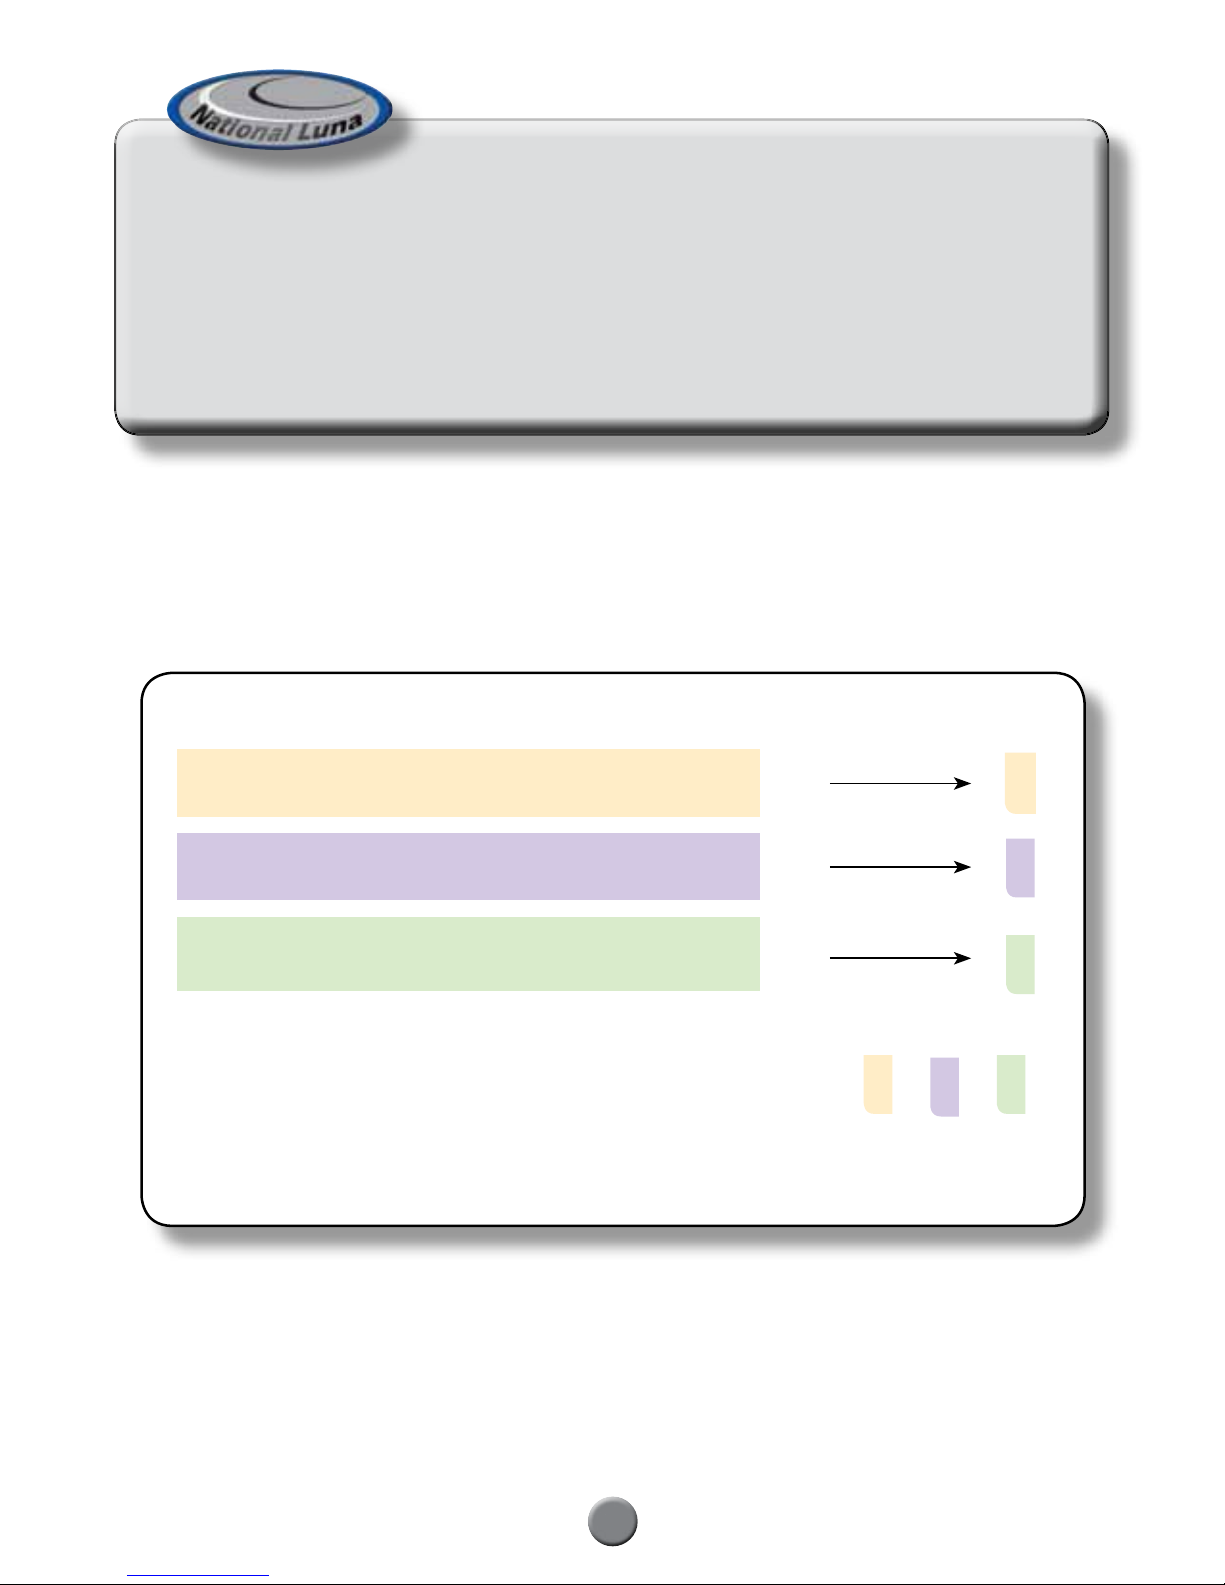
BATTERY
CAPACITY
BATTERY
VOLTAGE
When using the unit in a 24-volt application
do not select battery protection “LOW”
as this will completely drain the battery bank.
(Causing permanent damage to the batteries)
12 VOLT 24 VOLT
Battery
Protection Cut-out Cut-in Cut-out Cut-in
LOW 9.6 10.9
MED 10.4 11.7 22.8 24.2
HIGH 11.3 12.5 24.6 26.0
Note: these values are measured at the
Danfoss control unit input. It is important
to note that poor / thin wiring and bad con-
nections to the battery can cause a large
voltage drop. When this occurs the fridge
switches off and will re-start again on a
repeat cycle “hunting”.
NOTE: When connecting the fridge for the rst time, it will look at the cut-in voltage.
If the battery protection is set on “High” the initial cut in voltage will be 12.5.
If the battery is not fully charged the fridge will not start. Simply select low to start.
When selecting “Low” the fridge will operate within a voltage supply of 9.6-31.5volts.

11
Indicator Lights
Status indicators will identify the current operation of the refrigerator.
RUN - This indicator will be illuminated whenever the fridge compressor is running
and the compartment is being cooled.
FAULT ID - This indicator is used to identify fault conditions that may occur with the
refrigerator such as low power supply.
This indicator will ash a pre-determined number of times every 4-seconds
when a particular fault occurs (see table below). Also refer to page 26.
1 Low voltage. This is shown when the DC supply voltage is low. The battery could be at,
wiring losses are too high or there is a poor connection to the power source.
2 Fan over-current cut-out. There is a problem with the ventilation fan. It is possible that the
ventilation fan is obstructed, blocked or damaged.
3 Motor start error. The compressor has not started successfully. This can happen in extreme
environments where the refrigerator is heavily loaded and temperature is very high.
4 Minimum speed error. The motor cannot maintain a minimum speed of 1900 rpm.
This can be the result of an internal electronics failure.
5 Thermal cut-out. The electronic circuitry has over-heated. This happens in very hot environments.
This can occur when the fridge is over-loaded with warm contents and the ambient temperature is high.
The electronics will re-set when the temperature has dropped.
# of
ashes Fault description
Battery Protection Settings
The refrigerator is equipped with a multi-level
battery protection circuit.
The user has the choice of three voltage levels
at which the compressor will shut down to
protect against excessive battery discharge.
(See page 10)
To change the protection level, press and hold
the button until the preferred level is reached.
When powered by an AC source, the battery
protection level can be changed but will only
affect operation when the DC source is used.
Selecting the “Low” cut-out setting can cause excessive discharge
resulting in damage to the battery.

1. Lid
2. Interior light (24V 10W)
3. Lid locking latches
4. Cabinet exterior
5. Control panel
6. Carry handles
7. Compressor area
8. AC input with fuse (3.15A)
9. DC input with fuse (15A)
10. Cooling Bin (Evaporator)
4
7
8
9
6
10
5
Developed for performance at high ambient temperatures, minimum power consumption
and high operating efciency, these single compartment fridges are recognised as the most
powerful in the world.
Low power consumption is achieved using 60mm high-density insulation and a very compact design.
With the aid of an integrated electronic thermostat these units can be accurately set as a
fridge or as a freezer.
Introduction
National Luna Classic Range
40/65/80/125 Litre
Getting to know your portable fridge
Single door (40L - 65L - 80L - 125L)
12

Control Panel
Automatic speed control
with TURBO over-ride
Fault identier light
Run status light
Power ON/OFF and
temperature UP control
Temperature display
SET mode and temperature
DOWN control
Battery protection control
On / Off control The refrigerator can be turned ON and OFF via
the control panel.
Press and hold the button for 3 seconds
to turn the fridge ON or OFF.
If power to the refrigerator is interrupted, it will
default to ON automatically.
Note: When the fridge is switched off, the
interior light will still function if the unit is
connected to a power source.
Battery Protection
The refrigerator is equipped with a multi-level
battery protection circuit.
The user has the choice of three voltage levels
at which the compressor will shut down to
protect against excessive battery discharge.
To change the protection level, press and hold
the button until the preferred level is
reached.
When powered by an AC source, the battery
protection level can be changed but will only
affect operation when the DC source is used.
(Refer to page 10 and 11).
13

14
National Luna refrigerators have an advanced speed
control which will vary the speed of the compressor in
order to conserve power and optimise performance.
For situations where maximum cooling power is
required, press and hold the “Turbo” button until the
indicator is illuminated.
This will bypass automatic control and force high
speed operation. (Refer to page 9)
Using the TURBO function can
increase power consumption
Speed Control
Setting the Temperature
The digital thermostat tted to the
National Luna Portable refrigerator
allows accurate setting of the desired
cooling temperatures.
With the single compartment refrigerators,
temperatures can be selected between
+20°C and -30°C in 1°C increments.
When powering up the fridge, the temperature inside the fridge will be reected on the display.
(NOTE: the previously set temperature will be in memory)
To select the new cooling temperature, press and hold the button until the display starts to ash.
(The previous set temperature will be displayed).
Press or to raise or lower the desired temperature. The thermostat will accept the new
setting and exit the setting mode 10 seconds after the last button was pressed. (It will now remember
the new set temperature).
The temperature display will reect the inner bin temperature prior to the new setting. If the new setting
is colder, the compressor will then switch on and cool the fridge further to the set point.
(During this time the run indicator light will be displayed).

Introduction
The Double door and Twin fridges in this range have only one compressor but due to
National Luna’s unique Dual Control technology, the fridge and freezer compartments can be
set independently. This is like having two fridges in one.
The Double Door range has two lids, one for each compartment.
Double Door 74/95 Litre
Twin Compartment 90 Litre
Double Door Range (74/95 L)
15
1. Lid
2. Interior light x 2 - (24V 5W)
3. Lid locking latches
4. Cabinet exterior
5. Control panel
6. Carry handles
7. Compressor area
8. AC input with fuse (3.15A)
9. DC input with fuse (15A)
10. L/H Cooling Bin - Freezer
11. R/H Cooling Bin - Fridge
3
4
5
6
1
7
8
9
10
11

90 Litre Twin
The Twin has one lid covering both compartments. The freezer compartment has a separate
internal lid. This prevents cold air escaping from the freezer when the main lid is opened,
adding to the efciency and ensuring stable temperatures within.
1. Lid
2. Interior light - (24V 5W)
3. Lid locking latches
4. Cabinet exterior
5. Control panel
6. Carry handles
7. Compressor area
8. AC input with fuse (3.15A)
9. DC input with fuse (15A)
10. L/H Cooling Bin - Freezer
11. R/H Cooling Bin - Fridge
3
4
5
6
1
7
8
9
10
11
16

17
Control Panel Battery protection control
Automatic speed control
with TURBO over-ride
Fault identier light
Individual run status lights
Power ON/OFF and fridge
temperature UP control
Fridge temperature display
Fridge SET mode and
temperature DOWN control
Freezer SET mode and
temperature UP / DOWN
Freezer temperature display
On / Off control
The refrigerator can be turned ON and OFF via
the control panel.
Press and hold the button for 3 seconds
to turn the fridge ON or OFF.
If power to the refrigerator is interrupted, it will
default to ON automatically.
Note: When the fridge is switched off, the
interior light will still function if the unit is
connected to a power source.
Battery Protection
The user has the choice of three voltage levels
at which the compressor will shut down to
protect against excessive battery discharge.
To change the protection level, press and hold
the button until the preferred level is reached.
(Refer to page 10 and 11).
National Luna refrigerators have an advanced
speed control which will vary the speed of the
compressor in order to conserve power and
optimise performance.
For situations where maximum cooling power is
required, press and hold the “Turbo” button until
the indicator is illuminated.
This will bypass automatic control and force high
speed operation. (Refer to page 9)
Speed Control

18
Setting the Temperature
74Lt / 90Lt / 95Lt Refrigerators have dual thermostats allowing
individual temperatures to be selected for each of the cooling bins.
The “FREEZER” bin has a temperature range between +20°C and -24°C.
The “FRIDGE” bin has a temperature range between +20°C and -12°C.
It is important that the freezer thermostat should be set at the same or colder temperature than the
fridge thermostat. This will ensure temperatures are accurately maintained and the refrigerator
operates efciently.
To select the cooling temperature, press and hold the button until the display starts to ash.
Press or to raise or lower the desired temperature. The thermostat will accept the new
setting and exit the setting mode 10 seconds after the last button was pressed.
The same procedure is used on both thermostat controls.
(NOTE: You can only set one thermostat at a time).
The dual control will rst operate to cool the R/H fridge bin
before switching to the L/H freezer bin.
NB - Set one thermostat at a time
The setting of the L/H bin as a fridge, and the R/H bin as a freezer is not an option. The reason for this
is that in order to achieve maximum efciency (i.e. the lowest average battery power consumption), the
gas-ows within the unit are intentionally biased to ow from the R/H bin to the L/H bin. Thus the freezing
gas could ow from the R/H bin and freeze the contents of the L/H bin.
Recommended Temperature Settings
L/H Freezer Bin R/H Fridge Bin
Fridge / Freezer 6 6
Freezer / Fridge - 6 2
Freezer / Freezer -12 - 6
Deep Freeze / Freezer -18 -12

19
Introduction
The National Luna Weekender is a high-performance, low-power portable refrigerator designed
primarily for use in mobile applications.
By reducing the insulation to 42mm thickness, National Luna offers a lightweight fridge/freezer to
meet the demand for maximum fridge capacity where space is a problem.
(Average Power consumption of these fridges would be slightly higher than the 60mm insulation range).
Weekender 50 Lt TWIN
Weekender 52 Lt SINGLE
Weekender 50L Twin
1. Lid
2. Interior light (24V 10W)
3. Lid locking latches
4. Cabinet exterior
5. Control panel
6. Carry handles
7. Compressor area
8. AC input with fuse (3.15A)
9. DC input with fuse (15A)
10. Fridge Bin (40 Lt) Evaporator
11. Freezer bin (10 Lt) with inner lid
12. Alternative lid handle position
13. Alternative lid latch position
14. Alternative lid hinge positions
1
2
3
10
11
4
12
13
5
6
7
8
9
14
50 Litre Twin
The Weekender 50 Twin is split into a 40-litre fridge compartment and a 10-litre freezer compartment.
Under normal operating conditions, the larger compartment is used as a fridge and the smaller
compartment will attain sub-zero temperatures.
The freezer bin of the Weekender 50-Twin has a separate internal lid. This prevents cold air
escaping from the freezer when the main lid is opened, adding to the efciency and ensuring stable
temperatures within.

20
Weekender 52L
1. Lid
2. Interior light (24V 10W)
3. Lid locking latches
4. Cabinet exterior
5. Control panel
6. Carry handles
7. Compressor area
8. AC input with fuse (3.15A)
9. DC input with fuse (15A)
10. Cooling Bin (Evaporator)
11. Alternative lid handle position
12. Alternative lid latch position
13. Alternative lid hinge positions
4
5
11
10
13
12
6
7
8
9
52 Litre Single Bin
This model has been designed to operate as a fridge or freezer and the bin temperature can be set
between +20°C and -30°C.
This manual suits for next models
8
Table of contents
Other National Luna Refrigerator manuals
Popular Refrigerator manuals by other brands

Sauber
Sauber SC-171 user manual

GE
GE SIDE-BY-SIDE REFRIRATOR 22 Owner's Manual & Installation Instructions

Samsung
Samsung Refrigerator user manual

Dometic
Dometic RH418NTEG Installation and operating manual

Wards Garden Mark
Wards Garden Mark FR27 instruction manual

Telefunken
Telefunken TER 278S user manual