6 EXPLODED VIEW & REPLACEMENT PARTS LIST
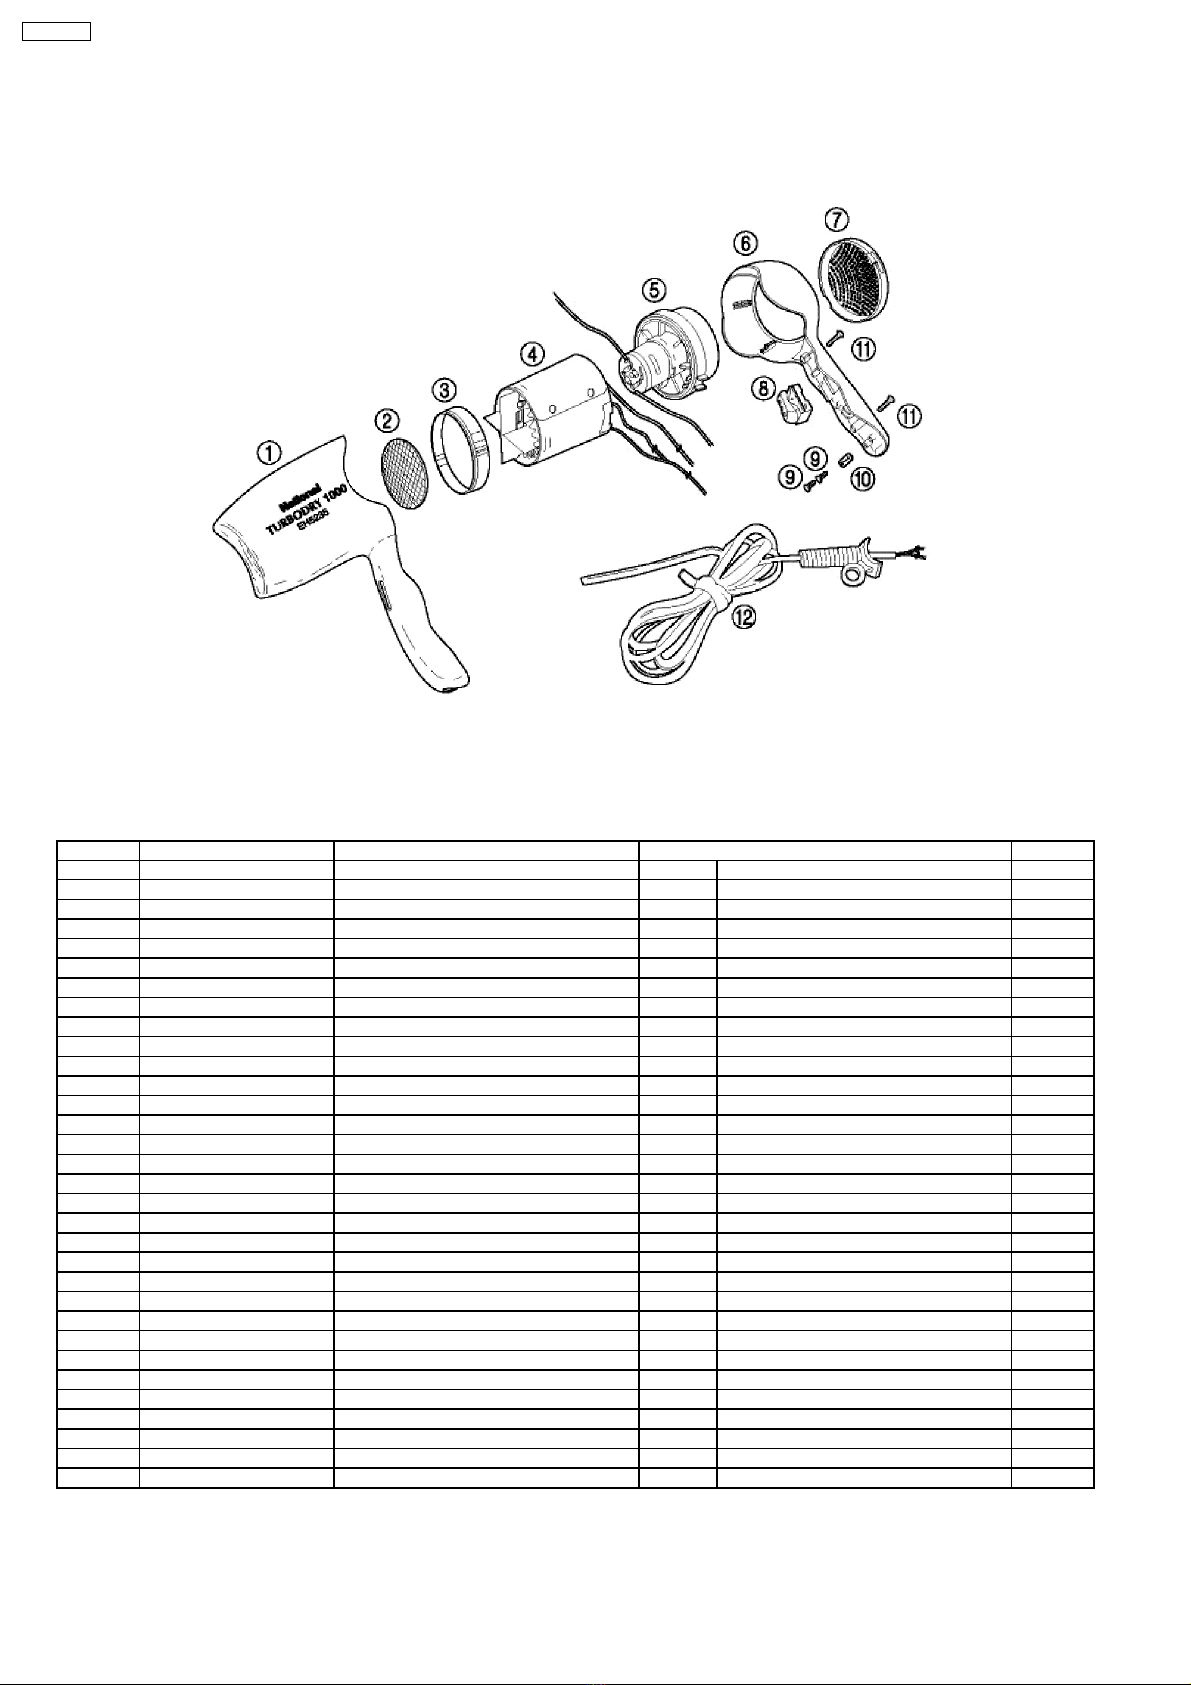
6.1. EXPLODED VIEW
6.2. REPLACEMENT PARTS LIST
Note : All parts are supplied from MEW-Thailand through PLGA.
Remarks : *1= Available individually
Ref. No. Parts No. Parts Name & Descriptions Remarks Per Unit
1EH5235FHSL1W FRONT HOUSING Bule / TAIWAN (for 110V) 1
1EH5235FHSL2W FRONT HOUSING Bule / OTHERS (220-240V) 1
1EH5235FHSD1W FRONT HOUSING Orange / TAIWAN (for 110V) 1
1EH5235FHSD2W FRONT HOUSING Orange / OTHERS (220-240V) 1
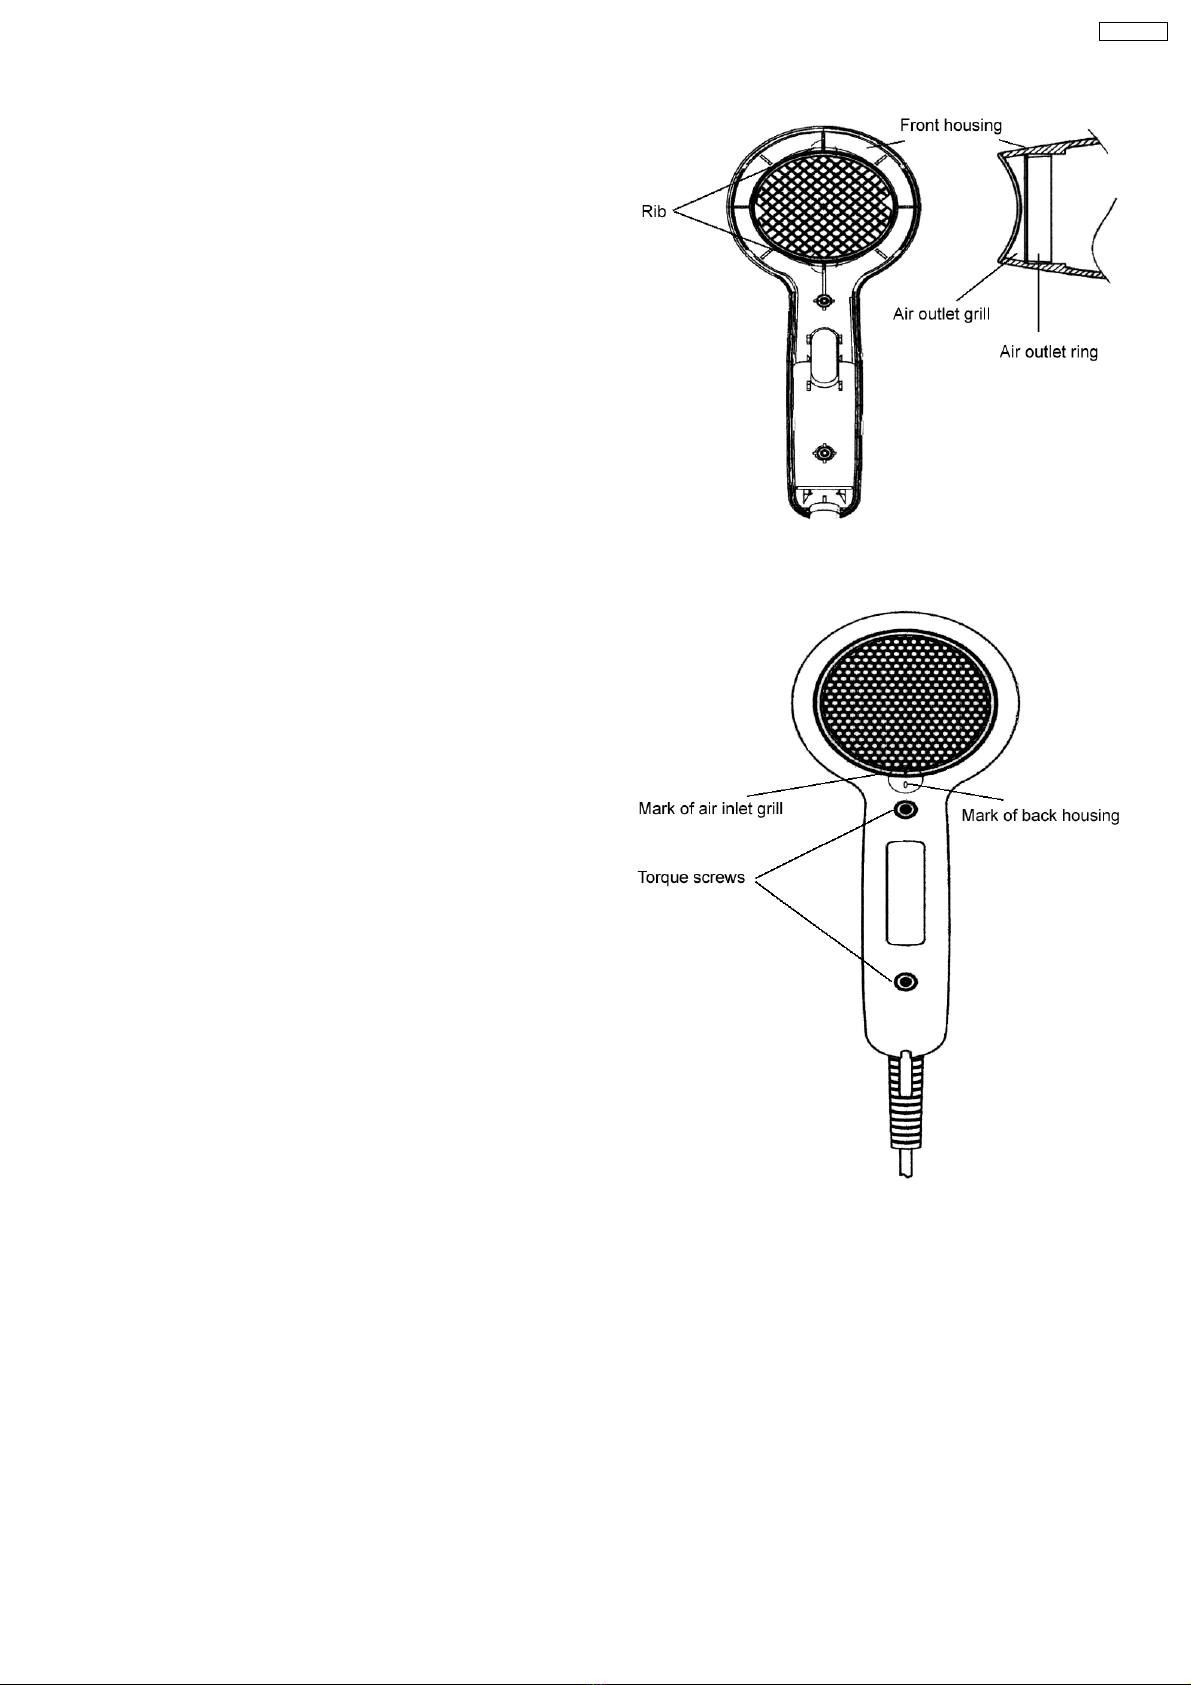
2EH5235AOGW AIR OUTLET GRILL 1
3EH5235AORW AIR OUTLET RING 1
4EH5235HB11W HEATER BLOCK ASS´Y TAIWAN (110V) 1
4EH5235HB22W HEATER BLOCK ASS´Y OTHERS (220-240V) 1
5EH5235MBRW MOTOR BLOCK 1
6EH5235BHSL1W BACK HOUSING Bule / TAIWAN (for 110V) 1
6EH5235BHSL2W BACK HOUSING Bule / OTHERS (220-240V) 1
6EH5235BHSL7W BACK HOUSING Blue / KOREA 1
6EH5235BHSL8W BACK HOUSING Blue / SINGAPORE, HONGKONG 1
6EH5235BHSD1W BACK HOUSING TAIWAN (110V) 1
6EH5235BHSD2W BACK HOUSING OTHERS (220V) 1
6EH5235BHSD7W BACK HOUSING KOREA 1
6EH5235BHSD8W BACK HOUSING SINGAPORE, HONGKONG 1
7EH5235AIGLW AIR INLET GRILL Blue 1
7EH5235AIGDW AIR INLET GRILL Orange 1
8EH5235MSLW MAIN SWITCH Blue 1
8EH5235MSDW MAIN SWITCH Orange 1
9EH5235T3080W TAPPING SCREW *1 2
10 EH5235PCRW POWER CORD RETAINER 1
11 EH5235T3012W TAPPING SCREW *1 2
12 EH5235PCA2W POWER CORD ASS´Y A2 Plug / TAIWAN 1
12 EH5235PCS3W POWER CORD ASS´Y S3 Plug / S´PORE, HONGKONG 1
12 EH5235PCC2W POWER CORD ASS´Y C2 Plug / OTHER 1
12 EH5235PCB2W POWER CORD ASS´Y B2 Plug / KOREA 1
-EH5235S01LW INDIVIDUAL PACKAGE Blue 1
-EH5235S01DW INDIVIDUAL PACKAGE Orange 1
-EH5235S03W INSTRUCTION BOOKLET 1
-EH5235S05W PROTECTION PAD 1
8
EH5235-A3