Nature's Comfort SunMor SM-V30 User manual

SunMor SM-V30 Solar Water Heater
Installation Manual
by
Congratulations on the purchase of your
new SunMor SM-V30 from Nature’s Comfort LLC!
ou must read this entire instruction manual before beginning installation to
completely understand system requirements.
Aquastats, heat exchangers, mixing valves, pex pipe, valves and 1” brass pex fittings are all available from
your Nature’s Comfort Dealer or you may order directly by calling 877-251-7740 ext 304.
If you should ever have a problem or question refer to this manual or call your dealer. If your dealer does not have the information you
need, request they contact Nature’s Comfort and we will further educate them to provide the best possible customer service. Please
keep in mind that Nature’s Comfort has no control over the installation, water heater configuration, weather conditions, or the
efficiency of a building’s insulation.

How It Works
• The SunMor SM-V30 by Nature’s Comfort LLC is a solar water heater that uses the sun’s radiant energy to heat water
through the use of 30 double wall vacuum insulated glass tubes. Each tri-element glass tube has a coating on the
outside of the inner layer of glass made up of nitrogen aluminum to absorb heat on top of a copper coating to transfer
and hold in the heat. The copper coating provides extra efficiency and is a benefit to the Nature’s Comfort brand that
other solar evacuated tube systems do not have. As water is heated through the glass tubes it rises into the storage
tank and cooler water falls to the bottom of each tube to circulate by thermo-siphoning. The double wall vacuum
insulated glass tubes provide the best insulation and won’t freeze the water inside during winter nights. Heat
production can reach up to 36,000 btu’s per day.
• The cold water line into your domestic water heater will be interrupted to first run to the copper coil heat exchanger
in the SM-V30’s storage tank. When a faucet is turned on, water is heated by the hot water created by the sun in the
storage tank which then enters your domestic water heater. Utility is kept on to maintain water temperature and in
case demand overcomes solar production.
Safety Notes
• Always wear gloves and safety glasses whenever installing or working on or around the system.
• Tubes without water in them can reach over 400 degrees inside. DO NOT LOOK INTO OR LACE YOUR FINGERS IN A
TUBE.
• CAUTION! Water temperatures can exceed 200F! See additional notes on page 4.
• Never close off the exhaust pipe as the SM-V30 is an atmospheric pressure (non-pressurized) system and damage can
occur if the tank is pressurized.
lacement of the Solar Water Heater
• The SM-V30 must be positioned so the maximum exposure to the sun is achieved and also kept as close as possible to
where your water heater tank is located for the best efficiency. The solar water heater can be placed anywhere that is
convenient, including on a rooftop (different frame assembly is required due to roof angle). Make sure to follow
building codes for weight distribution and use flashing and sealant wherever a wall or roof is penetrated.

Assembly - Wear gloves and safety glasses!
• Assemble the frame (and mount securely if on a roof), mount the storage tank, auto-fill valve and vent tube. Snap the
black plastic tube-end holders in place on the bottom of the frame.
• NOTE! When installing fittings in the storage tank ports, do not over tighten or the welds on the storage tank will
break.
• Install a ½” T on the bottom right copper coil heat exchanger port.
• Interrupt the cold water line into your domestic water heater to first run to the ½” T in the previous step.
• Branch off the side of the ½” T with a line to the auto-fill valve. Land on the port with the screen inside (remove top to
confirm which port is the valve).

• Off the extra port from the auto-fill valve, run a line to drain water that overflows from heat expansion to a desired
area.
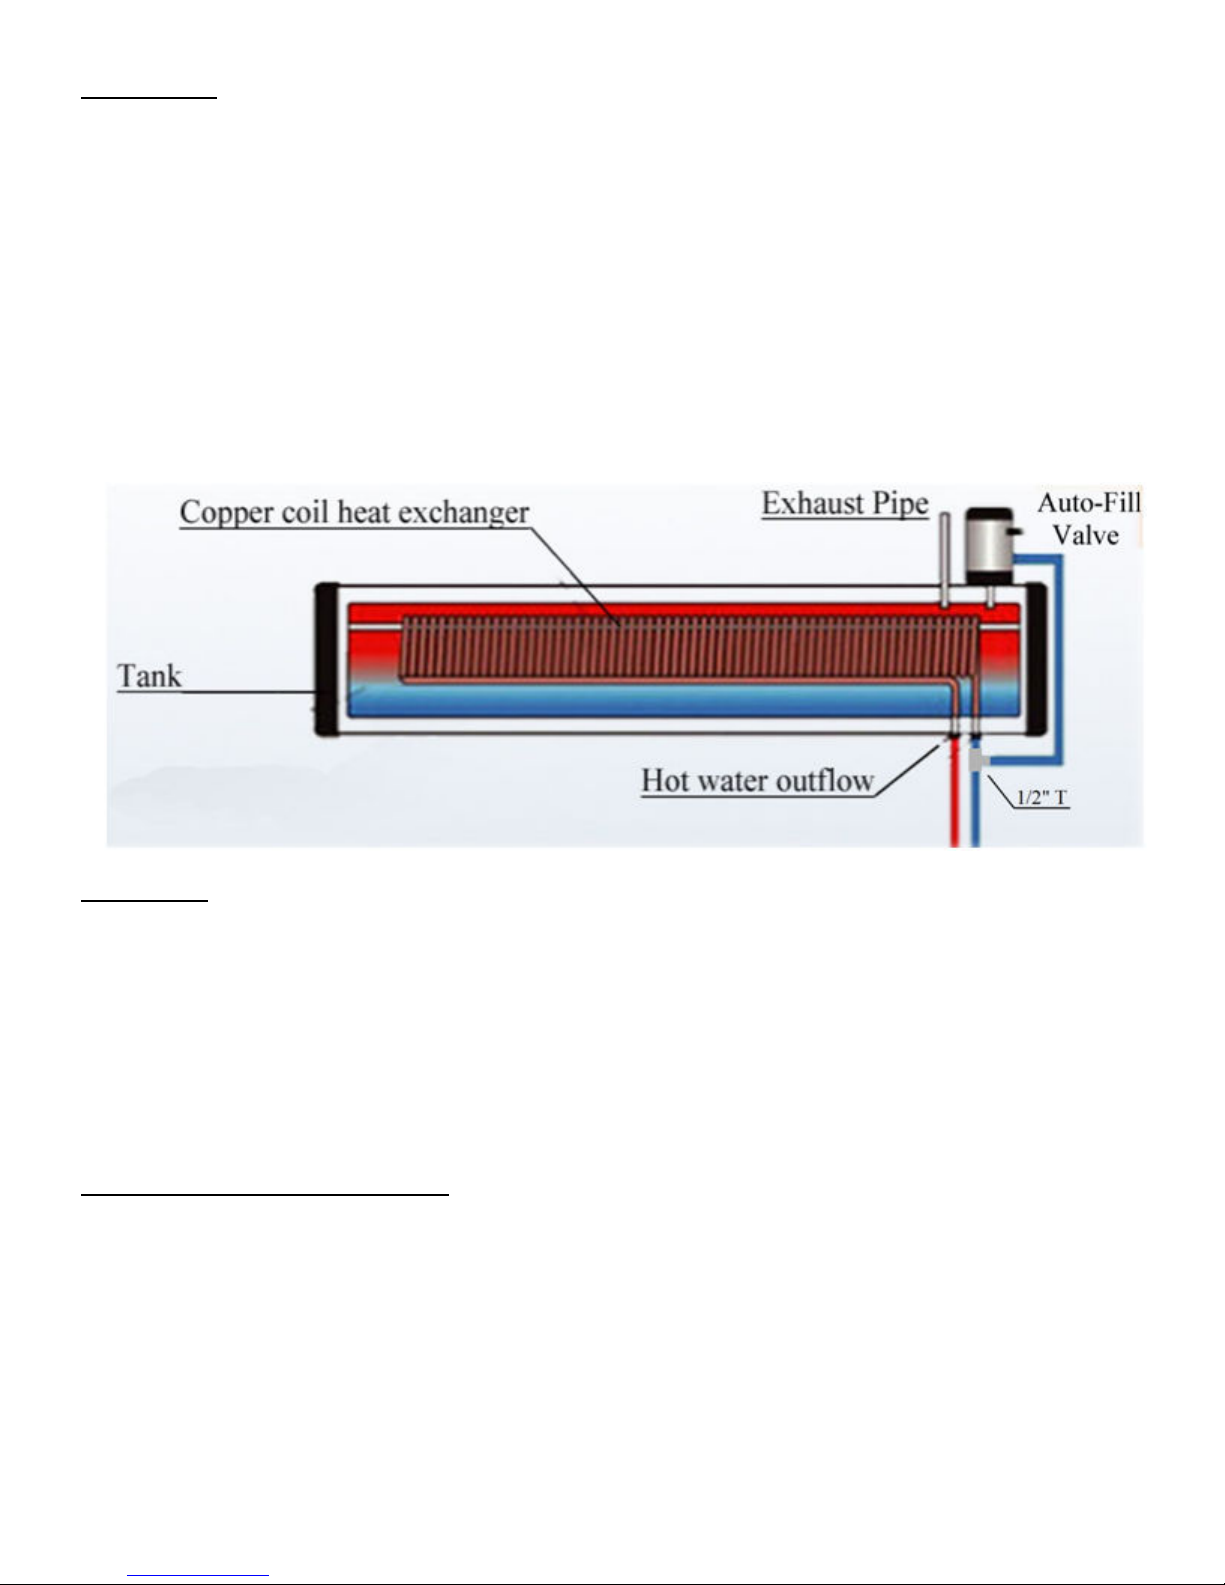
• Run a line from the left copper coil heat exchanger port to the cold water input of your domestic water heater.
• All water lines must be super insulated using closed-cell foam insulation. Heat tape will be necessary to install BEFORE
you insulate. Use a heat tape that has a thermostat so it will only turn on if it gets cold to save energy.
• Plug any unused port that are left.
• ONLY INSTALL THE GLASS TUBES AND FILL WITH WATER BEFORE DAYLIGHT. Doing so at any other time will cause
the glass tubes to shatter due the extreme temperature difference of the glass tubes reaching over 400 degrees
being hit with unheated water. Heat is still produced on cloudy days and if empty, the tubes take a long time to cool
down after dark! The other option is to have the water lines installed first and water turned on for the auto-fill valve
to let water flow and fill a tube right as it is installed. Keep the glass tubes completely covered from sunlight until
ready to immediately install.
• Before inserting a glass tube into the manifold, coat the end with soapy water before and after putting the black
rubber trim ring on and also coat the manifold gasket for ease of installation. Carefully install each tube into the
manifold by twisting and pushing in to the manifold as straight as possible. Use controlled, firm pressure. The tubes
will suddenly slide easily once fully pushed though the manifold gasket. Use extreme caution not to insert too far so as
to bump into copper coil heat exchanger causing glass to shatter.
• Using the same twisting method, pull to seat the tubes in place in the black plastic cups on bottom end of the frame.
Slide the cups left or right to keep tubes evenly spaced.
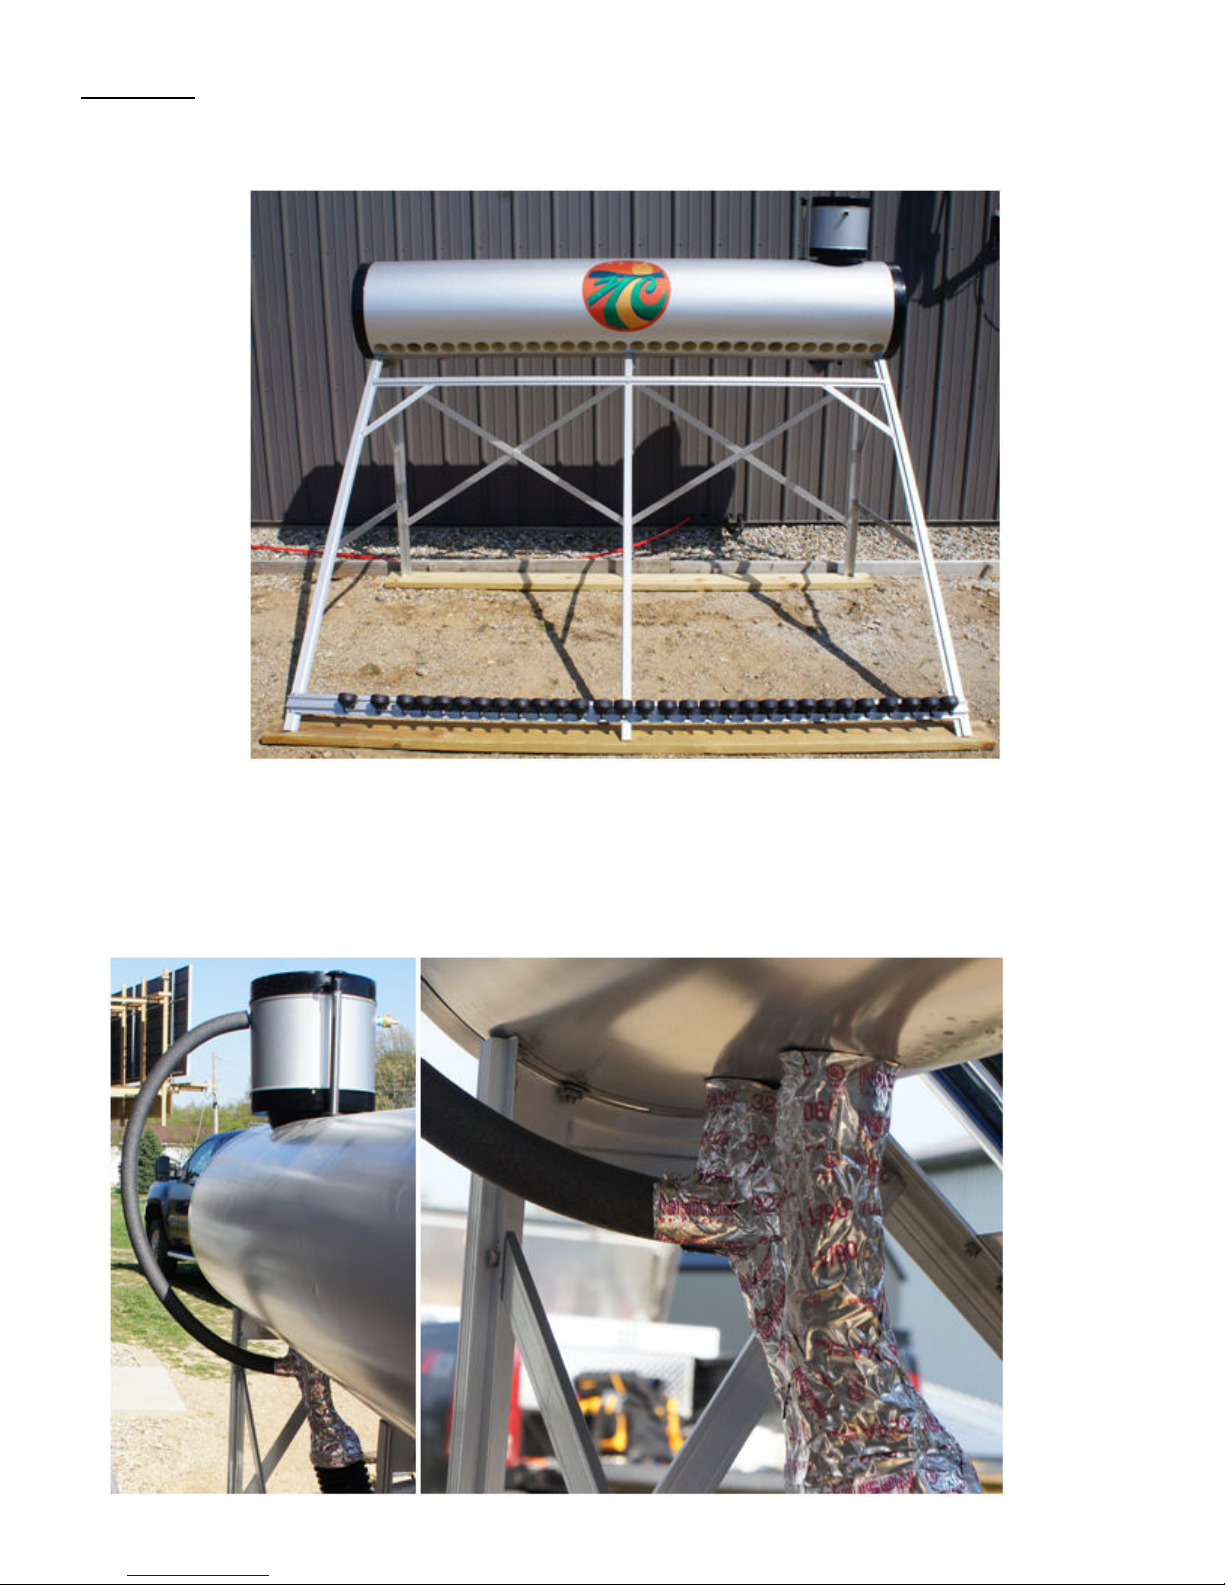
Additional Safety Notes, Installing Multiple Systems
• The SM-V30 is a non-pressurized system only and must always be vented and water pressure continually on at the
auto-fill valve to keep the storage tank full of water.
• Keep snow cleaned off the glass tubes using only a soft bristle brush. Never use hard tools or scrapers!
• For those who have larger demand that want to use multiple SM-V30 systems, put the domestic lines to and from the
copper coil heat exchangers of the SM-V30’s in series. Install the line to the auto-fill valve as usual (hot water from the
first system is permitted for auto-filling the next system).
• ou must install a water tempering (mixing) valve on the hot water out of the domestic water heater to prevent
scalding water (available from Nature’s Comfort).
Enjoy your free hot water!
All drawings and pictures are copyrighted material and are the property of Nature’s Comfort. No unauthorized use is permitted without written permission from
Nature’s Comfort LLC, 3790 N SR 5, Shipshewana, IN 46565
Table of contents